manuals.online logo
Brands
  1. Home
  2. •
  3. Brands
  4. •
  5. Argos
  6. •
  7. Indoor Furnishing
  8. •
  9. Argos Hallingford 305/2323 User manual

Argos Hallingford 305/2323 User manual

Assembly Instructions - Please keep for future reference
Issue 4 - 28/01/14
Ruler - Use this ruler to help correctly identify the screws
0 10 20 30 40 50 60 70 80 90 100 110 120 130 140 150 160 170
MADE IN
BRITAIN
If you need help or have damaged or missing parts, call the Customer Helpline: 0870 112 1928
or email: [email protected] (quoting your original order number)
Important - Please read these instructions fully before starting assembly
Dresser
Dimensions
Width - 99cm
Depth - 40cm
Height - 74.5cm
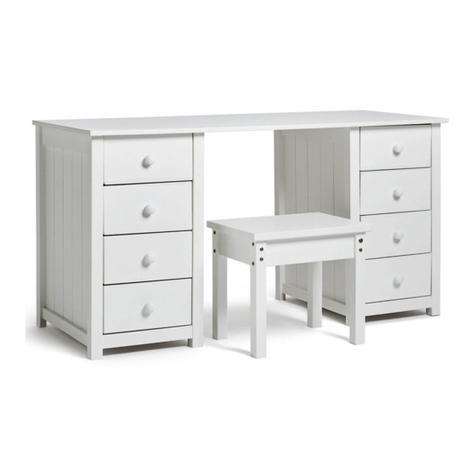
Hallingford - Dresser and Stool
ALR2888
305/2323
305/2316
305/2282
305/2347
305/2299
Stool
Dimensions
Width - 51.5cm
Depth - 35.5cm
Height - 45cm
Issue 2 - 20/11/13 - Changed to Click helpline number
Issue 3 - 29/11/13 - The screws to fit the seat pad were too long and have been replaced
Issue 4 - 28/01/14 - Changed the Slider Runners from F307 to F1004.
Safety and Care Advice
Important - Please read these instructions fully before starting assembly
• Warning: This unit weighs
approximately 29kgs.
Please lift with care.
• Check you have all the
components and tools listed on
pages 2 and 3.
• Remove all fittings from the
plastic bags and separate them
into their groups.
• Keep children and animals
away from the work area, small
parts could choke if swallowed.
• Parts of the assembly will be
easier with 2 people.
• Make sure you have enough
space to layout the parts before
starting.
• Do not stand or put weight on
the product, this could cause
damage.
• Assemble the item as close to
its final position (in the same
room) as possible.
• Assemble on a soft level
surface to avoid damaging the
unit or your floor (use opened
out unit carton).
• We do not
recommend the
use of power
drill/drivers for
inserting screws,
as this could damage the unit.
Only use hand screwdrivers.
• Safety note: If there is any
chance of this unit being pulled
over by children etc. it is
recommended that the unit is
secured to a wall using suitable
fixings (not supplied).
• Dispose of all packaging
carefully and responsibly.
1
Care and maintenance
• Only clean using a damp cloth
and mild detergent, do no use
bleach or abrasive cleaners.
• From time to time check that
there are no loose screws on
this unit.
• This product should not be
discarded with household
waste. Take to your local
authority waste disposal centre.
Note: If required the next page
can be cut out and used as
reference throughout the
assembly. Keep this page with
these instructions for future
reference.
2
80%
x2
Components - Panels
Please check you have all the panels listed below
If you have damaged or missing components, call the
Customer Helpline: 0870 112 1928 or email:
[email protected] (quoting your original order number
and the reference numbers below)
1
Top (D2326A)
(990 x 396mm)
Upright (D2329A)
(333 x 372mm)
Modesty (D2330A)
(598 x 244mm)
Rail (D2331A)
(342 x 66mm) x 2
Back (X350-366)
(350 x 366mm)
Left Side (D2327A)
(721 x 372mm)
2Right Side (D2328A)
(721 x 372mm)
5
3
Drawer Front (D2309A)
(362 x 162mm) x 2
Drawer Base (T304-327)
(304 x 327mm) x 2
Left Drawer
Side (W500LH)
(330 x 95mm) x 2
Right Drawer
Side (W500RH)
(330 x 95mm) x 2
Drawer Back (W293-95)
(293 x 95mm) x 2
7
4
6
8 9
10 11
13
12
Stool Top (D2332A)
(513 x 353mm)
Stool Base (D2336A)
(478 x 308mm)
Stool Drawer
Front (D2338A)
(472 x 126mm)
Stool Left Side (D2333A)
(395 x 350mm)
17
14 Stool Right Side (D2334A)
(395 x 350mm)
15
Stool Rail (D2335A)
(478 x 124mm) x 2
18 Stool Drawer
Back (W445-95)
(445 x 95mm)
Stool Drawer Base (T456-297)
(456 x 297mm)
Stool Left
Drawer Side
(W410LH)
(300 x 95mm)
Stool Right
Drawer Side
(W410RH)
(300 x 95mm)
Stool Seat Pad (FHALPAD)
(458 x 300mm)
16
19 20 21
22 23
Dresser
Stool
3
mm 10 20 30 40 50 60 70 80 90 100 110 120 130 140 150 160 170
Tools required
mm 10 20 30 40 50 60 70 80 90 100 110 120 130 140 150 160 170
Ruler - Use this ruler to help correctly identify the screws
Please check you have all the fittings listed below
Note: The quantities below are the correct amount to complete the assembly. In some cases
more fittings may be supplied than are required.
Components - Fittings
If you have damaged or missing components, call the
Customer Helpline: 0870 112 1928 or email:
[email protected] (quoting your original order number
and the reference numbers below)
Rule Scissors Hammer
Eye protection
(when using a
hammer or drill)
Cross-head
screwdriver
B C
D E F
G H
Small locking
nut (F3) x 6
L
Nail (F51) x 10
13mm Screw (F52) x 12 13mm Screw (F63) x 12
I
A
Wooden dowel (F22) x 14
19mm Screw (F461) x 4
Metal dowel (F901) x 36
Large locking
nut (F900) x 30 Knock-in Peg (F171) x 12
MR Runner (F160) x 2
b
L Runner (F161) x 2
Mc
L Runner (F159) x 2
Ma
R Runner (F162) x 2
Md
350mm long
K
9mm Screw (F73) x 4
J
9mm Screw (F74) x 2
N
280mm long
O
Handle (F278) x 2
25mm Screw (F50) x 4
Drawer runner (F1004) x 2
4
F
Step 1
80%
x3
Assembly Instructions
If you have damaged or missing components, call the
Customer Helpline: 0870 112 1928 or email:
[email protected] (quoting your original order number
and the reference numbers below)
6
x 2
B
6
8
B
B
C
B
B
9
Groove
8
CCC
89
Note: Due to the manufacturing process, the holes for the
locking nut can be on either surface of the drawer sides.
Note: The locking nuts can be on either surface of the drawer sides.
Make sure that the groove is on the inside, as shown.
6
x 2 x 2
x 2
Step 2
Prepare the 2 drawer
fronts
Screw 2 metal dowels
into the holes shown on
the back of each drawer
front .
Note: Tighten metal
dowels up fully against
the panels.
B
6
Prepare the drawer
sides
Insert a small locking
nut into the hole
shown on the left drawer
side and right drawer
side .
Note: Arrow on locking
nut must point towards
hole in edge of panel.
Step 3
C
8
9
Attach the drawer
sides to the drawer
front
Push the left drawer side
. and right drawer side
. onto the back of the
drawer front .
Turn the small locking
nuts on the left
drawer side and right
drawer side .
Note: Turn the locking
nuts clockwise to
secure panels - more
than 1/2 a turn.
8
9
6
C
8
9
C
Assembly Instructions
5
Step 4
Fit the drawer base
Slide the drawer base
down the grooves in the
drawer sides and
and down into the
groove in the drawer
front .
Step 5
Fit the drawer back
Fit the drawer back
between the drawer
sides and .
Make sure that the
drawer base fits into
the groove in the drawer
back .
Hold the drawer back
in position and tap the
knock-in pegs
through the holes in the
drawer sides and .
Step 6
11
8 9
6
10
8 9
11
10
10
E
8 9
Attach the handle
Attach a handle to
each drawer front
using 2 screws .
O
G
6
6
8
9
11
E
E
E
E8
10
9
11
O
6
G
G
x 2
x 2
x 2
Assembly Instructions
6
Step 7
Fit runners to the
drawers
Turn the 2 drawer
assemblies over.
Fit runner , marked
with ‘R’, to the bottom
edge of the right drawer
side , as shown,
making sure that it is
pushed up against the
back of the drawer front
. .
Use a bradawl to mark
the fixing positions, then
secure with 2 screws .
Fit runner , marked
‘L’, to the bottom edge
of the left drawer side
using the same method.
8
M d
9
6
I
M c
I
I
Runners must be
pushed up against
the drawer front
M d
R
R
I
I
L
M c
L
6
8
9
x 2
D
D
D
A
10mm
A
Prepare the 2 rails
Tap 2 wooden dowels
into each rail .
Note: Wooden dowels
must not stick out from
the edge by more than
10mm or they may
damage other panels.
Insert 2 large locking
nuts into each rail .
Note: The arrow on the
locking nut must point
towards the hole in the
edge of the panel.
A
A
Step 8
x 2 5
5
D5
Plain
chipboard
surface
Assembly Instructions
7
Step 9
Step 10
B
D
2
5
5
A
Prepare the right side
a: Fit 2 runners to
the right side .
The 1st screw uses
the 2nd hole in from the
front of the runner.
The 2nd and 3rd screws
. use the holes that line
up with the other panel
holes.
b: Fit a screw into
the 2nd hole in at the top
of the runner .
Screw 2 metal dowels
into the right side .
Insert 2 large locking
nuts into the right
side .
Tap a wooden dowel
into the right side .
B
D
2
2
M b
2
H
H
I
M b
M b
H
Finished front edge
H1st
screw
2nd
screw
H3rd
screw
M b
Finished front edge
I
a:
b:
A
2
H
H
M b
H
H
H
M b
H
D
I
I
D
B
B
Finished
front edge
Finished
front edge
2
2
Join the rails to the
right side
Push the 2 rails onto
the right side .
Use a screwdriver to
tighten the 2 large
locking nuts fitted to
the rails .
Note: Turn the large
locking nuts as far as
they will go - more than
1/2 a turn.
D
5
2
5
D
Finished
front edge
Assembly Instructions
8
Step 11
Finished
front edge
Finished
front edge
a:
Prepare the upright
a: Fit 2 runners to
the upright .
The 1st screw uses
the 2nd hole in from the
front of the runner.
The 2nd and 3rd screws
. use the holes that line
up with the other panel
holes.
b: Fit a screw into
the 2nd hole in at the top
of the runners .
Screw 2 metal dowels
into the upright .
Insert 2 large locking
nuts into the upright
. .
Turn the upright over
c: Screw 2 metal
dowels into the
upright .
b:
c:
B
D
3
3
M a
3
H
H
M a
H
Finished front edge
H
1st
screw
2nd
screw
H
3rd
screw
M a
Finished front edge
I
I
M a
H
M a
H
H
H
M a
H
H
3
3
I
I
D
D
B
B
B
B
3
Turn the upright over
B
3
Finished
front edge
A
Assembly Instructions
9
Step 12
Step 14
Fit the upright
Push the upright onto
the 2 rails .
Use a screwdriver to
tighten the 2 large
locking nuts fitted to
the rails .
Step 13
3
D
5
5
3
5
5
Prepare the modesty
Insert 4 large locking
nuts into the modesty
. .
D
4
D
D
D
D
4
Plain
chipboard
surface
D
D
B
B
Prepare the left side
Tap a wooden dowel
into the left side .
Screw 2 metal dowels
into the left side .
Insert 2 large locking
nuts into the left side
. .
A
1
D
1
B
1
1
Finished
front edge
Assembly Instructions
10
Step 15
Join the modesty to
the left side
Push the modesty
onto the left side .
Note: The top edges
should be flush.
Use a screwdriver to
tighten the 2 large
locking nuts fitted to
the modesty .
44
1
1
4
1
D
4
Fit the modesty and
left side assembly
Push the modesty
onto the upright .
Use a screwdriver to
tighten the 2 large
locking nuts fitted to
the modesty .
Using 2 people,
carefully stand the
unit up .
Step 16
4
3
D
4
4
3
Assembly Instructions
11
Step 17
Step 18
Prepare the top
Screw 6 metal dowels
into the top .
B
B
B
B
B
B
B
7
7
plain chipboard surface
Fit the top
Lower the top down
onto the assembly.
Use a screwdriver to
tighten the 6 large
locking nuts fitted to
the left side , right
side and upright .
Using 2 people,
carefully lay the unit
back down onto its
front.
D
7
1
2 3
3
1
2
7
y
Assembly Instructions
12
Step 19
Step 20
y
y
x
x
Fit the back
a: Square up the unit by
making sure that
measurement x to x
equals y to y.
b: Place the back
onto the unit.
Nail around the
outside edges of the
back .
Note: Nails should be
spaced about 150mm
apart.
Stand the unit up
for the next step.
12
F
The measurement from top corner X to bottom corner X must be
equal to the measurement from top corner Y to bottom corner Y
a:
12
Warning: The
unit is heavy.
Lift with care.
12
b:
F
Fit the drawers
Slide the wheels of the
runners fitted to the
drawers, over the wheels
of the runners fitted to
the side panels and push
the drawers into position.
Side
panel
Drawer
Assembly Instructions
13
Step 21
18
19
B
B
C
Note: Due to the manufacturing process, the holes for the
locking nut can be on either surface of the drawer sides.
Note: The locking nuts can be on either surface of the drawer sides.
Make sure that the groove is on the inside, as shown.
Step 22
Prepare the stool
drawer front
Screw 2 metal dowels
into the stool drawer
front .
B
18
Prepare the stool
drawer sides
Insert a small locking
nut into the hole
shown on the stool left
drawer side and stool
right drawer side .
Note: Arrow on locking
nut must point towards
hole in edge of panel.
Step 23
C
19
20
Attach the stool
drawer sides to the
stool drawer front
Push the stool left
drawer side and stool
right drawer side
onto the back of the
stool drawer front .
Turn the small locking
nuts on the stool left
drawer side and stool
right drawer side .
19
20
18
C
19
20
B
B
C
C
19
C
20
18
Groove
18
19
20
E
E
Assembly Instructions
14
Step 24
Step 25
Fit the stool drawer
base
Slide the stool drawer
base down the grooves
in the stool drawer sides
. and and down
into the groove in the
stool drawer front .
23
19 20
18
Fit the stool drawer
back
Fit the stool drawer back
. down onto the stool
drawer base .
Make sure that the stool
drawer base fits into
the groove in the stool
drawer back .
Hold the stool drawer
back in position and
tap the knock-in pegs
through the holes in the
stool drawer sides
and .
Step 26
21
23
23
21
21
E
19
20
E
E
18
19
20
23
19
20
23
21
Prepare the left side
Tap a wooden dowel
into the left side.
Note: Wooden dowels
must not stick out from
the edge by more than
10mm or they may
damage other panels.
A
A
Prepare the stool rails
Tap 2 wooden dowels
into each of the stool
rails .
Insert 4 large locking
nuts into each of the
stool rails .
D
17
A
17
D
D
A
D
D
17
x 2
A
Assembly Instructions
15
Step 27
Prepare the stool left
side
a: Place a runner
onto the stool left side .
Slide back the top of
runner and use the 2nd
hole from the front to fit
the 1st screw .
b: Slide the runner
back the other way and
use the 2nd hole from
the back to fit the 2nd
screw .
c: Screw 6 metal
dowels into the stool
left side .
d: Tap a wooden dowel
. into the stool left side
.
Insert 2 large locking
nuts into the stool left
side .
N
13
K
K
N
K
N
a:
b:
c:
d:
B
BB
B
B
B
D
D
K
B
13
13
A
D
13
13
13
13
13
K
N
K
A
Assembly Instructions
16
Step 28
Prepare the stool right
side
a: Place a runner
onto the stool right side
. . Slide back the top of
runner and use the 2nd
hole from the front to fit
the 1st screw .
b: Slide the runner
back the other way and
use the 2nd hole from
the back to fit the 2nd
screw .
c: Screw 6 metal
dowels into the stool
right side .
d: Tap a wooden dowel
. into the stool right
side .
Insert 2 large locking
nuts into the stool
right side .
N
14
K
a:
b:
c:
d:
K
B
14
14
A
D
14 B
B
B
B
B
B
D
D
K
N
K
N
14
14
14
14
K
N
K
Assembly Instructions
17
Step 29
Step 30
Step 31
13
16
Fit the stool base
Push the stool base
onto the stool left side
. .
Use a screwdriver to
tighten the 2 large
locking nuts fitted to
the stool base .
16
13
D
16
13
17
Fit a stool rail to the
stool left side
Push a stool rail onto
the stool left side .
Use a screwdriver to
tighten the 2 large
locking nuts fitted to
the stool rail .
17
13
D
17
A
Prepare the stool
base
Tap 2 wooden dowels
into the stool base .
Insert 4 large locking
nuts into the stool
base .
D
16
D
D
D
Plain
chipboard
surface
A
A
16
16
D
Assembly Instructions
18
Step 32
Step 33
Step 34
14
16
Secure the stool base
Use a screwdriver to
tighten the 2 large
locking nuts fitted to
the stool base .
Stand the stool up for
the next step.
D
16
17
17
Fit the stool right side
Push the stool right side
. onto the stool base
and the 2 stool rails .
Use a screwdriver to
tighten the 2 large
locking nuts fitted to
each of the stool rails .
14 16
17
D
17
14
13
17
Fit the other stool rail
Push the other stool rail
. onto the stool left
side .
Use a screwdriver to
tighten the 2 large
locking nuts fitted to
the stool rail .
17
13
D
17
16
Assembly Instructions
19
Step 35
Step 36
Fit the stool seat pad
to the stool top using
4 screws .
Note: Make sure that
you screw into the hard
surface of the stool seat
pad.
Step 37
22
15
L
L
L
Hard
surface
Soft
surface
22
15
Prepare the stool top
Screw 4 metal dowels
into the stool top .
B
B
B
B
15
Plain
chipboard
surface
15
B
Fit the stool top
Lower the stool top
down onto the assembly.
Use a screwdriver to
tighten the 4 large
locking nuts fitted to
the stool left side and
stool right side .
D
15
13
14
15
13
14
L
L

This manual suits for next models

4

Other Argos Indoor Furnishing manuals

Argos 642/0110 User manual

Argos

Argos 642/0110 User manual

Argos Puerto Rico 658/3129 User manual

Argos

Argos Puerto Rico 658/3129 User manual

Argos Napoli 600/6273 User manual

Argos

Argos Napoli 600/6273 User manual

Argos Stirling 331/3639 User manual

Argos

Argos Stirling 331/3639 User manual

Argos Habitat DUO CLIC CLAC 3553657 User manual

Argos

Argos Habitat DUO CLIC CLAC 3553657 User manual

Argos 487/8317 User manual

Argos

Argos 487/8317 User manual

Argos 457/2156 Manual

Argos

Argos 457/2156 Manual

Argos Carmen 239/2091 User manual

Argos

Argos Carmen 239/2091 User manual

Argos 620/4721 User manual

Argos

Argos 620/4721 User manual

Argos Fuji 8 607/2960 User manual

Argos

Argos Fuji 8 607/2960 User manual

Argos 617/1799 User manual

Argos

Argos 617/1799 User manual

Argos SKYE WOOD Datasheet

Argos

Argos SKYE WOOD Datasheet

Argos 600/6039 User manual

Argos

Argos 600/6039 User manual

Argos 435/6152 User manual

Argos

Argos 435/6152 User manual

Argos HOME 607/7446 User manual

Argos

Argos HOME 607/7446 User manual

Argos 213/4864 User manual

Argos

Argos 213/4864 User manual

Argos Ottawa 600/0444 User manual

Argos

Argos Ottawa 600/0444 User manual

Argos Atlas 161/5803 User manual

Argos

Argos Atlas 161/5803 User manual

Argos Lucas 247/3965 User manual

Argos

Argos Lucas 247/3965 User manual

Argos 875/4334 User manual

Argos

Argos 875/4334 User manual

Argos Ellie 257/8028 User manual

Argos

Argos Ellie 257/8028 User manual

Argos 609/2256 User manual

Argos

Argos 609/2256 User manual

Argos Cheval 147/3100 User manual

Argos

Argos Cheval 147/3100 User manual

Argos Verona 609/5033 User manual

Argos

Argos Verona 609/5033 User manual

Popular Indoor Furnishing manuals by other brands

EQ3 3020-131 Assembly instructions

EQ3

EQ3 3020-131 Assembly instructions

FLORABEST 103443 Instructions for use

FLORABEST

FLORABEST 103443 Instructions for use

Simpli Home REDMOND 3AXCADM-01 Assembly instructions

Simpli Home

Simpli Home REDMOND 3AXCADM-01 Assembly instructions

HAMPTON BAY FCA60401BM Use and care guide

HAMPTON BAY

HAMPTON BAY FCA60401BM Use and care guide

SouthShore 727 Assembly instructions

SouthShore

SouthShore 727 Assembly instructions

PB TEEN Locker Bed Queen and Full Assembly manual

PB TEEN

PB TEEN Locker Bed Queen and Full Assembly manual

Simpli Home WyndenHall Brooklyn+Max AXCB222-BL USER ASSEMBLY GUIDE

Simpli Home

Simpli Home WyndenHall Brooklyn+Max AXCB222-BL USER ASSEMBLY GUIDE

Homebase CONSOLE TABLE Quick start manual

Homebase

Homebase CONSOLE TABLE Quick start manual

Home Styles 5050-13 manual

Home Styles

Home Styles 5050-13 manual

Closet Maid Indoor Furniture 3571 instruction sheet

Closet Maid

Closet Maid Indoor Furniture 3571 instruction sheet

Twin Star Home SB6839 manual

Twin Star Home

Twin Star Home SB6839 manual

System Build 7014500COM Assembly instructions

System Build

System Build 7014500COM Assembly instructions

HAMPTON BAY CRESTRIDGE FTS61215E Use and care guide

HAMPTON BAY

HAMPTON BAY CRESTRIDGE FTS61215E Use and care guide

PB TEEN Chelsea Assembly

PB TEEN

PB TEEN Chelsea Assembly

System Build 6383337COM manual

System Build

System Build 6383337COM manual

Simpli Home DRAPER AXCDRP41-WH manual

Simpli Home

Simpli Home DRAPER AXCDRP41-WH manual

LOWE'S Smartcore quick guide

LOWE'S

LOWE'S Smartcore quick guide

PB TEEN GIRLS BEDROOM CHAIR Assembly instructions

PB TEEN

PB TEEN GIRLS BEDROOM CHAIR Assembly instructions

manuals.online logo
manuals.online logoBrands
  • About & Mission
  • Contact us
  • Privacy Policy
  • Terms and Conditions

Copyright 2025 Manuals.Online. All Rights Reserved.