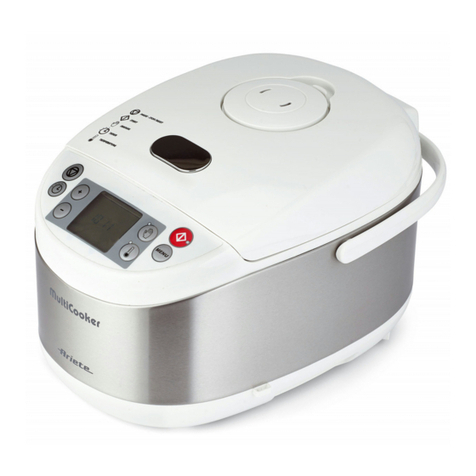
ARIETE 2945 User manual

2945
Macchina multifunzione per cottura
Multicooker
Machine multifonctions pour cuisson
Multikocher
Máquina multifuncional para cocinar
Máquina de cozedura multifunções
Multifunctionele machine voor het bakken
Πολυλειτουργική συσκευή μαγειρέματος
Мультиварка
Мультиварка

1
HR MIN
1. LATTE BOLLITO
RISOTTO
BOILED MILK
BOLLIRE
BOIL
VAPORI
VERDURE
VAPORE/STEAM
PESCE/FISH
VAPORE/STEAM
CARNE/MEAT
YOGURTH
POLENTA
PILAF
BARBECUE
CREMA
PASTICCERA
STERILIZATION
MULTIFUNCTION
SLOW
COOKING
FORMAGGIO
CHEESE
PIZZA
FUSIONE/MILK
CIOCCOLATO
RISCALDAMENTO
HEATING
POCHE’
SOFFRITTO
BROWN
LEGUMI
LEGUMES
DEFROST
TOR TA
CAKE
STUFATO
STEW
2.
3.
4.
5.
6.
7.
8.
9.
10.
11.
12.
14.
13.
15.
18.
17.
19.
25.
24.
26.
28.
27.
29.
30.
21.
20.
22.
23.
16.
MARMELLATA
JEAM
PANE
BREAD
FRITTO
FRIED
ZUPPA
SOUP
FONDUTA
FONDUE
LIEVITAZIONE
LEAVENING
2
C
D
E
B
I
L
A
M
2
3
4
1
7
9
8
6
F
H G
5
N

5 6
3 4
7 8
9

IT
- 2 -
AVVERTENZE IMPORTANTI
LEGGERE QUESTE ISTRUZIONI PRIMA DELL’USO.
Usando apparecchi elettrici è necessario prendere le opportune precauzioni, tra le
quali:
Assicurarsi che il voltaggio elettrico dell’apparecchio corrisponda a quello della1.
vostra rete elettrica.
Non lasciare l’apparecchio incustodito quando collegato alla rete elettrica; disin-2.
serirlo dopo ogni uso.
Non mettere l’apparecchio sopra o vicino a fonti di calore.3.
Durante l’utilizzo posizionare l’apparecchio su di un piano orizzontale, stabile e4.
ben illuminato.
Non lasciare l’apparecchio esposto ad agenti atmosferici (pioggia, sole, ecc...).5.
Fare attenzione che il cavo elettrico non venga a contatto con superfici calde.6.
Questo apparecchio può essere usato da ragazzi di età maggiore o uguale a7.
8 anni; le persone con capacità fisiche, sensoriali o mentali ridotte o privi di
esperienza e conoscenza dell’apparecchio oppure ai quali non siano state date
istruzioni relative all’utilizzo dovranno essere soggette alla supervisione da
parte di una persona responsabile della loro sicurezza oppure dovranno essere
prima adeguatamente formati su come usare tale apparecchio in sicurezza e sui
rischi connessi all’uso dello stesso. Ai bambini è vietato giocare con l’apparec-
chio. Le operazioni di pulizia e di manutenzione non possono essere effettuate
da ragazzi a meno che non abbiano un’ètà superiore agli 8 anni e in ogni caso
sotto supervisione di un adulto.
Tenere l’apparecchio e il suo cavo fuori dalla portata di bambini di età inferiore8.
agli 8 anni.
Non immergere mai il corpo del prodotto, la spina ed il cavo elettrico in acqua o9.
altri liquidi, usare un panno umido per la loro pulizia.
Anche quando l’apparecchio non è in funzione, staccare la spina dalla presa di10.
corrente elettrica prima di inserire o togliere le singole parti o prima di eseguire
la pulizia.
Assicurarsi di avere sempre le mani ben asciutte prima di utilizzare o di regolare11.
gli interruttori posti sull’apparecchio o prima di toccare la spina e i collegamenti
di alimentazione.
Per staccare la spina, afferrarla direttamente e staccarla dalla presa a parete.12.
Non staccarla mai tirandola per il cavo.

IT
- 3 -
Non usare l’apparecchio se il cavo elettrico o la spina risultano danneggiati,13.
o se l’apparecchio stesso risulta difettoso; tutte le riparazioni, compresa la
sostituzione del cavo di alimentazione, devono essere eseguite solamente dal
centro assistenza Ariete o da tecnici autorizzati Ariete, in modo da prevenire
ogni rischio.
In caso di utilizzo di prolunghe elettriche, quest’ultime devono essere adeguate14.
alla potenza dell’apparecchio, onde evitare pericoli all’operatore e per la sicu-
rezza dell’ambiente dove si opera. Le prolunghe non adeguate possono provo-
care anomalie di funzionamento.
Non lasciar pendere il cavo in un luogo dove potrebbe essere afferrato da un15.
bambino.
Per non compromettere la sicurezza dell’apparecchio, utilizzare solo parti di16.
ricambio e accessori originali, approvati dal costruttore.
L’apparecchio è concepito per il SOLO USO DOMESTICO e non deve essere17.
adibito ad uso commerciale o industriale.
Questo apparecchio è conforme alla direttiva 2006/95/EC e EMC 2004/108/EC,18.
ed al regolamento (EC) No. 1935/2004 del 27/10/2004 sui materiali in contatto
con alimenti.
Eventuali modifiche a questo prodotto, non espressamente autorizzate dal pro-19.
duttore, possono comportare il decadimento della sicurezza e della garanzia del
suo utilizzo da parte dell’utente.
Allorchè si decida di smaltire come rifiuto questo apparecchio, si raccomanda di20.
renderlo inoperante tagliandone il cavo di alimentazione. Si raccomanda inoltre
di rendere innocue quelle parti dell’apparecchio suscettibili di costituire un peri-
colo, specialmente per i bambini che potrebbero servirsi dell’apparecchio per i
propri giochi.
Gli elementi dell’imballaggio non devono essere lasciati alla portata dei bambini21.
in quanto potenziali fonti di pericolo.
Prima dell’utilizzo lavare ed asciugare accuratamente tutti gli accessori.22.
Non trasportare l’apparecchio quando è in funzione.23.
Non posare niente sull’apparecchio quando è in funzione.24.
Non coprire la valvola vapore posta sul coperchio superiore.25.
L’apparecchio emette vapore durante il funzionamento. Prestare attenzione in26.
modo da evitare ustioni.
Durante il funzionamento, il coperchio e la superficie esterna dell’apparecchio27.
potrebbero diventare molto caldi.

IT
- 4 -
Quando si apre il coperchio, prestare attenzione per evitare di scottarsi con il28.
vapore.
Non usare cucchiai di metallo all’interno del recipiente.29.
L’apparecchio non va alimentato attraverso timer esterni o con impianti separati30.
comandati a distanza.
31. Per il corretto smaltimento del prodotto ai sensi della Direttiva Europea
2009/96/CE si prega leggere l’apposito foglietto allegato al prodotto.
CONSERVARE QUESTE ISTRUZIONI
DESCRIZIONE DELL’APPARECCHIO (Fig. 1)
A Valvola vapore
B Maniglia apertura/chiusura coperchio
C Coperchio
D Corpo dell’apparecchio
E Pannello comandi
F Cassetto raccogli vapore acqueo
G Cucchiaio
H Spatola
I Pala mescolatrice
L Accessorio cottura a vapore
M Recipiente
N Misurino
PANNELLO COMANDI (Fig. 2)
1 Tasto avvio funzionamento (START)
2 Tasto programmi (MENU) / Tasto per atti-
vazione/disattivazione manuale della pala
mescolatrice
3 Tasto manuale multifunzione
4 Pannello selezione programmi di cottura e
display LED
5 Tasto variazione minuti (MIN) tempo di
cottura
6 Tasto variazione ore (HR) tempo di cottura
7 Tasto selezione temperatura
8 Tasto avvio posticipato
9 Tasto interruzione/pausa (STOP/RESET)
ISTRUZIONI D’USO
ATTENZIONE: Prima dell’utilizzo dell’apparecchio si consiglia di lavare tutte le parti removibili
che verranno a contatto con il cibo con acqua e comune sapone da piatti.
Utilizzo dell’apparecchio
- Preparare il cibo da cuocere seguendo le ricette.
- Inserire il cibo nel recipiente (M).
- Ruotare l’apposita maniglia (B) in senso orario oppure antiorario ed aprire il coperchio (C) (Fig. 3).
- Inserire il recipiente (M) all’interno del corpo dell’apparecchio (D) (Fig. 4).
- Se necessaria per la ricetta da realizzare, inserire la pala mescolatrice (I) nell’apposito foro sulla
parte interna del coperchio (C) e ruotarla in senso antiorario fino al completo bloccaggio (Fig. 5).
- Nel caso si desiderasse procedere con programmi vapore (n. 9, 13, 20) , risulta necessario inserire

IT
- 5 -
all’interno del recipiente (M) l’apposito accessorio per la cottura a vapore (Fig. 7).
- In modalità standby, scegliere il programma di cottura desiderato, tramite il tasto programmi
(MENU) (2), oppure utilizzare la funzione manuale (3). In seguito verrà spiegato in modo detta-
gliato il funzionamento dei tasti in oggetto.
Al termine della cottura, l’apparecchio accederà automaticamente alla modalità di mantenimento del
calore a seconda del programma selezionato e l’apparecchio andrà in standby dopo 24 ore (non tutti
i programmi prevedono mantenimento automatico del calore, vedere tabella di riferimento).
ATTENZIONE:
Se durante la cottura risulta necessario sollevare il coperchio, l’apposita maniglia (B) deve
essere girata in senso orario o antiorario prima della presa. Tale maniglia (B) non deve essere in
corrispondenza della valvola vapore (A), in modo da evitare eventuali bruciature/scottature.
Rispettare i livelli MIN e MAX indicati nel recipiente (M) per le quantità del cibo utilizzate.
DESCRIZIONE TASTI
Tasto programmi (MENU) / Tasto per attivazione/disattivazione manuale della pala mescolatrice (2)
In modalità stand-by, premere il tasto MENU (2) in sequenza per selezionare il programma di cottura
desiderato. Ad esempio, per scegliere il programma di cottura n. 3, è necessario premere 3 volte il
tasto MENU (2). I programmi disponibili sono 30 in totale (Fig. 2).
Con il tasto MENU (2) è anche possibile attivare/disattivare manualmente la pala mescolatrice (I)
durante il programma di cottura.
Tasto selezione temperatura (7)
Tale tasto consente di regolare la temperatura solo nel programma manuale: n.30 “MULTIFUNCTION“
oppure tasto MANUALE (3) posto sul pannello comandi.
La temperatura varia da 35°C a 180°C ad intervalli di tempo di 5°C.
Dopo aver impostato il tempo, risulta necessario premere il tasto temperatura più volte fino alla scelta
di quella desiderata. In modalità operativa nel programma manuale, premendo il tasto, la temperatu-
ra viene visualizzata per 5 secondi. Trascorso tale tempo, si torna alla schermata precedente.
Tasti variazione tempo ore (hr) e minuti (min) (5-6)
Nel caso si desiderasse un programma in cui è possibile impostare il tempo di cottura, modificarlo
premendo i tasti “HR” e “MIN” (“HR” si riferisce alle ore, con intervalli di 1 ora, mentre “MIN” si riferi-
sce ai minuti; far riferimento all’apposita tabella per conoscere gli intervalli di tempo).
Per modificare le ore (HR), premere più volte il tasto HR (6) fino alla scelta delle ore desiderate.
Per modificare i minuti (MIN), premere più volte il tasto MIN (5) fino alla scelta dei minuti desiderati.
Tramite i tasti in oggetto (5-6) è possibile modificare anche i tempi di avvio posticipato (vedere par-
grafo di riferimento).
Tasto manuale multifunzione (3)
Tale tasto consente di impostare il tempo e la temperatura in base alle proprie esigenze, tramite gli
appositi tasti. In modalità di standby o di inattività, premere il tasto MANUALE (3); si accenderà la
spia corrispondente ed il display mostrerà il tempo da modificare tramite i tasti HR (6) e MIN (5).
IT
- 6 -
Dopo aver scelto il tempo di cottura, selezionare il tasto selezione TEMPERATURA (7) per scegliere
quella desiderata.
E’ possibile attivare la pala mescolatrice (I) manualmente tramite il tasto (2). Al termine del processo
di cottura l’apparecchio accederà automaticamente alla modalità di mantenimento del calore.
Tasto avvio posticipato (8)
Il tasto avvio posticipato (8) permette di posticipare/ritardare l’avvio del processo di cottura fino a 24
ore. Dopo aver selezionato il programma dal menu ed aver impostato eventuale tempo/temperatura,
premere il tasto in oggetto; il display inizierà a lampeggiare. Successivamente, impostare il ritardo
tramite i pulsanti HR/MIN.
Es: per l’avvio dopo 12 ore, digitare 12:00. Al termine, premere il tasto avvio funzionamento (START)
(1) per procedere.
ATTENZIONE:
Il prodotto non ha l’orologio integrato.
Non lasciare gli alimenti deperibili, come carne, pollame, pesce, formaggio ed alimenti
caseari, a temperatura ambiente per piú di 2 ore (oppure per oltre un’ora ad una temperatura
ambiente superiore a circa 32°C). Per la preparazione del suddetto cibo, non impostare un
ritardo superiore alle 1-2 ore.
Tasto avvio funzionamento (START) (1)
Tramite il pulsande START (1) si avvierà il programma di cottura desiderato e sul display apparirà il
tempo residuo al passare dei minuti.
Tasto interruzione/pausa (STOP/RESET) (9)
Tramite il tasto (9) è possibile:
- interrompere il programma di cottura;
- mettere in modalità pausa il programma di cottura;
- attivare la funzione mantenimento del calore.
INTERRUZIONE: Tenendo premuto per 3 secondi tale tasto (9), l’apparecchio entra in standby ed il
programma si cancella.
PAUSA: Premendo una sola volta tale tasto il programma di cottura andrà in modalità PAUSA, man-
tenendo quindi il tempo residuo.
La modalità PAUSA è utile per mescolare il cibo con la spatola (H) o aggiungere ingredienti con
l’apposito cucchiaio (G), dopo aver aperto il coperchio (C) (Fig. 6-8).
Per uscire dalla modalità PAUSA premere nuovamente il tasto in oggetto (9), la macchina ripartirà
dal tempo residuo.
MANTENIMENTO CALORE: In modalità stand by, se viene premuto il tasto in oggetto (9), il prodotto
entrerà in modalità MANTENIMENTO CALORE per 24 ore, ed il display visualizzerà i minuti trascorsi
dall’attivazione di questa modalità.
Esempio: se il valore visualizzato è 0:30, significa che sono trascorsi 30 minuti dall’attivazione di tale
funzione. Per tornare alla modalità stand by ed interrompere la modalità MANTENIMENTO CALORE
premere nuovamente il tasto (9).

IT
- 7 -
TEMPERATURA E INTERVALLO DI TEMPO PER OGNI PROGRAMMA
Programma Tempo
preimpostato
Regolazione
tempo
Intervallo Pala
mescolatrice
automatica
Temperatura Mantenimento
in caldo
1 Latte bollito/boiled milk 10 min. - - 120°C
2 Risotto 20 min. - - 110°C
3 Torta/cake 5 min. 5 min. - 3 ore 5 min. 135°C
4 Stufato/stew 2 ore 1 ora - 3 ore 30 min. intermi -
tente ogni 2
minuti
120°C
5 Bollire/boil 5 min. 5 min. - 2 ore 5 min. 180°C
6 Soffritto / brown 3 min. 3 min. - 20
min.
1 min. 120°C
7 Legumi/ legumes 5 min. 5 min. - 2 ore 5 min. 100°C
8 Defrost 10 min. 10 min. - 2
ore
10 min. 25°C
9 Vapore verdure /steam
vegetable
15 min. - - 100°C
10 Poche’ 10 min. - - 110°C
11 Fusione cioccolato/melt
chocolate
1 min. 1 min.-20 min. 1 min. 35°C
12 Riscaldamento/heating 5 min. 5 min. - 2 ore 5 min. 90°C
13 Vapore pesce/steam sh 5 min. - - 100°C
14 Pizza 20 min. 20 min. - 1
ora
5 min. 140°C
15 Slow cooking 30 min. 30 min. - 8
ore
10 min. 80°C
16 Formaggio/cheese 60 min. - - 37°C
17 Marmellata/jam 40 min. - - 180°C
18 Zuppa/soup 5 min. 5 min. - 2 ore 5 min. 110°C
19 Fonduta /fondue 10 min. - - 70°C
20 Vapore carne /steam meat 20 min. - - 100°C
21 Yogurt 8 ore - - 39°C
22 Sterilization 30 min. - - 180°C
23 Lievitazione /leavening 30 min. 30 min.-3 ore 15 min. 35°C
24 Pane /bread 30 min. 30 min. - 2
ore
15 min. 135°C
25 Polenta 45 min. - - 100°C
26 Fritto /fried 5 min. 5 min. - 1 ora 5 min. 180°C
27 Pilaf 20 min. - - 135°C
28 Barbecue 5 min. 5 min. - 8 ore 5 min. 160°C
29 Crema pasticcera /custard 3 min. - - 120°C
30 Multifunction 5 min. 5 min. - 12
ore
5 min. 35°C-180°C
(regolabilie
ad intervalli di
5°C)

IT
- 8 -
PULIZIA DELL’APPARECCHIO
ATTENZIONE: Assicurarsi che l’apparecchio sia spento e che la spina sia scollegata dalla
presa prima di procedere con lo smontaggio.
- Per la pulizia del corpo dell’apparecchio (D) utilizzare esclusivamente un panno pulito e morbido.
- Tutti i componenti possono essere puliti utilizzando acqua calda e un qualsiasi detersivo per piatti
Per la pulizia della valvola (A), è sufficiente sollevare il bordo ed estrarla (Fig. 9).
- Lavare il recipiente (M) con detersivo per i piatti ed una spugna e sciacquare.
ATTENZIONE:
Per far in modo che sia più facile da pulire, dopo l’uso, lasciare i componenti immersi in acqua
calda con un poco di detersivo per piatti per 10 minuti.
In caso di deformazione del recipiente o di rivestimento antiaderente rovinato, acquistarne
una nuova dal rivenditore più vicino ed effettuare la sostituzione. Non usare pentole di altri
prodotti simili.
Non pulire il recipiente con polvere o pagliette in lana d’acciaio o nylon abrasivi. Pulire la
pentola usando una spugna. Evitare di sbatterla o graffiarla.
LISTA ERRORI
AzioniCausaErrore
inserire correttamente il recipiente
nell’apparecchio per l’utilizzo.
appare in caso di rimozione del reci-
piente
E0
spegnere immediatamente l’appa-
recchio e lasciarlo raffreddare. Se il
problema persiste e l’icona di errore
non scompare, è possibile che si sia
verificato un guasto del circuito di
riscaldamento; quindi contattare il cen-
tro assistenza.
circuito sensore inferiore difettoso
Il sensore inferiore rileva la temperatura
inferiore a -15°C.
E1
circuito sensore superiore difettoso
Il sensore superiore rileva la temperatura
inferiore a -15°C.
E2
corto circuito sensore inferiore
Il sensore inferiore rileva la temperatura
superiore a 190°C.
E3
corto circuito sensore superiore
Il sensore superiore rileva la temperatura
superiore a 190°C.
E4

EN
- 9 -
IMPORTANT SAFEGUARDS
READ THESE INSTRUCTIONS BEFORE USE
The necessary precautions must be taken when using electrical appliances, and
these include the following:
Make sure that the voltage on the appliance rating plate corresponds to that of1.
the mains electricity.
Never leave the appliance unattended when connected to the power supply;2.
unplug it after every use.
Never place the appliance on or close to sources of heat.3.
Always place the appliance on a flat, level surface during use.4.
Never leave the appliance exposed to the elements (rain, sun, etc....).5.
Make sure that the power cord does not come into contact with hot surfaces.6.
This appliance can be used by children aged from 8 years and above and7.
persons with reduced physical, sensory or mental capabilities or lack of experi-
ence and knowledge only if they have been given supervision or instruction
concerning use of the appliance in a safe way and understand the hazards
involved. Do not allow children to play with the appliance. Cleaning and user
maintenance must not be carried out by children unless they are older than 8
and supervised.
Children under age 8 should not be allowed to handle appliance and its power8.
cord which must be kept out of their reach.
Never place the appliance body, plug or power cord in water or other liquids;9.
always wipe clean with a damp cloth.
Always unplug the power cord from the electricity mains before fitting or remov-10.
ing single attachments or before cleaning the appliance.
Always make sure that your hands are thoroughly dry before using or adjust-11.
ing the switches on the appliance, or before touching the power plug or power
connections.
To unplug the appliance, grip the plug and remove it directly from the power12.
socket. Never pull the power cord to unplug the appliance.
Do not use the appliance if the power cord or plug are damaged or if the appli-13.
ance itself is faulty; all repairs, including substitution of power cord, must be
carried out exclusively by an Ariete assistance centre or by authorized Ariete
technicians in order to avoid all risks.
In case of using extension leads, these must be suitable for the appliance power14.

EN
- 10 -
to avoid danger to the operator and for the safety of the environment in which
the appliance is being used. Extension leads, if not suitable, can cause operat-
ing anomalies.
Never allow the cord to dangle in places where it may be grabbed by a child.15.
Do not threaten the safety of the appliance by using parts that are not original16.
or which have not been approved by the manufacturer.
This appliance is designed for HOME USE ONLY and may not be used for com-17.
mercial or industrial purposes.
This appliance conforms to the directives 2006/95/EC and EMC 2004/108/EC,18.
and to the regulations (EC) No. 1935/2004 of 27/10/2004 regarding material in
contact with foods.
Any changes to this product that have not been expressly authorised by the19.
manufacturer may lead to the user’s guarantee being rendered null and void.
In the event that you decide to dispose of the appliance, we advise you to make20.
it inoperative by cutting off the power cord. We also recommend that any parts
that could be dangerous be rendered harmless, especially for children, who may
play with the appliance or its parts.
Packaging must never be left within the reach of children since it is potentially21.
dangerous.
Before use, wash and wipe all accessories with care.22.
Do not move appliance while operating.23.
Do not place anything on the appliance while operating.24.
Do not cover the steam valve situated on the upper lid.25.
The appliance emits steam while operating. Be careful to prevent burn hazard.26.
During operation, the lid and the outside surface of the appliance may get very27.
hot.
When opening the lid, be careful to prevent burn hazard owing to steam.28.
Do not use metal spoons inside the container.29.
The appliance must not be energised with external timers or separate remote30.
controls.
31. To dispose of product correctly according to European Directive 2009/96/
CE, please refer to and read the provided leaflet enclosed with the product.
DO NOT THROW AWAY THESE INSTRUCTIONS

EN
- 11 -
APPLIANCE DESCRIPTION (Fig. 1)
A Steam valve
B Lid opening/closing handle
C Lid
D Appliance body
E Control panel
F Water vapour drawer
G Spoon
H Spatula
I Mixing paddle
L Steam cooking attachment
M Container
N Measuring cup
CONTROL PANEL (Fig. 2)
1 START button
2 Program button (MENU) / Button for manual
activation/deactivation of the mixing paddle
3 Multifunction manual button
4 Cooking program selection panel and LED
display
5 Minute button (MIN) of cooking time
6 Hour button (HR) of cooking time
7 Temperature button
8 Time delay button
9 STOP/RESET button
INSTRUCTIONS FOR USE
ATTENTION: Before using the appliance, it is recommended to wash all removable parts that
will be in contact with food using water and common dish detergent.
Appliance use
- Prepare food to cook according to the recipes.
- Insert food into the container (M).
- Rotate the apposite handle (B) clockwise or anti-clockwise and open the lid (C) (Fig. 3).
- Insert the container (M) into the appliance body (D) - Fig. 4.
- If necessary, insert the mixing paddle (I) into the apposite hole on the inner part of the lid (C) and
rotate it anti-clockwise until it locks in place (Fig. 5).
- To proceed with the steam programs (No. 9, 13, 20), insert the apposite attachment for steam
cooking (Fig. 7) into the container (M).
- In standby mode, select the required cooking program through the MENU button (2), or use the
manual function (3). Functioning of the above mentioned buttons will be explained in details here-
under.
Once cooked, the appliance will switch on the keep warm mode automatically according to the
selected program and will enter the standby mode after 24 hours (the keep warm mode is not
available for every program, see reference table).
ATTENTION:
When it is necessary to raise the lid during cooking, the apposite handle (B) is to be turned
clockwise or anti-clockwise before holding it. Such handle (B) must not be in correspondence
of the steam valve (A) to prevent the burn hazard.
Respect the MIN/MAX levels on the container (M) for the amount of food used.

EN
- 12 -
BUTTON DESCRIPTION
Program button (MENU) / Button for manual activation/deactivation of the mixing paddle (2)
In standby mode, select the MENU button (2) in sequence to select the required cooking program.
For instance, to select the coking program No. 3, it is necessary to press the MENU button (2) 3
times. The total available programs are 30 (Fig. 2).
The MENU button (2) serves also to activate/deactivate the mixing paddle (I) manually during the
cooking program.
Temperature button (7)
This button serves to set the temperature only in the manual program: No. 30 “MULTIFUNCTION” or
MANUAL button (3) situated on the control panel.
The temperature changes from 35°C to 180°C at 5°C intervals.
After having set the time, it is necessary to press the temperature button several times until the
required value is reached. In operating mode on the manual program, pressing the button, the tem-
perature is shown for 5 seconds. After this time has elapsed, you return to the previous screen.
Buttons for changing hours (hr) and minutes (min) - 5-6
In case of selection of a program in which the cooking time can be set, modify pressing the buttons
“HR” and “MIN” (“HR” refers to hours, with 1-hour intervals, while “MIN” refers to minutes; see the
apposite table for information about time intervals).
To change hours (hr), press the HR button (6) several times, until the required value is reached.
To change minutes (MIN), press the MIN button (5) several times, until the required value is
reached.
The above buttons (5-6) serves to modify also the delayed start times (see corresponding para-
graph).
Multifunction manual button (3)
This button allows to set the time and the temperature according to personal requirements through
the apposite buttons. In standby/idle time, press the MANUAL button (3); the corresponding light will
turn on and the display will show the time to be changed trough the buttons HR (6) and MIN (5).
After having selected the cooking time, press the selection button TEMPERATURE (7) to select the
required one.
The mixing paddle (I) can be started manually using the button (2). After the cooking process, the
appliance will access the keep warm mode automatically.
Time delay button (8)
The time delay button (8) serves to postpone/delay the cooking process start up to 24 hours. After
having selected the program from the menu and having set the time/temperature, press the above
button. The display will start blinking. Then, set the delay through the buttons HR/MIN.
E.g.: for starting after 12 hours, digit 12:00. At the end, press the START button (1) to proceed.
ATTENTION:
The product is not equipped with built-in clock.

EN
- 13 -
Do not leave perishable food, as meat, poultry, fish, cheese, and dairy food, at room tempera-
ture for more than 2 hours, or for more than 1 hour at a room temperature above 32°C. For
preparing such food, do not set a time delay above 1-2 hours.
START button (1)
The required cooking program will activate through the START button (1) and the display will show
the remaining time with the passing of minutes.
STOP/RESET button (9)
The button (9) serves to:
- stop the cooking program
- pause the cooking program
- enable the keep warm mode
INTERRUPTION: By keeping pressed the button (9) for 3 seconds, the appliance enters standby
mode and the program is cancelled.
PAUSE: By pressing this button once, the cooking program enters the PAUSE mode, keeping the
remaining time.
The PAUSE mode serves to mix the food with the spatula (H) or add ingredients with the apposite
spoon (G), after having opened the lid (C), Fig. 6-8.
To exit the PAUSE mode, press this button (9) again and the machine will start from the remaining
time.
KEEP WARM MODE: In standby mode, by pressing this button (9), the product will enter the KEEP
WARM mode for 24 hours and the display will show the minutes elapsed from the activation of this
mode.
E.g.: if the value shown is 0:30, it means that 30 minutes have elapsed from the activation of the func-
tion. To return to the standby mode and stop the KEEP WARM mode, press the button (9) again.
TEMPERATURE AND INTERVAL OF TIME FOR EACH PROGRAM
Program Pre-set
time
Time setting Interval Automatic
mixing
paddle
Temperature Keep warm
mode
1 Latte bollito/boiled milk 10 min. - - 120°C
2 Risotto 20 min. - - 110°C
3 Torta/cake 5 min. 5 min. - 3
hours
5 min. 135°C
4 Stufato/stew 2 hours 1 ora - 3
hours
30 min. intermi -
tent every 2
minutes
120°C
5 Bollire/boil 5 min. 5 min. - 2
hours
5 min. 180°C
6 Soffritto / brown 3 min. 3 min. - 20
min.
1 min. 120°C
7 Legumi/ legumes 5 min. 5 min. - 2
hours
5 min. 100°C

EN
- 14 -
Program Pre-set
time
Time setting Interval Automatic
mixing
paddle
Temperature Keep warm
mode
8 Defrost 10 min. 10 min. - 2
hours
10 min. 25°C
9 Vapore verdure /steam
vegetable
15 min. - - 100°C
10 Poche’ 10 min. - - 110°C
11 Fusione cioccolato/melt
chocolate
1 min. 1 min.-20 min. 1 min. 35°C
12 Riscaldamento/heating 5 min. 5 min. - 2
hours
5 min. 90°C
13 Vapore pesce/steam sh 5 min. - - 100°C
14 Pizza 20 min. 20 min. - 1
hour
5 min. 140°C
15 Slow cooking 30 min. 30 min. - 8
hours
10 min. 80°C
16 Formaggio/cheese 60 min. - - 37°C
17 Marmellata/jam 40 min. - - 180°C
18 Zuppa/soup 5 min. 5 min. - 2
hours
5 min. 110°C
19 Fonduta /fondue 10 min. - - 70°C
20 Vapore carne /steam meat 20 min. - - 100°C
21 Yogurt 8 hours - - 39°C
22 Sterilization 30 min. - - 180°C
23 Lievitazione /leavening 30 min. 30 min.-3
hours
15 min. 35°C
24 Pane /bread 30 min. 30 min. - 2
hours
15 min. 135°C
25 Polenta 45 min. - - 100°C
26 Fritto /fried 5 min. 5 min. - 1
hour
5 min. 180°C
27 Pilaf 20 min. - - 135°C
28 Barbecue 5 min. 5 min. - 8
hours
5 min. 160°C
29 Crema pasticcera /custard 3 min. - - 120°C
30 Multifunction 5 min. 5 min. - 12
hours
5 min. 35°C-180°C
(the tempe-
rature can
be set in 5°C
intervals).

EN
- 15 -
APPLIANCE CLEANING
ATTENTION: Make sure the appliance is off and unplugged before disassembling it.
- Use only a clean and soft cloth only for cleaning the appliance body (D).
- All components may be cleaned using warm water and any kind of dish detergent. For cleaning
the valve (A), lift the edge and remove it (Fig. 9).
- Wash the container (M) with dish detergent and a sponge, and then rinse.
ATTENTION:
In order to make components cleaning easier, after use, let them immersed in warm water with
a little dish detergent for 10 minutes.
In case of deformation of the container or the non-stick coating is damaged, replace it with a
new one bought at the nearest dealer. Do not use pans or other similar products.
Do not clean the container using abrasive powder, steel wool, or nylon. Clean the pan using
a sponge. Do not slam or scrape it.
ERROR LIST
ActionsCauseError
insert the container into the appliance
properly
it is shown in case of container removalE0
immediately switch the appliance off
and leave it to cool. If the problem
remains and the error icon does not
disappear, a heating circuit failure may
have occurred; therefore contact the
Service Centre.
lower sensor circuit faulty
The lower sensor detects the temperatu-
re below -15°C.
E1
upper sensor circuit faulty
The upper sensor detects the temperatu-
re below -15°C.
E2
lower sensor short circuit
The lower sensor detects the temperatu-
re above 190°C.
E3
upper sensor short circuit
The upper sensor detects the temperatu-
re above 190°C.
E4

FR
- 16 -
AVERTISSEMENTS IMPORTANTES
LIRE CES INSTRUCTIONS AVANT L’EMPLOI
Lors de l’utilisation d’appareils électriques, il est nécessaire de prendre les précau-
tions suivantes:
Vérifiez que le voltage électrique de l’appareil corresponde à celui de votre1.
réseau électrique.
Ne laissez jamais l’appareil sans surveillance lorsqu’il est branché au réseau2.
électrique; débranchez-le après chaque utilisation.
Ne placez pas l’appareil au dessus ou près de sources de chaleur.3.
Lors de son utilisation, placez l’appareil sur une surface horizontale et stable.4.
N’exposez jamais l’appareil aux agents atmosphériques externes (pluie, soleil,5.
etc.).
Veillez à ce que le câble électrique n’entre jamais en contact avec des surfaces6.
chaudes.
Cet appareil peut etre utilise par des enfants ages ou majeurs de 8 ans. Les per-7.
sonnes presentant des capacites physiques, sensorielles ou mentales reduites
ou depourvues d’experience et de connaissance de l’appareil, ou n’ayant pas
reçu les instructions necessaires devront utiliser l’appareil sous la surveillance
d’une personne responsable de leur securite ou devront etre correctement ins-
truites sur les modalites d’emploi en toute securite de cet appareil et sur les ris-
ques lies a son utilisation. Il est interdit aux enfants de jouer avec l’appareil. Les
operations de nettoyage et d’entretien doivent etre effectuees par des enfants
ages de plus de 8 ans et, dans tous les cas, sous la surveillance d’un adulte.
Garder l’appareil et son cordon d’alimentation loin de la portee des enfants ages8.
de moins de 8 ans.
Ne pas plonger le corps du produit, la fiche ni le cable electrique dans l’eau ou9.
autres liquides, et utiliser toujours un chiffon humide pour les nettoyer.
Meme lorsque l’appareil n’est pas en marche, debrancher la fiche de la prise de10.
courant electrique avant d’installer ou de defaire les simples parties ou avant de
proceder au nettoyage.
Vérifier d’avoir toujours les mains sèches avant d’utiliser ou de régler les inter-11.
rupteurs placés sur l’appareil ou avant de manipuler la fiche et les connexions
électriques.
Pour débrancher l’appareil, saisir directement la fiche en la débranchant de la12.
prise murale. Ne tirez jamais sur le câble d’alimentation.

FR
- 17 -
Ne pas utiliser l’appareil si le cordon electrique ou la fiche sont endommages13.
ou si l’appareil est defectueux; toutes les reparations, y compris la substitution
du cordon d’alimentation, doivent etre effectuees exclusivement par le centre
de service apres-vente Ariete ou par des techniciens agrees Ariete, de façon a
prevenir tout risque de danger.
En cas d’utilisation de rallonges électriques, ces dernières doivent être appro-14.
priées à la puissance de l’appareil afin d’éviter tout risque pour l’opérateur et
pour la sécurité du lieu de travail. Les rallonges non appropriées peuvent pro-
voquer des anomalies de fonctionnement.
Ne laissez jamais pendre le cordon là où il pourrait être tiré par un enfant.15.
Pour ne pas compromettre la sécurité de l’appareil, utiliser uniquement des piè-16.
ces de rechange et des accessoires originaux, approuvés par le constructeur.
L’appareil a été conçu EXCLUSIVEMENT pour un USAGE DOMESTIQUE et il17.
ne peut en aucun cas être destiné à un usage commercial ou industriel.
Cet appareil est conforme aux directives 2006/95/EC et EMC 2004/108/EC, et18.
au règlement (EC) N. 1935/2004 du 27/10/2004 concernant les matériaux et
objets destinés à entrer en contact avec les denrées alimentaires.
Toute modification du produit, non autorisé expressément par le producteur,19.
peut comporter la réduction de la sécurité et la déchéance de la garantie.
Si vous décidez de vous défaire de cet appareil, il est fortement recommandé20.
de le rendre inutilisable en éliminant le câble d’alimentation électrique. Nous
conseillons en outre d’exclure toute partie de l’appareil pouvant constituer une
source de danger, en particulier pour les enfants qui peuvent se servir de l’ap-
pareil pour jouer.
Ne laissez pas les parties de l’emballage à la portée des enfants car elles21.
constituent une source potentielle de danger.
Avant leur utilisation, lavez et essuyez soigneusement tous les accessoires.22.
Ne déplacez pas l’appareil lorsqu’il est en marche.23.
Ne posez rien sur l’appareil quand il est en marche.24.
Ne couvrez pas la vanne située sur le couvercle supérieure.25.
L’appareil émet de la vapeur lors de son fonctionnement. Faites très attention26.
de ne pas vous brûler.
Durant le fonctionnement de l’appareil, le couvercle et la surface externe peu-27.
vent devenir très chauds.
Lorsque vous ouvrez le couvercle, faites très attention de ne pas vous brûler28.
avec la vapeur.

FR
- 18 -
N’utilisez pas de cuillères en métal à l’intérieur du récipient.29.
L’appareil ne doit pas être alimenté à travers des timer externes ou avec des30.
installations séparées et commandées à distance.
31. Pour l’élimination correcte du produit aux termes de la Directive
Européenne 2009/96/CE, nous vous prions de lire le feuillet qui accompagne
le produit.
CONSERVEZ SOIGNEUSEMENT CES
INSTRUCTIONS
DESCRIPTION DE L’APPAREIL (Fig. 1)
A Soupape vapeur
B Poignée ouverture/fermeture couvercle
C Couvercle
D Corps de l’appareil
E Panneau des commandes
F Tiroir de récupération de la vapeur d’eau
G Cuillère
H Spatule
I Mélangeur
L Accessoire cuisson à vapeur
M Récipient
N Mesureur
PANNEAU DE COMMANDES (Fig. 2)
1 Touche démarrage fonctionnement
(START)
2 Touche programmes (MENU) / Touche pour
démarrage/arrêt mélangeur
3 Touche manuelle multifonctions
4 Panneau de sélection programmes de cuis-
son et afficheur à LED
5 Touche variation minutes (MIN) temps de
cuisson
6 Touche variation heures (HR) temps de
cuisson
7 Touche sélection température
8 Touche démarrage retardé
9 Touche interruption/pause (STOP/RESET)
INSTRUCTIONS D’EMPLOI
ATTENTION: Avant d’utiliser l’appareil, il est conseillé de laver toutes les parties amovibles
qui entreront en contact avec les aliments, avec de l’eau et un produit vaisselle ordinaire.
Utilisation de l’appareil
- Préparer les aliments à cuire en suivant les recettes.
- Verser les aliments dans le récipient (M).
- Tourner la poignée (B) vers la droite ou vers la gauche et ouvrir le couvercle (C) (Fig. 3).
- Introduire le récipient (M) à l’intérieur du corps de l’appareil (D) (Fig. 4).
- Si la recette à réaliser l’exige, introduire le mélangeur (I) dans l’ouverture située sur la partie
interne du couvercle (C) et le tourner vers la gauche jusqu’à ce qu’il se bloque parfaitement (Fig.
5).
Table of contents
Languages:
Other ARIETE Kitchen Appliance manuals

ARIETE
ARIETE 440 User manual

ARIETE
ARIETE 1598/1 User manual

ARIETE
ARIETE 2957 User manual

ARIETE
ARIETE Saladino Chef 1796 User manual

ARIETE
ARIETE 2879 User manual

ARIETE
ARIETE Grati waterproof 457 User manual

ARIETE
ARIETE 632 User manual

ARIETE
ARIETE 909 User manual

ARIETE
ARIETE 2971 User manual

ARIETE
ARIETE Grati 447 User manual

ARIETE
ARIETE saladino 1791 User manual

ARIETE
ARIETE 908 User manual

ARIETE
ARIETE GRATI User manual

ARIETE
ARIETE GRATI User manual

ARIETE
ARIETE 740 User manual

ARIETE
ARIETE 4079 User manual

ARIETE
ARIETE ARC287803 User manual

ARIETE
ARIETE Party Time 0076/00 User manual

ARIETE
ARIETE 1589 User manual

ARIETE
ARIETE 2941 User manual