manuals.online logo
Brands
  1. Home
  2. •
  3. Brands
  4. •
  5. Assa Abloy
  6. •
  7. Door Opening System
  8. •
  9. Assa Abloy RIXSON 91DCP User manual

Assa Abloy RIXSON 91DCP User manual

IS91DCP 05/20
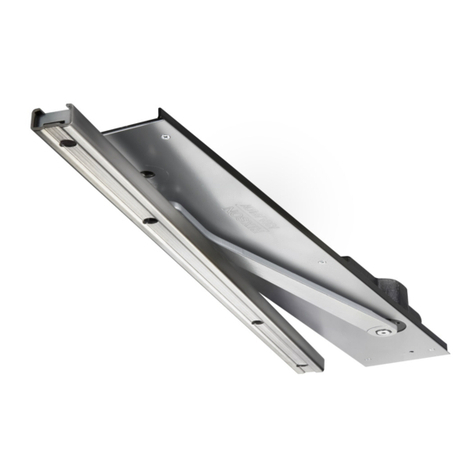
Model 91DCP Overhead Concealed Closer
Non-Hold Open and Hold Open
Metal Frame Installation Instructions
Copyright © 2016, 2020, ASSA ABLOY Accessories and Door Controls Group, Inc. All rights reserved. Reproduction in whole
or in part without the express written permission of ASSA ABLOY Accessories and Door Controls Group, Inc. is prohibited.
Pour la version francaise voir www.nortondoorcontrols.com.
READ AND FOLLOW ALL INSTRUCTIONS. SAVE THESE INSTRUCTIONS.
This product can expose you to lead which is known to the state of
California to cause cancer and birth defects or other reproductive harm.
For more information go to www.P65warnings.ca.gov.
WARNING
Slider
(90253)
Optional Hold Open
Assembly (90254)
Retrot Track Spacer and Screws,
Optional (90260)
Not for new installation. Replacement only.
Consult factory.
Closer Body
91DCP LAP x (Specify
hand and function)
Cover Plate
LH: 90272-(nish)
RH: 90275-(nish)
Arm
LH: 90236-DCP (nish)
RH: 90237-DCP (nish)
Track
(90239)
Model 91DCP (Left Hand shown)
4-1/2" x 4-1/2" Butt or 3/4" Offset Pivot Hung; consult factory if other means
Tools Needed
Non Hold Open Stop
Block (90255)
Supplied Fasteners
Components
Closer
Screw Pack
(90241-nish)
Track
Screw Pack
(90242)
Arm
Screw Pack
(90283-nish)
Cover Plate
Screw Pack
(90278-nish)
IS91DCP 05/20
Copyright © 2016, 2020, ASSA ABLOY Accessories and Door Controls Group, Inc. All rights reserved. Reproduction in whole
or in part without the express written permission of ASSA ABLOY Accessories and Door Controls Group, Inc. is prohibited.
2
Model 91DCP, Metal Frame
Before You Begin:
IMPORTANT:
• The Americans with Disabilities Act (ADA) requires that doors having door closers have an opening force not to
exceed 5 lbf.
• Door closer’s power size adjustment feature may require adjustment to its lowest setting to comply with ADA
opening force guidelines.
• ADA compliant closers may not latch doors, manufacturer does not guarantee latching on lower opening
force settings.
• A separate Rixson Surface Checkmate® or other door stop, supplied by others, is strongly recommended to
avoid damage to door closer and adjacent property.
• Doors should be hung on ball bearing or anti-friction hinges/pivots. Door must swing freely. For other hanging
means a special layout may be required, consult factory.
• Door and frame must be reinforced for attaching screws.
• All dimensions are given in inches (millimeters).
• An improperly installed or incorrectly adjusted door closer may cause property damage or personal injury and
will void product warranty.
• To avoid personal injury, DO NOT DISASSEMBLE THIS DOOR CLOSER BODY.
• Door closers must be securely fastened to a prepared door and frame with fasteners provided.
• HOLD OPEN option not permitted to be installed in re door assemblies.
Contents
Important.............................................................................................. 2
Before You Begin ....................................................................................... 2
Installation............................................................................................. 3
Adjustments ........................................................................................... 6
4-1/2" x 4-1/2" Butt Hinge Template..................................................................... 7
3/4" Offset Pivot Template . . . . . . . . . . . . . . . . . . . . . . . . . . . . . . . . . . . . . . . . . . . . . . . . . . . . . . . . . . . . . . . . . . . . . . . . . . . . . . 8
IS91DCP 05/20
Copyright © 2016, 2020, ASSA ABLOY Accessories and Door Controls Group, Inc. All rights reserved. Reproduction in whole
or in part without the express written permission of ASSA ABLOY Accessories and Door Controls Group, Inc. is prohibited.
3
Model 91DCP, Metal Frame
A. Verify frame and door installation.
1. Determine if right hand or left hand
installation. (Figure 1)
2. Verify frame is square by using a
carpenter’s square. (Figure 2)
3. Note if gaps between door and frame are
consistent. Gap should be 1/16" (1.6) at
jamb and header.
4. Using supplied templates, conrm all
dimensions of cut-outs.
Installation
Figure 1
Figure 2
Figure 3 Left Hand Shown
B. Install closer.
1. Install closer in prepped frame with
four (4) 1/4-20 x 5/8" FHPMS mounting
screws provided. (Figure 3)
NOTE: Mounting plate should be ush
with frame rabbet.
D. Attach arm.
1. Using provided 5/32" hex wrench and
1/4-20 x 3/4" Allen Drive with Patch
screw and washer, attach arm to closer
spindle. (Figure 5)
IMPORTANT: Arm should rest at
15° away from door side of closer
mounting plate. Arm always rotates
in direction of door.
C. Install cover plate.
1. Install cover plate to closer mounting
plate with six (6) 6-32 x FHPMS
mounting screws provided. (Figure 4)
Figure 4
Figure 5
IS91DCP 05/20
Copyright © 2016, 2020, ASSA ABLOY Accessories and Door Controls Group, Inc. All rights reserved. Reproduction in whole
or in part without the express written permission of ASSA ABLOY Accessories and Door Controls Group, Inc. is prohibited.
4
Model 91DCP, Metal Frame
E. Assemble track.
1. Slide track components into track.
(Figure 6)
NOTE:
• All track components must be placed in
track before installing track into door.
• Stop block (or optional hold open)
should be last component at hinge side
of track.
• The longer end of slider should be
pointed towards hinge end of track.
Figure 6
OR
F. Install track to door.
1. Make sure slider and track components are
installed prior to installing track to door.
2. Install track and, if necessary, optional
retrot spacer (replacement application
only, consult factory) using either four (4)
provided 1/4-20 x 7/16" FHPMS screws
for metal door or four (4) provided #14
x 1-1/4" FHPWS screws for wood door.
(Figure 7)
G. Attach arm to track.
1. With provided 1/8" hex wrench, completely
tighten latch and sweep valves by turning
screws clockwise. This will allow for an easier
closer-to-door connection. (Figure 8)
2. Open door to about 45° then rotate arm over
to door.
NOTE: Arm should maintain position because
latch and sweep valves have been tightened.
3. Align slider square with arm square and
connect using provided 5/32" hex wrench and
1/4-20 x 3/4" Allen Drive with Patch screw.
(Figure 9)
NOTE: If you choose to open door beyond
45°, backcheck may need to be adjusted
counter clockwise to easily rotate arm to
door position.
Non Hold Open Track Components
Optional Hold Open Track Components
Figure 7
Figure 8
Figure 9
IS91DCP 05/20
Copyright © 2016, 2020, ASSA ABLOY Accessories and Door Controls Group, Inc. All rights reserved. Reproduction in whole
or in part without the express written permission of ASSA ABLOY Accessories and Door Controls Group, Inc. is prohibited.
5
Model 91DCP, Metal Frame
Adjustments
Latch SpeedBackcheck Sweep Speed
Spring Power Adjustment for Closing Force
(Closer shipped at lowest setting)
Model PH91DCP Model 91DCP
Closer
Size
Approx # of
360° Turns
Closer
Size
Approx # of
360° Turns
ADA 0 3 0
1 15 4 17
2 30 5 25
3 55 6 32
Speed Adjustment
Use provided 1/8" hex wrench to adjust
sweep, latch and backcheck valves to control
speed of door.
NEVER completely close backcheck valve.
NEVER use backcheck as a dead stop.
NEVER fully open valves. Valves will leak.
Do not use a power drill.
Warranty will be void.
Closing Force Adjustment
If additional force is needed, use 3/8" hex
wrench to adjust closing force. Refer to
chart.
Do not use a power drill.
Warranty will be void.
All 91DCP Series closers are factory set to
minimum force. Adjust closer as
necessary for more force taking into
consideration door size, weight, positive
room pressure, etc.
Optional Hold Open Adjustment
1. Insert locking tab of hold open assembly
into track slider.
NOTE: Hold open assembly should be
on hinge side of track slider.
2. Open door to desired hold open position.
3. Tighten hold open set screws to lock
down hold open assembly.
4. Pull door in closing direction to
disengage hold open assembly and track
slider.
5. Adjust hold open by turning adjustment
screw with provided 3/16" hex wrench.
NOTE: THIS FEATURE CANNOT BE USED ON
FIRE-RATED DOORS
5° 5°
0°
75°
IS91DCP 05/20
Rixson is a brand associated with ASSA ABLOY Accessories and Door Controls Group, Inc., an ASSA ABLOY Group company.
Copyright © 2016, 2020, ASSA ABLOY Accessories and Door Controls Group, Inc. All rights reserved. Reproduction in whole
or in part without the express written permission of ASSA ABLOY Accessories and Door Controls Group, Inc. is prohibited.
Rixson Technical Product Support:
Monroe, NC 28112 USA
Phone: 800.438.1951 ext: 6030
TechSupport.Rixson@assaabloy.com
rixson.com
H. Install removable stop.
After closer is installed and all adjustments are
complete, install removable stop.
NOTE: DO NOT drill holes into closer cover plate.
You’ve now installed the Model 91DCP Overhead Concealed Closer.
Troubleshooting
Symptom Cause Remedy
Door won’t latch
Spring tension not strong enough Increase opening force.
See Adjustments section.
Latch speed control not fast enough Adjust latch speed valve.
See Adjustments section.
Door hung on products other than
4-1/2 x 4-1/2 butts or 3/4 offset pivots
Send template for hanging means
to factory. A new installation sheet
is required. Closer will need to be
relocated.
Arm is not preloaded See Step G. Attach Arm to Door
Door is too difcult to open Spring tension is set too strong Decrease opening force.
See Adjustments section.
IS91DCP 05/20
Copyright © 2016, 2020, ASSA ABLOY Accessories and Door Controls Group, Inc. All rights reserved. Reproduction in whole
or in part without the express written permission of ASSA ABLOY Accessories and Door Controls Group, Inc. is prohibited.
22 1
2
"
572mm
LENGTH OF TRACK
21
16
"
52mm
77
16
"
189mm
17 3
16
"
437mm
VARIES WITH
DOOR THICKNESS
11
4
"
32mm
7
8
"
22mm
11
16
"
27mm
22 9
16
"
573mm
23 5
8
"
600mm
LENGTH OF MORTISE
HINGE SIDE
4X DRILL AND TAP 1/4-20 UNC-2B
513
16
"
148mm
21 7
8
"
556mm
21 1
8
"
537mm
3
8
"
10mm
5
8
"
16mm
5
8
"
16mm
4X 1/4-20 UNC -2B
CLOSER MOUNTING HOLES
23
4
"
70mm
33
4
"
95mm
CLOSER CUTOUT
WIDTH
1
8
"
3mm
FROM FRAME EDGE IN
ALL CASES
5
8
"
16mm
MUST HAVE REMOVABLE STOP
7
16
"
11mm
FRAME RABBET TO
TAB MOUNT SURFACE
13
4
"
44mm
MIN. FRAME WIDTH
REMOVABLE STOP TABS IF NOT
USING FULL LENGTH REMOVABLE STOP
CLOSER MOUNTING TABS
5
16
"
8mm
1
4
"
6mm
DOOR
A
1
1
16
"
23 5
8
"
600mm
ARM CUTOUT
STOP SIDE ONLY
2
1
16
"
TOP OF DOOR
A
1
8
"
3mm
FROM FRAME EDGE
IN ALL CASES
4"
102mm
MIN. WIDTH
15
8
"
41mm
CLOSER HEIGHT
OPTIONAL SPACER
REMOVABLE STOP
CLOSER
NOTES:
FOR 180
OPENING, MAX. ALLOWABLE BUTT
1.
HINGE SIZE IS 5" X 5".
MINIMUM STOP THICKNESS 1/2".
2.
1/8" DOOR TO SOFFIT CLEARANCE REQUIRED.
3.
REINFORCING PER ANSI/SDI-100
4.
RECOMMENDED FOR HOLLOW METAL DOORS
& FRAMES.
AUXILIARY STOP RECOMMENDED.
5.
DO NOT SCALE DRAWING.
6.
LEFT HAND DOOR AND CLOSER SHOWN.
RIGHT HAND OPPOSITE.
A REMOVABLE HEADSTOP MUST BE USED IN COMBINATION
WITH THE CLOSER FOR PROPER INSTALLATION. MOUNTING HOLES
FOR THE HEADSTOP MUST SPAN CLOSER LENGTH. HEADSTOP MUST BE
REMOVABLE TO INSTALL CLOSER AND MAKE PROPER ADJUSTMENTS.
Copyright 2020 ASSA ABLOY Accessories and Door Controls Group, Inc. All rights reserved. Reproduction in whole or in
part without the express written permission of ASSA ABLOY Accessories and Door Controls Group, Inc. is prohibited.
C
PRODUCT:
TEMPLATE NUMBER:
DATE:
91DCP OHC CLOSER
OC60901
5/2020
MODEL 91DCP OVERHEAD CONCEALED CLOSER
BUTT HINGE, METAL FRAME
MAX. DEGREE OF OPENING
91NDCP NON HOLD OPEN (180
)
91NDCP NON HOLD OPEN WITH TRACK STOP
(135
)
91HDCP HOLD OPEN (105
)
www.rixson.com
CUTOUT FOR ARM
INCLUDES HEEL OF
DOOR AS SHOWN
"A" Dimension
Standard Appilcation
1" - 1/16" (27)
Retrofit Track Option
1" - 3/8" (35)
Model 91DCP Overhead Concealed Closer Template
Butt Hinge, Metal Frame
Left Hand Shown, Right Hand Opposite
IS91DCP 05/20
Copyright © 2016, 2020, ASSA ABLOY Accessories and Door Controls Group, Inc. All rights reserved. Reproduction in whole
or in part without the express written permission of ASSA ABLOY Accessories and Door Controls Group, Inc. is prohibited.
22 1
2
"
572mm
LENGTH OF TRACK
VARIES WITH
DOOR THICKNESS
11
4
"
32mm
7
8
"
22mm
23 5
8
"
600mm
LENGTH OF MORTISE
49
16
"
116mm
1"
25mm
63
8
"
162mm
16 1
8
"
410mm
21 1
2
"
546mm
HINGE SIDE
C
L
PIVOT
4X DRILL AND TAP 1/4-20 UNC-2B
61
4
"
159mm
21 7
8
"
556mm
21 1
8
"
537mm
3
8
"
10mm
5
8
"
16mm
5
8
"
16mm
4X 1/4-20 UNC -2B
CLOSER MOUNTING HOLES
23
4
"
70mm
33
4
"
95mm
CLOSER CUTOUT
WIDTH
1
8
"
3mm
FROM FRAME EDGE IN
ALL CASES
5
8
"
16mm
MUST HAVE REMOVABLE STOP
7
16
"
11mm
FRAME RABBET TO
TAB MOUNT SURFACE
13
4
"
44mm
MIN. FRAME WIDTH
REMOVABLE STOP TABS IF NOT
USING FULL LENGTH REMOVABLE STOP
CLOSER MOUNTING TABS
5
16
"
8mm
1
4
"
6mm
DOOR
A
4
9
16
"
19"
483mm
ARM CUTOUT
STOP SIDE ONLY
5
9
16
"
TOP OF DOOR
A
1
8
"
3mm
FROM FRAME EDGE
IN ALL CASES
4"
102mm
MIN. WIDTH
15
8
"
41mm
CLOSER HEIGHT
OPTIONAL SPACER
REMOVABLE STOP
CLOSER
NOTES:
FOR PIVOT INSTRUCTIONS OR DETAILS, SEE
1.
PIVOT TEMPLATE. FOR USE WITH RIXSON PIVOT
MODEL 180 SERIES.
MINIMUM STOP THICKNESS 1/2".
2.
1/8" DOOR TO SOFFIT CLEARANCE REQUIRED.
3.
REINFORCING PER ANSI/SDI-100
4.
RECOMMENDED FOR HOLLOW METAL DOORS
& FRAMES.
AUXILIARY STOP RECOMMENDED.
5.
DO NOT SCALE DRAWING.
6.
LEFT HAND DOOR AND CLOSER SHOWN.
RIGHT HAND OPPOSITE.
A REMOVABLE HEADSTOP MUST BE USED IN COMBINATION
WITH THE CLOSER FOR PROPER INSTALLATION. MOUNTING HOLES
FOR THE HEADSTOP MUST SPAN CLOSER LENGTH. HEADSTOP MUST BE
REMOVABLE TO INSTALL CLOSER AND MAKE PROPER ADJUSTMENTS.
C
PRODUCT:
TEMPLATE NUMBER:
DATE:
91DCP OHC CLOSER
OC60913
5/2020
MODEL 91DCP OVERHEAD CONCEALED CLOSER
3/4" OFFSET PIVOT, METAL FRAME
MAX. DEGREE OF OPENING
91NDCP NON HOLD OPEN (115
)
91NDCP NON HOLD OPEN WITH TRACK STOP
(105
)
91HDCP HOLD OPEN (85
)
www.rixson.com
CUTOUT FOR ARM
INCLUDES HEEL OF
DOOR AS SHOWN
C
L
PIVOT
Copyright 2020 ASSA ABLOY Accessories and Door Controls Group, Inc. All rights reserved. Reproduction in whole or in
part without the express written permission of ASSA ABLOY Accessories and Door Controls Group, Inc. is prohibited.
"A" Dimension
Standard Appilcation
1" - 1/16" (27)
Retrofit Track Option
1" - 3/8" (35)
Model 91DCP Overhead Concealed Closer Template
3/4" Offset Pivot, Metal Frame
Left Hand Shown, Right Hand Opposite

This manual suits for next models

1

Other Assa Abloy Door Opening System manuals
Assa Abloy Norton 7570 Series User manual

Assa Abloy

Assa Abloy Norton 7570 Series User manual

Assa Abloy SARGENT FIREGUARD 2499 User manual

Assa Abloy

Assa Abloy SARGENT FIREGUARD 2499 User manual

Assa Abloy NORTON RIXSON 5200 Series User manual

Assa Abloy

Assa Abloy NORTON RIXSON 5200 Series User manual

Assa Abloy RD150-3 User manual

Assa Abloy

Assa Abloy RD150-3 User manual

Assa Abloy Norton 7970DPS-B Series User manual

Assa Abloy

Assa Abloy Norton 7970DPS-B Series User manual

Assa Abloy Corbin Russwin DC8200 Series User manual

Assa Abloy

Assa Abloy Corbin Russwin DC8200 Series User manual

Assa Abloy SW100 User manual

Assa Abloy

Assa Abloy SW100 User manual

Assa Abloy RD3 User manual

Assa Abloy

Assa Abloy RD3 User manual

Assa Abloy Yale 6000 Series User manual

Assa Abloy

Assa Abloy Yale 6000 Series User manual

Assa Abloy Lockwood L7714SDSIL User manual

Assa Abloy

Assa Abloy Lockwood L7714SDSIL User manual

Assa Abloy Corbin Russwin PED4800 Series User manual

Assa Abloy

Assa Abloy Corbin Russwin PED4800 Series User manual

Assa Abloy Besam SW300 User manual

Assa Abloy

Assa Abloy Besam SW300 User manual

Assa Abloy Rockwood OH200 Series User manual

Assa Abloy

Assa Abloy Rockwood OH200 Series User manual

Assa Abloy Norton 78-B/FHA Hold Open Series User manual

Assa Abloy

Assa Abloy Norton 78-B/FHA Hold Open Series User manual

Assa Abloy CMD User manual

Assa Abloy

Assa Abloy CMD User manual

Assa Abloy Norton PR7500 User manual

Assa Abloy

Assa Abloy Norton PR7500 User manual

Assa Abloy Norton LEO 5700 Series Quick guide

Assa Abloy

Assa Abloy Norton LEO 5700 Series Quick guide

Assa Abloy Norton 5630 Series Quick guide

Assa Abloy

Assa Abloy Norton 5630 Series Quick guide

Assa Abloy SARGENT 281 Series User manual

Assa Abloy

Assa Abloy SARGENT 281 Series User manual

Assa Abloy G-CO-FMS User manual

Assa Abloy

Assa Abloy G-CO-FMS User manual

Assa Abloy Corbin Russwin ED5600 Series User manual

Assa Abloy

Assa Abloy Corbin Russwin ED5600 Series User manual

Assa Abloy DC140 User manual

Assa Abloy

Assa Abloy DC140 User manual

Assa Abloy SW60 Manual

Assa Abloy

Assa Abloy SW60 Manual

Assa Abloy Norton 9510 Series User manual
Assa Abloy

Assa Abloy Norton 9510 Series User manual

Popular Door Opening System manuals by other brands

Dorex 441C Series installation instructions

Dorex

Dorex 441C Series installation instructions

Merlin Overdrive Installation and operating instruction manual

Merlin

Merlin Overdrive Installation and operating instruction manual

EZ-ACCESS CONCIERGE 23DL installation manual

EZ-ACCESS

EZ-ACCESS CONCIERGE 23DL installation manual

JNF IN.05.204 installation manual

JNF

JNF IN.05.204 installation manual

ChuXawaY SCX Installation and operating instructions

ChuXawaY

ChuXawaY SCX Installation and operating instructions

Dormakaba Best SL6000 SIS installation instructions

Dormakaba

Dormakaba Best SL6000 SIS installation instructions

DITEC entrematic HA8-LP Installation instructions manual

DITEC

DITEC entrematic HA8-LP Installation instructions manual

BWI 2000V Series installation instructions

BWI

BWI 2000V Series installation instructions

GEZE TSA 160 Planning Document

GEZE

GEZE TSA 160 Planning Document

GEZE TSA 160 NT manual

GEZE

GEZE TSA 160 NT manual

Dormakaba GSR-EMR XEA BG Mounting instructions

Dormakaba

Dormakaba GSR-EMR XEA BG Mounting instructions

LCN 4310ME Series installation instructions

LCN

LCN 4310ME Series installation instructions

Manaras Opera EYLESSO42 user manual

Manaras Opera

Manaras Opera EYLESSO42 user manual

DITEC 0DT848 Installation manual, maintenance, use

DITEC

DITEC 0DT848 Installation manual, maintenance, use

TOPP S200 Instructions for installation and use

TOPP

TOPP S200 Instructions for installation and use

Record C 127 X SU H-B OFFSET user manual

Record

Record C 127 X SU H-B OFFSET user manual

Entrematic EM user manual

Entrematic

Entrematic EM user manual

Hettich Easys 200 operating instructions

Hettich

Hettich Easys 200 operating instructions

manuals.online logo
manuals.online logoBrands
  • About & Mission
  • Contact us
  • Privacy Policy
  • Terms and Conditions

Copyright 2025 Manuals.Online. All Rights Reserved.