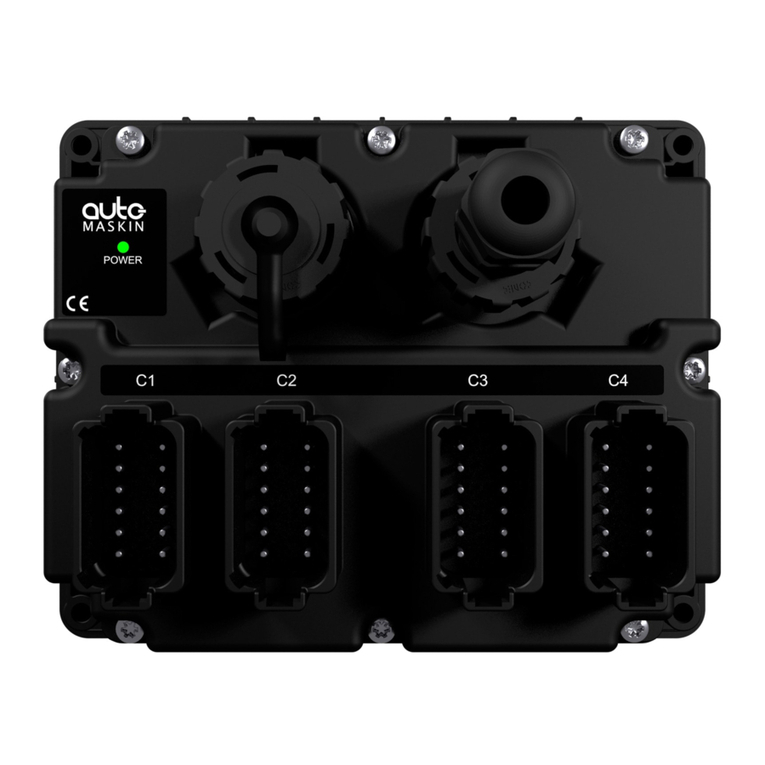
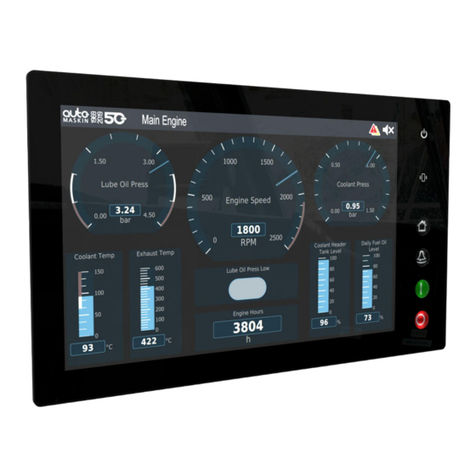
auto maskin Marine Pro DCU 410E User manual

Manual# 1006422
User’s Manual
DCU 410E –Engine Control Unit
RP 410E –Remote Panel
RP 410E
DCU 410E

User’s Manual – 400E Series
Page ii
User's Manual
for
Marine Pro 400E Series
~~~
DCU 410E –Engine Control Unit
RP 410E –Remote Panel
Revision
1.1
Revised
September 20, 2016
Revision history:
Rev.
Date
Description
1.0
16.11.2015
Initial Release Revision.
1.1
20.09.2016
Updates for RP 410E
Copyright © 2016 by Auto-Maskin AS.
All rights reserved. No part of this document may be reproduced or transmitted in any form or by any means,
electronic, mechanical, photocopying, recording, or otherwise, without the prior written permission of Auto-Maskin AS.

User’s Manual – 400E Series
Page iii
Table of Content
DOCUMENT INFORMATION ................................ 1
ABOUT THIS MANUAL.............................................. 1
Responsibilities .............................................. 1
ORDERING INFORMATION......................................... 1
Copyrights and Trademarks .......................... 1
Contact Information ...................................... 1
OVERVIEW OF THE 400 SERIES .................................. 2
Available Modules ......................................... 2
DCU 410E OPERATION......................................... 4
CONFIGURATIONS ................................................... 4
BUTTONS .............................................................. 4
SCREEN LAYOUT ..................................................... 4
Status bar ...................................................... 4
Main screen area........................................... 4
Softbutton bar ............................................... 4
STATUS BAR SYMBOLS.............................................. 5
Automatic Mode............................................ 5
Emergency Mode........................................... 5
Manual Mode ................................................ 5
Harbor Mode ................................................. 5
Shutdown Override........................................ 5
Service ........................................................... 5
All OK ............................................................. 5
START ENGINE ....................................................... 6
Latched Start ................................................. 6
Hold Start ...................................................... 6
E-Start............................................................ 6
STOP ENGINE......................................................... 7
Latched Stop.................................................. 7
Hold Stop ....................................................... 7
ALARM LIST ........................................................... 8
Indication....................................................... 8
Enter the Alarm List ....................................... 8
Filter Alarms .................................................. 8
Silence the Buzzer.......................................... 8
Acknowledge a single alarm.......................... 8
Acknowledge all alarms................................. 9
Further reading.............................................. 9
SOFTBUTTONS........................................................ 9
Softbuttons in Instrument View..................... 9
MENU ................................................................ 11
Settings........................................................ 11
Log & Counters ............................................ 15
Screen Backlight .......................................... 17
Help ............................................................. 17
VERSION INFORMATION ......................................... 22
RP 410E OPERATION .......................................... 23
INTRODUCTION .................................................... 23
SCREEN LAYOUT ................................................... 23
STATUS BAR SYMBOLS............................................ 24
START ENGINE ..................................................... 24
E-Start.......................................................... 25
STOP ENGINE....................................................... 25
ALARM LIST ......................................................... 26
Enter the Alarm List ..................................... 26
Silence the Buzzer ........................................ 26
Acknowledge a single alarm........................ 26
Acknowledge all alarms............................... 26
Active Station indication in the Alarm List... 26
Filter Alarms ................................................ 26
MENU ................................................................ 28
Active Station .............................................. 28
Settings........................................................ 29
Log & Counters ............................................ 30
Camera ........................................................ 31
Backlight...................................................... 31
Help ............................................................. 31
THE ALARM LIST ................................................ 33
Severity number........................................... 33
Bold text ...................................................... 33
Background colors ....................................... 33
Sample events ............................................. 34

User’s Manual – 400E Series
Page 1
Document
Information
About this Manual
This manual has been published
primarily for professionals and
qualified personnel.
The user of this material is assumed to
have basic knowledge in marine
systems, and must be able to carry out
related electrical work.
Work on the low-voltage circuit should
only be carried out by qualified and
experienced personnel.
Installation or work on the shore
power equipment
must only
be carried
out by electricians authorized to work
with such installations.
Responsibilities
It is the
sole responsibility of the
installer
to ensure that the installation
work is carried out in a satisfactorily
manner, that it is operationally in good
order, that the approved material and
accessories are used and that the
installation meet all applicable rules
and regulations.
Note! Auto-Maskin continuously
upgrades its products and reserves the
right to make changes and
improvements without prior notice.
All information in this manual is based
upon information at the time of
printing.
For updated information, please
contact your local distributor.
Ordering information
The Marine Pro covers a wide range of
compatible products within both the
200- and 400 Series. Please visit our
web site for more information.
http://auto-maskin.com/marine/
Copyrights and
Trademarks
Copyright © Auto-Maskin AS, 2016.
Information given in this document
may change without prior notice. This
document should not be copied
without written permission from Auto-
Maskin.
All trademarks acknowledged.
Contact Information
See the website to locate the nearest
distributor.
www.auto-maskin.com

User’s Manual – 400E Series
Page 2
Overview of the 400
series
Available Modules
These are some of the main modules
available in the 400 series:
DCU 410/E Engine Control Unit
DCU 408 Engine Control Unit,
without user interface
SDU 404 Safety Unit
SDU 410 Safety Unit
RIO 410 I/O Expansion Unit
RIO 412 Exhaust Temperature
Unit
RP 410/E Remote Panel
The following is a brief explanation of
the different modules.
DCU 410E/408 Engine Control
Units
The DCU 410E and DCU 408 are
engine monitoring and control units.
One panel is required for each engine.
The DCU 410E has a color screen, and
buttons for user interaction.
The DCU 408 does not have screen or
buttons, and is intended for use with
remote panels.
Note! The DCU 410E and DCU 408 will
hereafter be referred to as the “DCU”
only. If functionality differs between
the two, this will be noted.
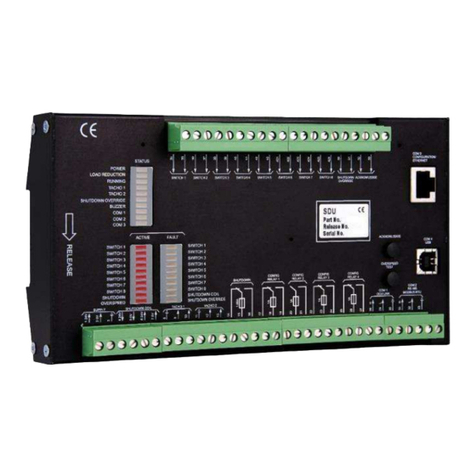
SDU 404/410 Safety Unit
The SDU 404/410 is the safety
module, and is linked to the DCU
engine control unit. It is mandatory in
classed installations that are to be
type approved.
When connected to the SDU link of a
DCU, the DCU will detect it
automatically.
RIO 410 I/O Expansion Unit
The RIO 410 is an I/O expansion unit,
and is linked to the DCU.
A maximum of four RIO units can be
connected to one DCU.
When connected to the RIO link of a
DCU, the DCU will detect it
automatically
RIO 412 Exhaust Temperature
Unit
The RIO 412 is an expansion unit with
20 thermocouple channels. The
operator can read individual cylinder
temperatures, as well as average
values.
When connected, the DCU detects it
automatically and adds a new page to
its configuration.

User’s Manual – 400E Series
Page 3
RP 410E Remote Panel
The RP 410E is the remote panel for
the DCU engine panels.
Numerous RP remote panels can be
connected together in the same
Ethernet network.
One RP 410E can be connected to a
maximum of eight DCU units.
When an RP 410E remote panel is
connected on the Ethernet link to one
or several DCU units, the RP can
update its configuration automatically.

User’s Manual – 400E Series
Page 4
DCU 410E
Operation
Configurations
The behavior of the DCU 410E
depends heavily on its configuration.
For instance, the start/stop buttons
can be configured as latched, meaning
the DCU completes the start/stop
cycle once the button is pressed, or it
can be configured as hold-to, meaning
the operator must keep the button
pressed until the engine has started or
stopped.
The configuration of the DCU is not
part of this document.
Buttons
The DCU has ten buttons for the
following:
Engine Start
Engine Stop
Display/Hide Alarm List
Display/Hide Menu
Menu navigation with arrow
up/down
Four “softbuttons”with screen-
dependent functionality
Screen Layout
The screen is divided into three main
sections from the top and downwards
as follows:
Status bar
Top-most line on the screen, which is
reserved for engine state (left) and
status symbols (right).
The status bar flashes in the event of
an alarm.
Main screen area
This is where all instruments and
menu items are displayed.
Softbutton bar
Bottom-most line on the screen, which
is reserved for softbuttons.
These have varying functionality
depending on the current screen.
Status bar
Main screen
area
Softbutton bar

User’s Manual – 400E Series
Page 5
Status bar symbols
These are the symbols in the top-right
area of the status bar.
Several symbols may be visible
simultaneously.
DCU is in automatic mode.
DCU is in emergency mode.
DCU is in manual mode.
DCU is in local mode.
DCU is in
harbor
mode.
DCU is in
shutdown override
mode.
A service interval is past due.
All OK.
(no alarms)
Automatic Mode
The DCU is ready to accept automatic
start- and stop commands.
Local start- and stop is possible.
Emergency Mode
This mode is available only if the DCU
is configured as a Combined
Harbor/Emergency set.
Channels configured as shutdown will
not give an engine shutdown, but
indicate with an alarm only.
The Exception is overspeed, which is
not disabled.
Manual Mode
The DCU does not accept automatic
start- and stop commands.
Local start and stop is possible.
Harbor Mode
This mode is available only if the DCU
is configured as a Combined
Harbor/Emergency set.
Shutdown channels are enabled.
Automatic start/stop is disabled.
Shutdown Override
All channels configured as shutdown
will give alarm only.
The exception is overspeed, which is
enabled.
Service
A service interval is past due.
All OK
There are no alarms in the alarm list.

User’s Manual – 400E Series
Page 6
Start Engine
The start button can be configured as
latched
or
hold
. It will always be the
same as the stop button, though.
Latched Start
If the button is configured as
latched
,
press the start button, observe the
confirmation dialog, and press the soft
button Start to start.
The DCU will complete the start
sequence.
Hold Start
If the start button is configured as
hold
, press and hold the start button
until the engine has started.
There will be no confirmation dialog.
E-Start
If the DCU is configured for it, an
Emergency Start option is available in
the Start dialog. See the previous
picture.
Note! Activating E-Start will override
any configured Prelube and also set
Shutdown Override. The engine will
start immediately, and run in a
Shutdown Override mode setting.
If necessary, the operator can switch
off Shutdown Override mode once the
engine has started.

User’s Manual – 400E Series
Page 7
Stop Engine
The stop button can be configured as
latched
or
hold
. It will always be the
same as the start button, though.
Latched Stop
If the button is configured as
latched
,
press the stop button, observe the
confirmation dialog, and press the
stop softbutton to start.
The DCU will complete the stop
sequence.
Hold Stop
If the stop button is configured as
hold
, press and hold the stop button
until the engine has stopped.
There will be no confirmation dialog.

User’s Manual – 400E Series
Page 8
Alarm List
Indication
Whenever there is a new event in the
alarm list, the DCU indicates as
follows:
Buzzer oscillates
Alarm list LED flashes
The screen status bar flashes
Note! The color of the flashing LED
and status bar is either yellow
(warning) or red (alarm or shutdown)
depending on the most severe
unacknowledged event in the list.
Enter the Alarm List
To see the alarm list, press the alarm
list button.
Press the button again to leave the
alarm list.
The above picture indicates a warning
in the alarm list.
Filter Alarms
The alarm list can filter alarms in three
groups
All Alarms (all alarms and
diagnostics)
Panel Alarms (all alarms, no
diagnostics)
Diagnostics (diagnostics only)
To switch between the different views,
press the corresponding softbutton 2
and/or softbutton 3.
Silence the Buzzer
If the buzzer sounds,
press the alarm list button
to silence the buzzer.
If the alarm list is
currently
not
displayed, then
this operation will display the
alarm list.
If the alarm list
is
displayed,
then pressing the alarm list
button to silence the buzzer will
not exit the alarm list.
Acknowledge a single
alarm
In the alarm list, select the
alarm to be acknowledged
using the arrow buttons. Note
that the selected alarm line will
expand to reveal additional
information, if any.
Press the Acknowledge button
to acknowledge the selected
alarm.

User’s Manual – 400E Series
Page 9
Acknowledge all alarms
In the alarm list, press and hold
(~1 sec) the Acknowledge
button. This acknowledges all
alarms.
Note that alarms that are still active
will stay displayed in the screen until
they go inactive.
Further reading
For an explanation around the use of
colors and bold text in the alarm list,
see the chapter on page 33.
Softbuttons
The DCU has four softbuttons, see
picture below.
These are located at the bottom of the
screen, and changes depending on the
actual screen.
Softbuttons in Instrument
View
There are four functions assigned to
the softbuttons in instrument view.
These four functions are also available
elsewhere in the menu.
Language
Note that there are two pages to select
from in the Language menu.
Select the desired language and press
the Ok button.

User’s Manual – 400E Series
Page 10
Backlight
Select the desired backlight intensity.
Note that if 10% is selected, the menu
will still be using 50% backlight.
Units
Select the preferred unit of measure.
Press the Ok button to select.
Mode
Select the mode of operation.
Automatic Mode
The DCU accepts external automatic
start- and stop commands, as well as
remote start- and stop commands.
Manual
The DCU does
not
accept external
start- and stop commands.
It does accept remote start- and stop
commands.
Local
The DCU does not accept
any
external
commands.
Local start- and stop commands are
accepted.

User’s Manual – 400E Series
Page 11
Menu
Press the menu button to access the
menu.
Settings
Note that the settings menu has two
pages.
Mode
Select the mode of operation. This is
discussed on page 10.
Start Disabled
Set active to disable all starts, also
local start.
Note! It is recommended to remove
the start battery connection before any
maintenance work on the engine.
Prelube Override
Set active to override prelube.
If selecting Prelube Override during a
prelube sequence, the prelube will be
cancelled and the DCU will continue to
crank the engine.
Button Beep
Set to disabled to not have the internal
buzzer beep for every button press.
Language
Select the language. All internal
messages are ready translated. All
configured signals must be translated
in the configuration.
If a signal does not have a text
description in the selected language,
then the English language will be
used.
If the signal does not have an English
text description either, then the
channel name
will be used, eg. “4-
20mA channel #1”.
Units
Select the units of operation, Metric or
U.S.
Metric (Celsius, bar, etc), or
U.S. (Fahrenheit, psi, etc)
Note that the selection is local to this
panel only.
Wallpaper
Set the wallpaper (background image)
for instruments, menus and popups
respectively.

User’s Manual – 400E Series
Page 12
Engine Overspeed Test
In this mode, the engine can be tested
for overspeed by lowering the
overspeed setpoint to 90% of the
nominal (max) speed.
Activate
Make sure the engine is not
running. The Overspeed Test
mode cannot be entered on a
running engine.
Note that the overspeed
setpoint has been lowered by
observing the red are on the
RPM meter.
Start the engine and adjust rpm
until it crosses the red labeled
setpoint.
Observe engine shutdown.
Note! If the Overspeed Shutdown has
been disabled in the configuration,
then this test will NOT generate a
shutdown.
Deactivate
The Overspeed Test times out after 5
minutes, or when an actual overspeed
situation is observed.
The test can also be turned off by
selecting the menu item again.
Connect a PC
To connect to the DCU, an Ethernet
cable and a PC or laptop is necessary.
Connect the cable
Connect a standard CAT5 ethernet
cable between the laptop Ethernet port
and the DCU Ethernet port (COM 6).
Matching IP-address range
To connect a PC to the DCU, the IP-
address (IP number) of the PC or
laptop must be in the same ‘range’ as
the IP-address of the DCU.
Often, the IP-address in a laptop is not
available to change by the user due to
company policy.
Whenever the laptop is connected in a
network, it is given a new IP-address.
Normally, the laptop is given a new IP-
address whenever it connects to the
network at work. This scheme is called
dynamic IP-address.
This given IP-address may not match
that of the DCU though.
For this purpose, the DCU has an
inbuilt server component, which
resembles that of the company
network, and gives the laptop an IP-
address that matches the DCU.
On the top of this form is the DCU’s
current IP-address. The next lines
display a start- and end IP-address.
This is the range the DCU’s DHCP
server will scan.

User’s Manual – 400E Series
Page 13
Make sure the DCU IP-address is
outside
the DHCP Start- and End IP-
address range, by setting the start IP
higher or the end IP lower than the
DCU IP-address.
For the example in the figure above, a
Start IP of 192.168.0.110 is OK, whilst
a Start IP of 192.168.0.105 is not.
When the range is fine, then press the
OK button. The DCU’s server will now
give a new IP-address to any laptop
connected to the DCU within the next
10 minutes (timeout period).
The laptop keeps the new IP-address
even after the 10 minute timeout,
which is fine.
Connect to the PC
When the above exercise is done,
connect to the DCU by typing the DCU
IP-address into the browser’s URL
field.
The above picture is representative for
a typical successful login.
Administration
This menu gives access to the next
level of menus, and is not discussed in
this manual.
A four digit pin-code is needed to
access the menu.
Interface Design
Up to four extra instrument screens
can be added by the user.
Note! The webserver can also be used
to add new user screens.
The screen layout
Each screen is built up as follows.
Each screen has a
template
.
There are multiple templates to
choose from, and each screen
can have a different template.
A template is divided into
rectangles called
slots
. A slot is
simply a placeholder for a
widget.
A
Widget
can be a circular dial,
a horizontal bargraph, a
numerical value, etc. To be
used, the widget must fit into
the slot.

User’s Manual – 400E Series
Page 14
Add a user screen
Press ‘Insert new’.
Use the up/down arrow buttons
to select a suitable template.
Press ‘OK’, then ‘Save’.
Now, press ‘Slot Design’ and
‘Edit View’.
Use the arrow up/dn buttons to
select a slot (indicated with a
bold rectangle around it).
Select ‘Pick Signal’. Pick a signal
from the list of configured
signals, for instance Engine
Speed.
Now, press arrow buttons
up/dn again to select another
slot, and repeat the process.
Press softbutton 4 when
finished.
Observe the new screen.
Press the arrow buttons to cycle
between screens.
Delete a user screen
First, select the menu item Interface
Design.
Using the arrow up/dn buttons, select
the screen to be deleted.
Press the Delete button to delete the
screen.

User’s Manual – 400E Series
Page 15
Log & Counters
The engine running hours are available
in this menu.
Events and service intervals are also
available.
Counters
The Counters page display engine
running hours.
Total
The total accumulated engine hours.
Depending on the configuration, the
value is calculated in the DCU, or read
from the ECM.
This counter value cannot be reset by
the operator.
Since Start
This counter starts at zero every time
the engine is started, and counts until
the engine is stopped.
This counter value cannot be reset by
the operator.
Since Reset
This counter accumulates every time
the engine is running.
Press the Reset button to clear the
Since Reset values.
Idle Hours
The idle hours counter counts
whenever the engine is running below
600 rpm.
Event Log
The DCU keeps a log of all events. The
log is about 500 events long, after
which the oldest event is lost.
Note! Using the web server, the entire
log can be downloaded.
An event is defined as any diagnostic,
warning alarm or engine shutdown
situation, but also certain user
interaction such as start- and stop
button.

User’s Manual – 400E Series
Page 16
Event Sorting
The events can be sorted as follows:
Oldest first
Most severe first
Least severe first
Count
Navigation
Use the up and down arrow to
navigate in the event log.
Timestamp
The selected event will be expanded,
and the second line displays the
running hours when the event
triggered.
For alarms, the second line will also
display the running hours for the
acknowledged and inactive events.
Engine Service Interval
Four different service intervals can be
configured.
The DCU indicates with a warning
when a service is past due.
Next Service Interval
Press the Tab button to see the next
service interval.
Service Done
Press this button when the service has
been completed. The counter restarts.
The Service done operator event
appears in the event log.
Select J1939 Node
DM2 is stored trouble codes according
to SAE J1939, and the DCU can retrieve
stored DTCs / DM2 from a J1939
node. It needs to select J1939 node.

User’s Manual – 400E Series
Page 17
Screen Backlight
Select the desired backlight intensity.
Note that if 10% is selected, the DCU
will still switch to 50% backlight
intensity while in the menu.
Help
The help menu has information about
the panel and troubleshooting
information.
Troubleshooting
The DCU has a comprehensive
troubleshooting screen for the DCU,
and also for each of the optional
expansion units.
This manual suits for next models
1
Table of contents
Other auto maskin Marine Equipment manuals
auto maskin
auto maskin Marine Pro 400 Series User manual
auto maskin
auto maskin Marine Watch S Series User manual
auto maskin
auto maskin Marine Pro 400 Series User manual

auto maskin
auto maskin Marine Pro 200 Series User manual
auto maskin
auto maskin Marine Pro 200E Series User manual
auto maskin
auto maskin LT Series User manual

auto maskin
auto maskin Marine Pro 400 Series User manual
auto maskin
auto maskin S Series User manual

auto maskin
auto maskin Marine Pro 400 Series Instruction sheet
auto maskin
auto maskin 1006451 User manual
