Baldan CRSG 32 User manual

CRSG / CRI / CRI-R AT Instruction Manual
Instruction Manual
Trailled Oset Disc Harrow
CRSG 32-48
Trailled Oset Disc Harrow Light
CRSG-L 18-32
Drag Type Oset Disc Harrow Remote Control
Strong
CRI-R 12-26
Drag Type Oset Disc Harrow Remote Control
CRI 32-44


We thank you for the preference and congratulate your excellent choice in acquiring
an implement of outstanding quality, manufactured in accordance with the advanced
technology of BALDAN IMPLEMENTOS AGRÍCOLAS S/A.
This manual will assist you, in proceeds necessaries, since when you bought until the
operational proceeds application, security and maintenance.
The BALDAN guarantees that deliver this implement to the dealer, working properly, and in perfect
conditions.
The dealers it’s under the responsibility to keep the protection and conservation while keep the
implement in your stock, and than, to assembly, tighten, lubrication and overhaul.
On time of the technical deliver, the dealer must to have conducted the user customer about the manutentation, safety, and
your obligations in a possible technical assistance, the obligation to see the warranty terms and read the instruction manual.
Any solicitation of warranty, please contact our Baldan technical service, by your Baldan dealer that you bought our implement.
Rearm the necessity to read carefully of warranty certicate and note all of items from this manual, therefore you will increa-
se the working life of your equipment.
INTRODUCTION

Trailled Oset Disc Harrow
CRSG 32-48
Trailled Oset Disc Harrow Light
CRSG-L 18-32
Drag Type Oset Disc Harrow Remote Control Strong
CRI-R 12-26
Drag Type Oset Disc Harrow Remote Control
CRI 32-44
BALDAN IMPLEMENTOS AGRÍCOLAS S/A.
CNPJ: 52.311.347/0009-06
Insc. Est.: 441.016.953.110
Scan the QR Code on the
identification plate of your
device and access this
Instruction Manual online.

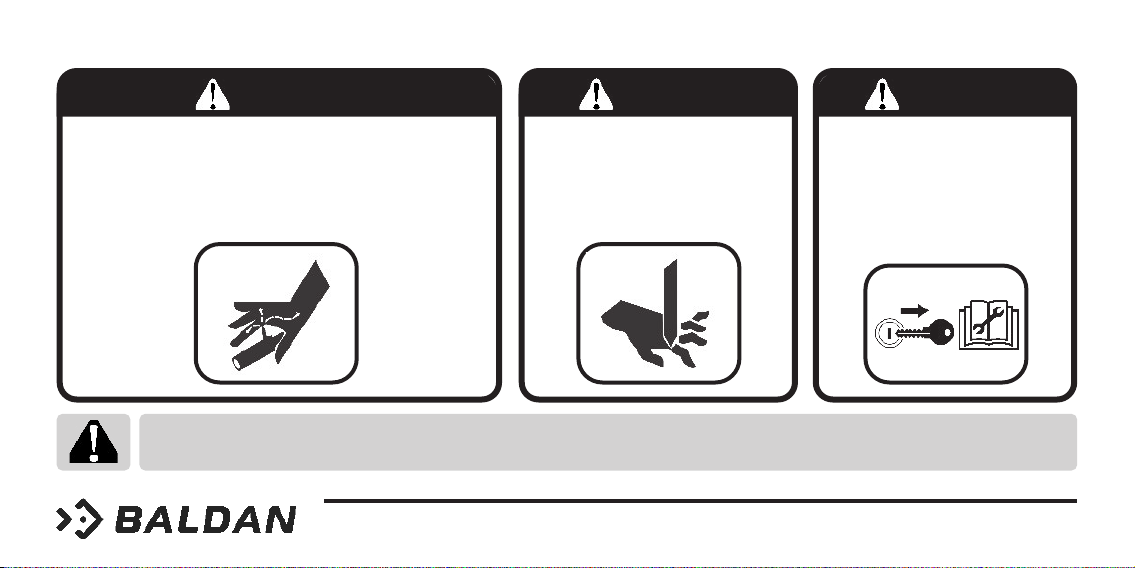
01. Safety rules.................................................................................................................................................................................................................................................................. 4 - 8
02. Components............................................................................................................................................................................................................................................................... 9
03. Technical specications - CRSG ............................................................................................................................................................................................................................. 10
04. Technical specications - CRI ................................................................................................................................................................................................................................. 11
05. Technical specications - CRIR ............................................................................................................................................................................................................................. 12
06. Assembly ..................................................................................................................................................................................................................................................................... 13 - 15
Assemble of front and rear gang ....................................................................................................................................................................................................................................................................... 16 - 17
Mounting of the hydraulic system and articulating wheel assembly CRI/CRSG 12 - 28 models with single wheels....................................................................................................................................... 18
Mounting of the hydraulic system and the articulating wheel assembly CRI/CRSG 32 - 48 models with dual wheels................................................................................................................................... 19
CRI/CRSG 32 - 48 models with large single wheel version................................................................................................................................................................................................................................ 20
Mounting of the hitch system............................................................................................................................................................................................................................................................................ 21-22
07. Hitching to the tractor.............................................................................................................................................................................................................................................. 22
08. Adjustments and operations.................................................................................................................................................................................................................................. 23
Transport ........................................................................................................................................................................................................................................................................................................... 23
Transport / Work................................................................................................................................................................................................................................................................................................ 23
Disk Harrow Gangs Adjustments....................................................................................................................................................................................................................................................................... 24
Displacement Adjustment................................................................................................................................................................................................................................................................................. 24
Hitch Transversal Bar Adjustment ..................................................................................................................................................................................................................................................................... 25
Operations ......................................................................................................................................................................................................................................................................................................... 26
09. Lubrication.................................................................................................................................................................................................................................................................. 27
10. Lubrication Points ..................................................................................................................................................................................................................................................... 28 - 29
11. Bearing adjustments ................................................................................................................................................................................................................................................ 30
12. Cleaning....................................................................................................................................................................................................................................................................... 30
13. Hourly production of the CRSG/CRI/CRIR......................................................................................................................................................................................................... 31 - 33
14. Identication .............................................................................................................................................................................................................................................................. 34 - 35
INDEX

CRSG / CRI / CRI-R 4 Instruction Manual
Instruction Manual 5 CRSG / CRI / CRI-R
01. SAFETY RULES
THIS ALERT SYMBOL INDICATES IMPORTANT SAFETY NOTES. WHENEVER YOU FIND IT IN THIS MANUAL, READ THE MESSAGE WITH ATTENTION TO AVOID
ANY ACCIDENT.
WARNING WARNING WARNING WARNING
• Read this instruction ma-
nual carefully to know the re-
commended safety rules.
• Only start the tractor opera-
tions, when are you properly
accommodated and with the
seat belt fasted.
• Never carry people over the
tractor or equipment.
• Há riscos de lesões graves
por tombamento ao traba-
lhar em terrenos inclinados.
• Não utilize velocidade ex-
cessiva.

CRSG / CRI / CRI-R 4 Instruction Manual
Instruction Manual 5 CRSG / CRI / CRI-R
01. SAFETY RULES
WARNING WARNING WARNING WARNING
• Before any equipment
maintenance, make sure that
is properly stopped.
• Avoid getting hit.
•Do not work with the tractor if
the front bee without enough
weight to the rear equipment.
•There is tendency to lift , add
weights at front or front wheels.
• Never weld the wheel mounted with
tire, the heat may cause air pressure
increase and provoke the explosion of
the tire
• When lling the tire, position yourself
besides the tire, never in front of it.
• Before beginning the work or
transportation of CRSG/CRI/CRI-R,
check if there are people or blocka-
ges close to it.
FALLOW ALL RECOMMENDATIONS, WARNINGS AND SAFE PRACTICES RECOMMENDED IN THIS MANUAL, UNDERSTAND THE IMPORTANCE OF YOUR SAFETY.
ACCIDENTS MAY LEAD TO DISABILITY OR INCLUDING DEATH. REMENBER, ACCIDENTS CAN BE AVOIDED!

CRSG / CRI / CRI-R 6 Instruction Manual
Instruction Manual 7 CRSG / CRI / CRI-R
01. SAFETY RULES
ALCOHOLIC BEVERAGE OR SOME MEDICATIONS MAY CAUSE LOSS OF REFLEXES AND CHANGE THE OPERATOR’S PHYSICAL CONDITIONS. FOR THIS REASON,
NEVER OPERATE THIS EQUIPAMENT UNDER ANY OF THESE SUBSTANCES.
WARNING WARNING WARNING
• Hydraulic oil works under pressure and may cause serious injuries if
there are any leakages. Periodically check the conservation status of
the hoses. If there are any sign of leakage, replace them immediately.
• Before connecting or disconnecting the hydraulic hoses, relief the
system pressure by activating the control with the tractor power swit-
ched o.
• Always keep yourself distant from the
active elements of the CRSG/CRI/CRi-R
(discs), they are sharp and may cause ac-
cidents.
• When performing any service in the dis-
cs, use safety gloves on the hands.
• Remove the ignition key before per-
formin any type of maintenance
in CRSG/CRI/CRI-R. Protect yoursef
against possible injuries or death by
CRSG/CRI/CRI-R unexpected start-up.
• Do not start the tractor up if CRSG/
CRI/CRi-R unexpected start-up.

CRSG / CRI / CRI-R 6 Instruction Manual
Instruction Manual 7 CRSG / CRI / CRI-R
The incorrect handling of the tractor engine can result in serious or fatal accidents. Before using the read carefully the instructions in this ma-
nual. Be sure that the person responsible for the operation is instructed about the correct handling and safety and has read and understood the
instruction manual concerning this machine.
WARNING
01- When operating the implement do not allow people to stand close or on the implement.
02- During assembly or disassembly of the discs section use protective gloves.
03- When coupling or uncoupling the hydraulic hose relieve the hydraulic circuit pressure.
04- Check out periodically the hoses condition. Where there is oil emptying change it immediately because the oil works under high pressure and
may cause serious damage.
05- Do not use large or daggy clothes because they can get caught on the implement.
06- When you start the tractor engine, be correctly placed at the operator seat and be aware of the correct and safety handling of both tractor and
implement. Always place the gearshift crank at the neutral position, turn o the gear of the power command and place the hydraulic commands at
the neutral position.
07- Do not turn on the tractor in a closed place without appropriate ventilation because the fumes from the fuel are is bad for health.
08- While maneuvering the tractor to clamp the implement be sure that there is enough space and nobody is too close, maneuver always in slow
gear and be ready to brake in case of emergency.

CRSG / CRI / CRI-R 8 Instruction Manual
Instruction Manual 9 CRSG / CRI / CRI-R
09- Do not carry out adjustments with the implement working.
10- When working over hilly areas try to keep the necessary stability. In case of instability reduce the acceleration, turn the wheels to the inclined
side of the land and never lift the implement.
11- Always use the tractor at safe speeds, especially when working in irregular or inclined areas, make sure the tractor is always in gear.
12- When using the tractor on the road, keep the brake pedal connected.
13- Do not work with the front tractor light. If there is a tendency to lift up add more weight in the front of the tractor at the front wheels.
14- When leaving the tractor, place the gearshift at the neutral position and apply the park brake. Never let clamped implements be hitched to the
tractor with the hydraulic system at the lifted position.
15- Drugs and alcohol will aect an operator’s alertness and coordination. Do not operate any engine under these conditions.
16- Explain the operation, inspection and maintenance instructions to those users or operators who can not read.

CRSG / CRI / CRI-R 8 Instruction Manual
Instruction Manual 9 CRSG / CRI / CRI-R
01 - Front disc gang
02 - Rear disc gang
03 - Central main frame
04 - Stabilizer bar
05 - Hydraulic cylinder
06 - Hydraulic hoses
07 - Wheel articulation system
08 - Wheel
09 - Disc blades
10 - Stabilizer rod
11 - Stabilizer bar support
12 - Transversal bar
13 - Hitch beam
14 - Hitch shackle
15 - Hydraulic hoses support
02. COMPONENTS
TRAILLED OFFSET DISC HARROW CRSG
DRAGTYPE OFFSET HARROW REMOTE CONTROL CRI
DRAGTYPE OFFSET HARROW REMOTE CONTROL STRONG CRIR
Figure 1
9
8
74
3
2
1
6
12 13
14
15
5
10

CRSG / CRI / CRI-R 10 Instruction Manual
Instruction Manual 11 CRSG / CRI / CRI-R
Table 1
03. TECHNICAL SPECIFICATIONS CRSG
Baldan reserves the right to modify any technical specications without prior notice.
The technical specications it´s approximate and informed by regular conditions of work.
Model Nr of Discs Disc Diameter (ø) Working Width
(mm)
Axle
Diameter (ø)
Disc
Spacing (mm)
Working
Depth (mm)
Approx. Weight (Kg) Required
Tractor Power
(hp)
Ground Wheels
24” 26” 28”
CRSG 32 24” - 26” - 28” 3650 1.5/8” 235 150 - 250
3459 3660
169 - 185 Dual
CRSG 36 24” - 26” - 28” 4500 1.5/8” 235 150 - 250
3890 4116
190 - 208 Dual
CRSG 40 24” - 26” - 28” 4600 1.5/8” 235 150 - 250
4180 4431
212 - 232 Dual
CRSG 44 24” - 26” - 28” 5100 1.5/8” 235 150 - 250
4246 4367 4643
238 - 250 Dual
CRSG 48 24” - 26” - 28” 5600 1.5/8” 235 150 - 250
4577 4880
254 - 280 Dual
Model Nr of Discs Disc Diameter (ø) Working Width
(mm)
Axle
Diameter (ø) Disc Spacing (mm) Working Depth
(mm)
Approx. Weight (Kg) Required
Tractor Power
(hp)
Ground Wheels
24” 26”
CRSG-L 18 24” - 26” 2000 1.5/8” 235 150 - 250 1170 1210 80 - 90 Single
CRSG-L 20 24” - 26” 2250 1.5/8” 235 150 - 250 1320 1365 90 - 100 Single
CRSG-L 22 24” - 26” 2420 1.5/8” 235 150 - 250 1430 1480 100 - 110 Single
CRSG-L 24 24” - 26” 2700 1.5/8” 235 150 - 250 1550 1605 110 - 120 Single
CRSG-L 28 24” - 26” 3200 1.5/8” 235 150 - 250 1984 2089 125 - 135 Single
CRSG-L 32 24” - 26” 3650 1.5/8” 235 150 - 250 2100 2260 140 - 150 Single
4071
3792
3371
4446

CRSG / CRI / CRI-R 10 Instruction Manual
Instruction Manual 11 CRSG / CRI / CRI-R
04. TECHNICAL SPECIFICATIONS CRI
Baldan reserves the right to modify any technical specications without prior notice.
The technical specications it´s approximate and informed by regular conditions of work.
Table 2
Model Nr of
Discs Disc Diameter (ø) Working Width
(mm)
Axle Diameter
(ø) Disc Spacing (mm) Working
Depth (mm)
Approx. Weight (Kg) Required Tractor
Power (hp)
Ground
Wheels
26” 28”
CRI 32 26” - 28” 4200 1.5/8” 270 150 - 250
3689 3890
189 - 202 Dual
CRI 36 26” - 28” 4700 1.5/8” 270 150 - 250
4172 4397
213 - 227 Dual
CRI 40 26” - 28” 5250 1.5/8” 270 150 - 250
4499 4750
236 - 252 Dual
CRI 44 26” - 28” 5800 1.5/8” 270 150 - 250
4719 4995
260 - 278 Dual

CRSG / CRI / CRI-R 12 Instruction Manual
Instruction Manual 13 CRSG / CRI / CRI-R
Model Nr of
Discs
Working Width
(mm)
Axle Diameter
(ø)
Disc Spacing
(mm)
Working Depth
(mm)
Approx. Weight (Kg) Required Tractor
Power (hp) Ground Wheels
28” 30”
CRI-R 12 1650 2.1/4” 300 150 - 250 1730 - 60 - 78 Single
CRI-R 14 1950 2.1/4” 300 150 - 250 1840 1910 95 - 112 Single
CRI-R 16 2250 2.1/4” 300 150 - 250 2240 2310 115 - 128 Single
CRI-R 18 2550 2.1/4” 300 150 - 250 2460 2530 125 - 144 Single
CRI-R 20 2850 2.1/4” 300 150 - 250 2620 2690 135 - 160 Single
CRI-R 22 3150 2.1/4” 300 150 - 250 2740 2810 150 - 176 Single
CRI-R 24 3450 2.1/4” 300 150 - 250 2860 2930 160 - 192 Single
CRI-R 26 3750 2.1/4” 300 150 - 250 2970 3040 180 - 208 Single
05. TECHNICAL SPECIFICATIONS CRIR
Baldan reserves the right to modify any technical specications without prior notice.
The technical specications it´s approximate and informed by regular conditions of work.
Table 3

CRSG / CRI / CRI-R 12 Instruction Manual
Instruction Manual 13 CRSG / CRI / CRI-R
06. ASSEMBLY
Before starting the assembly wear
gloves.
01 -Check the amount of parts in the box using the parts list.
02 -Before starting the assembly wear gloves.
03 -Install on the shaft (#1) the washer from the disc (#2), the nut (#3) locking
washer (#4), using the bolt (#5), keep the nut in the same position of the
shaft edge.
04 -Instal on the shaft (#1) the disc blade (#6) the bearing (#7), another
disc blade (#6), spools (#8) then continue the assembly in this se-
quence as illustrated on the gure 02.
05 -On the rear gang install a disc blade with smaller diameter
on the edge “A” as illustrated on the drawing 4 - page 6.
06 -When you have completed the assemble with all disc
blades, spools and bearing, install the convex wa-
sher (#9), the nut (#3), then tighten the system.
07 -When you are almost nished the tighte-
ning procedure adjust the lock (#4), with
the convex washer until that the holes
are aligned, then lock using the bolt
(#5).
7
8
8
9
4
5
3
6
6
6
6
6
7
5
4
3
2
1
Figure 2

CRSG / CRI / CRI-R 14 Instruction Manual
Instruction Manual 15 CRSG / CRI / CRI-R
Figures 3
= BEARING
= SPOOL
= BLADES
SYMBOL
08 -The drawing 4 shows the assembley for each model of harrow.
CRSG-L/CRI-R 22 Blades CRSG-L/CRI-R 24 Blades CRI-R 26 Blades
CRSG-L/CRI-R 20 Blades
CRSL-L/CRI-R 18 Blades CRSG-L 20 Blades
CRI-R 12 Blades CRI-R14 Blades CRI-R16 Blades

CRSG / CRI / CRI-R 14 Instruction Manual
Instruction Manual 15 CRSG / CRI / CRI-R
CRSG/CRI 40 Blades CRSG/CRI 44 Blades CRSG/CRI 48 Blades
Figures 3
CRSG-L 28 Blades CRSG-L 32 Blades CRSG/CRI 36 BladesCRSG/CRI 32 Blades

CRSG / CRI / CRI-R 16 Instruction Manual
Instruction Manual 17 CRSG / CRI / CRI-R
ASSEMBLE OF FRONT AND REAR GANG
09 -Insert the front gang (#1 gure 05) and rear
(#2), in safety terrain.
10 -Install the frame (#3) over the gangs and atta-
ch using the bolts (#4), lock (#5), washer (#6)
and nut (#7).
Figure 4
4
2
3
1

CRSG / CRI / CRI-R 16 Instruction Manual
Instruction Manual 17 CRSG / CRI / CRI-R
Figure 6
Figure 5
1
1
11 -Raise the gang front or rear install the blades as il-
lustrated on the drawing 04, checking the bearing
and gang holes are aligned, then mount using the
bolt (#1 - Drawing 05), be sure the that the support
is turned in a concave direction as illustrated on
the drawing 06.
12 -Raise the second gang, install the blades as ins-
tructed in the point above beteween the disc con-
cave face the oposite direction to the rst gang.

CRSG / CRI / CRI-R 18 Instruction Manual
Instruction Manual 19 CRSG / CRI / CRI-R
Figure 7 MOUNTING OF THE HYDRAULIC SYSTEM AND ARTICULATING WHEEL
ASSEMBLY CRI/CRSG 12 28 MODELS WITH SINGLE WHEELS
13 -Slide the pillow block hubs, item (2) in the illustration, onto
the axles of the wheel articulating system (3) lift the assem-
bly to allow xation of the hubs to the frame and tighten the
bolts.
• MAKE SURE THE CONNECTION OF ITEMS (2) AND (3) ARE
TIGHT, OTHERWISE PREMATURE WEAR WILLOCCUR.
14 -There fore the pillow block hub it self has alongated holes to
allow a tight t.
15 -Now you can introduce the axles of the mounted wheels into
the axles holes on the support, tighten the bolts and make
sure, you lock the bolts (6) with the little screw (7).
16 -Attach the hydraulic ram or piston, as shown in the illustra-
tion, with the base (8), directed to the rear of the implement
(9) and attach the hydraulic hoses (10).
17 -At this stage, you also attach the stabilizer bar (11) and make
sure the bend at the xation point (12) is directed down-
wards.
5
6
3
2
4
9
1
8
11
10
9
12
7
Other manuals for CRSG 32
1
This manual suits for next models
7
Table of contents
Other Baldan Farm Equipment manuals

Baldan
Baldan CRI User manual

Baldan
Baldan CRSG 12 User manual

Baldan
Baldan MOVERE User manual

Baldan
Baldan CRI-A User manual

Baldan
Baldan CRI-E User manual

Baldan
Baldan PNA 3000 User manual

Baldan
Baldan ASDA User manual

Baldan
Baldan GTCR User manual

Baldan
Baldan SPDE CXP User manual

Baldan
Baldan GTCR 34 User manual