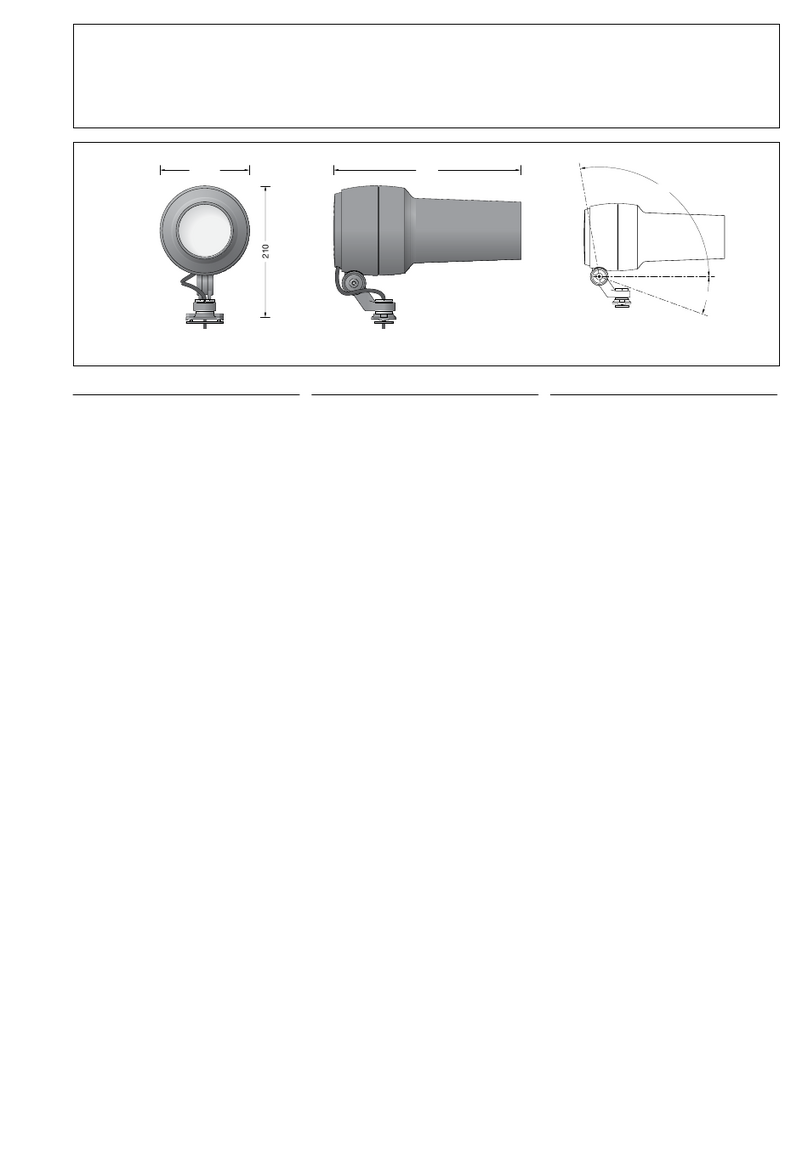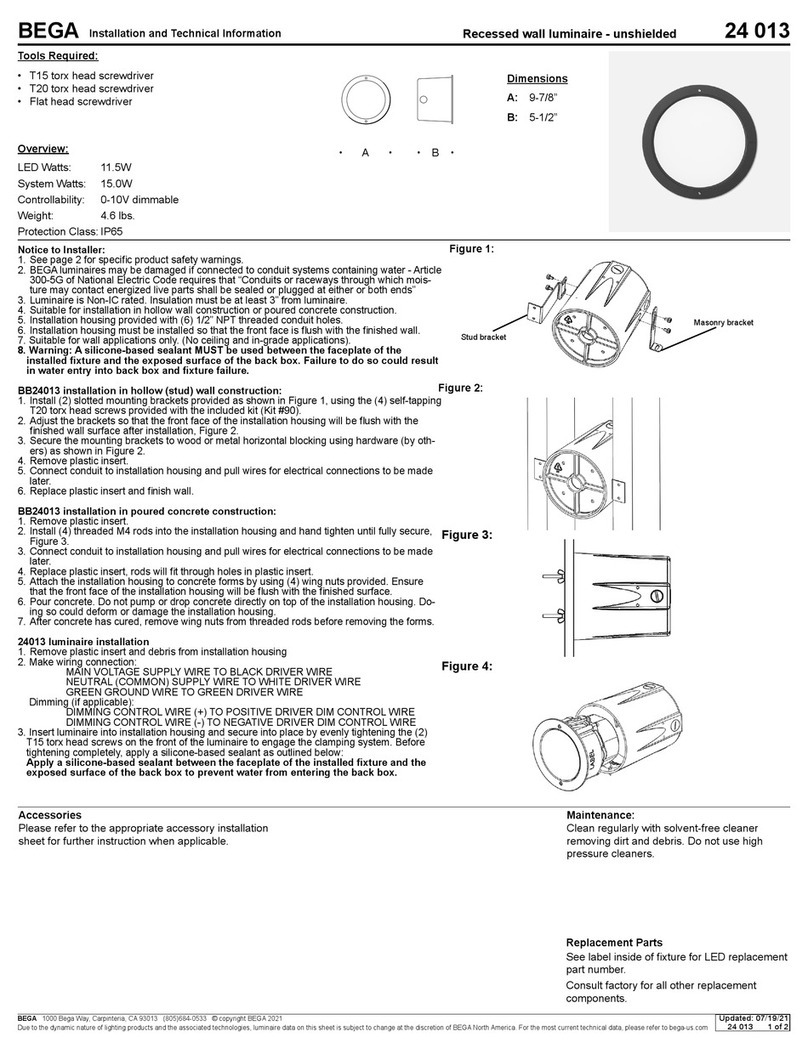
BEGA Gantenbrink-Leuchten KG · Postfach 31 60 · 58689 Menden · info@bega.com · www.bega.com
Sicherheit
Für die Installation und für den Betrieb
dieser Leuchte sind die nationalen
Sicherheitsvorschriften zu beachten.
Der Hersteller übernimmt keine Haftung für
Schäden, die durch unsachgemäßen Einsatz
oder Montage entstehen.
Werden nachträglich Änderungen an der
Leuchte vorgenommen, so gilt derjenige als
Hersteller, der diese Änderungen vornimmt.
Safety indices
The installation and operation of this luminaire
are subject to national safety regulations.
The manufacturer is then discharged from
liability when damage is caused by improper
use or installation.
If any luminaire is subsequently modied, the
persons responsible for the modication shall
be considered as manufacturer.
Sécurité
Pour l’installation et l’utilisation de ce luminaire,
respecter les normes de sécurité nationales.
Le fabricant décline toute responsabilité
résultant d'une mise en œuvre ou d'une
installation inappropriée du produit.
Toutes les modications apportées au luminaire
se feront sous la responsabilité exclusive de
celui qui les effectuera.
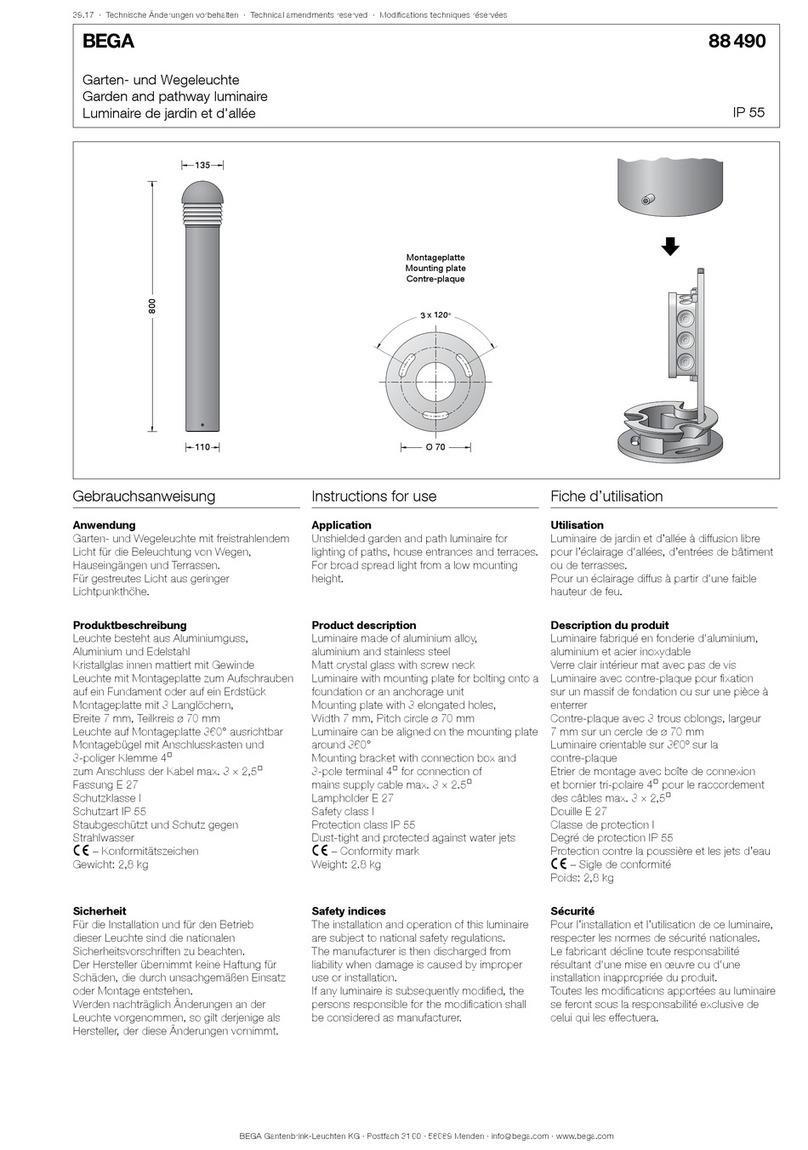
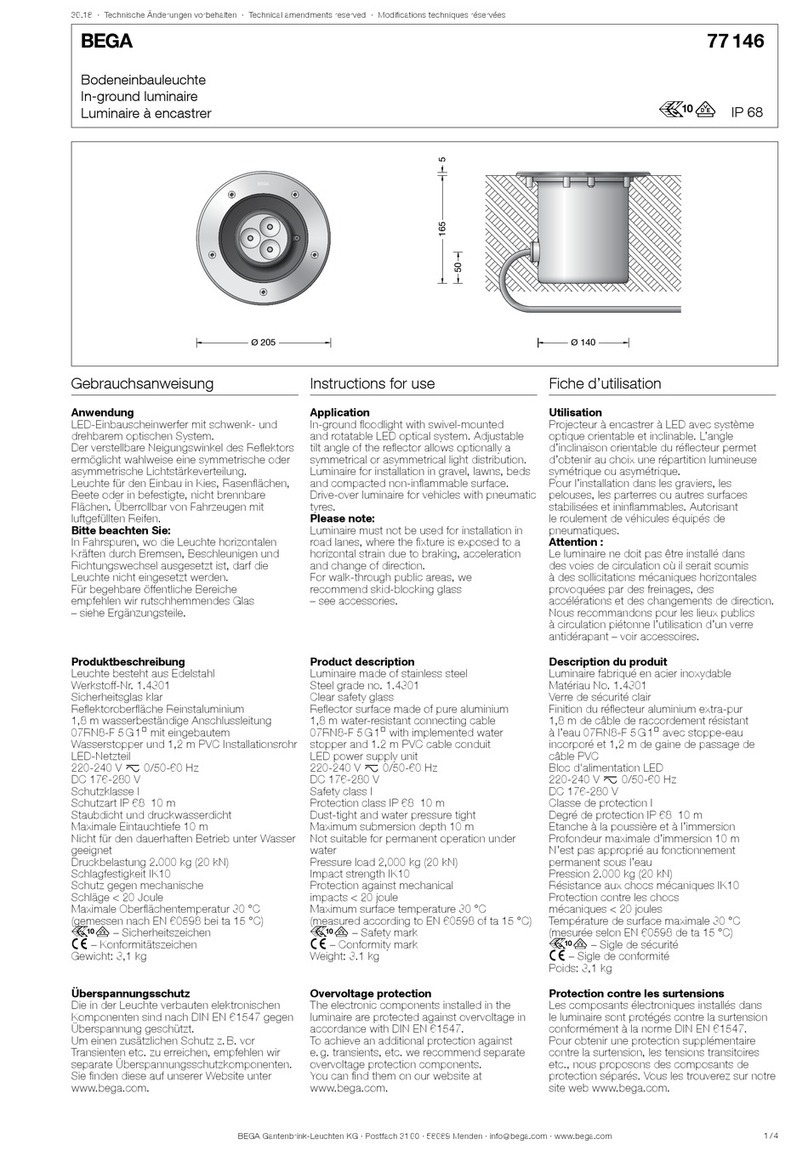
Montage
Der Fußpunkt der Leuchte darf nicht tiefer
als die Oberkante des Bodenbelags liegen.
Für den elektrischen Anschluss der Leuchte
ist eine Kabellänge von etwa 500mm
über Befestigungsgrund ausreichend. Der
Anschlusskasten erlaubt die Durchverdrahtung
der Leuchte. Schraube am Fußpunkt lösen.
Montageplatte drehen und entnehmen.
Montageplatte mit beiliegendem oder
anderem geeigneten Befestigungsmaterial
auf ein Fundament oder Erdstück 70 896
anschrauben.
Bei Montage auf einem Fundament bitte
beachten: Feuchter Beton kann stark alkalisch
sein und darf nicht dauerhaft mit der Leuchte in
Kontakt kommen.
Wir empfehlen den Montagebereich zu
drainieren und mit Isolieranstrich zu versehen.
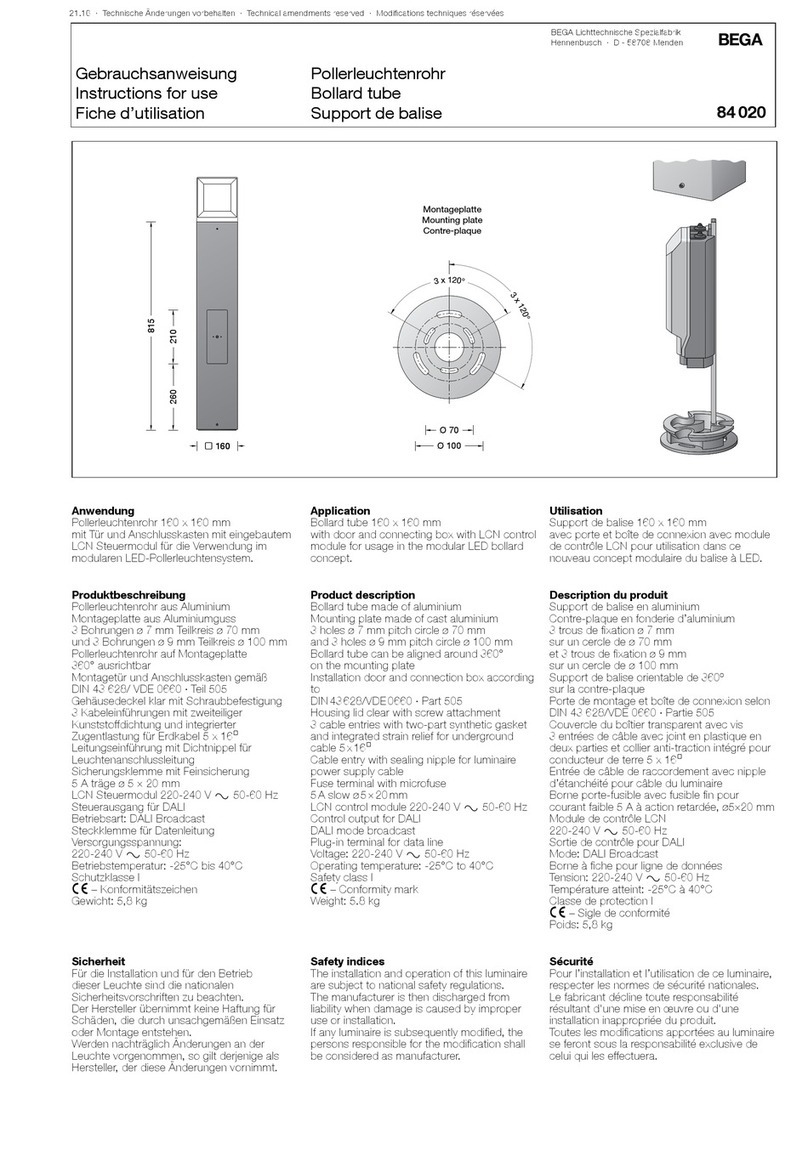
Die Montageplatte mit Anschlusskasten so
montieren, dass der Anschlusskasten von
der Montagetür zugänglich ist.
Die genaue Ausrichtung der Leuchte erfolgt
durch Drehung im Fußpunkt der Leuchte.
Anschlusskasten öffnen.
Erdkabel im Anschlusskasten anschließen.
Leuchte in die Montageplatte einsetzen,
drehen und mit Schraube befestigen.
Montagetür öffnen. Schutzleiterverbindung
herstellen. Elektrischen Leuchtenanschluss im
Anschlusskasten vornehmen. Anschlusskasten
schließen. Montagetür einsetzen und
verschrauben.
Leuchte öffnen:
Befestigungsschrauben unterhalb vom
Leuchtendach lösen und Leuchtenoberteil
abnehmen.
Lampe einsetzen.
Auf richtigen Sitz der Dichtung achten.
Leuchtenoberteil montieren.
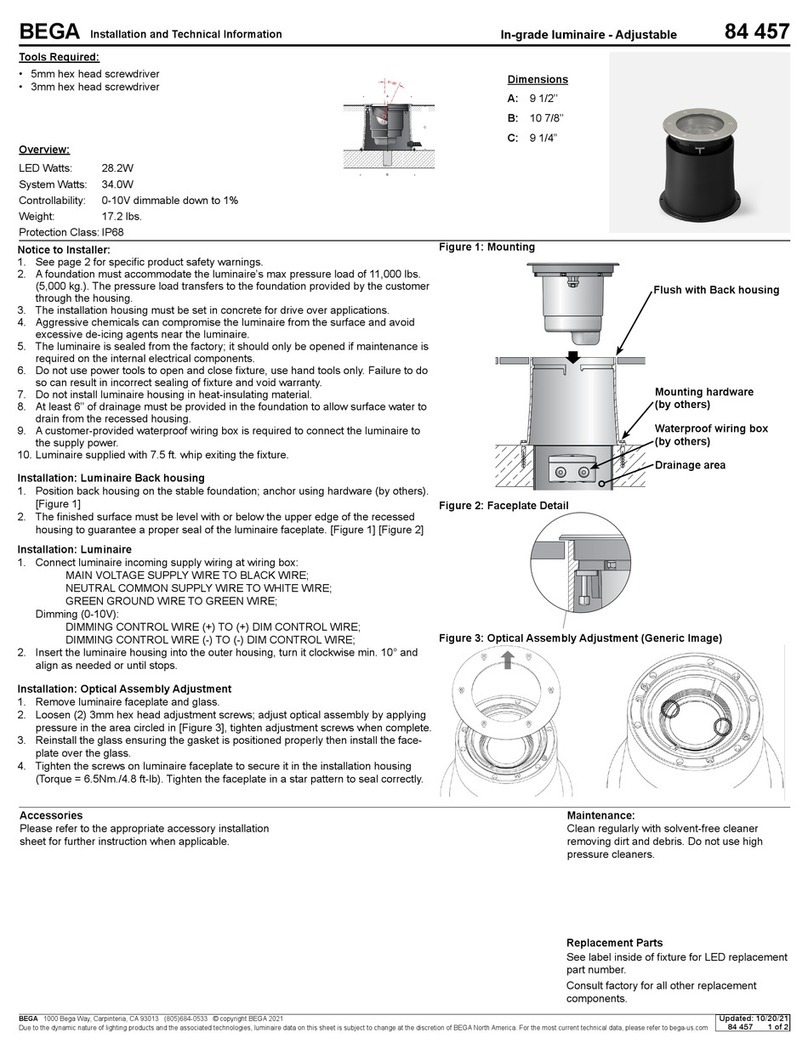
Installation
The luminaire foot must not be below the upper
edge of the oor covering. Approximately
500mm of cable above the mounting surface
will sufce for connecting the luminaire to the
power supply. The connection box allows
through-wiring of the luminaire. Undo the screw
at the base. Rotate and remove the mounting
plate.
Using the provided mounting materials or
other suitable mounting materials, screw-t the
mounting plate to a foundation or anchorage
unit 70 896.
In case of an installation on a foundation please
observe the following:
Wet concrete can be very alkaline and must not
get into contact with the luminaire permanently.
We recommend to drain the mounting area and
to provide it with insulating paint.
Install the mounting plate with connection
box in such a way that the connection box is
accessible via the access door.
The exact alignment of the luminaire is
achieved by turning the luminaire in the base
section.
Open the connection box.
Connect mains supply cable in the connection
box. Insert luminaire on the mounting plate,
turn it and x with screw. Open the access
door. Make earth conductor connection. Make
electrical connection of the luminaire in the
connection box. Close the connection box.
Install the access door and bolt together.
Open the luminaire:
Undo the xing screws located under the
luminaire top and remove luminaire top.
Insert lamp.
Make sure that gasket is positioned correctly.
Assemble luminaire top.
Installation
Le pied du luminaire ne doit pas se trouver en
dessous du bord supérieur de la couche de
nition du sol. Pour le raccordement électrique
du luminaire, une longueur de câble d’environ
500 mm au dessus du sol est sufsante. La
boîte de connexion permet un branchement
en dérivation du luminaire. Desserrer la vis du
pied de la balise. Tourner puis retirer la contre-
plaque.
Visser la contre-plaque avec le matériel de
xation fourni ou tout autre matériel approprié
sur un massif de fondation ou sur une pièce à
enterrer 70 896.
Attention: En cas d'installation sur un massif
de fondation: La laitance du béton peut être
fortement alcaline et ne doit pas être en
contact durable avec le luminaire. La surface
où le luminaire est installé doit être draînée et
protégée par une matière isolante.
Installer la contre-plaque avec la boîte de
connexion de telle façon que la boîte soit
accessible par la porte de montage.
La direction du faisceau peut être orientée
de façon précise en tournant le luminaire sur
son pied.
Ouvrir la boîte de connexion.
Raccorder le câble réseau à la boîte de
connexion. Poser le luminaire sur la contre-
plaque, tourner et xer avec la vis. Ouvrir la
porte de montage. Mettre à la terre. Procéder
au raccordement électrique du luminaire à
la boîte de connexion. Fermer la boîte de
connexion. Installer et visser la porte de
montage.
Ouvrir le luminaire:
Desserrer les vis de xation au-dessous du toit
et retirer la partie supérieure du luminaire.
Installer la lampe.
Veiller au bon emplacement du joint.
Installer la partie supérieure du luminaire.
Lampenwechsel · Wartung
Anlage spannungsfrei schalten.
Leuchte öffnen und reinigen.
Nur lösungsmittelfreie Reinigungsmittel
verwenden. Lampe auswechseln.
Dichtung überprüfen, ggf. ersetzen.
Leuchte schließen.
Für Reinigungsarbeiten dürfen keine
Hochdruckreiniger verwendet werden.
Relamping · Maintenance
Disconnect the electrical installation.
Open the luminaire and clean.
Use only solvent-free cleansers.
Change the lamp.
Check the gasket and replace, if necessary.
Close the luminaire.
For cleaning do not use a high pressure
cleaner.
Changement de lampe · Maintenance
Travailler hors tension.
Ouvrir le luminaire et nettoyer.
N'utiliser que des produits d'entretien ne
contenant pas de solvant.
Changer la lampe.
Vérier et remplacer le joint le cas échéant.
Fermer le luminaire.
Lors des travaux de nettoyage ne pas utliliser
de nettoyeur haute pression.
Kompensation
Leuchte kann werkseitig netzparallel
kompensiert geliefert werden.
1 x 12 µF · 250 V y
Kondensator: EN 61 048/049
- 40° bis + 100° C
PF-Correction
The luminaire can be delivered with a
prefabricated mains parallel correction.
1 x 12 µF · 250 V y
Capacitor: EN 61 048/049
- 40° up to + 100° C
Compensation
Le luminaire peut également être livré
compensé en parallèle à l’usine.
1 x 12 µF · 250 V y
Condensateur: EN 61 048/049
- 40° jusqu’à + 100° C
Ergänzungsteil
70 896 Erdstück
Erdstück mit Befestigungsansch aus
feuerverzinktem Stahl. Gesamtlänge 500 mm.
3 Befestigungsschrauben M 8 aus Edelstahl.
Teilkreis ø 132 mm.
Accessory
70 896 Anchorage unit
Anchorage unit with mounting ange made of
hot-dip galvanised steel. Total length 500mm.
3 stainless steel xing screws M 8.
Pitch circle ø 132 mm.
Accessoire
70 896 Pièce à enterrer
Pièce à enterrer avec asque de xation en
acier galvanisé. Longueur totale 500 mm.
3 vis de xation M 8 en acier inoxydable
sur un cercle de ø 132 mm.
Es gibt dazu eine gesonderte
Gebrauchsanweisung. See the separate instructions for use. Une che d’utilisation pour ces accessoires est
disponible.
Ersatzteile
Ersatzglas 11002735
Montageplatte 22002999L
Zündgerät 61001180
Vorschaltgerät 61001283
Fassung 63000105
Reektor oben 76000346
Reektor unten 76000347
Dichtung Glas 83000610
Spares
Spare glass 11002735
Mounting plate 22002999L
Ignitor 61001180
Ballast 61001283
Lampholder 63000105
Reector Upper 76000346
Reector Lower 76000347
Gasket glass 83000610
Pièces de rechange
Verre de rechange 11002735
Contre-plaque 22002999L
Amorceur 61001180
Ballast 61001283
Douille 63000105
Réecteur supérieur 76000346
Réecteur inférieur 76000347
Joint du verre 83000610


