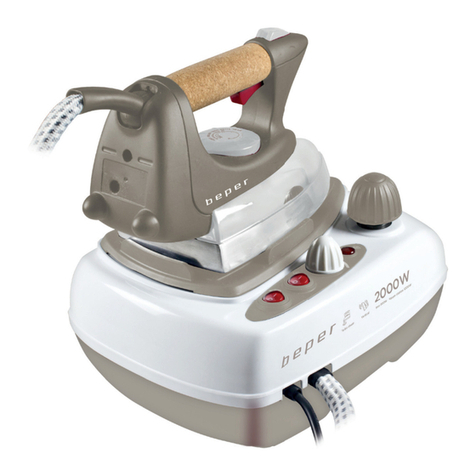
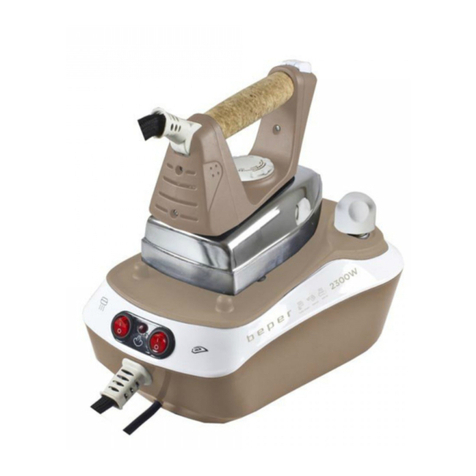
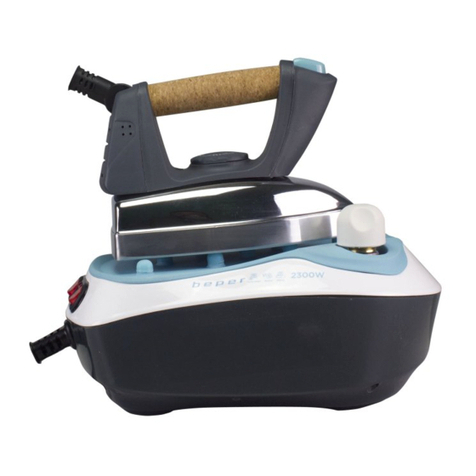
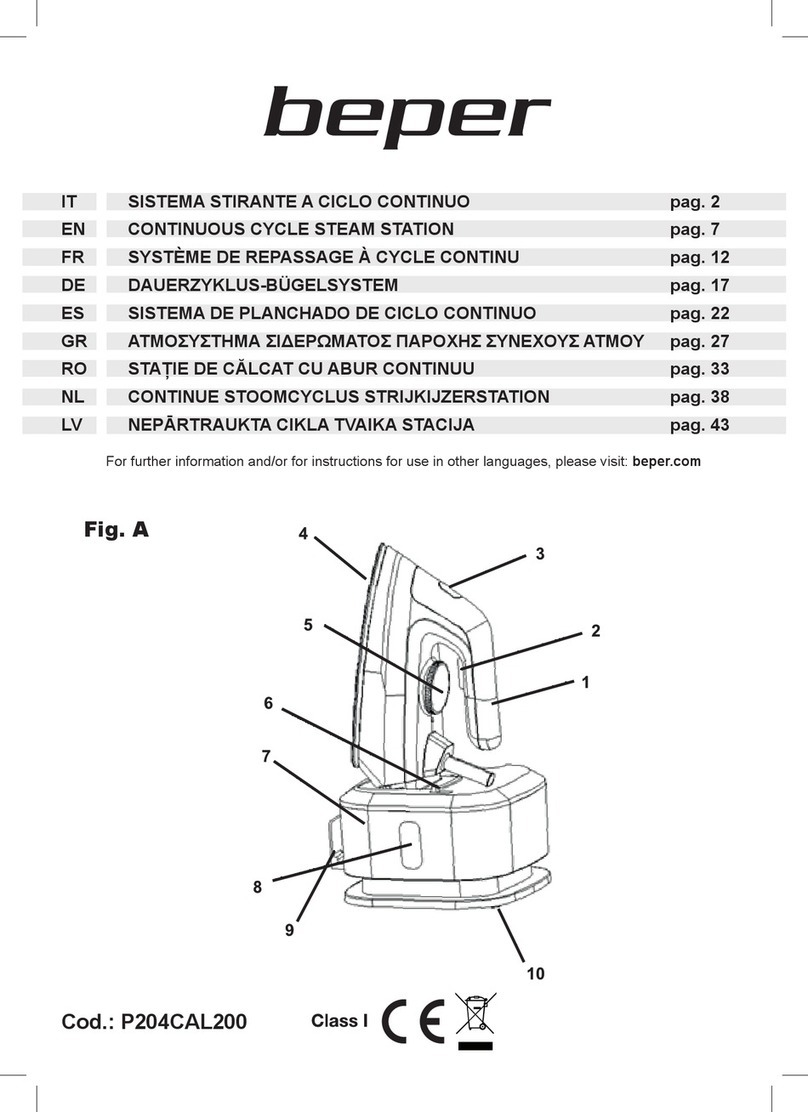
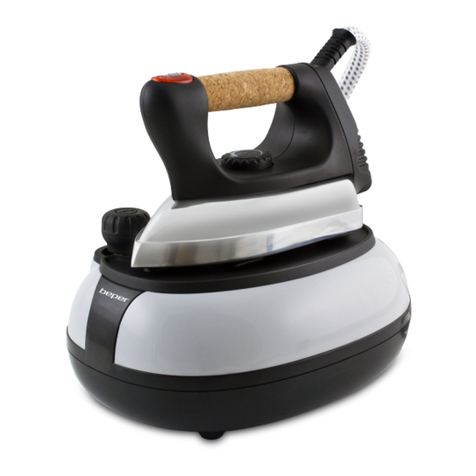
Beper Vaporex 50.934 Quick guide

• SISTEMA STIRANTE - MANUALE DI ISTRUZIONI
• STEAM STATION - USE INSTRUCTIONS
• CENTRALE VAPEUR - MANUEL D’INSTRUCTIONS
• BUEGELSTATION - BETRIEBSANLEITUNG
• CENTRO PLANCHADO - MANUAL DE INSTRUCCIONES
R
Cod.: 50.934

ITALIANO
ENGLISH
FRANÇAIS
DEUTSCH
ESPAÑOL
pag. 4
pag. 13
pag. 21
pag. 30
pag. 38
For further information and/or for instructions for use in other languages, please visit:
www.beper.com

33
AVVERTENZE GENERALI
LEGGERE QUESTE ISTRUZIONI PRIMA DI USARE L’APPARECCHIO.
Prima e durante l’uso dell’apparecchio è necessario seguire alcune precauzioni elementari.
Dopo aver tolto l’imballaggio assicurarsi dell’integrità dell’apparecchio. In caso di dubbio non utiliz-
zare l’apparecchio e rivolgersi a personale professionalmente qualicato. Gli elementi dell’imbal-
laggio (sacchetti di plastica, polistirolo, ecc.) non devono essere lasciati alla portata dei bambini, in
quanto potenziali fonti di pericolo.
Si raccomanda di non gettare nei riuti domestici i materiali costituenti l’imballaggio, ma consegnarli
negli appositi centri di raccolta o smaltimento dei riuti, chiedendo eventualmente informazioni al
gestore della nettezza urbana del proprio comune di residenza.
Assicurarsi sempre che la tensione di rete elettrica sia uguale a quella indicata nell’etichetta dati
tecnici e che l’impianto sia compatibile con la potenza dell’apparecchio.
In caso di incompatibilità tra la presa e la spina dell’apparecchio fare sostituire la presa con una altra
di tipo adatto da personale professionalmente qualicato. Quest’ultimo, in particolare, dovrà anche
accertare che la sezione dei cavi della presa sia idonea alla potenza assorbita dall’apparecchio.
Non tirare mai il cavo per scollegarlo dalla presa di corrente elettrica.
Assicurarsi che il cavo non sia in contatto con superci calde o taglienti.
Non utilizzare l’apparecchio con il cavo danneggiato.
Se il cavo di alimentazione è danneggiato, esso deve essere sostituito dal Costruttore o dal suo
Servizio Assistenza Tecnica o comunque da una persona con qualica similare, in modo da preve-
nire ogni rischio.
Collegare l’apparecchio esclusivamente ad una presa di corrente elettrica alternata.
In generale è sconsigliabile l’uso di adattatori, prese multiple e/o prolunghe. Qualora il loro uso
si rendesse indispensabile è necessario utilizzare solamente adattatori e prolunghe conformi alle
vigenti norme di sicurezza.
Questo apparecchio dovrà essere destinato solo all’uso per il quale è stato espressamente concepi-
to. Ogni altro uso è da considerarsi improprio e quindi pericoloso, nonché far decadere la garanzia.
Il costruttore non può essere considerato responsabile per eventuali danni derivati da usi impropri,
erronei ed irragionevoli.
Per evitare surriscaldamenti pericolosi si raccomanda di svolgere in tutta la sua lunghezza il cavo di
alimentazione e di staccare la spina dalla rete di alimentazione elettrica quando l’apparecchio non
è utilizzato.
Prima di effettuare qualsiasi operazione di pulizia o di manutenzione, disinserire l’apparecchio dalla
rete di alimentazione elettrica.
Non immergere mai l’apparecchio in acqua o in altri liquidi.
Non toccare l’apparecchio con mani e piedi bagnati o umidi.
Non usare l’apparecchio a piedi nudi.
Non lasciare esposto l’apparecchio ad agenti atmosferici (pioggia, sole, etc.).
Non tenere l’apparecchio vicino a fonti di calore (es. termosifone).
Questo apparecchio non deve essere utilizzato da persone (compresi i bambini) con capacità si-
che, sensoriali o mentali ridotte; da persone che manchino di esperienza e conoscenza dell’appa-
recchio, a meno che siano attentamente sorvegliate o ben istruite relativamente all’utilizzo dell’ap-
parecchio stesso da parte di una persona responsabile della loro sicurezza.
Assicurarsi che i bambini non giochino con l’apparecchio.
Allorché si decida di smaltire come riuto questo apparecchio, si raccomanda di renderlo inoperante
tagliandone il cavo di alimentazione. Si raccomanda inoltre di rendere innocue quelle parti dell’ap-
parecchio suscettibili di costituire un pericolo, specialmente per i bambini che potrebbero servirsi
dell’apparecchio per i propri giochi.
4
Sistema stirante Manuale di istruzioni
AVVERTENZE D’USO
Vericare che il voltaggio della rete elettrica corrisponda a quello indicato sull’etichetta.
In caso di danneggiamento al cavo, alla spina o di cortocircuiti, non utilizzare il sistema stirante e
farlo riparare da un centro di assistenza autorizzato.
Al primo utilizzo del ferro da stiro rimuovere la pellicola di protezione dalla piastra.
Al primo utilizzo la piastra può emettere un leggero fumo causa l’evaporazione dell’olio protettivo,
applicato in fase di fabbricazione; ciò non deve destare alcuna preoccupazione e dopo pochi utilizzi
il fumo sparirà.
E’ possibile che nel serbatoio rimangano residui in fase di fabbricazione; al primo utilizzo del ferro
da stiro fare fuoriuscire più volte il vapore lontano dal capo da stirare per eliminare i residui interni.
Il cavo elettrico deve sempre essere libero da nodi o grovigli.
Non afferrare il cavo per scollegare la spina.
Non avvolgere il cavo elettrico attorno al ferro da stiro.
Mantenere il cavo di alimentazione a debita distanza dalla piastra, specialmente quando è calda.
Nei momenti di pausa lavoro e quando non si utilizza il ferro da stiro riporlo sopra il ripiano isolante
in gomma, in posizione verticale.
Non lasciare incustodito il sistema stirante mentre è collegato alla rete elettrica.
Riempire il serbatoio con acqua prima di mettere in funzione il sistema stirante. Le operazioni di
riempimento di acqua devono essere effettuate con la spina del cavo di alimentazione elettrica
staccata dalla presa elettrica.
Non riempire il serbatoio con quantità d’acqua maggiori della capienza massima.
Non introdurre nel serbatoio miscele smacchianti, aceto, agenti disincrostanti o chimici in genere,
utilizzare solo acqua distillata o demineralizzata.
Posizionare il sistema stirante solamente su superci piane, stabili e resistenti al calore.
La piastra del ferro da stiro diventa molto calda; attenzione a non scottarsi.
Attenzione a non avvicinare il viso al vapore che fuoriesce dalla piastra.
Scegliere sempre la temperatura più idonea al capo da stirare.
Non utilizzare il ferro da stiro come unità riscaldante. Non stirare indumenti molto umidi, lasciarli
asciugare prima di applicare il ferro da stiro. Mai tentare di stirare indumenti indosso.
Non stirare sopra cerniere o bottoni per non rovinare la piastra.
Non sottoporre il ferro da stiro ad urti. Non toccare le parti metalliche del ferro quando è in funzione
e nei minuti seguenti al suo spegnimento poiché potrebbero causare scottature.
Non appoggiare il ferro da stiro caldo sul cavo di collegamento o sul cavo di alimentazione e fare
molta attenzione a che essi non vengano in contatto con la piastra calda del ferro da stiro.
Non avvolgere il cavo di alimentazione attorno alla piastra soprattutto quando il ferro da stiro è caldo.
Attenzione a non avvicinare il viso al vapore che fuoriesce dalla piastra.
Non aprire il tappo della caldaia quando il sistema stirante è in funzione e collegato alla presa di
corrente.

5
Sistema stirante Manuale di istruzioni
Prima di effettuare qualsiasi operazione di pulizia scollegare sempre la spina dalla presa elettrica.
Riporre il sistema stirante solamente quando si è raffreddato completamente, dopo ogni utilizzo.
Se si decide di non utilizzare più il prodotto è opportuno collocarlo lontano dal raggiungimento dei
bambini ed in modo da non costituire pericolo alcuno.
DESCRIZIONE PRODOTTO
1 – Serbatoio
2 – Monotubo (vapore e alimentazione)
3 – Cavo di alimentazione
4 – Tasto on/off caldaia
5 – Tasto on/off vapore
6 – Spia luminosa “pronto vapore”
7 – Base ferro da stiro
8 – Tappo di sicurezza
9 – Termostato regolabile
10 –Tasto colpo di super vapore
11 – Spia luminosa del termostato
12 – Tasto vapore continuo
13 – Imbuto
14 – Spia luminosa di acqua esaurita
15 – Manopola di regolazione del vapore
ISTRUZIONI PER L’USO
STIRATURA A VAPORE
NOTA:Stirare solo su superci resistenti al calore e che permettono al calore di fuoriuscire
(griglia).
Assicurarsi che il tappo si sicurezza sia ben chiuso, altrimenti parte del vapore fuoriesce da
questa apertura. La spia di vapore si accende e si spegne durante l’utilizzo, questo fatto è
normale ed indica che la macchina mantiene costantemente la pressione di vapore.
Quando l’acqua all’interno del serbatoio sta per esaurirsi la spia luminosa di acqua esaurita
si accende, spegnete il ferro da stiro e aprite il tappo di sicurezza solo quando si è raffred-
dato.
Premete l’interruttore della caldaia (4) e aspettare che l’acqua diventi bollente (circa 8
minuti).
Successivamente, premere il pulsante (5) per accendere il ferro e quindi selezionare la
temperatura desiderata tramite la manopola del termostato (9).

6
Sistema stirante Manuale di istruzioni
Quando la luce (11) si spegne, la temperatura impostata è stata raggiunta e il ferro è pronto per
l’uso. Ci vogliono circa 8 minuti perché la caldaia raggiunga l’optimum.
Quando l’apparecchio è pronto per l’uso la lampada pilota a vapore (6) si accende.
Quando si utilizza il ferro per la prima volta, pulire il ferro con un panno pulito prima.
Per ottenere vapore, premere il pulsante vapore (10).
Rilasciare il pulsante del vapore quando il vapore non è più necessario.
Questo apparecchio è anche in grado di generare vapore in posizione verticale e può quindi essere
utilizzato per stirare i tessuti facilmente con un getto di vapore.
Attenzione: non permettere mai al vapore di fuoriuscire del ferro mentre è appoggiato sul supporto
fornito (8). Se il getto di vapore diminuisce mentre si stira, signica che il serbatoio è a corto di
acqua.
Attenzione: la caldaia è sempre in pressione!
Come riempire la caldaia mentre l’apparecchio è in uso
Per continuare a stirare, fare come segue:
-Spegnere la caldaia (4). Selezionare la temperatura desiderata “MIN” ruotando le manopole ter-
mostato (9).
-Rilasciare la pressione residua della caldaia, tenendo premuto il pulsante vapore (10) sul ferro
premuto no a quando non esce più vapore della piastra. Quindi spegnere il ferro (5).
-Scollegare il cavo di alimentazione dalla presa a muro.
-Attendere che il ferro e la caldaia si raffreddino.
-Svitare il tappo e attendere qualche minuto.
-Versare lentamente 1,0 litri d’acqua nell’apertura usando l’imbuto in dotazione.
-Chiudere la caldaia e serrare il tappo.
-Premere l’interruttore della caldaia (4).
-Aspetta che la spia luminosa del vapore (6) si illumini prima di continuare a stirare.
ATTENZIONE! Non tentare mai di aprire il tappo mentre la caldaia è in pressione.
Non svitare mai il tappo della caldaia quando l’apparecchio è collegato
alla presa di corrente.
Il ferro può fumare un po’ quando viene acceso per la prima volta - questo
è normale e ben presto cessa.
Se il ferro rimane inutilizzato per un lungo periodo di tempo (poche settimane), si suggerisce di
premere il pulsante vapore (10) per circa 30 secondi con il ferro in posizione orizzontale, per pulire
con il vapore i condotti, prima di iniziare la sessione di stiro.
Non è necessario riempire completamente il serbatoio caldaia per sessioni di stirato brevi. Una
misura (o meno) di acqua è sufciente per ridurre il tempi di attesa e risparmiare energia elettrica.

7
Sistema stirante Manuale di istruzioni
NOTA: all’accensione del ferro alcune gocce miste vapore usciranno dal ferro no al rag-
giungimento della temperatura. È consigliabile direzionare il primo getto di vapore su di uno
straccio no a quando non si avrà una emissione di vapore stabile.
Alla ne dell’operazione appoggiare il ferro da stiro sul ripiano del ferro da stiro e staccare la spina
dalla presa di corrente elettrica.
Il ferro da stiro deve essere mantenuto in costante movimento sul tessuto da stirare.
IMPOSTARE LA TEMPERATURA
Consultare sempre la targhetta di lavaggio e stiratura situata all’interno dei capi da stirare. Se le
informazioni per la stiratura non fossero presenti, ma si conosce la tipologia del tessuto, fare riferi-
mento alla tabella sottostante.
Il numero di punti presenti nel termostato regolabile (1) del ferro da stiro indicano la temperatura da
quella più bassa (•) a quella più alta (•••).
Tipo di tessuto Posizione
manopola
termostato
Istruzioni per stiratura
Acetato
Acrilico
Nylon
Stiratura senza vapore.
Seguire le istruzioni sull’etichetta dell’indumento.
Questo tipo di tessuto richiede normalmente una
stiratura molto leggera.
Poliestere
Rayon
Stirare senza vapore.
Stirare al rovescio. Quando vengono stirati tes-
suti misti, selezionare la temperatura più bassa.
Seta Stirare senza vapore.
Stirare al rovescio.
Lana
Cotone leggero
Lino
Stirare a vapore.
Stirare al rovescio.Mettere un panno sul tessuto
in modo da evitare che diventi lucido.
Cotone
Lino no
Tessuti inamidati
Stirare a vapore.
Inumidire i tessuti prima di stirare. Tessuti pesanti
e inamidati richiedono più umidità.
Mentre i tessuti leggeri colorati possono essere
stirati sul diritto: i colori scuri ed indumenti rica-
mati devono essere stirati al rovescio.
Lino Stirare a vapore.
Usare molto vapore e stirare i tessuti scuri al ro-
vescio in modo da evitare che diventino lucidi.

8
Sistema stirante Manuale di istruzioni
La tabella è valida per i tessuti e non per riniture tipo lucido o rilievo della piega che devono essere
stirate ad una bassa temperatura.
Accertarsi sempre, prima dell’utilizzo del ferro da stiro, che la temperatura del ferro sia corretta con
il tipo di tessuto: lana con lana, cotone con cotone, ecc.
Il ferro da stiro è veloce a scaldarsi e lento a raffreddarsi; quindi iniziare a stirare i capi che richie-
dono temperature basse (come i tessuti sintetici) e andare in progressione con temperature sempre
più alte.
Quando il capo da stirare è formato da più tessuti, regolare la temperatura per il tessuto più delicato.
Se non si conosce il tipo di tessuto che si deve stirare è consigliato stirare una parte di esso, normal-
mente non visibile quando il capo è indossato, partendo dalla temperatura minima, per poi trovare la
temperatura più adatta. Può succedere che il capo diventi lucido, in questo caso bisogno terminare
la stiratura per non rovinarlo e stirare il tessuto da rovescio.
N.B. Fare molta attenzione al simbolo : il tessuto (capo di abbigliamento) non deve
essere stirato.
STIRATURA A SECCO
Per poter stirare a secco, ovvero senza vapore, dopo aver collegato la spina alla rete elettrica, re-
golare il termostato sulla temperatura desiderata senza premere i tasti vapore.
STIRATURA IN VERTICALE
Il ferro da stiro può emettere vapore anche nella posizione verticale può quindi essere utilizzato per
rinfrescare facilmente i tessuto con un getto di vapore, premendo il pulsante vapore.
Premere la leva del vapore continuo per avere un getto di vapore continuo.
TAPPO DI SICUREZZA
Il ferro da stiro a caldaia ha un tappo di sicurezza che previene l’apertura del serbatoio da parte di
bambini.
È una sicurezza molto importante ed è necessario seguire le seguenti indicazioni quando si deve
riempire di nuovo il serbatoio:
1- spegnere il ferro attraverso il tasto on/off;
2- premere il tasto vapore per eliminare tutto il vapore residuo;
3- staccare la spina dalla presa di corrente;
4- premere e contemporaneamente svitare il tappo di sicurezza;
5- aspettare alcuni minuti che il serbatoio si raffreddi;
6- versare lentamente l’acqua nella tanica.

9
Sistema stirante Manuale di istruzioni
PULIZIA DEL FERRO DA STIRO
Togliere la spina dalla presa di corrente elettrica.
Per rimuovere incrostazioni o resti di amido dalla piastra del ferro, utilizzare un panno umido o con
un detersivo non abrasivo quando la piastra è ancora calda.
Per le macchie ostinate esistono detersivi speciali.
Asciugare sempre la piastra del ferro dopo ogni pulitura.
Pulire il corpo del ferro da stiro con un panno umido senza detersivi.
Non utilizzare pagliette metalliche o detersivi abrasivi.
RIPORRE IL FERRO DA STIRO
Spegnere il ferro da stiro posizionando il termostato regolabile su 0 e scollegare la spina dalla presa
di corrente.
Lasciare raffreddare il ferro da stiro sull’apposita griglia. Riporre il sistema stirante avendo l’accor-
tezza di non far toccare i cavi di alimentazione con le parti calde del ferro da stiro.
Riporre sempre il sistema stirante su una supercie stabile e lontano dalla portata dei bambini.
DATI TECNICI
Potenza totale: 2100W
Potenza ferro da stiro: 800W
Potenza caldaia: 1300W
Alimentazione: 230V ~ 50Hz
In un’ottica di miglioramento continuo Beper si riserva la facoltà di apportare modiche e
migliorie al prodotto in oggetto senza previo preavviso.
TRATTAMENTO DEI RIFIUTI DELLE APPARECCHIATURE ELETTRICHE ED ELETTRONICHE
Il prodotto al termine del suo ciclo di vita deve essere smaltito seguendo le norme vigenti relative allo smaltimen-
to differenziato e non può essere trattato come un semplice riuto urbano.
Il prodotto deve essere smaltito presso i centri di raccolta dedicati o deve essere restituito al rivenditore nel caso
si voglia sostituire il prodotto con un altro equivalente nuovo.
Il costruttore si farà carico delle spese necessarie allo smaltimento del prodotto secondo quanto prescritto dalla
legge.
Il prodotto è composto da parti non biodegradabili e sostanze che possono inquinare l’ambiente circostante se
non opportunamente smaltite. Inoltre parte di questi materiali possono essere riciclati evitando l’inquinamento
dell’ambiente. E’ vostro e nostro dovere contribuire alla salute dell’ambiente.
Il simbolo indica che il prodotto risponde ai requisiti richiesti dalle nuove direttive introdotte a tutela del
l’ambiente (2011/65/EU) e che deve essere smaltito in modo appropriato al termine del suo ciclo di vita.
Chiedere informazioni alle autorità locali in merito alle zone dedicate allo smaltimento dei riuti.
Chi non smaltisce il prodotto seguendo quanto indicato in questo paragrafo ne risponde secondo le norme
vigenti.

CERTIFICATO DI GARANZIA
Questo apparecchio è stato controllato in fabbrica. La garanzia di applicazione è valida 24 mesi
dalla data di acquisto per difetti di materiale o di fabbricazione. Lo scontrino di acquisto e il certicato
di garanzia si devono presentare assieme nel caso di reclami.
Se l’apparecchio dovesse richiedere assistenza tecnica rivolgersi al venditore o presso la nostra
sede. Questo per conservare inalterata l’efcienza del vostro apparecchio e per NON invalidare la
garanzia. Eventuali manomissioni dell’apparecchio da parte di personale non autorizzato invalide-
ranno automaticamente la garanzia.
Condizioni di garanzia
Se ci sono guasti a causa di difetti di materiale e/o fabbricazione durante il periodo di garanzia,
garantiamo la riparazione del prodotto gratuitamente, a patto che:
- l’apparecchio sia stato usato in modo corretto ed ai ni per cui è stato costruito;
- l’apparecchio sia stato riparato da esperti, cioè da persone incaricate dal fornitore;
- venga presentato lo scontrino;
- non rientrano in garanzia le parti che dimostrano un normale logoramento.
Sono quindi escluse tutte le parti che hanno subito rotture accidentali o che sono soggette ad usura
(tra le quali lampade, batterie, resistenze) e difetti derivanti da un utilizzo non domestico dell’appa-
recchio, negligenza nell’uso o nella manutenzione, danni da trasporto e tutti quei danni non imputa-
bili direttamente al produttore.
Se entro il periodo di garanzia emerge un difetto che non può essere riparato, l’apparecchio viene
cambiato gratuitamente.
Assistenza tecnica
Anche dopo il periodo di garanzia prestiamo molta attenzione alle riparazioni.
Per l’assistenza tecnica e/o riparazioni fuori dal periodo di garanzia ci si può rivolgere direttamente
all’indirizzo sottostante.
BEPER SRL
Via Salieri, 30
37050 - Vallese di Oppeano - Verona
Tel. 045/7134674 – Fax 045/6984019
e-mail: assistenza@beper.com

ENGLISH
Steam station Use instructions
11
GENERAL SAFETY ADVICE
READ THE OPERATING INSTRUCTIONS CAREFULLY BEFORE FIRST USE OF THE
APPLIANCE.
Read the following instructions carefully, since they give you useful safety information
about installation, use and maintenance and help you avoid mishaps and possible acci-
dents.
Remove the packing and make sure that the appliance is intact, with special attention to
the supply cable. The elements of the packing (plastic bags, polystyrene, etc) do not have
to be accessible to the children, in order to preserve them from danger sources.
It is recommended not to throw these packing material in the domestic waste, but to deliver them
to the appropriate station of collection or destruction refusals, asking eventually information to the
manager of the Sanitation Department of your own municipality.
Before connecting the appliance make sure that the mains voltage corresponds to the data specied
on the label.
If the plug does not suit the socket, let it be replaced with another suitable plug by qualied person-
nel only, which shall also ensure that the section of the socket cables is suitable for your appliance
power absorption.
Never pull the supply cord to unplug the appliance.
Make sure that the supply cord never comes into contact with hot or cutting surfaces
Do not use this appliance if the supply cord is damaged. In case of damage, it must be replaced by
the manufacturer, its service agent or similarly qualied persons in order to avoid a hazard.
Only connect this appliance on alternating current
Generally, the use adaptors multiple plugs and/or extensions is not recommended; should they be
necessary, please use only simple or multiple adaptors and extensions in compliance with the safety
rules in force, making sure that the capacity absorption limit marked on the simple adaptors and the
extensions and the maximum power limit marked on the multiple adaptor are not exceeded.
This appliance is to be destined to its special purpose only.
Any other use is to be considered as improper and thus dangerous. The manufacturer cannot be
responsible for any damages deriving from improper, wrong or incautious use.
To avoid any heating risk, it is recommended to unroll completely the supply cord and to unplug the
appliance, when not used.
Before cleaning, always unplug the appliance.
To protect against electric shock, do not immerse cord, plug or any parts of the appliance into water
or other uids.
Do not hold the appliance with wet hands or feet.
Do not hold the appliance with naked feet.
Do not expose the appliance to atmospheric agents such as rain, wind, snow, hail.
Do not use the appliance near explosives, highly ammable materials, gases, burning ames, he-
aters.
Do not allow children, disabled people or every people without experience or technical ability to
use the appliance if they are not properly watched over. Close supervision is necessary when any
appliance used by or near children.
Make sure that children do not play with this appliance.
If you decide not to use the appliance any longer, make it unserviceable by simply cutting the supply
cable after disconnecting the plug from the socket. Also make any dangerous parts unserviceable,
especially for children who could play with the appliance.

12
Steam station Use instructions
INSTRUCTIONS FOR USE
Before rst use, please ensure that the wattage and mains voltage correspond to the instructions
on the rating label.
Ensure that the power cord is not damaged by being crushed, kinked or scraped against sharp ed-
ges. If the replacement of the supply cord is necessary, this has to be done by the manufacturer or
his agent in order to avoid a safety hazard.
When using the steam station for the rst time, take off the protection lm of the plate.
During the rst use, a light smoke caused by the evaporation of the protective oil applied in manu-
facture may appear; this is normal and after some use, the smoke will disappear.
The steam station may contain some residues in the boiler or steam tube. During the rst use of
the domestic iron, release the steam several times steam in order to eliminate the internal residues
Never pull the supply cord to unplug the appliance.
Do not roll up the electric cord around the iron.
Keep away to a reasonable distance the supply cord from the iron plate, especially when it is hot.
When making a break or if not used, put the iron on the iron rest in vertical position.
Do not leave the steam station plugged, without supervision.
Rell the tank with water before plugging the appliance. During lling and relling, we recommend
to unplug the appliance from the mains supply.
Do not ll the tank over his maximum capacity.
Do not ll with mixture stain-removing, vinegar, scaling or chemical agent, but use only distilled or
demineralised water.
Lay the steam station on a plane surface, stable and resistant to heat.
The plate of the iron becomes very hot, take care not to burn you.
Never direct the jet of steam towards your face.
Always choose the right temperature according the cloth which has to be ironed.
Do not use the stream station as a heater. Do not iron the wet clothes, let them dry before ironing.
Do not iron clothes when wearing them on you.
Do not pass the iron on buttons or zipper in order to not to damage the plate.
Take care not to knock the iron. Do not touch the parts of iron when this one is on and in the minutes
following the extinction to avoid any risk of burns.
Do not put the hot iron on the electric cord. Pay attention that this one does not touch the hot plate
of the iron.
Do not open the tank during the use.
Before cleaning, unplug the supply cord.
After complete cooling you can store the appliance.
If you no longer use this appliance, please keep away from children.

13
Steam station Use instructions
PARTS AND ACCESSORIES
1- Boiler
2 - Iron boiler connection cable (supply cable + steam hose)
3 - Supply cable with plug
4 - Boiler on/off switch with pilot lamp
5 - Iron on/off switch with pilot lamp
6 - “Steam ready” pilot lamp
7 - Safety boiler cap
8 - Iron stand
9 - Thermostat knob
10 - Steam button
11 - Thermostat pilot lamp
12 - Continuous steam button
13 - Water measure
14 - “Lack water” pilot lamp
15 - Steam adjustment
NOTICE
IRONING WITH STEAM
NOTE: Only iron resistant to heater.
Make sure that the safety boiler cap is well closed, otherwise part of the steam will escape
from this opening. The steam ready” pilot lamp switch on and off itself during the use ; this
is the correct way and shows that the appliance always contains the pressure.
When there is a lack of water into the tank, the “lack water” pilot lamp illuminates, turn off the
iron and open the safety boiler cap only when completely cool.
Press switch on/off (4) and for the water gets very hot (about 8 minutes).
Then press on/off steam button to turn on the iron and select desired temperature with the thermo-
stat knob (9).
When the thermostat pilot lamp (11) turn off, that means the temperature is reached and the iron
ready to use. It takes about 8 minutes to the steam station to reach the desired temperature.
When the steam station is ready the steam ready pilot lamp (6) illuminates.
When used for the rst time, clean the iron with a cloth.
Press steam button (10) to get steam.
Release the steam button when steam is no longer necessary.
This appliance is able to generate steam in vertical position and can be used to iron easily fabrics
with steam jet.

14
Steam station Use instructions
Attention : be sure the iron is correctly placed in vertical position on the iron rest, steam must never
leave. If the steam jet becomes lower when ironing, that means the tank is empty.
Attention : the steam station is always under pressure !
How to ll the tank when using the steam station
To carry on with ironing, please operate as follows :
- Turn off the steam station (4). Select desired temperature “MIN” turning the temperature thermostat
knob (9).
- Release the pressure from the steam station, keeping the steam button (10) with the nger pres-
sure until steam stop. Then turn off the iron (5).
- Unplug the cord supply from the socket.
- Wait for the iron and station cool .
- Unscrew safety cap and wait for some minutes.
- Fill the tank with 1,0 litre of water using the ller funnel.
- Close and tighten the safety cap.
- Press on/off (4).
- Wait for the steam ready pilot lamp (6) lights before carry on ironing.
ATTENTION ! Do never try to open the safety cap when the steam station is under pressure.
Do never unscrew the safety cap when the appliance is plugged to the socket.
When used for the rst time a little smoke may appear ; that does not last and will stop quickly.
If the iron is not used for a long period (some weeks), it is recommended to press steam button (10)
for about 30 seconds, the iron in horizontal position, to clean the intern tubes with steam, before
starting ironing.
It is necessary completely ll the tank for a brief ironing. One measure of water (or less) will be
enough to reduce time and energy.
NOTE: during initial operation of the iron, a few drops of water mixed with steam may come out of
the soleplate until the temperature stabilizes. It is advisable to direct the rst jets of steam onto an
old cloth until a uniform stable jet of steam is obtained.
After using it, leave the iron on the iron rest and unplug the supply cord.
The iron must always be in movement on the cloth.

15
Steam station Use instructions
TEMPERATURE SETTING
Always consult the labels of washing and sharpening inside clothing. If you cannot nd them and if
you do not know the type of fabric, please refer to the table below:
The numbers of points on the thermostat knob (9) indicate the lower (•) and higher (•••) temperature.
Kind of fabric Temperature
position
Ironing instructions
AcetateAcrylicNylon Ironing without steam. Follow the instructions indicated
on clothing. This type of fabric requires a very soft ironing.
PolyesterViscose Ironing without steam.Ironing on the back of clothing. Se-
lect the lowest temperature for ironing mix fabric.
Silk Ironing without steam.Ironing on the back of clothing.
WoolLight cot-
tonLight linen
Ironing with steam.Ironing on the back of clothing. Put a
wet cloth on the fabric in order to avoid the “brilliant “ef-
fect.
Cotton Thin linen
Starched fabrics
Ironing with steam.Moist the fabrics before ironing. The
thicker and starched fabrics must be a little wetter than
the light fabrics which can be ironed directly: the dark co-
lours and clothing with embroidery must be ironed on the
back.
Linen Ironing with vapour.Use a lot of steam and iron the dark
clothing on the back in order to avoid the “brilliant “effect.

16
Steam station Use instructions
The table is valid for fabrics and not for brilliant surfaces, with relief printings or folds which must be
ironed with low temperature. Before using the iron, always make sure that the temperature of iron is
adapted to the type of fabric: wool with wool, cotton with cotton, etc.
The iron heats quickly and cools slowly; thus always start with clothing which requires a low tempe-
rature (like synthetic fabrics) and always progress with the highest temperatures.
When the cloth is made of several fabrics, set the temperature for the most delicate fabric.
If you do not know the type of fabric we recommend to iron the internal parts of clothing, from lowest
temperature, and then nding the temperature more adapted. If clothing becomes “brilliant”, stop
immediately in order to not damage it. Then start to iron it on the back.
N.B. pay attention to the symbol : the cloth or fabric must not be ironed.
DRY IRONING
For dry ironing (or without steam) set the temperature desired without pressing the steam buttons.
VERTICAL IRONING
The iron can produce steam also in vertical position and can be easily used to iron with a steam jet,
pressing the steam button.
Press the steam holding system button to have a permanent steam jet.
SAFETY CAP
The Steam Station is equipped with the safety cap, which prevents the children open the generator
tank as there is any pressure remaining inside the tank. This is an important and indispensable sa-
fety device, and it is necessary to follow certain procedures when re-lling the tank :
When you have used up all the water in the tank, do as follows:
1. Switch off the on/off switch.
2. Press the steam request button on the iron so as to fully exhaust the steam supply from the tank.
3. Disconnect the power supply cable from the mains.
4. Press and at the same time unscrew anti-clockwise the safety cap.
5. Wait for a few minutes to allow the generator tank to cool down.
6. When cool proceed to carefully rell the tank as described in paragraph la of the section “REPA-
RATION FOR USE” in the instructions. If relling the generator when not completely cooled, we
recommend that you carefully pour only very small quantities of water at each pouring into the tank,
so to avoid spitting form the tank.

17
Steam station Use instructions
CLEANING
Unplug the supply cord.
To clean the body of the appliance, simply use a moist cloth. Do not use solvents or detergents
which may harm the body material.
HOW TO STOCK YOUR STEAM STATION
Switch off the appliance by the button on 0 and unplug the supply cord.
Let the iron cool on the iron rest. Stock the steam station and pay attention that the supply cord does
not touch the hot parts.
Always stock the steam station on a stable surface and keep it away from children.
TECHNICAL DATA
Full power : 2100W
Iron power : 800W
Steam station power : 1300W
Power supply : 230V ~ 50Hz
For any improvement reasons, Beper reserves the right to modify or improve the product
without any notice.
DISPOSAL OF OLD ELECTRICAL APPLIANCES
The European directive 2011/65/EU on Waste Electrical and Electronic Equipment (WEEE), re-
quires that old household electrical appliances must not be disposed of in the normal unsorted
municipal waste stream. Old appliances must be collected separately in order to optimize the reco-
very and recycling of the materials they contain, and reduce the impact on human health and the
environment.
The crossed out “wheeled bin” symbol on the product reminds you of your obligation,
that when you dispose of the appliance, it must be separately collected.

CONTACT YOUR DISTRIBUTOR IN YOUR COUNTRY OR AFTER SALES DEPARTMENT
BEPER. E-MAIL assistenza@beper.com
WHICH WILL FORWARD YOUR ENQUIRIES TO YOUR DISTRIBUTOR.
GUARANTEE CERTIFICATE
This appliance has been checked in the factory. From the date of original purchase a 24 month
guarantee applies to material and production defects. The purchase receipt and the guarantee cer-
ticate must be submitted together in case of claim to guarantee.
For any technical assistance, please contact directly the seller or our head ofce in order to preserve
the appliance’s efciency and NOT TO void the guarantee. Any intervention on this appliance by
non-authorized persons will automatically void the guarantee.
Guarantee conditions
If the appliance shows defects as a result of faulty material and/or production during the period of
guarantee, we guarantee repair free of charge on condition that:
- The appliance has been used properly and for the purpose for which it has been intended.
- Repairs are professionally carried out by qualied persons who are appointed by the supplier.
- The purchase receipt shall be presented.
- The appliance showing a fair wear and tear shall not be covered by this guarantee.
Therefore, any part that could be accidentally broken or having visible signs of use in consuma-
ble products (such as lamps, batteries, heating elements…) is excluded from the guarantee, and
any defect whatsoever resulting from non-respect of the rules for use, negligence in usage and/or
maintenance of the appliance, damage during transport and any other damage not attributable the
supplier.
For every defect that could not be repaired within the guarantee period, the appliance will be repla-
ced free of charge.
Technical assistance
Even after the guarantee period we will always pay attention to repairs for defected appliances.
For technical assistance and/or repairs after the guarantee period you can directly contact the below
address:

FRANÇAIS
Centrale vapeur Manuel d’instructions
19
PRECAUTIONS GENERALES
LIRE ATTENTIVEMENT LES INSTRUCTIONS SUIVANTES AVANT LA PREMIERE UTILISATION
DE L’APPAREIL.
Avant et durant l’utilisation de cet appareil il est nécessaire de suivre précautions élémentaires
suivantes.
Après avoir enlever l’emballage, s’assurer de l’intégrité de l’appareil. En cas de doute ne
pas utiliser l’appareil et s’adresser à un professionel qualié. Les éléments d’emballage
(sachets plastique, polystirène, etc.) ne doivent pas être laissés à la portée des enfants,
car potentiellement dangereux.
Il est recommandé de ne pas jeter les éléments d’emballage dans les déchets ménagers,
mais de les déposer dans les centres de traitement des déchets appropriés, en deman-
dant éventuellement conseil au gérant du centre de sa commune de résidence.
Toujours s’assurer que la tension électrique soit la même que celle indiquée sur l’étiquette
des données techniques et que le réseau électrique soit compatible avec la puissance de
l’appareil.
En cas d’incompatibilité entre la prise électrique murale et celle de l’appareil faire changer
la prise de l’appareil par un professionel qualié. Ce dernier devra s’assurer que la sec-
tion des câbles de la prise soit adaptée à la puissance absorbée par l’appareil.
Ne jamais tirer sur le câble d’alimentation pour débrancher la prise électrique.
S’assurer que le câble n’entre pas en contact avec des supercies chaudes ou coupantes.
Ne pas utiliser l’appareil si le câble d’alimentation est abîmé.
Si le câble d’alimentation est endommagé, pour éviter tout risque, il devra être substitué par le con-
structeur, par son service d’assistance technique ou toute autre personne de même qualication.
Brancher l’appareil exclusivement sur une prise de courant alterné.
Il est en général déconseiller d’utiliser des adaptateurs, prises multiples et/ou rallonges. En cas de
nécessité, utiliser seulement des adaptateurs ou rallonges conformes aux normes de sécurité en
vigueur.
Cet appareil ne devra être utilisé que pour l’usage pour lequel il a été conçu.
Tout autre usage sera considéré comme inapproprié et donc dangereux, et engendrera l’annulation
de la garantie. Le construteur ne peut être tenu pour responsabile en cas de dommages causés par
une utilisation incorrecte, inappropriée et déraisonnable.
Pour éviter tout risque d’échauffement il est recommandé de dérouler entièrement le câble d’alimen-
tation et de débrancher l’appareil de la prise de courant en cas d’inutilisation.
Avant d’effectuer toute opération de nettoyage ou entretien, débrancher l’appareil de la prise de
courant électrique.
Ne jamais immerger l’appareil dans l’eau ou d’autres liquides.
Ne pas toucher l’appareil avec les mains et pieds mouillés ou humides.
Ne pas utiliser l’appareil si vous êtes pieds nus.
Ne pas laisser l’appareil exposés aux agents atmosphériques comme la pluie, le soleil …
Ne pas laisser l’appareil près d’une source de chaleur (ex. Radiateur)
Ne pas laisser les enfants, les personnes avec des capacités physiques, sensorielles ou mentales
réduites, ou manquant d’expérience ou de connaissance technique, utiliser cet appareil sans sur-
veillance
S’assurer que les enfants ne jouent pas avec cet appareil.
Dès lors que l’appareil doit être détruit, il est recommandé de couper le câble d’alimentation, et de
retirer toutes les parties suscpetibles de présenter un quelconque danger, en particulier pour les
enfants qui pourraient utiliser cet appreil comme un jeu.

20
Centrale vapeur Manuel d’instructions
CONSEILS D’UTILISATION
Vérier que le voltage du réseau électrique corrisponde bien à celui indiqué sur l’étiquette.
Si le câble d’alimentation est endommagé au niveau de la prise ou s’il y a de courts circuits, ne pas
utliser l’appareil et le faire réparer dans un centre d’assistance autorisé.
Lors de la première utilisation du fer à repasser, retirer la pélicule de protection de la plaque.
Lors de la première utilisation, la plaque pourrait émettre une légère fumée causée par l’évaporation
de l’huile protectrice appliquée au moment de la fabrication ; ceci ne doit en aucun cas vous préoc-
cuper, après quelques utilisation la fumée disparaîtra.
Il est possible d’observer des résidus dans le réservoir provenant de la fabrication ; lors de la
première utilisation du fer à repasser faire sortir plusieurs fois la vapeur an d’éliminer les résidus
internes.
Le câble électrique ne doit jamais comporter de noeuds ou énchevêtrement quelconque.
Ne pas tirer sur le câble pour débrancher la prise de courant électrique.
Ne pas enrouler le câble électrique autour du fer à repasser.
Maintenir le câble d’alimentation à une distance raisonnable de la plaque, en particulier quand celle-
ci est chaude.
En cas de pause et lors de toute inutilisation, reposer le fer à repasser sur la plaque isolante en
silicone, en position verticale.
Ne pas laisser l’appareil branché sans surveillance.
Remplir le réservoir avec de l’eau avant la mise sous tension de l’appareil. Les opérations de rem-
plissage d’eau doivent être effectuées lorsque le câble d’alimentation est débranché.
Ne pas remplir le reservoir au delà de sa capacité maximum.
Ne pas introduire de mélange détachant, vinaigre, agent désincrustant ou chimique, utiliser unique-
ment l’eau distillée ou déminéralisé.
Positionner la centrale de repassage sur une surface plane, stable et résistante à la chaleur.
La plaque du fer à repasser devient très chaude, veillez à ne pas vous brûler.
Attention de ne pas approcher le visage à la vapeur qui sort du fer.
Toujours choisir la température adéquate selon le vêtement à repasser.
Ne pas utiliser le fer à repasser comme source de chaleur. Ne pas repasser les vêtements humides,
les laisser sécher avant d’appliquer le fer à repasser. Ne jamais repasser les vêtements portés à
même le corps.
Ne pas passer le fer à repasser sur les boutons ou fermeture éclair pour ne pas abimer la plaque.
Veillez à ne pas cogner le fer à repasser. Ne pas toucher les parties du fer quand celui-ci est en
marche et dans les minutes suivant l’extinction pour éviter tout risque de brûlures.
Ne pas poser le fer à repasser chaud sur le câble d’alimentation et faire attention à ce que celui-ci
n’entre pas en contact avec la plaque chaude du fer à repasser.
Ne pas ouvrir le bouchon de la centrale vapeur lors de son fonctionnement.
Avant tout nettoyage débrancher la prise électrique.
Table of contents
Languages:
Other Beper Iron manuals

Beper
Beper P204FER003 Operating and maintenance manual

Beper
Beper 50.001 Quick guide

Beper
Beper P204FER100 Quick guide

Beper
Beper 50.971 Quick guide

Beper
Beper 50.937 Quick guide

Beper
Beper 50.200 Quick guide

Beper
Beper P204FER002 Operating and maintenance manual

Beper
Beper 50.980 User manual

Beper
Beper 50.050 Quick guide

Beper
Beper 50.161 Quick guide

Beper
Beper Stirello Quick guide

Beper
Beper P204CAL001 User manual

Beper
Beper 50.933H Quick guide

Beper
Beper 50.000 Quick guide

Beper
Beper 50.101 Quick guide

Beper
Beper P204FER250 Quick guide

Beper
Beper P204FER200 Quick guide

Beper
Beper P204CAL200 Quick guide

Beper
Beper 50.943 Quick guide

Beper
Beper 50.815 Quick guide