manuals.online logo
Brands
  1. Home
  2. •
  3. Brands
  4. •
  5. Bticino
  6. •
  7. Control Unit
  8. •
  9. Bticino N4575CW User manual

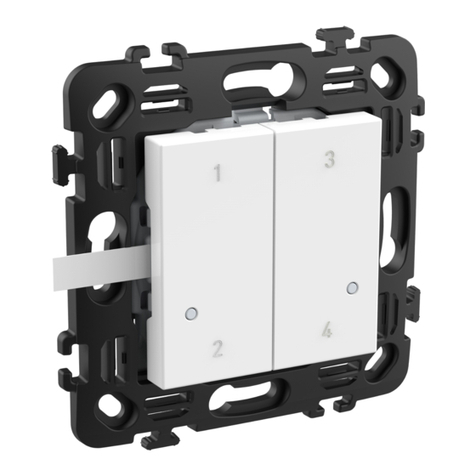
Bticino N4575CW User manual

N4575CW
NT4575CW
L4575CW
06/20-01 PC
LE12290AA
BTicino SpA – Viale Borri, 231 – 21100 Varese – Italy – www.bticino.com
12
Con scatola 502E
With 502E box
Avec boîte 502E
Mit Dose 502E
Con caja 502E
Met doos 502E
Com caixa 502E
С использованием
коробки 502E

502E
BT-N4575CW
18W08 070
02 018
MAC: 00:04:74:00:00:7A:8A:F8
2
1
Con adesivo
riposizionabile
With removable sticker
Avec adhésif
repositionnable
Mit wiederpositionierbare
Klebestreifen
Con adhesivo
reposicionable
Met verplaatsbare sticker
Com adesivo
reposicionável
С переустанавливаемой
наклейкой


1
2
A muro
On the wall
Mural
Wandmontage
Mural
Aan de wand
Na parede
Настенный

Il dispositivo NON è compatibile con le placche serie LIVINGLIGHT AIR.
The device is NOT compatible with the LIVINGLIGHT AIR cover plates.
Le dispositif N’EST PAS compatible avec les plaques de la série LIVINGLIGHT AIR.
Das Gerät ist NICHT mit den Platten der Serie LIVINGLIGHT AIR kompatibel.
El equipo NO es compatible con las placas serie LIVINGLIGHT AIR.
Het apparaat is NIET compatibel met platen uit de serie LIVINGLIGHT AIR.
O dispositivo NÃO é compatível com as placas da série LIVINGLIGHT AIR.
Устройство НЕСОВМЕСТИМО с пластинами серии LIVINGLIGHT AIR.
.LIVINGLIGHT AIR
L’azionamento da remoto può causare danni a persone o cose.
Remote operation may cause damage to people or property.
L’actionnement à distance peut causer des dommages corporels ou matériels.
Die Betätigung von fern kann Personen- oder Sachschäden verursachen.
El accionamiento a distancia puede causar daños a personas o cosas.
De aansturing op afstand kan persoonlijk letsel of materiële schade veroorzaken.
O acionamento à distância pode causar danos às pessoas ou aos bens.
Дистанционный пуск может причинить ущерб людям или предметам.

1
22
11
3 3
22
1
BT-N4575CW
18W08 070
02 018
MAC: 00:04:74:00:00:7A:8A:F8
4
*Da acquistare separatamente
To be purchased separately
À acheter séparément
Getrennt zu erwerben
Comprar por separado
Apart kopen
A adquirir separadamente
Приобретается отдельно

3
*
• Configurazione • Configuration • Configuration • Konfiguration • Configuración • Configuratie • Configuração • Конфигурация 
Per eseguire la prima installazione, la sostituzione e/o rimozione di un dispositivo e per qualsiasi altra informazione, fare riferimento alla App od al manuale del gateway scaricabile dal sito:
For the rst installation and/or replacement, and/or removal of the device, or any other information, refer to the App or to the gateway manual, which can be downloaded from the website:
Pour eectuer la première installation, le changement et/ou le retrait d’un dispositif et pour toute autre information, faire référence à l’appli ou au manuel de la passerelle téléchargeable en se rendant sur le site :
Um ein Gerät zum ersten Mal zu installieren und/oder auszutauschen und/oder zu entfernen, sowie für weitere Informationen, beziehen Sie sich bitte auf die App oder das Handbuch oder des Gateways, das von der
Website heruntergeladen werden kann:
Para efectuar la primera instalación, la sustitución y/o el desmontaje de un equipo y para otra información, se ha de consultar la App o el manual del gateway, que puede descargarse en el sitio:
Raadpleeg de App of de handleiding van de gateway, door deze de website te downloaden, voor de eerste installatie, de vervanging en/of de verwijdering van een apparaat en andere informatie:
Para executar a primeira instalação, a substituição e/ou a remoção de um dispositivo e para qualquer outra informação, roga-se consultar a APP ou manual do gateway que pode ser baixado do site:
Для выполнения первой установки, замены и/или удаления устройства или для получения любой другой информации обращаться к приложению или к руководству шлюза, которое можно скачать на сайте:
gateway
www.homesystems-legrandgroup.com
- ANDROID: Richiede Android 5.0 e successivo con accesso a Google Play
- ANDROID: requires Android 5.0 and higher with access to Google Play
- ANDROID : nécessite Android 5.0 ou suivant avec accès à Google Play
- ANDROID: erfordert Android 5.0 und höher mit Zugriff auf Google Play
- ANDROID: requiere Android 5.0 y sucesivo con acceso a Google Play
- ANDROID: vereist Android 5.0 en hoger met toegang tot Google Play
- ANDROID: requer Android 5.0 e posterior com acesso a Google Play
- ANDROID: Требует Android 5.0 или следующей версии с доступом к Google Play
5.0ANDROID
- iOS: Richiede un iPhone, iPad, o iPod touch con iOS 12.0 o successivo.
- iOS: requires an iPhone, iPad, or iPod touch with iOS 12,0 or later
- iOS : nécessite un iPhone, un iPad ou un iPod touch avec iOS 12.0 ou suivant
- iOS: erfordert ein iPhone, iPad oder iPod touch mit iOS 12.0 oder höher
- iOS: requiere el uso de un iPhone, iPad, o iPod touch con iOS 12.0 o sucesivo
- iOS: vereist een iPhone, iPad, of iPod touch met iOS 12.0 of hoger
- iOS: requer um iPhone, iPad, ou iPod touch com iOS 12.0 ou posterior
- iOS: Требует использования iPhone, iPad или iPod touch с iOS 12.0 или следующей версией
iOS 12.0iOS
www.homesystems-legrandgroup.com
App Home + Control
• Montaggio • Mounting • Montage • Montage • Montaje • Montage • Montagem • Монтаж 
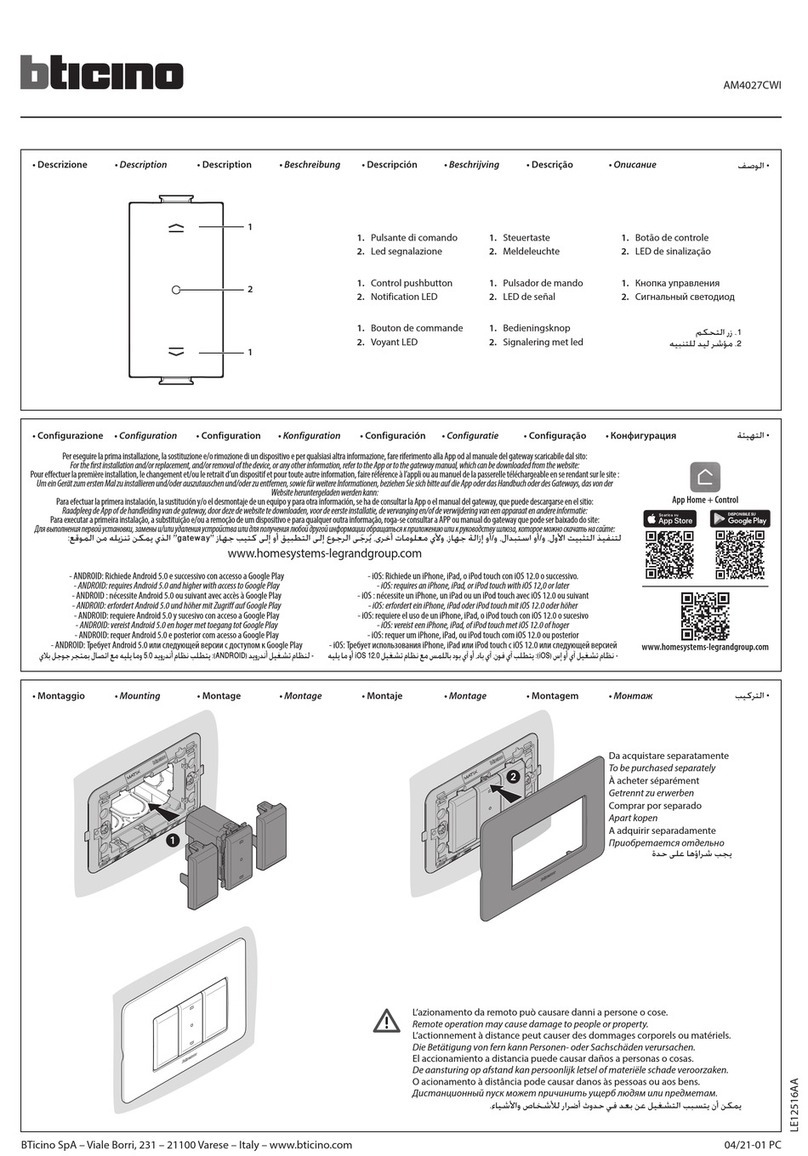
1. Fixing holes
(centre distance 60 mm)
2. Control pushbutton
3. Notification LED
4. Removable stickers
1. Befestigungslöcher
(Zwischenabstand 60 mm)
2. Steuertaste
3. Meldeleuchte
4. Wiederpositionierbare
Klebestreifen
1. Bevestigingsgaten
(tussenafstand 60 mm)
2. Bedieningsknop
3. Signalering met led
4. Verplaatsbare stickers
1. Крепежныеотверстия
(межосевоерасстояние 60 мм)
2. Кнопка управления
3. Сигнальныйсветодиод
4. Переустанавливаемые наклейки
1. Trous de fixation
(entraxe 60 mm)
2. Bouton de commande
3. Voyant LED
4. Adhésifs repositionnables
1. Agujeros de fijación
(distancia entre ejes 60 mm)
2. Pulsador de mando
3. LED de señal
4. Adhesivos reposicionables
1. Furos de fixação
(distância entre eixos de 60 mm)
2. Botão de comando
3. LED de sinalização
4. Adesivos reposicionáveis
1. Fori di fissaggio
(interasse 60 mm)
2. Pulsante di comando
3. Led segnalazione
4. Adesivi riposizionabili
1
60
2
3
4
• Descrizione • Description • Description • Beschreibung • Descripción • Beschrijving • Descrição • Описание 
2
• Reset alle impostazioni di fabbrica
• Reset to the factory settings
• Rétablissement des réglages par défaut
• Default-Einstellungen wieder herstellen
• Restablecer los ajustes de la fábrica
• Reset van de fabrieksinstellingen
• Resetar definições de fábrica
• Восстановление фабричных настроек

Attenzione: la pressione involontaria breve del pulsante reset, avvia l’associazione dei dispositivi. Per teminarla,
premere brevemente e contemporaneamente i due tasti del comando radio Master (se presente) oppure premere
brevemente il pulsante di reset del gateway.
Warning: a short accidental pressure of the reset pushbutton, starts the device association. To end it, briefly press at the
same time the two keys of the Master radio control (if present), or briefly press the reset button of the gateway.
Attention: une brève pression involontaire sur le bouton de reset active l’association des dispositifs. Pour l’arrêter,
appuyer brièvement et simultanément sur les deux touches de la commande radio Master (si présente) ou appuyer
brièvement sur le bouton de reset de la passerelle.
Achtung: Durch den kurzen versehentlichen Druck der Reset-Taste wird die Zuordnung der Geräte gestartet. Um sie zu
beenden, drücken Sie kurz die beiden Tasten auf der Master-Funksteuerung (falls vorhanden) oder drücken Sie kurz die
Reset-Taste am Gateway.
Atención: la presión involuntaria breve de la tecla de reset acciona la asociación de los dispositivos. Para acabarla,
presione brevemente y, al mismo tiempo, las dos teclas del mando radio Master (si presente) o brevemente la tecla de
reset del gateway.
Opgelet: het koppelen van de apparaten wordt gestart als de resetknop per ongeluk wordt ingedrukt. Druk de twee toetsen
van de draadloze masterbediening (indien aanwezig) tegelijkertijd kort in of druk kort op de resetknop van de gateway om
het koppelen te onderbreken.
Atenção: a pressão involuntária breve do botão Reset inicia a associação dos dispositivos. Para a terminar, carregar
breve e simultaneamente nos nas duas teclas de do comando rádio Master (se houver) ou brevemente no botão de reset
do gateway.
Внимание: случайное кратковременное нажатие на кнопку сброса запускает сопряжение устройств. Для
его завершения следует кратковременно и одновременно нажать на две кнопки главного устройства
радиоуправления (при наличии) или кратковременно нажать на кнопку сброса шлюза.



Premere e mantenere premuto il pulsante reset fino a quando lampeggia rosso.
A questo punto rilascia, il LED lampeggia verde, poi diventa rosso poi si spegne. Il reset è eseguito.
Press and hold down the reset pushbutton until it flashes red.
Now release the pushbutton, the LED flashes green, then turns red and then it goes off. The reset has been done.
Appuyer sur le bouton de reset et le maintenir enfoncé jusqu’au clignotement rouge.
Ensuite le relâcher : le voyant clignote sur le vert, devient rouge puis s’éteint. Le reset est effectué.
Drücken die Taste Reset und halten Sie sie gedrückt bis sie rot blinkt.
Die Taste dann loslassen, die LED blinkt grün, dann rot bis sie erlischt. Reset durchgeführt.
Presionar sin soltar el botón reset hasta que parpadee en color rojo.
Entonces, soltar, el LED se pone verde y luego rojo y se apaga. El reset se ha efectuado.
Houd de resetknop ingedrukt tot de led rood begint te knipperen.
Laat de knop nu los. De led knippert groen, kleurt vervolgens rood en gaat daarna uit. De reset is verricht.
Carregar e manter carregado o botão até piscar a vermelho.
Nesta altura soltar, o LED pisca verde, depois torna-se vermelho e então se desliga O reset foi efetuado.
Нажать и удерживать кнопку сброса до тех пор, пока она не начнет мигать красным светом.
После этого отпустить кнопку, светодиод начнет мигать зеленым, а затем красным светом, после чего погаснет. Сброс
выполнен.
 


1
2
Lo smaltimento delle batterie esauste deve essere eettuato nel rispetto delle leggi
vigenti.
Flat batteries must be disposed of respecting the laws in force.
L’élimination des batteries usées doit s’eectuer dans le respect de la règlementation en
vigueur.
Die erschöpften Batterien müssen gemäß den geltenden Vorschriften entsorgt werden.
La eliminación de las baterías gastadas se ha de efectuar en cumplimiento de las leyes
vigentes.
Uitgeputte batterijen moeten verwijderd worden in overeenstemming met de toepasselijke
wetgeving.
O descarte das baterias esgotadas deverá ser feito atendo-se rigorosamente às leis
vigentes.
Отработанные аккумуляторные батареи должны утилизироваться в соответ-
ствии с действующим законодательством

13
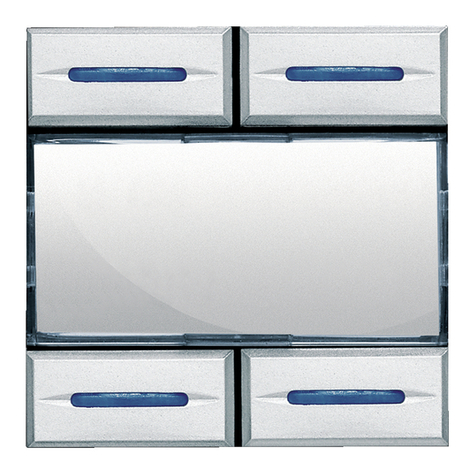
Il fabbricante, BTicino S.p.A., dichiara che il tipo di apparecchiatura radio comando4 scenari wireless art. L/N/NT4575CW è conforme alla direttiva 2014/53/UE.
Il testo completo della dichiarazione di conformità UE è disponibile al seguente indirizzo Internet: www.bticino.it/red
Hereby, BTicino S.p.A., declares that the radio equipment type 4 scenes wireless switch item L/N/NT4575CW is in compliance with Directive 2014/53/EU.
The full text of the EU declaration of conformity is available at the following internet address: www.bticino.it/red
+ 45 °C
+ 5 °C
45+
5+
Tecnologia Radio (Maglie di rete senza fili)
Livello di potenza <100mW
Frequenza di banda da 2,4 a 2,4835 GHz
Technology Radio (Wireless meshed network)
Power level <100mW
Band frequency from 2,4 to 2,4835 GHz
Technologie Radio (Réseau maillé sans fil)
Niveau de puissance <100mW
Fréquence de bande de 2,4 à 2,4835 GHz
Technologie Radio (Maschen eines drahtlosen Netzes)
Leistungsniveau <100mW
Bandfrequenz von 2,4 bis 2,4835 GHz
Tecnologia Radio (Mallas de red sin hilos)
Nivel de potencia <100mW
Frecuencia de banda de 2,4 a 2,4835 GHz
Technologie Radio (draadloos netwerkschakels)
Vermogensniveau <100mW
Frequentieband 2,4 t/m 2,4835 GHz
Tecnologia Rádio (links de rede sem fio)
Nível de potência <100mW
Frequência de banda de 2,4 a 2,4835 GHz
Технология Радио (Ячейки беспроводной сети)
Уровень мощности <100мВт
Полоса пропускания от 2,4 до 2,4835 ГГц
 
100< 
2,48352,4 
• Caratteristiche tecniche
• Technical features
• Caractéristiques techniques
• Technische Daten
• Características técnicas
• Technische eigenschappen
• Características técnicas
• Технические характеристики 
• Sostituzione della batteria
• Battery replacement
• Remplacement de la pile
• Batterie auswechseln
• Sustitución de la batería
• Vervanging van de batterij
• Substituição da bateria
• Замена аккумуляторной батареи

2
*
Batteria Lithium CR 2032 3 V
Lithium battery CR 2032 3 V
Pile Lithium CR 2032 3 V
Lithium-Batterie CR 2032 3V
Batería de litio CR 2032 3 V
Lithiumbatterij CR 2032 3 V
Bateria de Lítio CR 2032 3 V
Литиевая аккумуляторная
батарея CR 2032 3 В
CR 2032 3
*

This manual suits for next models

2

Other Bticino Control Unit manuals

Bticino L4488 User manual

Bticino

Bticino L4488 User manual

Bticino Terraneo 391612 User manual

Bticino

Bticino Terraneo 391612 User manual

Bticino AM4003CWI User manual

Bticino

Bticino AM4003CWI User manual

Bticino MP6-Megabreak MP6SH User manual

Bticino

Bticino MP6-Megabreak MP6SH User manual

Bticino M74D230 User manual

Bticino

Bticino M74D230 User manual

Bticino RW4575CW User manual

Bticino

Bticino RW4575CW User manual

Bticino Sfera Series User guide

Bticino

Bticino Sfera Series User guide

Bticino Sfera 352500 Operating manual

Bticino

Bticino Sfera 352500 Operating manual

Bticino AM4027CWI User manual

Bticino

Bticino AM4027CWI User manual

Bticino AM4890 User manual

Bticino

Bticino AM4890 User manual

Bticino M7000CB User manual

Bticino

Bticino M7000CB User manual

Bticino LN4003CWI User manual

Bticino

Bticino LN4003CWI User manual

Bticino F4N400 User manual

Bticino

Bticino F4N400 User manual

Bticino 375000 User manual

Bticino

Bticino 375000 User manual

Bticino KW8013 Operating manual

Bticino

Bticino KW8013 Operating manual

Bticino LIVING L4488 User manual

Bticino

Bticino LIVING L4488 User manual

Bticino BMNE500 User manual

Bticino

Bticino BMNE500 User manual

Bticino 351000 User manual

Bticino

Bticino 351000 User manual

Bticino LN4570CWI User manual

Bticino

Bticino LN4570CWI User manual

Bticino K4548 User manual

Bticino

Bticino K4548 User manual

Bticino F4N105 User manual

Bticino

Bticino F4N105 User manual

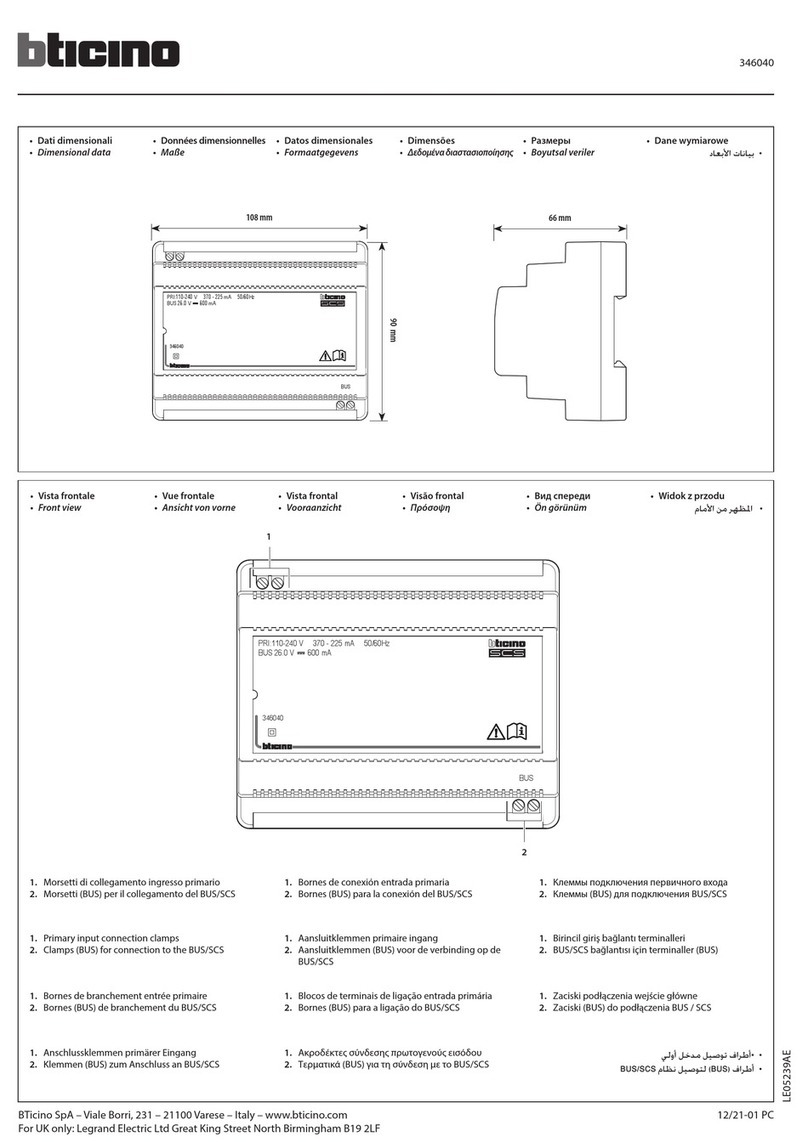
Bticino SCS 346040 User manual

Bticino

Bticino SCS 346040 User manual

Bticino Sfera video kit Operating manual

Bticino

Bticino Sfera video kit Operating manual

Bticino LN4890 User manual

Bticino

Bticino LN4890 User manual

Popular Control Unit manuals by other brands

ViaLite ViaLiteHD user guide

ViaLite

ViaLite ViaLiteHD user guide

Rockwell Automation Allen-Bradley 1606-XLSCAP24-6 instruction manual

Rockwell Automation

Rockwell Automation Allen-Bradley 1606-XLSCAP24-6 instruction manual

A.R.I. Eliptix R-30RM Installation, operation and maintenance

A.R.I.

A.R.I. Eliptix R-30RM Installation, operation and maintenance

Digi Connect ME Hardware reference

Digi

Digi Connect ME Hardware reference

Burkert 6213 EV operating instructions

Burkert

Burkert 6213 EV operating instructions

Viessmann 5220 Operation manual

Viessmann

Viessmann 5220 Operation manual

Zurn Wilkins ZW207 Installation, Troubleshooting, Maintenance Instructions

Zurn Wilkins

Zurn Wilkins ZW207 Installation, Troubleshooting, Maintenance Instructions

Lawler 410 Installation & maintenance manual

Lawler

Lawler 410 Installation & maintenance manual

Danfoss ChangeOver6 operating guide

Danfoss

Danfoss ChangeOver6 operating guide

LG Innotek ETWFAEWC01 user manual

LG Innotek

LG Innotek ETWFAEWC01 user manual

Victaulic KOIL-KIT 799 Series Installation and maintenance instructions

Victaulic

Victaulic KOIL-KIT 799 Series Installation and maintenance instructions

Cornelius Post-Mix Valves UFB-1 Operator's manual

Cornelius

Cornelius Post-Mix Valves UFB-1 Operator's manual

Delta Computer Systems VMC 186/40 manual

Delta Computer Systems

Delta Computer Systems VMC 186/40 manual

Espressif ESP8266 Series Technical reference

Espressif

Espressif ESP8266 Series Technical reference

Honeywell TR80 Installation and operating guide

Honeywell

Honeywell TR80 Installation and operating guide

PAW SolarBloC midi Basic Installation and operation instruction

PAW

PAW SolarBloC midi Basic Installation and operation instruction

Cabletron Systems SmartSwitch 9500 Hardware and installation guide

Cabletron Systems

Cabletron Systems SmartSwitch 9500 Hardware and installation guide

TQ-Systems TQMa8Xx Preliminary user's manual

TQ-Systems

TQ-Systems TQMa8Xx Preliminary user's manual

manuals.online logo
manuals.online logoBrands
  • About & Mission
  • Contact us
  • Privacy Policy
  • Terms and Conditions

Copyright 2025 Manuals.Online. All Rights Reserved.