manuals.online logo
Brands
  1. Home
  2. •
  3. Brands
  4. •
  5. Bticino
  6. •
  7. Control Unit
  8. •
  9. Bticino RW4575CW User manual

Bticino RW4575CW User manual

RW4575CW
RG4575CW
RA4575CW
06/20-01 PC
LE12166AA
BTicino SpA – Viale Borri, 231 – 21100 Varese – Italy – www.bticino.com
1
2
1
2
With 502E box
Avec boîte 502E
Con caja 502E
Me kuti 502E
S škatlo 502E
С кутия 502E
S kutijom 502E
Cu cutie 502E
Sa kutijom 502E

502E
BT-RW4575CW
18W08070
02018
M A C: 00:04:74:00:00:7A:8A:F8
2
1
With removable sticker
Avec adhésif repositionnable
Con adhesivo
reposicionable
Me ngjitës të ripozicionueshëm
S prestavljivo nalepko
С лепенка за многократна
употреба
S višekratnom naljepnicom
Cu adeziv repoziționabil
Sa repozicionirajućim
lepljivim trakama


On the wall
Mural
Mural
Në mur
Zidno
За стена
Zidne
De perete
Na zid

• Description • Description • Descripción • Përshkrimi • Opis • Описание • Opis • Descriere • Opis 
BT-RW4575CW
18W08 070
02 018
MAC: 00:04:74:00:00:7A:8A:F8
1
22
11
3 3
2
2
1
4
www.homesystems-legrandgroup.com
App Home + Control
• Configuration
• Configuration • Configuración
• Konfiguracioni • Konfiguracija
• Конфигуриране
• Konfiguracija
• Configurare • Konfiguracija

For the rst installation and/or replacement, and/or removal of the device, or any other information, refer to the App or to the gateway manual, which can be downloaded from the website:
Pour eectuer la première installation, le changement et/ou le retrait d’un dispositif et pour toute autre information, faire référence à l’appli ou au manuel de la passerelle téléchargeable en se rendant sur le site :
Para efectuar la primera instalación, la sustitución y/o el desmontaje de un equipo y para otra información, se ha de consultar la App o el manual del gateway, que puede descargarse en el sitio:
Për të kryer për herë të parë instalimin, zëvendësimin dhe/ose heqjen e një pajisjeje dhe për çdo informacion tjetër, referojuni Aplikacionit ose manualit të portës që mund të shkarkohet nga siti:
Če želite izvesti prvo namestitev, zamenjavo in / ali odstranitev naprave in za kakršno koli drugo informacijo, glejte aplikacijo ali navodila za prehod, ki jih lahko najdete na spletni strani:
За да осъществите първоначалното инсталиране, смяна или демонтаж на устройство, както и за всякаква друга информация, направете справка с Приложението или ръководството за шлюза, което можете да изтеглите от сайта:
Za potrebe prve instalacije, zamjene i/ili uklanjanja uređaja te za sve ostale informacije, koristite Aplikaciju ili priručnik gatewaya koji možete preuzeti na web-stranici:
Pentru a efectua prima instalare, înlocuirea și/sau eliminarea unui dispozitiv și pentru orice altă informație, consultați aplicația sau manualul pentru gateway, ce poate  descărcat de pe site-ul:
Kada se vrši prva instalacija, zamena i/ili uklanjanje nekog uređaja i za bilo kakvo objašnjenje, pogledajte aplikaciju ili priručnik za gateway na sajtu
gateway
www.homesystems-legrandgroup.com
- ANDROID: requires Android 5.0 and higher with access to Google Play
- ANDROID : nécessite Android 5.0 ou suivant avec accès à Google Play
- ANDROID: requiere Android 5.0 y sucesivo con acceso a Google Play
- ANDROID: Nevojitet Android 5.0 dhe versione të mëtejshme me akses në Google Play
- ANDROID: Zahteva Android 5.0 ali novejši z dostopom doTrgovine Play
- ANDROID: Изисква Android 5.0 или по-нова версия с достъп до Google Play
- ANDROID: Potreban je Android 5.0 i novije verzije s pristupom Google Playu
- ANDROID: Necesită Android 5.0 sau versiuni mai recente cu acces la Google Play
- ANDROID: Zahteva Android 5.0 i noviji sa pristupom usluzi Google Play
5.0ANDROID
- iOS: requires an iPhone, iPad, or iPod touch with iOS 12,0 or later
- iOS : nécessite un iPhone, un iPad ou un iPod touch avec iOS 12.0 ou suivant
- iOS: requiere el uso de un iPhone, iPad, o iPod touch con iOS 12.0 o sucesivo
- iOS: Nevojitet një iPhone, iPad, ose iPod touch me iOS 12.0 ose versione të mëtejshme
- iOS: Zahteva iPhone, iPad ali iPod touch z iOS 12.0 ali novejšim
- iOS: Изисква iPhone, iPad или iPod Touch с iOS 12.0 или по-нова версия
- iOS: Potreban je iPhone, iPad, o iPod touch s iOS-om 12.0 ili s novijim verzijama
- iOS: Necesită un iPhone, iPad sau iPod touch cu iOS 12.0 sau versiuni mai recente
- iOS: Zahteva iPhone, iPad ili iPod touch sa sistemom iOS 12.0 ili novijim
iOS 12.0iOS
1. Furos de fixação (distância
entre eixos de 60 mm)
2. Botão de comando
3. LED de sinalização
4. Adesivos reposicionáveis
1. Vrimat a fiksimit (bosht
i ndërmjetëm 60 mm)
2. Butoni i komandimit
3. Led sinjalizimi
4. Ngjitësa të
ripozicionueshëm
1. Rupe za fiksiranje
(međuosovinsko
rastojanje 60 mm)
2. Dugme komande
3. Signalna lučka
4. Repozicionirajuće
lepljive trake
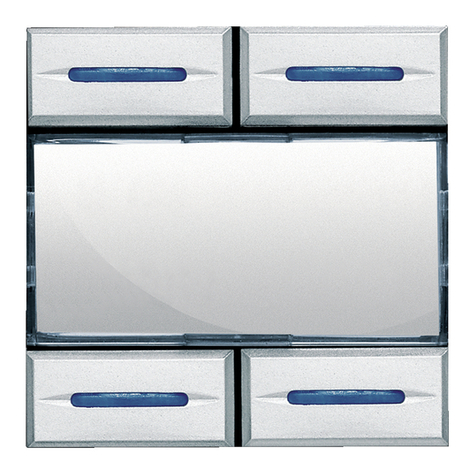
1. Fixing holes (centre
distance 60 mm)
2. Control pushbutton
3. Notification LED
4. Removable stickers
1. Trous de fixation
(entraxe 60 mm)
2. Bouton de commande
3. Voyant LED
4. Adhésifs repositionnables
1
60

2
3
4
1. Luknje za pritrditev
(medosje 60mm)
2. Krmilni gumb
3. LED индикатор
4. Prestavljive nalepke
1. Otvori za pričvršćivanje
(osovinski razmak 60
mm)
2. Upravljačka tipka
3. Led de semnalizare
4. Višekratne naljepnice
1. Отвори за закрепване
(разстояние между
центровете 60 мм)
2. Бутон за управление
3. Signalna led lampica
4. Лепенки за многократна
употреба
1. Orificii de fixare
(interax 60 mm)
2. Buton de comandă
3. Signalni Led
4. Adezivi repoziționabili
• Mounting • Montage • Montaje • Montimi • Montaža • Монтаж • Ugradnja • Montaj • Montaža 
*To be purchased separately
À acheter séparément
Comprar por separado
Duhet të blihet veçmas
Kupiti ločeno
Купува се отделно
Kupuje se zasebno
De achiziționat separat
Kupuje se odvojeno

*
3
2
• Technical features
• Caractéristiques techniques
• Características técnicas
• Karakteristikat teknike
• Tehnične značilnosti
• Технически характеристики
• Tehničke karakteristike
• Caracteristici tehnice
• Tehničke karakteristike

+ 45 °C + 45°C 
- 5 °C - 5°C 
Technology Radio (wireless mesh network)
Power level <100mW
Band frequency from 2,4 to 2,4835 GHz
Technologie Radio (réseaux maillés sans fil)
Niveau de puissance <100mW
Fréquence de bande de 2,4 à 2,4835 GHz
Tecnología Radio (mallas de red sin hilos)
Nivel de potencia <100mW
Frecuencia de banda de 2,4 a 2,4835 GHz
Teknologji Radio (Kryqëzime rrjetesh pa fije)
Niveli i fuqisë <100mW
Frekuenca e bandës nga 2,4 në 2,4835 GHz
Tehnologija Radijska (Brezžično prepleteno omrežje)
Močnostni nivo <100mW
Frekvenčni pas od 2,4 do 2,4835GHz
Технология Радио (безжични мрежи)
Ниво на мощността <100mW
Честотна лента от 2,4 до 2,4835 GHz
Tehnologija Radija (Bežična mreža)
Razina snage <100mW
Frekvencijski pojas od 2,4 do 2,4835 GHz
Tehnologie Radio (Plase de rețea fără fire)
Nivel de putere <100 mW
Frecvența de bandă de la 2,4 la 2,4835 GHz
Tehnologija Radio (mreže bez žica)
Nivo snage < 100 mW
Frekvencija opsega od 2,4 do 2,4835 GHz
 
100< 
2,48352,4 
13
Il fabbricante, BTicino S.p.A., dichiara che il tipo di apparecchiatura radio Comando4 scenari wireless art. RW/RG/RA4575CW è conforme alla direttiva 2014/53/UE. Il testo completo della dichiarazione di conformità UE è disponibile al seguente indirizzo Internet:
www.bticino.it/red
Hereby, BTicino S.p.A., declares that the radio equipment type 4 scenes wireless switch item RW/RG/RA4575CW is in compliance with Directive 2014/53/EU. The full text of the EU declaration of conformity is available at the following internet address: www.bticino.it/red
1
2
Press and hold down the reset pushbutton until it flashes red.
Now release the pushbutton, the LED flashes green, then turns red and then it goes off. The reset has
been done.
Appuyer sur le bouton de reset et le maintenir enfoncé jusqu’au clignotement rouge.
Ensuite le relâcher : le voyant clignote sur le vert, devient rouge puis s’éteint. Le reset est effectué.
Presionar sin soltar el botón reset hasta que parpadee en color rojo.
Entonces, soltar, el LED se pone verde y luego rojo y se apaga. El reset se ha efectuado.
Shtypni dhe mbajeni shtypur butonin e rivendosjes derisa të ndriçojë dritë të kuqe.
Në këtë pikë lëshojeni, LED-i do të ndriçojë ngjyrë të gjelbër, më pas do të ndriçojë ngjyrë të kuqe dhe më
pas do të fiket. Rivendosja është kryer me sukses.
Pritisnite in zadržite gumb za ponastavitev dokler ne začne rdeče utripati.
Zdaj spustite, LED lučka utripa zeleno, nato postane rdeča in se ugasne. Ponastavitev je izvedena.
Натиснете и задръжте натиснат бутона за нулиране , докато започне да мига в червено.
В този момент го отпуснете, LED индикаторът започва да мига в зелено, след което става
червен и после угасва. Възстановяването е завършено.
Pritisnite i zadržite tipku reset sve dok crvena lampica treperi.
Sada otpustite, zelena LED lampica treperi, zatim postane crvena i ugasi se. Resetiranje je izvršeno.
Apăsați lung butonul de resetare până când clipește în culoarea roșu.
În acest punct eliberează, LED-ul clipește în culoarea verde, apoi devine roșu și apoi se stinge. Resetarea
a fost efectuată.
Pritisnite i držite pritisnuto dugme reset sve dok ne zatreperi crveno.
Tada opustite dugme, LED zatreperi zeleno, zatim postaje crven pa se gasi. Resetovanje je izvršeno.
 


3
Warning: a short accidental pressure of the reset pushbutton, starts the device association.To end it, briefly press at the same time the two keys of the Master radio control (if present), or briefly press the reset button of the gateway.
Attention: une brève pression involontaire sur le bouton de reset active l’association des dispositifs. Pour l’arrêter, appuyer brièvement et simultanément sur les deux touches de la commande radio Master (si présente) ou appuyer brièvement sur le
bouton de reset de la passerelle.
Atención: la presión involuntaria breve de la tecla de reset acciona la asociación de los dispositivos. Para acabarla, presione brevemente y, al mismo tiempo, las dos teclas del mando radio Master (si presente) o brevemente la tecla de reset del
gateway.
Kujdes: shtypja e shkurtër dhe pa dashje e butonit të rivendosjes bën që pajisjet të fillojnë të lidhen me njëra tjetrën. Për ta ndërprerë lidhjen, shtypni shkurtimisht dhe njëkohësisht dy butonat e kontrollit radio Master (nëse i pranishëm) ose shtypni
shkurtimisht butonin e rivendosjes së portës.
Pozor: naključen kratek pritisk gumba za ponastavitev zažene povezovanje naprav. Prekinete jo tako, da na hitro istočasno pritisnete krmilni tipki radijskega krmilnika Master (če prisoten) ali na hitro pritisnete gumb za ponastavitev prehoda.
Внимание: при неволно натискане на бутона за нулиране за кратко време се стартира свързването на устройствата. За да го прекратите, натиснете за кратко едновременно двата бутона за радиоуправление Master (ако
ги има) или натиснете за кратко бутона за нулиране на шлюза.
Pažnja: slučajan kratki pritisak na tipku reset pokreće povezivanje uređaja. Za prekid povezivanja, kratko pritisnite istovremeno dvije tipke radijskog upravljanja Master (ako postoje) ili kratko pritisnite tipku za restiranje gatewaya.
Atenție: apăsarea accidentală scurtă a butonului de resetare pornește asocierea dispozitivelor. Pentru a-i pune capăt, apăsați scurt și simultan pe cele două taste ale comenzii radio Master (dacă există) sau apăsați scurt pe butonul de resetare pentru
gateway.
Pažnja: slučajno kratko pritiskanje dugmeta za resetovanje pokreće spajanje uređaja. Da bi se prekinulo, kratko pritisnite istovremeno dva tastera komande radio Master (ako ga ima) ili kratko pritisnite dugme za resetovanje gateway.


• Battery replacement
• Remplacement de la pile
• Sustitución de la batería
• Zëvendësimi i baterisë
• Menjava baterije
• Смяна на батерията
• Zamjena baterije
• Înlocuirea bateriei
• Zamena baterije

• Reset to the factory settings
• Rétablissement des réglages par défaut
• Restablecer los ajustes de la fábrica
• Rivendosje e parametrave të fabrikës
• Ponastavitev na tovarniške nastavitve
• Възстановяване на фабричните настройки
• Resetiranje na tvorničke postavke
• Resetarea setărilor din fabrică
• Resetovanje fabričkih postavki

Flat batteries must be disposed of respecting the laws in force.
L’elimination des batteries usees doit s’effectuer dans le respect de la reglementation en vigueur.
La eliminacion de las baterias gastadas se ha de efectuar en cumplimiento de las leyes vigentes.
Hedhja e baterive të shkarkuara duhet të bëhet në përputhje me ligjet në fuqi.
Iztrošene baterije morate odstraniti v skladu z veljavno zakonodajo.
Изхвърлянето на изтощените батерии трябва да става при спазване на действащото законодателство.
Zbrinjavanje praznih baterija mora biti izvršeno u skladu s normativom na snazi.
Eliminarea bateriilor descărcate trebuie efectuată cu respectarea legislațiilor în vigoare.
Uništavanje istrošenih baterija mora biti obavljeno uz poštovanje važećih propisa.

* Lithium battery CR 2032 3 V
Pile Lithium CR 2032 3 V
Batería de litio CR 2032 3 V
Bateri Litium CR 2032 3 V
Litijeva baterija CR 2032 3V
Литиева батерия CR 2032 3 V
Litij baterija CR 2032 3 V
Baterie Litiu CR 2032 3 V
Litijumska baterija CR 2032 3 V
CR 2032 3
*
2
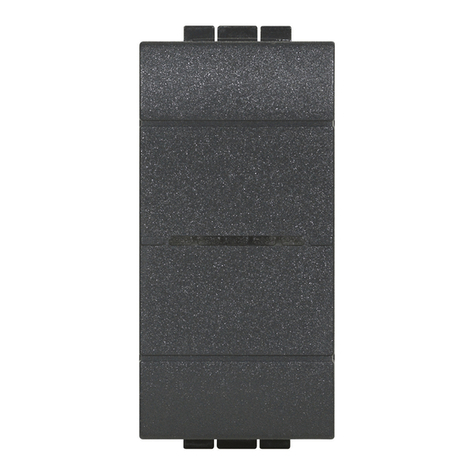
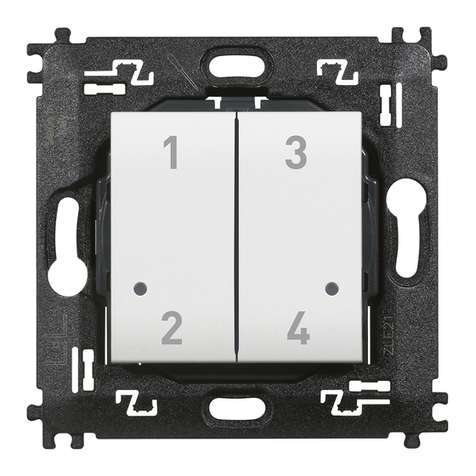
This manual suits for next models

2

Other Bticino Control Unit manuals

Bticino LN4003CWI User manual

Bticino

Bticino LN4003CWI User manual

Bticino F420 User manual

Bticino

Bticino F420 User manual

Bticino Sfera video kit Operating manual

Bticino

Bticino Sfera video kit Operating manual

Bticino MP6-Megabreak MP6SH User manual

Bticino

Bticino MP6-Megabreak MP6SH User manual

Bticino F4N400 User manual

Bticino

Bticino F4N400 User manual

Bticino LIVING L4488 User manual

Bticino

Bticino LIVING L4488 User manual

Bticino AM4890 User manual

Bticino

Bticino AM4890 User manual

Bticino AM4003CWI User manual

Bticino

Bticino AM4003CWI User manual

Bticino Scenario control User manual

Bticino

Bticino Scenario control User manual

Bticino F4N400 User manual

Bticino

Bticino F4N400 User manual

Bticino Living Now K4027CM2 User manual

Bticino

Bticino Living Now K4027CM2 User manual

Bticino 4027C User manual

Bticino

Bticino 4027C User manual

Bticino 351000 User manual

Bticino

Bticino 351000 User manual

Bticino F3N400 User manual

Bticino

Bticino F3N400 User manual

Bticino BMNE500 User manual

Bticino

Bticino BMNE500 User manual

Bticino N4575CW User manual

Bticino

Bticino N4575CW User manual

Bticino K4548 User manual

Bticino

Bticino K4548 User manual

Bticino 375000 User manual

Bticino

Bticino 375000 User manual

Bticino LN4890 User manual

Bticino

Bticino LN4890 User manual

Bticino M74D230 User manual

Bticino

Bticino M74D230 User manual

Bticino Terraneo 391612 User manual

Bticino

Bticino Terraneo 391612 User manual

Bticino SCS 346040 User manual

Bticino

Bticino SCS 346040 User manual

Bticino LN4027CWI User manual

Bticino

Bticino LN4027CWI User manual

Bticino L4531C User manual

Bticino

Bticino L4531C User manual

Popular Control Unit manuals by other brands

Proportion-Air QL3 Series Installation & maintenance instructions

Proportion-Air

Proportion-Air QL3 Series Installation & maintenance instructions

Glowworm Smart Wiring Center 2 Installation and servicing

Glowworm

Glowworm Smart Wiring Center 2 Installation and servicing

Keyautomation CT1RD Instructions and warnings for installation and use

Keyautomation

Keyautomation CT1RD Instructions and warnings for installation and use

preVent BR11 instruction manual

preVent

preVent BR11 instruction manual

Design Gateway AB14-CLKSMA manual

Design Gateway

Design Gateway AB14-CLKSMA manual

woodmizer Accuset 2 manual

woodmizer

woodmizer Accuset 2 manual

Delta R3707 manual

Delta

Delta R3707 manual

Ublox ZED-F9H Integration manual

Ublox

Ublox ZED-F9H Integration manual

red lion CSTC manual

red lion

red lion CSTC manual

Blu Stream Multicast ACM200 API Documentation

Blu Stream

Blu Stream Multicast ACM200 API Documentation

BOSSCO Ecomaxx Supplemental manual

BOSSCO

BOSSCO Ecomaxx Supplemental manual

B meters IWM-TX5 user manual

B meters

B meters IWM-TX5 user manual

ABB REC650 ANSI Applications manual

ABB

ABB REC650 ANSI Applications manual

EGi 41515H instruction manual

EGi

EGi 41515H instruction manual

COMEM MB 103 instruction manual

COMEM

COMEM MB 103 instruction manual

Keba D3-DA 3 Series Project engineering manual

Keba

Keba D3-DA 3 Series Project engineering manual

Panasonic INDUSTRY PAN9028 Integration guide

Panasonic

Panasonic INDUSTRY PAN9028 Integration guide

Discrete Wireless MARCUS 3G GPRS installation manual

Discrete Wireless

Discrete Wireless MARCUS 3G GPRS installation manual

manuals.online logo
manuals.online logoBrands
  • About & Mission
  • Contact us
  • Privacy Policy
  • Terms and Conditions

Copyright 2025 Manuals.Online. All Rights Reserved.