manuals.online logo
Brands
  1. Home
  2. •
  3. Brands
  4. •
  5. CAME
  6. •
  7. Gate Opener
  8. •
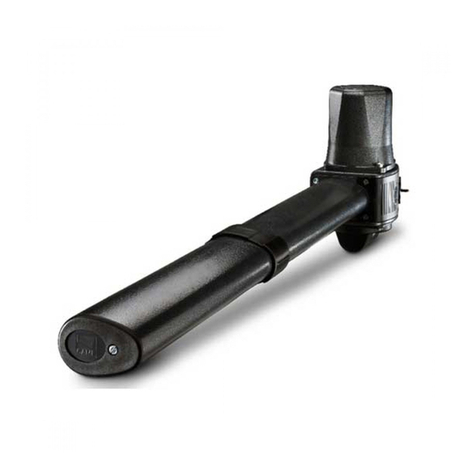
  9. CAME TOP Series User manual

CAME TOP Series User manual

This manual suits for next models

1

Other CAME Gate Opener manuals

CAME BK Series User manual

CAME

CAME BK Series User manual

CAME ATS-P3 KIT User manual

CAME

CAME ATS-P3 KIT User manual

CAME FA40230CB User manual

CAME

CAME FA40230CB User manual

CAME FA70230CB User manual

CAME

CAME FA70230CB User manual

CAME A 3024 N User manual

CAME

CAME A 3024 N User manual

CAME F7024N User manual

CAME

CAME F7024N User manual

CAME FTX20DGC User manual

CAME

CAME FTX20DGC User manual

CAME BX704AGS User manual

CAME

CAME BX704AGS User manual

CAME KRONO KR300 User manual

CAME

CAME KRONO KR300 User manual

CAME Ferni Series User manual

CAME

CAME Ferni Series User manual

CAME FE40230 User manual

CAME

CAME FE40230 User manual

CAME BXE 24 User manual

CAME

CAME BXE 24 User manual

CAME ATS-S3 User manual

CAME

CAME ATS-S3 User manual

CAME BKS22TGS User manual

CAME

CAME BKS22TGS User manual

CAME BXV Rapid Series User manual

CAME

CAME BXV Rapid Series User manual

CAME BIANCA-C User manual

CAME

CAME BIANCA-C User manual

CAME FE40230 User manual

CAME

CAME FE40230 User manual

CAME PB1100 User manual

CAME

CAME PB1100 User manual

CAME BK-221 User manual

CAME

CAME BK-221 User manual

CAME VER10DMS User manual

CAME

CAME VER10DMS User manual

CAME ATS-P324 User manual

CAME

CAME ATS-P324 User manual

CAME FROG J User manual

CAME

CAME FROG J User manual

CAME FROG series User manual

CAME

CAME FROG series User manual

CAME CBX series User manual

CAME

CAME CBX series User manual

Popular Gate Opener manuals by other brands

Nortek Security & Control Mighty Mule HD272 installation manual

Nortek Security & Control

Nortek Security & Control Mighty Mule HD272 installation manual

tousek TURN 10 Installation and operating instructions

tousek

tousek TURN 10 Installation and operating instructions

SOMFY AXOVIA 220B RTS installation instructions

SOMFY

SOMFY AXOVIA 220B RTS installation instructions

Nice HySecurity CBOX1050 Installation and programming manual

Nice HySecurity

Nice HySecurity CBOX1050 Installation and programming manual

Aprimatic ONDA 500 installation instructions

Aprimatic

Aprimatic ONDA 500 installation instructions

Turnstiles FSW 900 manual

Turnstiles

Turnstiles FSW 900 manual

Erreka BUL BL33 Quick installation and programming guide

Erreka

Erreka BUL BL33 Quick installation and programming guide

Extel VERA quick guide

Extel

Extel VERA quick guide

Beninca R1-2 WBV quick start guide

Beninca

Beninca R1-2 WBV quick start guide

Erreka VULCAN D user manual

Erreka

Erreka VULCAN D user manual

Motorline professional FORT User& installer's manual

Motorline professional

Motorline professional FORT User& installer's manual

Beninca BOB5024 manual

Beninca

Beninca BOB5024 manual

AGA GATEMASTER 900 HD installation manual

AGA

AGA GATEMASTER 900 HD installation manual

Cardin BL Series manual

Cardin

Cardin BL Series manual

Westfalia 85 27 06 instruction manual

Westfalia

Westfalia 85 27 06 instruction manual

Riello Elettronica CARDIN ACE FAST Instruction handbook

Riello Elettronica

Riello Elettronica CARDIN ACE FAST Instruction handbook

Telcoma ARM Instruction handbook

Telcoma

Telcoma ARM Instruction handbook

Telcoma ACE Instruction handbook

Telcoma

Telcoma ACE Instruction handbook

manuals.online logo
manuals.online logoBrands
  • About & Mission
  • Contact us
  • Privacy Policy
  • Terms and Conditions

Copyright 2025 Manuals.Online. All Rights Reserved.

3
-> Met actieve TOP-zenders
1 - druk gelijktijdig op de twee toetsen totdat het
lampje sneller knippert;
2 - druk dan op de te activeren toets: het lampje
gaat branden;
3 - houd binnen de 10 seconden de achterkant
van de zender tegen de actieve zender en druk op
de te dupliceren toets.
Zodra de code is opgeslagen, knippert het lampje
3 keer en is de zender klaar voor gebruik. Herhaal
deze procedure voor de andere toetsen.
-> Voor een NIEUWE INSTALLATIE
RAADPLEEG DE DOCUMENTATIE VAN HET BEDIENINGSPANEEL OM
DE EERSTE ZENDER TE PROGRAMMEREN EN HERHAAL DAN DE
HIERBOVEN BESCHREVEN PROCEDURE.
NL
NL
-> Con TOP activos
1 - pulse los 2 botones juntos hasta que el Led
parpadee más rápido;
2 - ahora pulse el botón a activar: el Led se
enciende;
3 - dentro de 10”, apoye sobre la parte trasera
el emisor activo (véase figura) y pulse el botón a
duplicar durante algunos segundos.
Una vez memorizado, el LED parpadeará 3 veces
y el emisor estará listo para ser usado. Repita los
puntos 1, 2 y 3 para el otro botón.
-> Para una NUEVA INSTALACIÓN
CONSULTE LA DOCUMENTACIÓN DEL CUADRO DE MANDO
PARA MEMORIZAR EL 1
O
EMISOR YSIGA EL PROCEDIMIENTO
ANTEDICHO PARA DUPLICARLO.
ES
ES
-> Mit bereits aktivierten TOP
1 - die beiden Taster zusammen so lange
drücken, bis die LED schneller aufblinkt;
2 - nun den zu aktivierende Taster drücken: die
LED schaltet sich ein;
3 - innerhalb von 10 Sekunden die Rückseite an
das aktivierte Sendegerät halten (siehe Figur) und
den zu kopierenden Taster kurz drücken.
Nach erfolgter Speicherung blinkt die LED dreimal
auf und das Sendegerät ist betriebsbereit. Die
Punkte 1,2 und 3 für den anderen Taster
wiederholen.
-> Für eine NEUE ANLAGE
ZUM EINSPEICHERN DES 1 SENDEGERÄT, DIE UNTERLAGEN DER
STEUERUNG EINSEHEN; DANACH ZUM KOPIEREN DESSELBEN
WIE OBEN BESCHRIEBEN VORGEHEN.
DE
DE
-> Avec des
TOP
déjà actifs
1 - appuyez en même temps sur les 2 touches
jusqu’à ce que la led clignote plus rapidement;
2 - appuyez ensuite sur la touche à mettre en
marche : la led s’allume;
3 - dans les 10 secondes, placez sa partie
postérieure contre l’émetteur actif (voir dessin)
et appuyez pendant quelques instants sur la
touche à copier.
Après avoir effectué la mise en mémoire, la Led
clignotera 3 fois et le émetteur sera prêt à être
utilisé. Répétez les opérations 1, 2 et 3 pour
l’autre touche.
-> Pour une NOUVELLE INSTALLATION
CONSULTEZ LA DOCUMENTATION DE L’ARMOIRE DE COMMANDE
POUR MÉMORISER LE 1
ER
ÉMETTEUR ET SUIVEZ LA PROCÉDURE
DÉCRITE CI-DESSUS POUR LE COPIER.
FR
FR
-> With TOPs already active
1- press the 2 buttons together until the LED
starts flashing more quickly;
2- now press the button that needs activating:
the LED turns on;
3 - within 10”, rest its back part against the active
transmitter (see figure) and press the button that
needs duplicating for a few seconds.
After at this point the LED will flash 3 times mea-
ning the transmitter is ready. Repeat steps 1, 2
and 3 for the other button.
-> For NEW SYSTEMS
READ TO SAVE THE FIRST TRANSMITTER READ THE CONTROL
PANEL MANUAL, THEN FOLLOW THE ABOVE PROCEDURE TO
DUPLICATE IT.
EN
EN
-> Con TOP già attivi
1 - premere assieme i 2 tasti fino a quando il Led
lampeggia più velocemente;
2 - premere ora il tasto da attivare: il Led si
accende;
3 - entro 10”, appoggiare alla sua parte posteriore
(vedi figura) il trasmettitore attivo e premere per
qualche istante il tasto da duplicare.
A memorizzazione avvenuta, il LED lampeggerà
per 3 volte e il trasmettitore sarà pronto all’uso.
Ripetere 1, 2 e 3 per l’altro tasto.
-> Per un NUOVO IMPIANTO
CONSULTARE LA DOCUMENTAZIONE DEL QUADRO COMANDO
PER MEMORIZZARE IL 1
O
TRASMETTITORE, QUINDI SEGUIRE LA
PROCEDURA SOPRADESCRITTA PER DUPLICARLO.
IT
IT
1
2
TOP
TOP
432SD
432SD
serie TOP
serie TOP
CAME
CAME
CAME
CAME
già attivi
already active
déjà actifs
schon aktiv
ya activos
reeds actief
Intelligent Security & Fire Ltd.
GIÀ CODIFICATO! Per ogni tasto, viene memorizzato di serie
un codice diverso tra le 4.096 possibili combinazioni.
ALREADY CODED! At the factory each key is assigned a
different code, from among 4.096 possible combinations.
DÉJÀ CODIFIÉ ! De série, pour chaque touche un code
différent parmi les 4.096 combinaisons possibles est mis
en mémoire.
BEREITS CODIERT! Für jede Taste wird standardgemäß ein
unter 4.096 Kombinationen möglicher Code eingespeichert.
YA CODIFICADO! para cada botón se memoriza de serie un
código diferente entre las 4.096 combinaciones posibles.
REEDS GEPROGRAMMEERD! Voor iedere toets wordt
standaard een verschillende code uit de 4.096 mogelijke
combinaties opgeslagen.
001TOP-432SD 1
*001TOP-432SD* *1*
CAME
50÷150 m
n° 2 CR1620
3V d.c. Lithium
Per aprire, aiutarsi con un cacciavite. Smaltire le batterie
esauste secondo quanto previsto dalle norme vigenti.
To open, pry open with a screwdriver. Please dispose of used batteries
properly as established by your Waste Authority.
Pour ouvrir, procédez en utilisant un tournevis. L’élimination des batteries
usées doit s’effectuer conformément aux normes en vigueur.
Zum Öffnen, einen Schraubenzieher verwenden. Die verbrauchten
Batterien nach den geltenden Richtlinien entsorgen.
Para abrir, use un destornillador. Elimine las baterías
agotadas según las normas vigentes.
Openen met een schroevendraaier. Behandel
de lege batterijen volgens de geldende
Afvalvoorschriften.
12 g
Note: Came is not responsible for any radio or TV interference caused by unauthorized modifications to
this equipment. Such modifications could void the user’s authority to operate the equipment
assorbimento in trasmissione
power draw while transmitting
absorption en transmission
Verbrauch beim Senden
consumo en transmisión
Verbruik bij zenden
frequenza
frequency
fréquence
Frequenz
frecuencia
frequentie
12 mA 433.92 MHz
compatibile con i trasmettitori CAME ...
compatible with CAME transmitters ...
compatible avec les émetteurs CAME ...
kompatibel mit den CAME-Sendegeräten ...
compatible con los emisores CAME ...
compatibel met de CAME zenders....
TOP-432M/434M • TOP-432S
• TOP-432SA/432NA/434MA
24 x 68
x 12 mm
119RS960
doc. tec. 119RU22 v. 0.1 - 10/2006
Y

Intelligent Security & Fire Ltd.