CDI 174-9610K 2 Guide

Installation and Troubleshooting Guide
This installation is to be completed by an Authorized Dealer or Professional Service
Technician. For questions regarding installation or warranty, call CDI Tech Support
at 866-423-4832. Do not return to the Dealer or Distributor where the part was purchased.
Contact CDI Electronics Directly for Return Material Authorization.
CDI Electronics, LLC •353 James Record Road SW •Huntsville, AL 35824 USA
Web Support: www.cdielectronics.com •Tech Support: 1-866-423-4832 •Order Parts: 1-800-467-3371
All rights reserved. Reproduction or use of content, in any manner, without express written permission by CDI Electronics, LLC., is prohibited.
Rev D •6/19/2023 Page - 1 of 4 QF-358
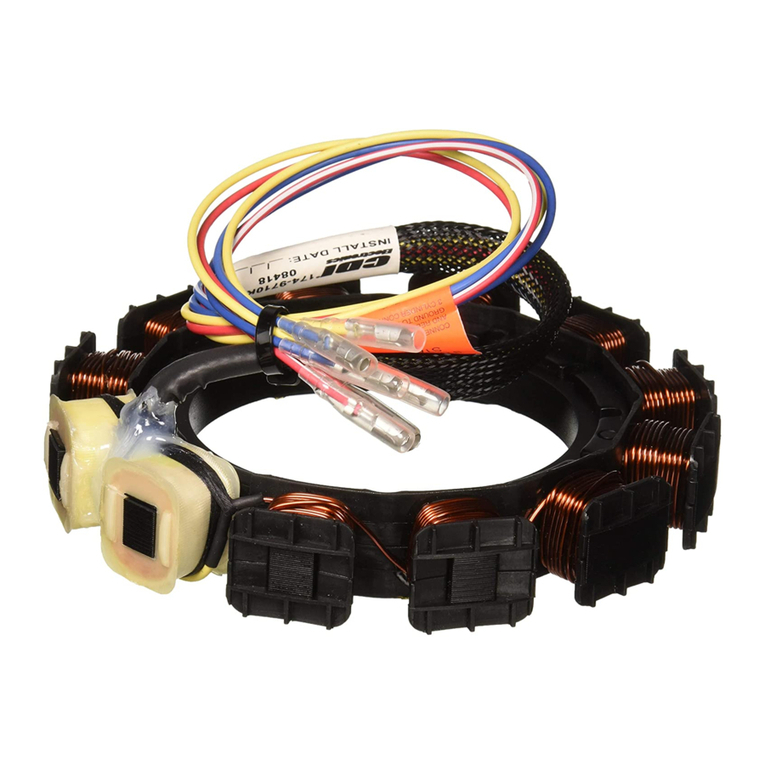
CDI P/N: 174-9610K 2
This unit replaces the following P/N’s: 398-9610A 3, A 5, A 6, A 9, A14, A17, A19, A22, and A24.
Warning! This product is designed to be installed by a professional marine mechanic. CDI Electronics cannot be held liable for
injury or damage resulting from improper installation, abuse, neglect, or misuse of this product.
It is recommended that dielectric grease (i.e. CDI 991-9705) be used in the bullet nose connectors to help prevent corrosion.
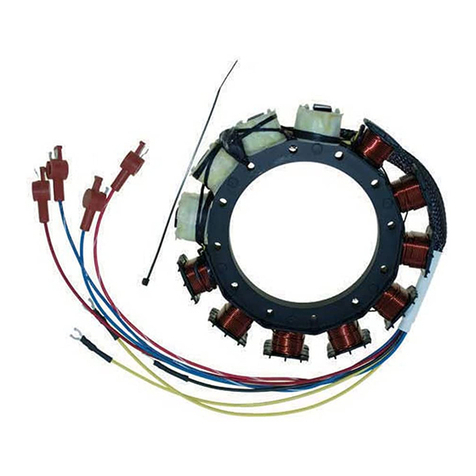
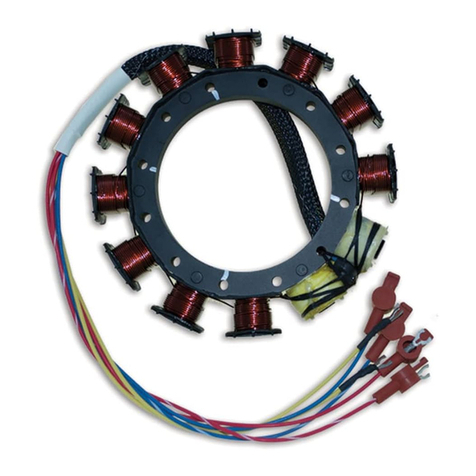
Any sign of leakage out of the Ignition charge coils or bubbling around the battery charge windings indicate a bad Stator. Check for burned
marks on each pole. If a problem is found on the battery windings, we recommend the Voltage Regulator be closely checked. To replace
Stators with ring terminals, please use the bullet to ring adapters enclosed with this Stator.
INSTALLATION
To replace the 398-9610A 3, A 5, A 6, A 9, and A14 Stators with two Yellow leads:
1. Disconnect the Negative battery cable.
2. Disconnect the Stator wires from the Switchbox, engine ground, and the Voltage Regulator.
3. Remove the flywheel according to the service manual for your engine.
4. Mark the position of the mounting screws in relation to where the Stator wires come out of the old Stator.
5. Remove the old Stator.
6. Orient and install the new Stator (using a good thread locker applied to the bolts) in the same position as the old Stator on the engine
and install the flywheel, following the service manual instructions.
7. Install the jumper leads included with the new Stator to the Stator leads, matching the color sets (Solid Yellow and Yellow/Black Stripe).
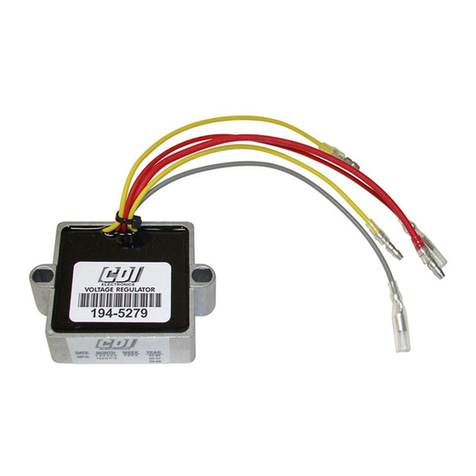
8. Connect the Yellow stator leads to the Voltage Regulator.
9. Connect the Stator Black wire to engine ground.
10. Connect the Red and Blue wires to one Switchbox and the Red/White and Blue/White wires to the other Switchbox. It does not matter
which set of wires goes to which Switchbox.
11. Reconnect the Negative battery cable.
To replace the 398-9610A17, A19, A22, and A24 Stators with four Yellow leads:
1. Disconnect the Stator wires from the Switchbox, engine ground, and the Voltage Regulator.
2. Remove the flywheel according to the service manual for your engine.
3. Mark the position of the mounting screws in relation to where the Stator wires come out of the old Stator.
4. Remove the old Stator.
5. Orient and install the new Stator (using a good thread locker applied to the bolts) in the same position as the old Stator on the engine
and install the flywheel, following the service manual instructions.
6. Connect the Stator leads to the Voltage Regulator, matching the short Yellow Stator wires to one Voltage Regulator and the long
Yellow stator wires to the other Voltage Regulator.
7. Connect the Stator black wire to engine ground.
8. Connect the Red and Blue wires to one Switchbox and the Red/White and Blue/White wires to the other Switchbox. It does not matter
which set of wires goes to which Switchbox.
9. Reconnect the Negative battery cable.
TROUBLESHOOTING
NO SPARK ON ANY CYLINDER:
1. Perform a visual inspection of the Stator and Trigger wiring to the Switchbox. Check to make sure that the wiring is correct, clean, and
free of corrosion, and that all connections are tight.
2. Disconnect the Black/Yellow kill wire AT THE SWITCHBOXES and retest. If the engine’s Ignition now has spark, the stop circuit has a
fault. Check the key switch, harness, and shift switch (if present).
3. Disconnect the Yellow wires from the Stator to the Voltage Regulator and retest. If the engine now has spark, replace the Voltage
Regulator.
4. Check the cranking RPM. A cranking speed less than 250 RPM will not allow the system to spark properly. This can be caused by a
weak battery, dragging starter, bad battery cables, or a mechanical problem inside the engine.
5. Inspect the flywheel Charge coil and Trigger magnets to see if they are loose or broken.

Installation and Troubleshooting Guide
This installation is to be completed by an Authorized Dealer or Professional Service
Technician. For questions regarding installation or warranty, call CDI Tech Support
at 866-423-4832. Do not return to the Dealer or Distributor where the part was purchased.
Contact CDI Electronics Directly for Return Material Authorization.
CDI Electronics, LLC •353 James Record Road SW •Huntsville, AL 35824 USA
Web Support: www.cdielectronics.com •Tech Support: 1-866-423-4832 •Order Parts: 1-800-467-3371
All rights reserved. Reproduction or use of content, in any manner, without express written permission by CDI Electronics, LLC., is prohibited.
Rev D •6/19/2023 Page - 2 of 4 QF-358
6. Check Stator and Trigger resistance and DVA:
Read from Read to OEM Ohms CDI Ohms DVA (Connected) DVA Disconnected
Blue (Low speed coil) Engine Gnd 5.0-7.0K Ω2.0-2.5K Ω140 V Minimum 140 V Minimum
Blue/White (Low speed coil) Engine Gnd 5.0-7.0K Ω2.0-2.5K Ω140 V Minimum 140 V Minimum
Red (High speed coil) Engine Gnd 90-200 Ω28-36 Ω20 V Minimum 20 V Minimum
Red/White (High speed coil) Engine Gnd 90-200 Ω28-36 Ω20 V Minimum 20 V Minimum
Brown (#1 Trigger) (a) White (#4 Trigger) (b) 0.8-1.4K Ω0.8-1.4K Ω 4 V Minimum 4 V Minimum
White (#3 Trigger) (a) Purple(#6 Trigger) (b) 0.8-1.4K Ω 0.8-1.4K Ω 4 V Minimum 4 V Minimum
Purple (#5 Trigger) (a) Brown (#2 Trigger) (b) 0.8-1.4K Ω 0.8-1.4K Ω 4 V Minimum 4 V Minimum
Brown (#1 Trigger) (a) Engine Gnd Open Open 1 V Minimum -
White (#3 Trigger) (a) Engine Gnd Open Open 1 V Minimum -
Purple (#5 Trigger) (a) Engine Gnd Open Open 1 V Minimum -
Brown (#2 Trigger) (b) Engine Gnd Open Open 1 V Minimum -
White (#4 Trigger) (b) Engine Gnd Open Open 1 V Minimum -
Purple (#6 Trigger) (b) Engine Gnd Open Open 1 V Minimum -
(a) Black band –Inside Switchbox (Engines using Studded Switchboxes)
(b) Yellow band –Outside Switchbox (Engines using Studded Switchboxes)
7. Disconnect Red and Red/White wires and retest. If the ignition system now has spark, the Switchbox is usually bad.
NO SPARK ON ONE BANK (ODD OR EVEN CYLINDERS ON INLINE 6 CYLINDER):
1. Perform a visual inspection of the Stator and Trigger wiring to the Switchbox. Check to make sure that the wiring is correct, clean, and
free of corrosion, and that all connections are tight.
2. Disconnect the Black/Yellow kill wire AT THE SWITCHBOXES and retest. If the engine’s Ignition now has spark, the stop circuit has a
fault. Check the key switch, harness, and shift switch (if present).
3. Disconnect the Yellow wires from the Stator to the Voltage Regulator and retest. If the engine now has spark, replace the Voltage
Regulator.
4. Check the cranking RPM. A cranking speed less than 250 RPM will not allow the system to spark properly. This can be caused by a
weak battery, dragging starter, bad battery cables, or a mechanical problem inside the engine.
5. Check the resistance and DVA of the Stator (see NO SPARK ON ANY CYLINDER).
6. Swap both sets of the Stator wires between the Switchboxes. If the problem moves, replace the Stator. If the problem stays on the
same bank, swap physical location and all connections of the two Switchboxes. If the problem stays with one Switchbox, replace the
Switchbox.
NOTE: If the Switchbox is bad, it is recommended that BOTH Switchboxes be replaced AS A SET.
NO SPARK OR INTERMITTENT SPARK ON ONE OR MORE CYLINDERS:
1. Perform a visual inspection of the Stator and Trigger wiring to the Switchbox. Check to make sure that the wiring is correct, clean, and
free of corrosion, and that all connections are tight.
2. Disconnect the White/Black wire between the Switchboxes and retest. If all cylinders now have spark, replace both Switchboxes as
there is a problem in the Bias circuitry.
3. Check the resistance and DVA of the Stator and Trigger (see NO SPARK ON ANY CYLINDER).
4. Check the DVA on the Green wires from the Switchbox while connected to the Ignition coils. Check the reading on the Switchbox
terminal AND on the Ignition coil terminal. You should have a reading of at least 150 DVA or more at both terminals. If the reading is
low on one cylinder, disconnect the Green wire from the Ignition coil for that cylinder and reconnect it to a Pack Load Resistor. Retest. If
the reading is now good, the Ignition coil is likely bad. A continued low reading symptom indicates a bad Switchbox.
5. Connect a spark gap tester and verify which cylinders are misfiring. If the cylinders are only misfiring above an idle, connect an
inductive tachometer to all cylinders and try to isolate the problem cylinders.
6. Disconnect the Yellow wires from the Stator to the Voltage Regulator and retest. If the engine now has spark, replace the Voltage
Regulator.
7. Check the cranking RPM. A cranking speed less than 250 RPM will not allow the system to fire properly. This can be caused by a weak
battery, dragging starter, bad battery cables, or a mechanical problem inside the engine.
WILL NOT ACCELERATE BEYOND 3000-4000 RPM:
1. Disconnect the Yellow wires from the Stator to the Voltage Regulator and retest. If the engine now has good spark, replace the Voltage
Regulator.
2. Disconnect the Idle Stabilizer (advance module) and reset the timing according to the service manual for your engine. If the problem
clears, discard the Idle Stabilizer as it is not needed.

Installation and Troubleshooting Guide
This installation is to be completed by an Authorized Dealer or Professional Service
Technician. For questions regarding installation or warranty, call CDI Tech Support
at 866-423-4832. Do not return to the Dealer or Distributor where the part was purchased.
Contact CDI Electronics Directly for Return Material Authorization.
CDI Electronics, LLC •353 James Record Road SW •Huntsville, AL 35824 USA
Web Support: www.cdielectronics.com •Tech Support: 1-866-423-4832 •Order Parts: 1-800-467-3371
All rights reserved. Reproduction or use of content, in any manner, without express written permission by CDI Electronics, LLC., is prohibited.
Rev D •6/19/2023 Page - 3 of 4 QF-358
3. Connect a DVA meter between the Stator’s Blue wire and engine ground. Run the engine up to the RPM where the problem is
occurring. The DVA should increase with RPM. A sharp drop in DVA right before the problem occurs usually indicates a bad Stator.
(Repeat the test from Blue/White to engine ground and compare the readings).
4. Connect a DVA meter between the Stator’s Red wire and engine ground. The DVA should show a smooth climb in voltage and remain
high through the RPM range. A reading lower than on the Blue wire reading indicates a bad Stator. (Repeat the test from Red/White to
engine ground and compare the readings).
5. If all cylinders become intermittent, replace both Switchboxes.
6. Connect an inductive tachometer to each cylinder in turn and try to isolate the problem. If two or more cylinders on the same bank are
dropping out, the problem is likely going to be either the Stator or the Switchbox. A single cylinder dropping spark will likely be a bad
Switchbox or Ignition coil. All cylinders not sparking properly usually indicates a bad Stator.
7. Perform a high-speed shutdown and read the spark plugs. Check for water. A crack in the block can cause a miss at high speed when
the water pressure gets high, but a normal shutdown will mask the problem.
8. Check the Trigger and Stator coil flywheel magnets for cracked, broken, or loose magnets.
MISS AT ANY RPM:
1. Disconnect the Yellow wires from the Stator to the Regulator/Rectifier and retest. If the miss clears, replace the Regulator/Rectifier.
2. Disconnect the Idle Stabilizer (advance module) and reset the timing according to the service manual for your engine. If the problem
clears, discard the Idle Stabilizer as it is not needed.
3. In the water or on a Dynamometer, check the DVA on the Green wires from the Switchbox while connected to the ignition coils. You
should have a reading of at least 150 DVA or more, increasing with engine RPM until it reaches 300-400 DVA maximum. A sharp drop
in DVA right before the miss becomes apparent on all cylinders will normally be caused by a bad Stator. A sharp drop in DVA on less
than all cylinders will normally be the Switchbox or Trigger.
4. Connect an inductive tachometer to each cylinder in turn and try to isolate the problem. A high variance in RPM on one cylinder usually
indicates a problem in the Switchbox or Ignition coil. Occasionally a Trigger will cause this same problem. Check the Trigger DVA (see
NO SPARK OR INTERMITTENT SPARK ON ONE OR MORE CYLINDERS).
5. DVA check the Blue and Blue/White wires in reference to engine ground and do a running test. The voltage should show a smooth
climb and stabilize, gradually falling off at higher RPM's (above 3000). If you see a sudden drop in voltage right before the miss
becomes apparent, the Stator is likely at fault.
6. Check DVA on the Red wires reference to engine ground of the Stator at high speed. readings should show a smooth climb in voltage.
If there is a sudden or fast drop in voltage right before the miss becomes apparent, the Stator is usually at fault. If there is no indication
of the problem, it could be a mechanical problem inside your engine.
NOTE: Use caution when doing this and do not exceed the rated voltage range of your meter.
7. Perform a high-speed shutdown and read the spark plugs. Check for water. A crack in the block can cause a miss at high speed when
the water pressure gets high, but a normal shutdown will mask the problem.
8. Check the Trigger and Stator coil flywheel magnets for cracked, broken, or loose magnets.
9. Rotate the Stator one bolt hole in either direction and re-test. If the miss is gone, leave the Stator as is. If the miss is worse, rotate the
Stator back where it was.
NO SPARK WITH THE SPARKPLUGS INSTALLED:
1. Check for a dragging starter or low battery that would cause slow cranking speed. Check the DVA of Stator and Trigger (see NO
SPARK ON ANY CYLINDER).
2. Disconnect the Voltage Regulator and retest. If the problem goes away, replace the Voltage Regulator.
SPARK ON ALL CYLINDERS BUT ENGINE WILL NOT RUN:
1. Check Ignition Timing for #1 Cylinder. Remember the Yellow banded leads go to cylinders 2, 4 & 6. and the Black banded leads go to
cylinders 1, 3 and 5. The Green Coil Primary leads could be swapped as well causing the engine to fire out of time.
2. Index the flywheel for all cylinders. ALL Cylinders should have approximately the same Ignition timing offset as # 1 Cylinder. If they are
not, this would indicate a problem with the Bias Circuitry inside the Switchboxes, the Trigger, or the Trigger magnet of the flywheel.
3. Check the Resistance on each Switchbox’s White/Black wire, reference to engine ground while disconnected. You should read 13-15K
Ωon each Switchbox. If there is over a 10% variance between the two Switchboxes, replace BOTH Switchboxes as a set.
4. Check Ignition Timing on all cylinders. If the Ignition Timing varies, replace both of the Switchboxes as a set.
WILL NOT IDLE BELOW 1500 RPM:
1. Check the Bias resistance from the Black/White terminal (wire disconnected) on the Switchbox to engine ground. Reading should be
13-15K Ω.
2. Check the Stator and Trigger Resistance and DVA (see NO SPARK ON ANY CYLINDER).
3. Check for air leaks.

Installation and Troubleshooting Guide
This installation is to be completed by an Authorized Dealer or Professional Service
Technician. For questions regarding installation or warranty, call CDI Tech Support
at 866-423-4832. Do not return to the Dealer or Distributor where the part was purchased.
Contact CDI Electronics Directly for Return Material Authorization.
CDI Electronics, LLC •353 James Record Road SW •Huntsville, AL 35824 USA
Web Support: www.cdielectronics.com •Tech Support: 1-866-423-4832 •Order Parts: 1-800-467-3371
All rights reserved. Reproduction or use of content, in any manner, without express written permission by CDI Electronics, LLC., is prohibited.
Rev D •6/19/2023 Page - 4 of 4 QF-358
DESTROYED ONE OR TWO CYLINDERS/PISTONS:
1. Check the Bias resistance from the Black/White terminal (wire disconnected) on the Switchbox to engine ground, you should read 13-
15K Ω. Readings above 15K Ωor less than 13K Ωindicate a defective Switchbox. Due to the design of the Switchboxes, a Switchbox
with a defective bias circuit can damage a mating Switchbox (domino effect). REPLACE BOTH SWITCHBOXES AS A SET!!!!
2. Use an ANALOG DVA meter to check the voltage on the White/Black (Bias) terminal. With everything connected, run the engine at
various Rpm’s and monitor the DVA. It should remain steady for a set RPM. Fluctuation in voltage indicates a problem in the Bias
circuit. If there is a problem, disconnect everything on the White/Black terminal except the jumper from the inside Switchbox to the
outside Switchbox. Retest, if the problem persists, replace BOTH Switchboxes. If the problem went away, reconnect the items taken off
of the White/Black terminal one at a time. Re-test after every reconnection until you locate the source of the problem.
ENGINE WILL NOT STOP (KILL):
1. Disconnect the Black/Yellow (or Orange) wire(s) at the Switchbox. Connect a jumper wire to the stop wire from the Switchbox and short
it to engine ground. If this stops the Switchbox from sparking, the stop circuit has a fault. Check the key switch, harness, and shift
switch. If this does not stop the Switchbox from sparking, replace the Switchbox. Repeat the test as necessary for any additional
Switchboxes.
BATTERY CHARGING ISSUES:
1. Regardless of whether the charging issue is overcharging or not charging at all, the #1 cause of all charging issues is the battery often
due to improper style and/or charging neglect. #2 is the battery’s connections. #3 is the Voltage Regulator. #4 is the Stator.
2. The recommended type of battery for outboards is a single (NOT more than one) 850+ CCA dual purpose or cranking/starting non-
maintenance-free battery.
3. Non-maintenance-free batteries (lead-acid flooded cell; has vent caps on its top) have heavy, thick plates. They’re ideal for outboards,
where batteries are commonly drained by accessories while fishing, etc. when there is no charge applied to a battery while the battery
is in use. Its heavy plates can withstand constant discharging and charging. These batteries have much more reserve time and are
much more suited for this behavior.
NOTE: Some Maintenance free batteries will have vented caps on top. When in doubt, change the battery to a non-
maintenance free type.
4. Maintenance-free batteries should NEVER be used in an Outboard application. A new, fully charged maintenance-free battery may
work fine at first but their life span is dramatically shortened due to the constant charging and discharging. This activity will cause the
cells to become weak, and/or the cells will become dead. When this happens, the battery is unable to accept a full charge, thus putting
the Voltage Regulator at extreme risk of failure. Therefore, maintenance-free style batteries commonly cause charging issues shortly
after installation.
5. Check all battery connections, particularly at engine ground. Make sure that all connections are tight and free of corrosion. Do NOT use
wing nuts as they tend to loosen over a period of time from vibration. A loose connection WILL cause a premature battery and/or
Regulator failure(s).
6. If there is no change, try a single (NOT more than one) known good fully charged battery that is 850+ CAA Dual Purpose, or a
cranking/starting battery that is non-maintenance free. Make sure the battery is a lead acid flooded cell battery (has vent caps on its
top).
7. Measure the DVA across the Stator’s Yellow battery charge wire pairs, while connected to the Voltage Regulator. At idle the DVA will
normally between 8-25 DVA. If not, disconnect the Yellow wires from the Voltage Regulator and retest. DVA will normally be 17-50 DVA
at idle. If the voltage is low, the Stator is possibly faulty. Perform a visual of the Stator for browning and varnish dripping. These are
signs that the Stator has overheated. If the visual inspection shows any of these signs, replace the Stator.
TACHOMETER TESTS
1. Measure the DVA across the Stator’s Yellow battery charge wire pairs, while connected to the Voltage Regulator. At idle the DVA will
normally be between 8-25 DVA. If not, disconnect the Yellow wires from the Voltage Regulator and retest. DVA will normally be 17-50
DVA at idle. If the voltage is now within specification, the Voltage Regulator is likely defective.
2. Disconnect the Voltage Regulator’s Gray wire. At 800-1,000 RPM, check the DVA on the Grey wire FROM THE VOLTAGE
REGULATOR measured to engine ground. The reading should be 8 DVA or more. If not, replace the Voltage Regulator.
3. If at least 8 DVA, run a jumper wire from the Grey wire out of the harness to one of the Stator’s Yellow wires.
4. If still no tachometer signal, try a known good tachometer.
5. If still no tachometer signal, replace the Stator.
Table of contents
Other CDI Marine Equipment manuals
Popular Marine Equipment manuals by other brands

GUIDANCE MARINE
GUIDANCE MARINE RadaScan View Installer's guide

Dometic
Dometic Optimus EPS Installation and user manual

Raymarine
Raymarine SPX-5 Installation & setup guide

Wet Sounds
Wet Sounds WS-MC2 owner's manual

AC MARINE
AC MARINE KUM400 Series installation guide

Quick
Quick MC2 Series Installation and use manual