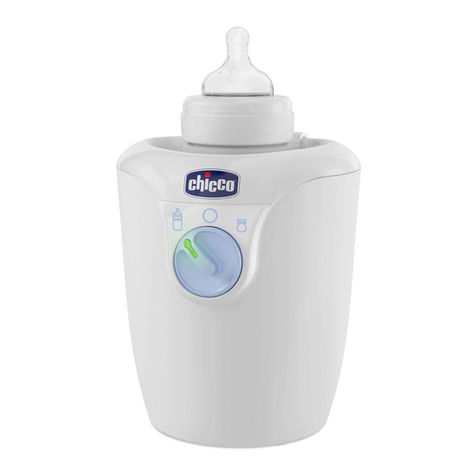
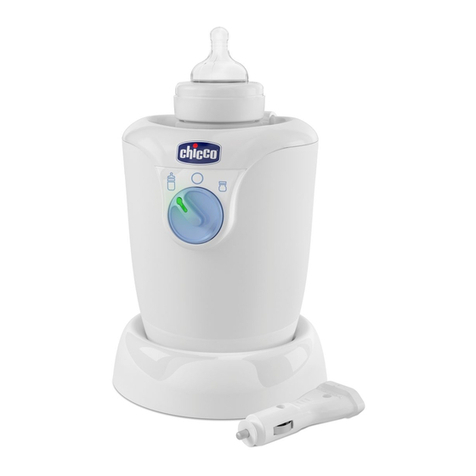
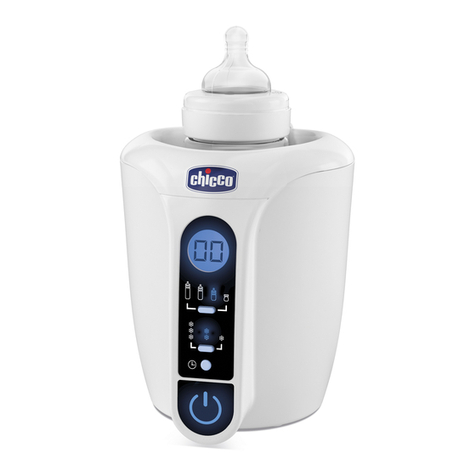
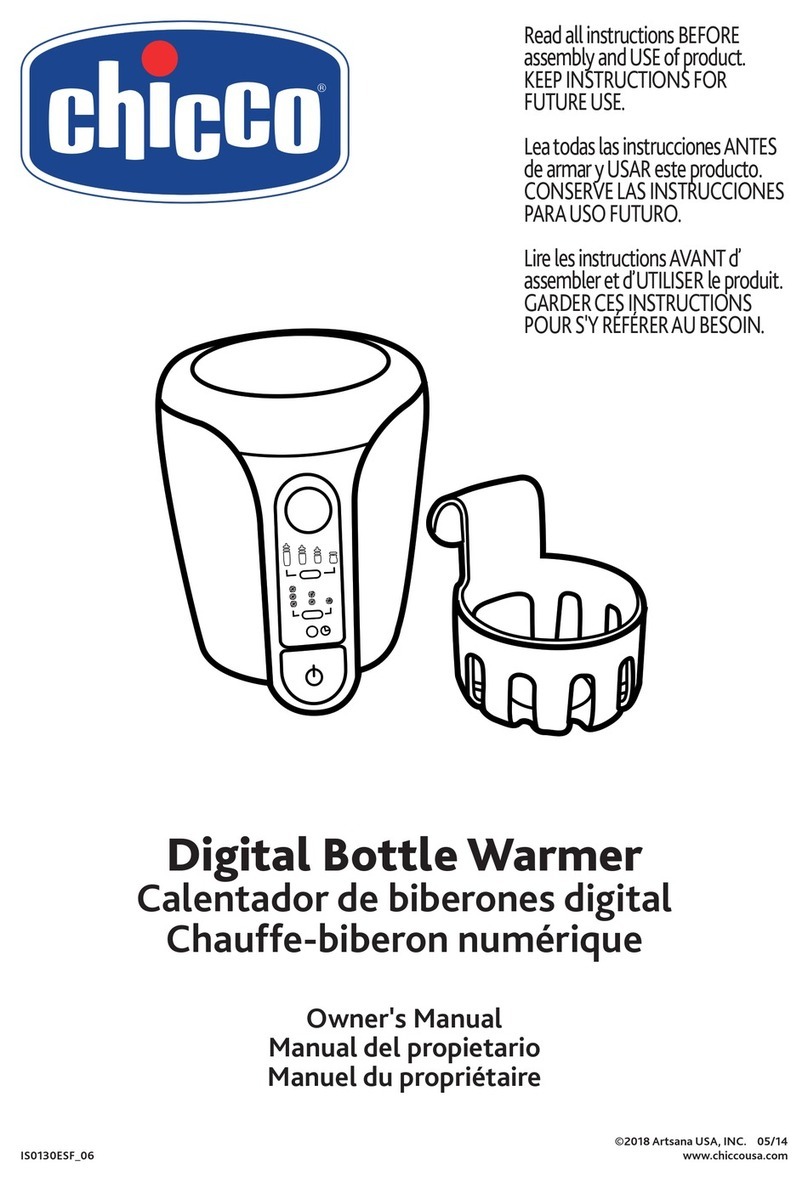
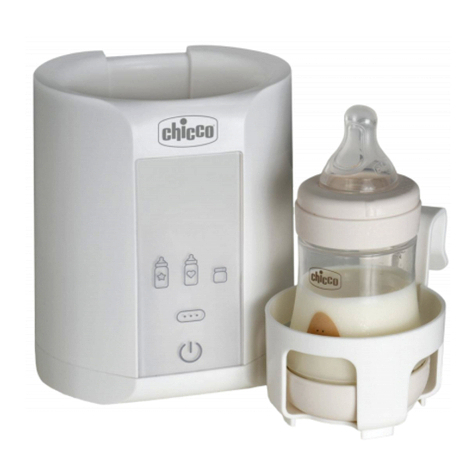
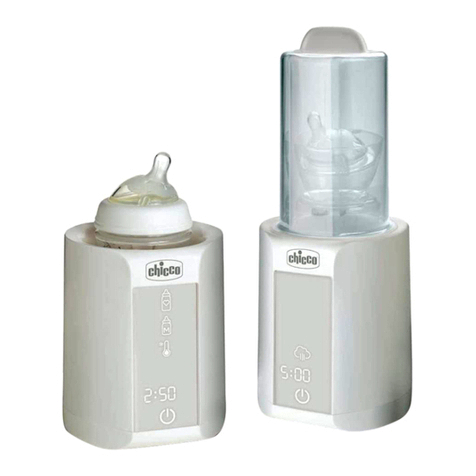
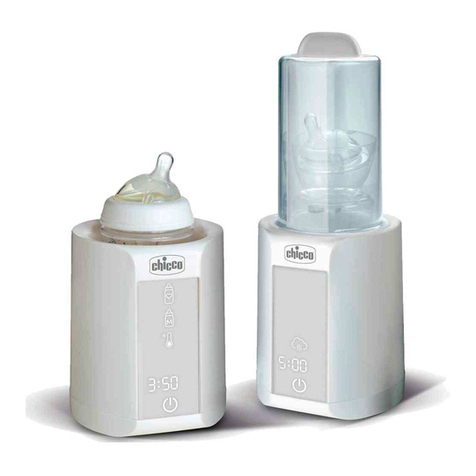
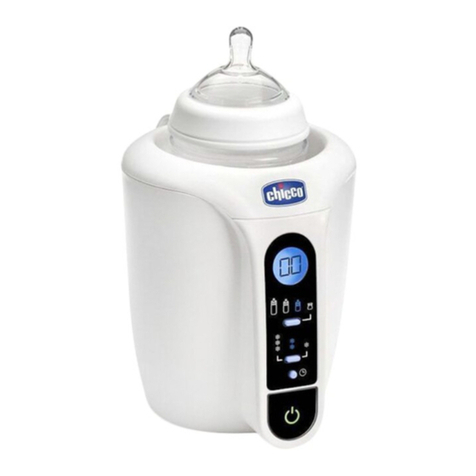
Chicco 06785 User manual

SCALDABIBERON DIGITALE
DIGITAL BOTTLE WARMER
CHAUFFE-BIBERON DIGITAL
DIGITALER FLÄSCHCHENWÄRMER
CALIENTABIBERÓN DIGITAL
AQUECEDOR DE BIBERÕES DIGITAL
DIGITALE ZUIGFLESVERWARMER
ΨΗΦΙΑΚΗ ΣΥΣΚΕΥΗ ΘΕΡΜΑΝΣΗΣ ΜΠΙΜΠΕΡΟΝ
DİJİTAL BİBERON ISITICISI
ЦИФРОВОЙ ПОДОГРЕВАТЕЛЬ ДЛЯ БУТЫЛОЧЕК И ДЕТСКОГО ПИТАНИЯ
ЕЛЕКТРОНЕН НАГРЕВАТЕЛ ЗА ШИШЕТА И БУРКАНЧЕТА
DIGIT SUTTEFLASKEVARMEREN/TÅTEFLASKEVARMEREN
DIGITÁLNÍ OHŘÍVAČ LAHVÍ
ÎNCĂLZITOR DE BIBERON ELECTRONIC
CYFROWY PODGRZEWACZ DO BUTELEK
DIGITÁLIS CUMISÜVEG MELEGÍTŐ
DIGITALNI GRIJAČ BOČICA
DIGITALNI GREJAČ ZA FLAŠICE

2

2
❄
❄
❄❄
❄❄
❄
❄
❄❄
❄❄
1
a
b
d
c
d1
d2
d3
d4
d5

5
4
Istruzioni per l’uso
Leggere attentamente prima dell’uso e conservare queste
istruzioni per riferimento futuro.
AVVERTENZE DI SICUREZZA
ATTENZIONE
La normativa europea EN 60335-2-15/A11:2012 prevede, a tutela della sicurez-
za dei bambini, che l’eventuale utilizzo del prodotto da parte di bambini di età
superiore a 3 anni avvenga esclusivamente con la supervisione di un adulto.
Artsana S.p.A., in ottemperanza a quanto previsto dalla vigente normativa,
riporta qui di seguito l’avvertenza prevista dalla normativa:
• Questo apparecchio può essere utilizzato da bambi-
ni dai 3 anni in su se sono sotto sorveglianza oppure
se hanno ricevuto delle istruzioni riguardanti l’uti-
lizzo dell’apparecchio in sicurezza e se capiscono i
pericoli implicati. Le operazioni di pulizia e la manu-
tenzione da parte dell’utilizzatore non devono esse-
re effettuate dai bambini a meno che non abbiano
un’età superiore agli 8 anni ed operino sotto sorve-
glianza. Tenere l’apparecchio e il suo cavo fuori dalla
portata dei bambini con età inferiore ai 3 anni.
• I bambini non devono giocare con questo apparecchio.
• Questi apparecchi possono essere utilizzati da per-
sone con ridotte capacità fisiche, sensoriali o men-
tali o con mancanza di esperienza e di conoscenza
se hanno una sorveglianza oppure se hanno rice-
vuto delle istruzioni a riguardo dell’uso in sicurezza
dell’apparecchio e capiscono i pericoli implicati.
Tuttavia, per le caratteristiche di questa categoria di prodotti (scalda-biberon
elettrici), Artsana S.p.A. raccomanda che bambini di qualsiasi età non utilizzino
o interagiscano con il prodotto nemmeno sotto la supervisione di un adulto.
• Questo apparecchio è destinato ad un utilizzo esclu-
sivamente domestico e deve essere utilizzato con-
formemente alle istruzioni d’uso. Ogni altro uso è da
considerarsi improprio e quindi pericoloso.
• Questo apparecchio è solo per uso interno, non
deve pertanto essere esposto a sole, pioggia ed altri
agenti atmosferici.
• Nel caso in cui l’apparecchio venga ceduto dall’ac-
quirente o affidato a utilizzatori terzi, è necessario
che gli stessi ricevano istruzioni relative all’uso sicu-
ro dell’apparecchio ed abbiano compreso i pericoli
ad esso inerenti, attraverso la lettura del manuale
d’uso ed in particolare delle avvertenze di sicurezza
in esso contenute che dovranno sempre accompa-
gnare l’apparecchio.
• Posizionare il prodotto solo su superci piane e sta-
bili non accessibili ai bambini, lontano da culle e let-
tini in quanto durante l’uso l’apparecchio e l’acqua
in esso contenuto diventano molto caldi: prestare la
massima attenzione! Pericolo di scottature.
• Non usare mai lo scaldabiberon senza acqua all’in-
terno della vasca riscaldante.
• Per evitare possibili scottature, durante e al termine
del ciclo di funzionamento, prestare attenzione: l’ac-
qua e la superficie superiore dell’apparecchio pos-
sono essere molto calde. Rimuovere sempre con
cura il biberon e/o il vasetto degli omogeneizzati al
termine del ciclo di funzionamento e/o di manteni-
mento in quanto potrebbero essere caldi.

7
6
• Prima di somministrare l’alimento riscaldato al bam-
bino, verificare sempre che la sua temperatura non
sia eccessiva (non superiore a 37°C).
• Non spostare mai lo scaldabiberon durante l’uso o
quando contiene ancora liquidi caldi.
•
Per scollegare lo scaldabiberon dalla rete elettrica,
assicurarsi che l’apparecchio sia spento e staccare
la spina del cavo di alimentazione dalla presa di
corrente. Non tirare il cavo di alimentazione o l’ap-
parecchio stesso per staccare la spina dalla presa di
corrente.
• Assicurarsi che la spina del cavo di alimentazione
sia sempre staccata dalla presa di corrente e che lo
scaldabiberon sia completamente freddo prima di
spostarlo, pulirlo, riporlo, fare operazioni di manu-
tenzione o tra un utilizzo e l’altro.
• La pulizia e la manutenzione destinata ad essere
effettuata dall’utilizzatore non deve essere effettua-
ta da bambini e/o da persone con ridotte capacità
mentali o prive di esperienza o della necessaria co-
noscenza.
• Non immergere né bagnare in nessun caso la spina,
lo scaldabiberon o il cavo di alimentazione in acqua
o altri liquidi.
• Non tentare di aprire o riparare l’apparecchio. L’aper-
tura dello scaldabiberon è possibile solo con l’ausilio
di utensili speciali. Per la eventuale sostituzione del
cavo di alimentazione deve essere utilizzato esclu-
sivamente un cavo di tipo identico a quello fornito
con l’apparecchio e l’operazione deve essere effet-
tuata esclusivamente da personale tecnicamente
qualicato o da Artsana S.p.A.
•
Queste istruzioni sono disponibili sul sito
www.chicco.it
ATTENZIONE:
- L’apparecchio, i suoi accessori e gli elementi dell’imballaggio (sacchetti in plastica, scatole cartone,
ecc.) non sono giocattoli pertanto non devono essere lasciati alla portata dei bambini in quanto
potenziali fonti di pericolo.
- Prima di utilizzare lo scaldabiberon vericare sempre che il prodotto e tutti i suoi componenti
non siano danneggiati. In caso contrario non utilizzare lo scaldabiberon ma rivolgersi a personale
tecnicamente qualificato o al rivenditore.
- Assicurarsi che il voltaggio e la frequenza (vedi dati di targa posta sotto l’apparecchio) corrispon-
dano a quelli della vostra rete elettrica. L’installazione elettrica del locale deve essere conforme alle
norme di sicurezza vigenti nel paese di utilizzo dell’apparecchio.
- Collegare l’apparecchio ad una presa di corrente facilmente accessibile.
- Non appoggiare mai lo scaldabiberon sopra o vicino a superci calde, cucine a gas o piastre
riscaldanti, o su superfici delicate sensibili al calore e/o all’umidità.
- Utilizzare solo biberon in plastica resistente al calore oppure in vetro termoresistente: non utiliz-
zare biberon monouso.
- Durante il normale funzionamento del prodotto, prestare attenzione ai vapori caldi dovuti al ri-
scaldamento dell’acqua per evitare possibili scottature
- Per motivi di ordine igienico–biologico gli scaldabiberon devono essere utilizzati esclusivamente
per riscaldare la pappa già pronta, non per cuocerla. La temperatura consigliata di riscaldamento
degli alimenti è di circa 37°C. Non riscaldare mai gli alimenti più di una volta o per un periodo di
tempo superiore ad un’ora.
- La temperatura finale dell’alimento ed il tempo di riscaldamento dipendono dalla quantità da
riscaldare, dalla sua temperatura iniziale (temperatura ambiente, frigorifero o freezer), dalla con-
sistenza della preparazione, programma di riscaldamento impostato, dal tipo e dimensioni del
contenitore utilizzato (biberon in plastica, biberon in vetro, vasetto omogeneizzati), dalla quanti-
tà di acqua inserita nella vasca riscaldante.
- Dopo tre minuti di inutilizzo dalla fine del ciclo di riscaldamento, o dopo tre minuti di inattività
l’apparecchio entra in modo standby, lasciarlo raffreddare completamente prima di un nuovo
utilizzo.
- Non toccare mai lo scaldabiberon con mani bagnate o umide.
- Non toccare lo scaldabiberon se questo cade accidentalmente in acqua; staccare subito la spina
e non utilizzarlo successivamente, rivolgersi a personale tecnicamente competente e qualificato
o a Artsana S.p.A..
- In caso di guasto e/o cattivo funzionamento dello scaldabiberon, spegnerlo e staccare la spina
dalla presa di corrente, non tentare di ripararlo e/o manometterlo ma rivolgersi esclusivamente a
personale tecnicamente competente e qualicato o a Artsana S.p.A.
- Per qualsiasi operazione di riparazione rivolgersi esclusivamente a personale tecnicamente quali-
cato o ad Artsana S.p.A.. Riparazioni errate, eseguite da personale non qualicato, possono cau-
sare danni o infortuni agli utilizzatori.
- Se avete dubbi sull’interpretazione del contenuto del presente libretto di istruzioni contattare il
rivenditore o Artsana S.p.A..

9
8
- Per lo smaltimento dell’imballo degli accessori soggetti ad usura o dell’apparecchio stesso, ope-
rare la raccolta differenziata facendo riferimento alle specifiche legislazioni vigenti in ogni paese.
LEGENDA SIMBOLI
= doppio isolamento
= apparecchio conforme ai requisiti essenziali delle direttive CE applicabili
= ATTENZIONE!
= istruzioni per l’uso
= leggere il manuale di istruzioni per l’uso
= ad esclusivo uso interno
Gentile cliente,
Ti ringraziamo e ci congratuliamo per la tua scelta. Lo Scaldabiberon Digit ti permette di scaldare
latte e pappa in modo veloce e sicuro.
Compatibile con la maggior parte dei biberon e dei vasetti in commercio.
Permette di scegliere il programma di riscaldamento più adatto alle proprie esigenze selezionando
la temperatura inziale del latte o della pappa; inoltre grazie alla funzione scongelamento è possibile
scongelare in modo più sicuro rispetto al microonde.
Prima dell’uso dello scaldabiberon leggere attentamente il presente manuale di istruzioni e con-
servarlo accuratamente.
Numero verde per l’Italia 800 188 898
DESCRIZIONE (g. 1)
a) Corpo centrale
b) Supporto porta omogeneizzato/biberon
c) Cavo di alimentazione
d) Gruppo pulsanti di selezione
d1) Display
d2) Pulsante di selezione “Biberon (capacità)/Vasetto”
d3) Pulsante di selezione “Temperatura iniziale dell’alimento”
d4) Pulsante di selezione “Timer”
d5) Pulsante “ON/OFF”
ISTRUZIONI PER L’USO
Attenzione: Si raccomanda di sanitizzare/disinfettare con cura i biberon prima di inserirli nello scal-
dabiberon. Non usare mai lo scaldabiberon senza acqua all’interno della vasca riscaldante.
Per versare la quantità corretta di acqua all’interno della vasca, utilizzare il biberon con la relativa
scala graduata o altro recipiente idoneo. Non riempire la vasca mettendo l’apparecchio sotto l’ac-
qua corrente del rubinetto.
Prima di eettuare le operazioni sotto descritte assicurarsi che la spina del cavo di alimentazione (c)
sia staccata dalla presa di corrente.
1. Sistemare lo scaldabiberon su una supercie piana e stabile.
2. Versare l’acqua all’interno del corpo centrale (a) secondo le modalità seguenti:
biberon (capacità) o vasetto
biberon circa
150 ml/5 oz biberon circa
250 ml/9 oz biberon circa
330 ml/11 oz
vasetto
temperatura
di partenza
20° C 20 ml 40 ml 80 ml5° C
-18° C 40 ml 60 ml
NOTA: le quantità d’acqua necessaria per il riscaldamento sopra indicate si riferiscono ai biberon
delle linee Chicco e a vasetti da 80 ml. Per i biberon di altre marche e vasetti di capacità diverse
si consiglia di utilizzare le stesse quantità d’acqua verificando però con attenzione la temperatura
dell’alimento alla ne del ciclo di riscaldamento (max 37°). Nel caso in cui l’alimento non sia su-
cientemente caldo, avviare un nuovo ciclo.
3. Inserire lentamente all’interno del corpo centrale (a) il supporto porta omogeneizzato/biberon (b) e:
• BIBERON: completo di ghiera e tettarella correttamente montati sulla bottiglia, senza aggiun-
gere il bicchierino.
• VASETTO: senza coperchio ed eventuali etichette.
ATTENZIONE: vasetti e biberon di piccole dimensioni vanno posizionati sul supporto por-
ta omogeneizzato/biberon (b) prima di essere inseriti all’interno del corpo centrale (a).
Fare attenzione che l’acqua di riscaldamento non fuoriesca dalla sommità dell’apparecchio e per i
biberon o vasetti di piccole dimensioni non raggiunga l’imboccatura degli stessi.
Nel caso in cui l’acqua a seguito del posizionamento del biberon esca dal corpo centrale (a), prov-
vedere immediatamente ad asciugare con un panno asciutto la zona esterna e la base dello scal-
dabiberon ed il cavo e la spina di alimentazione e provvedere a eliminare dalla vasca il quantitativo
di acqua in eccesso.
4. Inserire il connettore del cavo di alimentazione (c) nell’apparecchio e la spina nella presa di cor-
rente. L’apparecchio emetterà un segnale sonoro per indicare che sia correttamente collegato
(1 bip).
5. Accendere lo scaldabiberon premendo il pulsante “ON/OFF” (d5) per 3 secondi circa.
NOTA: Dopo 3 minuti d’inutilizzo o alla ne del ciclo, l’apparecchio entra in modo “stand by”, indica-
to dal led lampeggiante verde sopra il pulsante principale. Per riaccendere l’apparecchio quando è
in “stand by”, eettuare una pressione breve sul pulsante “ON/OFF” (d5).
NOTA: Se necessario spegnere lo scaldabiberon, in un qualsiasi momento, eettuare una pressione
prolungata sul pulsante “ON/OFF” (d5).
6. Impostare il tipo/capacità del contenitore da riscaldare premendo il rispettivo pulsante di sele-
zione “Biberon (capacità)/Vasetto” (d2) no a posizionare il led azzurro in corrispondenza della
selezione desiderata: Vasetto; biberon 150 ml; biberon 250ml; biberon 330ml.
7. Impostare la temperatura iniziale dell’alimento premendo il rispettivo pulsante di selezione
“Temperatura iniziale dell’alimento” (d3) no a posizionare il led azzurro in corrispondenza della
selezione desiderata: Temperatura ambiente (* circa 20°C); Temperatura media del frigorifero (**

11
10
circa 5°C); Temperatura media del freezer (*** circa -18°C).
8. Avviare il ciclo impostato con una breve pressione del pulsante “ON/OFF” (d5). Il led rosso posi-
zionato sopra il pulsante si accende (luce fissa) indicando che è iniziato il ciclo di riscaldamento.
Il display (d1) indica il tempo rimanente alla ne del ciclo di riscaldamento. Il termine del ciclo è
segnalato visivamente dal display (d1) (00) e dal led sul pulsante “ON/OFF” che diventa di colore
verde. Inoltre, 5 “bip” sonori avvertono che l’alimento è pronto.
TEMPI INDICATIVI DI RISCALDAMENTO (in minuti)
biberon (capacità) o vasetto
biberon circa
150 ml/5 oz biberon circa
250 ml/9 oz biberon circa
330 ml/11 oz
vasetto
temperatura
di partenza
20° C 3,5 min 4 min 5,5 min 7 min
5° C 5 min 6 min 8 min 8,5 min
-18° C 13 min 18 min 24 min 19 min
9. Una volta tolto il biberon o il vasetto degli omogeneizzati dal corpo centrale (a) dello scaldabi-
beron, asciugarlo accuratamente.
ATTENZIONE
I tempi di riscaldamento riportati nella tabella precedente si riferiscono ai biberon delle linee Chic-
co e a vasetti da 80ml. Per biberon di altre marche e vasetti di capacità diverse la temperatura nale
dell’alimento potrebbe non essere quella desiderata.
Prima di somministrare l’alimento al bambino vericare sempre che la temperatura dell’alimento
non sia eccessiva.
Nel caso in cui l’alimento non sia sucientemente caldo, inserirlo nello scaldabiberon e avviare
un nuovo ciclo. Vericare lo stato di riscaldamento a intervalli regolari, prestando attenzione a non
scottarsi, fino al raggiungimento della temperatura desiderata.
IN PARTICOLARE:
Per i biberon:
- agitare il biberon per qualche secondo in modo da uniformare la temperatura dell’alimento in esso
contenuto e controllare la temperatura versando qualche goccia sulla parte interna del polso.
Per i vasetti di omogeneizzato:
- mescolare il contenuto del vasetto in modo da uniformare la temperatura e assaggiarlo per assi-
curarsi che non sia troppo caldo.
NOTA: se riscaldato troppo le preziose sostanze nutritive e le vitamine contenute nel latte materno
potrebbero andare perse.
10. Spegnere l’apparecchio premendo il pulsante “ON/OFF” (d5) per 3 secondi circa. Staccare la
spina della presa e scollegare il connettore dell’apparecchio.
USO DELLA FUNZIONE TIMER
Permette di scegliere quando avere pronta la pappa (no a 1 ora di programmazione).
Procedere come indicato nei punti da 1 a 5 delle ISTRUZIONI PER L’USO.
6. Impostare il tempo entro cui si desidera l’alimento pronto premendo più volte il pulsante “Timer”
(d4) no a selezionare l’intervallo desiderato. Intervalli selezionabili: 15 min; 30 min; 45 min; 60
min.
7. Premere il pulsante “ON/OFF” (d5) per iniziare il ciclo impostato.
Il led posto sopra il pulsante diventa rosso a luce lampeggiante no all’inizio eettivo del ciclo di
riscaldamento. Dal momento in cui inizia il riscaldamento, la luce rimane fissa fino a termine ciclo.
Il display (d1) mostra il tempo rimanente dall’intervallo selezionato no a termine ciclo.
Il termine del ciclo è segnalato visivamente dal display (d1) (00) e dal led posizionato sopra il pul-
sante “ON/OFF” (d5) che diventa di colore verde. Inoltre, 5 “bip” sonori avvertono che l’alimento è
pronto.
NOTA: Se il tempo necessario ad eettuare il ciclo di riscaldamento è superiore a quello richiesto
con la funzione “Timer”, le cifre sul display (d1) lampeggiano per avvisare che il tempo desiderato
non è raggiungibile. Premendo il pulsante “ON/OFF” (d5) , si avvia il ciclo con la durata prevista
dalle impostazioni.
ATTENZIONE: Controllare sempre che la temperatura dell’alimento non sia eccessiva pri-
ma di somministrarlo al bambino.
Per il latte in polvere formulato con acqua fredda si raccomanda il consumo immediato.
NOTA:
- Si consiglia di consumare immediatamente il latte e le pappe una volta riscaldati.
- Latte e pappe non devono essere riscaldati una seconda volta al di fuori della singola poppata/
pappa. Se sono stati già riscaldati per una poppata/pappa precedente devono essere gettati via.
PULIZIA E MANUTENZIONE DELL’APPARECCHIO
Alla ne di ogni utilizzo staccare la spina del cavo di alimentazione (c) dello scaldabiberon dalla
presa di corrente. Lasciare raffreddare completamente lo scaldabiberon e dopo aver rimosso l’ac-
qua residua contenuta nella vasca asciugarlo accuratamente prima di riporlo in un luogo pulito e
asciutto.
DECALCIFICAZIONE
Durante il normale utilizzo, nella vasca di riscaldamento si possono formare incrostazioni di calcare
che possono ridurre le prestazioni dell’apparecchio e a lungo andare danneggiarlo. Per rimuovere
il calcare dal fondo della vasca assicurarsi che lo scaldabiberon sia completamente freddo, versare
all’interno della vasca una soluzione di 200 ml di acqua e aceto bianco in parti uguali e lasciare
agire per almeno una notte.
Non accendere mai lo scaldabiberon quando all’interno della vasca è stata inserita la soluzione
di acqua e aceto. Dopo il ciclo di decalcificazione risciacquare abbondantemente l’interno della
vasca, pulire e asciugare con cura tutte le parti interne ed esterne.
Eettuare un ciclo di riscaldamento a vuoto inserendo 140 ml di acqua nella vasca con imposta-
zione di un biberon da 250ml a temperatura di frigo. All’accensione del led verde sopra il pulsante
“ON/OFF” (d5) spegnere l’apparecchio, lasciarlo rareddare completamente, quindi rimuovere l’ac-
qua residua ed asciugare accuratamente.
Utilizzare un panno parzialmente inumidito con acqua per pulire le parti esterne dello scaldabiberon.
Si raccomanda di eettuare le operazioni di rimozione del calcare almeno una volta alla settimana
o, in caso di acque particolarmente ricche di calcare, anche più frequentemente.
Non utilizzare utensili, spugne abrasive, detergenti, alcol o solventi per eettuare le operazioni di
pulizia, potrebbero danneggiare irrimediabilmente lo scaldabiberon e/o i suoi accessori.
ATTENZIONE:
- Non mettere mai lo scaldabiberon direttamente sotto il rubinetto dell’acqua corrente né immer-
gere l’apparecchio, la spina o il cavo di alimentazione (c) in acqua o in altri liquidi.
- Non lavare mai lo scaldabiberon in lavastoviglie.

13
12
DATI TECNICI
REF 00007390000000
Mod. 06785
220-240V~, 50/60Hz, 170W
Peso: 530 gr
Dimensioni: 135.5 x 149.5 x h157mm
Per la garanzia sui difetti di prodotto si rinvia alle speciche previsioni delle normative naziona-
li applicabili nel Paese d’acquisto, dove previste. La garanzia non copre i componenti soggetti a
normale usura.
Artsana S.p.A. si riserva il diritto di modicare in qualsiasi momento e senza preavviso quanto de-
scritto nel presente manuale di istruzioni.
La riproduzione, la trasmissione, la trascrizione nonché la traduzione in altra lingua anche parziale
in qualsiasi forma di questo manuale, sono assolutamente vietate senza la previa autorizzazione
scritta da parte di Artsana S.p.A..
DICHIARAZIONE CE DI CONFORMITÀ:
Con la presente Artsana S.p.A dichiara che questo appa recchio marca Chicco mod. 06785 è conforme
ai requisiti essenziali ed alle altre disposizioni pertinenti stabilite dalle direttive 2004/108/CE (compa-
tibilità elettromagnetica), 2006/95/CE (sicurezza elettrica) e 2011/65/UE (RoHS). Copia integrale della
dichiarazione CE può essere richiesta ad Artsana S.p.A. Via S. Catelli 1 – 22070 Grandate (CO) Italy.
Non smaltire l’apparecchio o i suoi componenti come riuto urbano ma operare la raccolta die-
renziata facendo riferimento alle specifiche legislazioni vigenti in ogni paese.
Questo prodotto è conforme alla Direttiva 2012/19/UE.
Il simbolo del cestino barrato riportato sull’apparecchio indica che il prodotto, alla ne
della propria vita utile, dovendo essere trattato separatamente dai rifiuti domestici, deve
essere conferito in un centro di raccolta differenziata per apparecchiature elettriche ed elettroni-
che oppure riconsegnato al rivenditore al momento dell’acquisto di una nuova apparecchiatura
equivalente. L’utente è responsabile del conferimento dell’apparecchio a fine vita alle appropriate
strutture di raccolta. L’adeguata raccolta differenziata per l’avvio successivo dell’apparecchio di-
smesso al riciclaggio, al trattamento e allo smaltimento ambientalmente compatibile contribuisce
ad evitare possibili effetti negativi sull’ambiente e sulla salute e favorisce il riciclo dei materiali di
cui è composto il prodotto. Lo smaltimento abusivo del prodotto da parte dell’utente comporta
sanzioni amministrative stabilite per legge. Per informazioni più dettagliate inerenti i sistemi di
raccolta disponibili, rivolgersi al servizio locale di smaltimento rifiuti, o al negozio in cui è stato
effettuato l’acquisto.
Instructions
Please read these instructions carefully before use and keep
them for future reference.
SAFETY WARNINGS
WARNING
The European standard EN 60335-2-15/A11:2012 provides, for protecting the
safety of children, that any use of the product by children aged more than 3
years shall only happen under the supervision of an adult.
In compliance with the provisions of the current legislation, Artsana S.p.A.
reports below the warnings required by the regulations:
• This appliance can be used by children aged 3 years
and over under the supervision of an adult or if they
have been instructed on how to safely use the appli-
ance and if they understand the dangers involved.
Cleaning and maintenance to be performed by the
user should not be carried out by children under
8 years of age without the supervision of an adult.
Keep the appliance and the power cord out of the
reach of children under 3 years of age.
• Children must not play with this appliance.
• The appliance can be used by persons with reduced
physical, sensory or mental capabilities, or with no
prior experience or knowledge, provided that they
are supervised or have been instructed on how to
safely use the appliance and have understood the
risks involved.
However, due to the characteristics of this product category (electric feeding
bottle warmer), Artsana S.p.A. recommends that children of any age do not
use or interact with the product, even under the supervision of an adult.
• This appliance is destined for domestic use only, and

13
12
DATI TECNICI
REF 00007390000000
Mod. 06785
220-240V~, 50/60Hz, 170W
Peso: 530 gr
Dimensioni: 135.5 x 149.5 x h157mm
Per la garanzia sui difetti di prodotto si rinvia alle speciche previsioni delle normative naziona-
li applicabili nel Paese d’acquisto, dove previste. La garanzia non copre i componenti soggetti a
normale usura.
Artsana S.p.A. si riserva il diritto di modicare in qualsiasi momento e senza preavviso quanto de-
scritto nel presente manuale di istruzioni.
La riproduzione, la trasmissione, la trascrizione nonché la traduzione in altra lingua anche parziale
in qualsiasi forma di questo manuale, sono assolutamente vietate senza la previa autorizzazione
scritta da parte di Artsana S.p.A..
DICHIARAZIONE CE DI CONFORMITÀ:
Con la presente Artsana S.p.A dichiara che questo appa recchio marca Chicco mod. 06785 è conforme
ai requisiti essenziali ed alle altre disposizioni pertinenti stabilite dalle direttive 2004/108/CE (compa-
tibilità elettromagnetica), 2006/95/CE (sicurezza elettrica) e 2011/65/UE (RoHS). Copia integrale della
dichiarazione CE può essere richiesta ad Artsana S.p.A. Via S. Catelli 1 – 22070 Grandate (CO) Italy.
Non smaltire l’apparecchio o i suoi componenti come riuto urbano ma operare la raccolta die-
renziata facendo riferimento alle specifiche legislazioni vigenti in ogni paese.
Questo prodotto è conforme alla Direttiva 2012/19/UE.
Il simbolo del cestino barrato riportato sull’apparecchio indica che il prodotto, alla ne
della propria vita utile, dovendo essere trattato separatamente dai rifiuti domestici, deve
essere conferito in un centro di raccolta differenziata per apparecchiature elettriche ed elettroni-
che oppure riconsegnato al rivenditore al momento dell’acquisto di una nuova apparecchiatura
equivalente. L’utente è responsabile del conferimento dell’apparecchio a fine vita alle appropriate
strutture di raccolta. L’adeguata raccolta differenziata per l’avvio successivo dell’apparecchio di-
smesso al riciclaggio, al trattamento e allo smaltimento ambientalmente compatibile contribuisce
ad evitare possibili effetti negativi sull’ambiente e sulla salute e favorisce il riciclo dei materiali di
cui è composto il prodotto. Lo smaltimento abusivo del prodotto da parte dell’utente comporta
sanzioni amministrative stabilite per legge. Per informazioni più dettagliate inerenti i sistemi di
raccolta disponibili, rivolgersi al servizio locale di smaltimento rifiuti, o al negozio in cui è stato
effettuato l’acquisto.
Instructions
Please read these instructions carefully before use and keep
them for future reference.
SAFETY WARNINGS
WARNING
The European standard EN 60335-2-15/A11:2012 provides, for protecting the
safety of children, that any use of the product by children aged more than 3
years shall only happen under the supervision of an adult.
In compliance with the provisions of the current legislation, Artsana S.p.A.
reports below the warnings required by the regulations:
• This appliance can be used by children aged 3 years
and over under the supervision of an adult or if they
have been instructed on how to safely use the appli-
ance and if they understand the dangers involved.
Cleaning and maintenance to be performed by the
user should not be carried out by children under
8 years of age without the supervision of an adult.
Keep the appliance and the power cord out of the
reach of children under 3 years of age.
• Children must not play with this appliance.
• The appliance can be used by persons with reduced
physical, sensory or mental capabilities, or with no
prior experience or knowledge, provided that they
are supervised or have been instructed on how to
safely use the appliance and have understood the
risks involved.
However, due to the characteristics of this product category (electric feeding
bottle warmer), Artsana S.p.A. recommends that children of any age do not
use or interact with the product, even under the supervision of an adult.
• This appliance is destined for domestic use only, and

15
14
must be used in accordance with the user instruc-
tions provided. Any other use is to be deemed im-
proper and therefore dangerous.
• This appliance is for indoor use only and should
therefore not be exposed to sun, rain or other ele-
ments.
• In case the appliance is sold by the purchaser or
given to third party users, they must receive the
instructions for the safe use of the appliance, and
have understood the hazards involved, by reading
the instruction manual and in particular the safety
warnings contained in it, which should always ac-
company the appliance.
• Always place the appliance out of reach of children,
on flat, level surfaces, and away from cradles and
cots as the appliance and the water inside heats up
to a high temperature during use. Always pay maxi-
mum care and attention! Warning - burn risks.
• Never use the bottle warmer without water in the
heating tank.
• Pay great attention to prevent burns, during and at
the end of the operating cycle: the water and up-
per surface of the appliance can get very hot. Al-
ways remove the bottles and/or jars very carefully at
the end of the warming and/or stay-warm cycles as
they can get very hot.
• Before feeding your baby, always check the temper-
ature is not too hot (not over 37°C).
• Never move the bottle warmer when in use or when
it still contains hot liquids.
•
To disconnect the bottle warmer from the mains,
check that the device is switched off and discon-
nect the power cable plug from the mains socket.
Do not pull on the power cable or the appliance to
unplug the appliance from the mains.
• Check that the power cable is always unplugged
from the mains socket and that the bottle warmer
is cold before moving it, cleaning it, storing it, doing
maintenance work or in between warming cycles.
• The cleaning and maintenance to be performed by
the user should not be carried out by children and/
or people with reduced mental capabilities or lack-
ing experience or required knowledge.
• Never submerge or wet the plug, the bottle warmer
or power cable in water or any other liquid.
• Do not attempt to open or repair the appliance.
The bottle warmer can only be opened with special
tools. The power cable must only be replaced with
another identical power cable to the one supplied
with the appliance; this operation must be per-
formed by expert technicians or by Artsana S.p.A.
only.
•
These instructions are available on www.chicco.com
WARNING:
- Do not leave the appliance, its accessories and any packaging materials (plastic bags, cardboard
boxes, etc.) within the reach of children as they are not toys and can be hazardous.
- Before using the bottle warmer, always check that the product and all of its components are not
damaged. If in doubt, do not use the bottle warmer and contact your local retailer or qualied
experts.
- Ensure that the voltage and frequency (see voltage rating on the plate located underneath the

17
16
appliance) correspond to those provided by your mains network. The electrical system where the
appliance is used must conform to all safety regulations in force in the country the appliance is
being used.
- Connect the appliance to a mains socket that is easy to access.
- Never place the bottle warmer directly on or near hot surfaces, hobs, or onto delicate surfaces or
surfaces that may be sensitive to humidity and/or heat.
- Use heat-resistant glass or heat-resistant plastic feeding bottles only: never use disposable feed-
ing bottles.
- When using the product normally, always pay attention to the hot steam generated by the heated
water to prevent burns
- For hygiene-biological reasons, bottle warmers must be used for warming ready-to-eat meals,
and never to cook them. The ideal temperature when warming food is around 37°C . Never reheat
food more than once, or for over an hour.
- The final temperature of the food and the warming cycle time both depend on the amount
of food being reheated, the starting temperature (ambient, fridge or freezer temperatures), the
consistency of the mix, the selected warm-up cycle, plus the type and size of the containers
(plastic feeding bottles, glass feeding bottles, jars of baby food) and the amount of water in the
heating tank.
- After three minutes from the end of the warm-up cycle, or three minutes of inactivity, the appli-
ance will automatically switch to standby mode; allow it to cool down completely before using
it again.
- Never touch the bottle warmer with wet or damp hands.
- Never touch the bottle warmer if it accidentally falls into water; unplug it immediately and do not
use it again; contact expert qualied operators or Artsana S.p.A. for further instructions.
- If the bottle warmer is faulty and/or not working correctly, switch it o immediately and discon-
nect the plug from the mains socket. Do not attempt to open and/or tamper with the product.
Contact your retailer or one of Artsana S.p.A.’s authorised service centres.
- If any repair work is needed, contact expert qualied operators or Artsana S.p.A. only. Incorrect
repairs performed by unauthorised technicians can cause serious damage or injury to users.
- If you have any doubts on the contents of this instruction manual, please contact your retailer
or Artsana S.p.A..
- When disposing of packaging, parts which wear out or the appliance itself, dispose of them at
an appropriate differentiated collection point, as requested by the laws in force in each country.
SYMBOLS KEY
= double insulation
= Appliance in compliance with the essential requirements laid down in EC Directives in
force.
= WARNING!
= user instructions
= please read the instruction manual
= for indoor use only
Dear customer,
We thank you and congratulate you on your choice. The Digit Bottle Warmer allows warming milk
and baby food quickly and safely.
Compatible with most feeding bottles and food jars on the market.
You can choose the warming mode that best suits your needs by selecting the initial temperature
of the milk or baby food. Plus the defrost function is safer than the microwave for defrosting.
Before using this bottle warmer, please read these instructions carefully and keep them for future
reference.
DESCRIPTION (g. 1)
a) Main body
b) Baby food jar/feeding bottle support
c) Power cord
d) Selector buttons
d1) Display
d2) Feeding Bottle (capacity)/Jar selector button
d3) Food starting temperature selector button
d4) Timer selection button
d5) ON/OFF button
USER INSTRUCTIONS
Warning: We recommend sanitising and/or disinfecting the feeding bottle with care before tting
inside the bottle warmer. Never use the bottle warmer without water in the heating tank.
To pour the correct amount of water into the tank, use the feeding bottle which is marked with
graduated scale or other suitable recipients. Never place the appliance under running water to ll
the tank up.
Before performing the steps illustrated below, make sure the power cord (c) is unplugged from
the mains socket.
1. Place the bottle warmer on a at, level surface.
2. Pour water inside the main body (a) as follows:
Feeding Bottle (capacity) or jar
Feeding bot-
tle approx.
150 ml/5 oz
Feeding bottle
approx.
250 ml/9 oz
Feeding bottle
approx.
330 ml/11 oz
Baby food jar
Starting
temperature
20°C 20 ml 40 ml 80 ml5°C
-18°C 40 ml 60 ml
NB: The quantities of water needed for warming indicated above refer to Chicco feeding bottles
and 80-ml jars. We recommend using the same quantities for feeding bottles of other brands and
jars of different sizes making sure though to check the temperature of the food at the end of the
warming cycle (max 37°). If the food is not hot enough, repeat the warming cycle.
3. Slowly insert the baby food jar/feeding bottle support (b) inside the main body (a) and:
• FEEDING BOTTLE: complete with ring and teat t on the bottle without the cup.
• FOOD JAR: without lid and any labels.
WARNING: small jars and feeding bottles must be placed on the baby food jar/feeding

17
16
appliance) correspond to those provided by your mains network. The electrical system where the
appliance is used must conform to all safety regulations in force in the country the appliance is
being used.
- Connect the appliance to a mains socket that is easy to access.
- Never place the bottle warmer directly on or near hot surfaces, hobs, or onto delicate surfaces or
surfaces that may be sensitive to humidity and/or heat.
- Use heat-resistant glass or heat-resistant plastic feeding bottles only: never use disposable feed-
ing bottles.
- When using the product normally, always pay attention to the hot steam generated by the heated
water to prevent burns
- For hygiene-biological reasons, bottle warmers must be used for warming ready-to-eat meals,
and never to cook them. The ideal temperature when warming food is around 37°C . Never reheat
food more than once, or for over an hour.
- The final temperature of the food and the warming cycle time both depend on the amount
of food being reheated, the starting temperature (ambient, fridge or freezer temperatures), the
consistency of the mix, the selected warm-up cycle, plus the type and size of the containers
(plastic feeding bottles, glass feeding bottles, jars of baby food) and the amount of water in the
heating tank.
- After three minutes from the end of the warm-up cycle, or three minutes of inactivity, the appli-
ance will automatically switch to standby mode; allow it to cool down completely before using
it again.
- Never touch the bottle warmer with wet or damp hands.
- Never touch the bottle warmer if it accidentally falls into water; unplug it immediately and do not
use it again; contact expert qualied operators or Artsana S.p.A. for further instructions.
- If the bottle warmer is faulty and/or not working correctly, switch it o immediately and discon-
nect the plug from the mains socket. Do not attempt to open and/or tamper with the product.
Contact your retailer or one of Artsana S.p.A.’s authorised service centres.
- If any repair work is needed, contact expert qualied operators or Artsana S.p.A. only. Incorrect
repairs performed by unauthorised technicians can cause serious damage or injury to users.
- If you have any doubts on the contents of this instruction manual, please contact your retailer
or Artsana S.p.A..
- When disposing of packaging, parts which wear out or the appliance itself, dispose of them at
an appropriate differentiated collection point, as requested by the laws in force in each country.
SYMBOLS KEY
= double insulation
= Appliance in compliance with the essential requirements laid down in EC Directives in
force.
= WARNING!
= user instructions
= please read the instruction manual
= for indoor use only
Dear customer,
We thank you and congratulate you on your choice. The Digit Bottle Warmer allows warming milk
and baby food quickly and safely.
Compatible with most feeding bottles and food jars on the market.
You can choose the warming mode that best suits your needs by selecting the initial temperature
of the milk or baby food. Plus the defrost function is safer than the microwave for defrosting.
Before using this bottle warmer, please read these instructions carefully and keep them for future
reference.
DESCRIPTION (g. 1)
a) Main body
b) Baby food jar/feeding bottle support
c) Power cord
d) Selector buttons
d1) Display
d2) Feeding Bottle (capacity)/Jar selector button
d3) Food starting temperature selector button
d4) Timer selection button
d5) ON/OFF button
USER INSTRUCTIONS
Warning: We recommend sanitising and/or disinfecting the feeding bottle with care before tting
inside the bottle warmer. Never use the bottle warmer without water in the heating tank.
To pour the correct amount of water into the tank, use the feeding bottle which is marked with
graduated scale or other suitable recipients. Never place the appliance under running water to ll
the tank up.
Before performing the steps illustrated below, make sure the power cord (c) is unplugged from
the mains socket.
1. Place the bottle warmer on a at, level surface.
2. Pour water inside the main body (a) as follows:
Feeding Bottle (capacity) or jar
Feeding bot-
tle approx.
150 ml/5 oz
Feeding bottle
approx.
250 ml/9 oz
Feeding bottle
approx.
330 ml/11 oz
Baby food jar
Starting
temperature
20°C 20 ml 40 ml 80 ml5°C
-18°C 40 ml 60 ml
NB: The quantities of water needed for warming indicated above refer to Chicco feeding bottles
and 80-ml jars. We recommend using the same quantities for feeding bottles of other brands and
jars of different sizes making sure though to check the temperature of the food at the end of the
warming cycle (max 37°). If the food is not hot enough, repeat the warming cycle.
3. Slowly insert the baby food jar/feeding bottle support (b) inside the main body (a) and:
• FEEDING BOTTLE: complete with ring and teat t on the bottle without the cup.
• FOOD JAR: without lid and any labels.
WARNING: small jars and feeding bottles must be placed on the baby food jar/feeding

19
18
bottle support (b) before being inserted inside the main body (a).
Make sure that no water overows from the top of the appliance; for small sized feeding bottles or
jars, check that the water does not reach the top or open mouth of the same.
If water overows from the bottle warmer when the feeding bottle is placed inside the main body
(a), immediately use a dry cloth to dry the outside and base of the bottle warmer and the power
cord; then pour out the water in excess from the tank.
4. Connect the power cord connector (c) to the appliance and plug it into the mains socket. The
appliance will beep when it is connected correctly (1 beep).
5. Press and hold the ON/OFF button (d5) for about 3 seconds to switch the bottle warmer ON.
NB: After 3 minutes of inactivity or from the end of the “warm-up” cycle, the appliance will switch to
“stand-by” mode and the green led above the main button will blink. To restart the appliance when
it is in “stand by” mode, briey press and release the “ON/OFF” button (d5).
NB: To switch the bottle warmer o, at any time, press and hold the “ON/OFF” button (d5).
6. Select the type/capacity of the container to be warmed by pressing the Feeding Bottle (capac-
ity)/Jar selector button selector button (d2) until the blue led is positioned on the desired option:
Jar, Feeding Bottle 150 ml; Feeding Bottle 250 ml; Feeding Bottle 330 ml.
7. Set the starting temperature of the food by pressing the food starting temperature selector but-
ton (d3) until the blue led is positioned on the desired option: Ambient temperature (* about
20°C); Average fridge temperature (** about 5°C); Average freezer temperature (*** about -18°C);
8. Press and release the “ON/OFF” button (d5) to start the selected cycle. The red led above the but-
ton will come on (fixed light) to signal the start of the warm-up cycle. The warming cycle count-
down time can be seen on the display (d1). At the end of this cycle, a visual signal will appear on
the display (d1 (00) and the ON/OFF button led will turn to green. In addition, the appliance will
beep 5 times to indicate the food is ready.
STANDARD WARM UP TIMES (in minutes)
Feeding Bottle (capacity) or jar
Feeding bottle
approx.
150 ml/5 oz
Feeding bottle
approx.
250 ml/9 oz
Feeding bottle
approx.
330 ml/11 oz
Baby food jar
Starting
temperature
20°C 3.5 min 4 min 5.5 min 7 min
5°C 5 min 6 min 8 min 8.5 min
-18°C 13 min 18 min 24 min 19 min
9. On removing the bottles and/or baby food jars from the main body of the bottle warmer (a),
dry them carefully.
WARNING
The warming cycle times in the table above refer to Chicco feeding bottles and 80 ml jars. The nal
temperature may not be that desired with feeding bottles of other brands and jars of different sizes.
Before feeding your baby, always check the temperature of the contents is not too hot.
If the food is not hot enough, put it back in the warmer and repeat the warming cycle. Check the
warming status at regular intervals, taking care not to burn yourself, until the required temperature
is reached.
IN PARTICULAR:
For feeding bottles:
- Shake the feeding bottle for a few seconds to ensure the temperature of the contents is even; then
check the temperature by squeezing a few drops onto the inside of your wrist.
For baby food jars:
– Stir the contents of the jar to make sure the temperature is even, then taste it to check it is not
too hot.
NB: If the content is warmed too much, the precious nutrients and vitamins contained in milk may
be destroyed.
10. Press and hold the ON/OFF button (d5) for about 3 seconds to switch the bottle warmer OFF.
Disconnect the plug from the mains and the connector from the appliance.
USING THE TIMER FUNCTION
This feature can be used to warm-up the food in advance (up to 1 hour before).
Follow the instructions in steps 1 to 5 of the USER INSTRUCTIONS.
6. Press the Timer button (d4) until you reach the time interval within which the contents should be
ready. Time intervals: 15 min; 30 min; 45 min; 60 min.
7. Press the ON/OFF button (d5) to start the selected cycle.
The led above the button will go red and blink until the actual warm-up cycle begins. The red led
will remain fixed from start to finish of the warm-up cycle.
The warming cycle countdown time can be seen on the display (d1).
At the end of this cycle, a visual signal will appear on the display (d1 (00) and the ON/OFF button
led will turn to green. In addition, the appliance will beep 5 times to indicate the food is ready.
NB: If the time needed to complete the warm-up cycle is longer than the options available for the
Timer function, the numbers will ash on the display (d1) to warn you that the entered time is not
within the timer threshold. Press the ON/OFF button (d5) to start the selected cycle.
WARNING: Always check that the temperature of the food is not too hot before feeding
your child.
We recommend consuming powdered formula mixed with cold water immediately.
NB:
- We recommend consuming warmed milk and baby food immediately.
- Milk and baby food must never be warmed again after feeding. If you warmed the milk/baby food
for a previous meal, throw it away.
CLEANING, CARE & MAINTENANCE OF THE APPLIANCE
When you nish using the appliance, always unplug the bottle warmer’s power cord (c) plug from
the mains socket. Allow the bottle warmer to cool down completely, remove any water left inside
and dry the inside thoroughly; store it in a clean and dry place.
DESCALING
During normal use of the appliance, limescale residue may build up inside the water tank which
can compromise the performance and damage the appliance over time. To remove the limescale
from the bottom of the tank, check that the bottle warmer is cold, make a 200-ml solution of water
and white vinegar, in equal parts, and pour into the tank; leave to soak overnight.
Never switch the bottle warmer ON when the tank is being soaked in the water-white vinegar mix.
On completing the descaling cycle, rinse the inside of the tank thoroughly; then wash and dry the
inside and outside of the appliance.
Fill the bottle warmer tank with 140 ml of water and complete an idle warming cycle using the 250
ml feeding bottle fridge starting temperature settings. When the green led above the ON/OFF (d5)
button comes on, switch the appliance OFF, leave to cool down and then remove any water left

21
20
inside and dry thoroughly.
Use a soft damp cloth to clean the external parts of the appliance.
In order to avoid the formation of limescale residues, it is necessary to frequently clean the water
tank, at least once a week, or more often if the water used has a high limestone content.
Do not use tools, abrasive products, harsh detergents, alcohol, solvents or similar products when
cleaning the appliance, which may cause permanent damage to the bottle warmer and/or its ac-
cessories.
WARNING:
- Never place the bottle warmer directly under a running water tap, and never submerge the appli-
ance, the plug or the power cable (c) in water or any other liquid.
- Never place the bottle warmer in the dish-washer.
TECHNICAL FEATURES
REF 00007390000000
Mod. 06785
220-240V~, 50/60Hz, 170W
Weight: 530 g.
Measurements: 135.5 x 149.5 x h157mm
Please refer to the specic regulations in force in the country of purchase, if any, with regard to the
warranty against product defects. The warranty does not cover components subject to normal
wear and tear.
Artsana S.p.A. reserves the right to change information provided in this manual at any time and
without notice.
All reproduction, transmission, transcription or translation into other languages of this manual, or
part of the same, is strictly prohibited without prior written authorisation by Artsana S.p.A..
DECLARATION OF EC COMPLIANCE:
Artsana S.p.A hereby declares that this Chicco appliance, model number 06785, appliance complies
with all the essential requirements and other provisions indicated in the EU Directives 2004/108/EC
(electromagnetic compatibility) and 2006/95/EC (electrical safety) and 2011/65/EU (RoHS). A full copy
of the EC declaration can be requested from Artsana S.p.A. Via S. Catelli 1 – 22070 Grandate (Co) Italy.
Do not dispose of this appliance or its components as normal urban refuse. Dispose of them at
an appropriate differentiated collection point, as requested by the laws in force in each country.
This product complies with the Directive 2012/19/EU.
The crossed bin symbol on the appliance indicates that the product, at the end of its life,
must be disposed of separately from domestic waste, either by taking it to a separate waste
disposal site for electric and electronic appliances or by returning it to your dealer when you buy
another similar appliance. The user is responsible for taking the appliance to a special waste dis-
posal site at the end of its life. If the disused appliance is collected correctly as separate waste, it
can be recycled, treated and disposed of ecologically; this avoids a negative impact on both the
environment and health, and contributes towards the recycling of the product’s materials. For fur-
ther information regarding the waste disposal services available, contact your local waste disposal
agency or the shop where you bought the appliance.
Notice d’emploi
Lire attentivement ces instructions et les conserver pour
toute consultation ultérieure.
AVERTISSEMENTS DE SÉCURITÉ
AVERTISSEMENT
La norme européenne EN 60335-2-15 / A11: 2012 prévoit, pour la sécurité des
enfants, que l’utilisation éventuelle du produit par des enfants de plus de 3 ans
ait lieu exclusivement sous la surveillance d’un adulte.
Conformément aux dispositions de la règlementation en vigueur, Artsana
S.p.A. reporte ci-après l’avertissement prévu par la norme :
• Cet appareil peut être utilisé par des enfants de plus
de 3 ans s’ils sont sous la surveillance d’un adulte
ou s’ils ont reçu des instructions concernant l’utili-
sation de l’appareil en toute sécurité et s’ils sont en
mesure de comprendre les dangers encourus. Les
opérations de nettoyage et d’entretien par l’utilisa-
teur ne doivent pas être eectuées par des enfants,
sauf s’ils ont plus de 8 ans et qu’ils agissent sous la
surveillance d’un adulte. Garder l’appareil et son
câble hors de portée des enfants de moins de 3 ans.
• Les enfants ne doivent pas jouer avec cet appareil.
• Ces appareils peuvent être utilisés par des per-
sonnes ayant des capacités physiques, sensorielles
ou mentales réduites ou manquant d’expérience et
de connaissances si elles sont sous la surveillance
d’un adulte ou si elles ont reçu des instructions
concernant l’utilisation de l’appareil en toute sécu-
rité et qu’elles sont en mesure de comprendre les
dangers encourus.
Cependant, en raison des caractéristiques de cette catégorie de produits
Other manuals for 06785
1
This manual suits for next models
1
Table of contents
Languages:
Other Chicco Bottle Warmer manuals

Chicco
Chicco 7389 User manual

Chicco
Chicco 06785 User manual

Chicco
Chicco 06867 M User manual

Chicco
Chicco 06783 User manual

Chicco
Chicco 00060082000000 User manual

Chicco
Chicco NaturalFit Electric Bottle Warmer User manual

Chicco
Chicco 000.71553.000.000 User manual

Chicco
Chicco 06785U User manual

Chicco
Chicco 06867 MU User manual

Chicco
Chicco 06785U User manual