English
GREAT BRITAIN
For consumer contact, please visit www.clasohlson.co.uk and click on customer service.
Ver. 200909
Please read the entire instruction manual before using the
product and save it for future reference. We apologise for
any text or photographic errors and any changes in technical
data. If you have any questions concerning technical pro-
blems please contact our Customer Service Department.
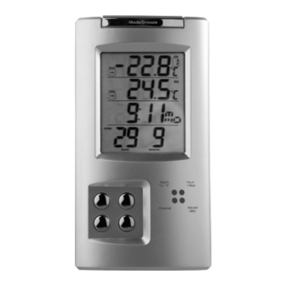
Receiver and Sensor
A. Channel:Press repeatedly to browse between the
channels 1-4, or to browse between the week days
when you set the date.
B. Alarm/°C/°F:Switches between ºC and ºF, 12 and 24
hour format, alarm on and off; erases the settings for
the temperature alarm.
C. Mode/Snooze: Press repeatedly to browse between
time, week day, time zone, alarm and temperature
alarm. Snooze button for the alarm.
D. Hour/+/Max:Press repeatedly to set hours, months,
and language. Also displays max. temperature
indoors and outdoors and increases the degrees
when setting the temperature alarm.
E. Minute/-/Min:Press repeatedly to set minutes, days,
and language. Also displays min. temperature
indoors and outdoors and increases the degrees
when setting the temperature alarm.
F. Tablestand/Wallbracket.
G. SET: Channel and house code setting button.
H. C/F: Changes between Celsius and Fahrenheit and
skips between channels and house codes.
I. Batterycompartment.
J. Connectortoanexternaltemperaturesensor.
K. LCD-display.
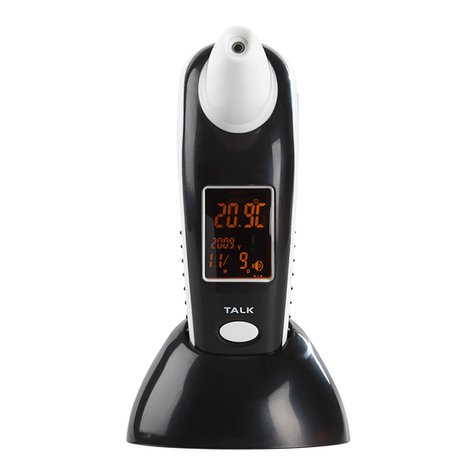
Wireless Thermometer, art.no. 36-2953 Display
Before Starting
1. Insert batteries in the sensor rst, then the receiver.
2. When inserting the batteries, place the sensor and the
receiver unit close to each other to make sure that they
synchronise.
3. Position the sensor and receiver within operating range of
one another.
NOTE
• Despite the sensor being watertight, we recommend that
it is not exposed to direct sunlight, rain and snow.
• The range of the units is affected by their position in
relation to various obstacles or walls. Experiment until
you nd the best position.
Getting Started
Installation of the sensor
1. Remove the battery cover and
insert 2 x LR6 AA batteries. Make
sure that the plus and minus poles
correspond to the markings in the
battery compartment.
2. The house code digit ashes for 8 seconds.
3. While the digit blinks, select house code (01-15) by
pressing C/Frepeatedly. Make sure that all the sensors
in your system has the same house code.
4. Push SET to conrm the house code. The channel will
ash for 8 seconds.
5. Choose channel (1-4) by pressing C/F. Conrm channel
by pressing SETor by not pressing any chance for 10
seconds. If you only have one sensor, we recommend
that you choose channel 1.
6. The temperature is shown on the display.
7. Alternate between Celsius and Fahrenheit by pushing C/F.
• When the sensor is installed it will send data with one
minute intervals.
• Choose another house code if your weather station can
receive interference from other radio signals.
• Factory presetting: house code = 01, channel = 1
Setting the alarm
The alarm sounds for two minutes. Turn it off with any
button or let it repeat after 5 minutes withMode/Snooze.
Outdoors temperature
and trend
Indoor temperature and
trend
Clock/Alarm clock
Date/Month
Channel for
outdoor sensor.
Day of the week
Symbols for the
alarm clock
Outdoor temperature
Installation of the Receiver
Remove the battery cover and insert
2 x LR6 AA batteries. Make sure that the
plus and minus poles correspond to the
markings in the battery compartment.
Setting the time, date, language and
alternative time zone
Setting the clock
1. Hold Mode/Snooze for three seconds until a signal is
heard and you get to the settings mode. The digits for the
clock blink.
2. Press Hour/+/Max
to set the hours and
press Minute/-/Min
to set the minutes.
3. While setting
the clock, press
Alarm/°C/°F to switch
between 12/24 hour
clock.
Setting the date
1. When the digits for the clock blink, press Mode/Snooze
one more time so the date starts blinking.
2. Press Hour/+/Max to set the month and press Minute/-
/Minto set the day.
Setting the language
1. When the digits for the date starts blinking, press
Mode/Snooze until the letter for language (D for German,
E for English, F for French or I for Italian) blinks.
2. Then set the language with Hour/+Max and
Minute/-/Min.
Alternative time zone setting
Can be used to display +/- 12 hours compared to your
current time zone.
1. Press and hold Mode/Snooze for three seconds until a
buzzer is heard and you get to the settings mode. Then
press Mode/Snooze until the setting for time zone blinks.
2. Push the Hour/+/Max button or the Minute/-/Min button
to set the right time zone.
3. Conrm the setting with Snooze/Mode.
1. Press Mode/Snooze repea-
tedly until you get to Alarm 1
or
2. Press Hour/+/Maxto set the
hours and press Minute/-
/Min to set the minutes.
3. PressAlarm/°C/°F to
activate or deactivate the
alarm. ON is seen next to the
alarm symbol if the alarm is
activated.
Synchronization of the outdoor temperature
Automatic synchronisation
1. The synchronisation starts automatically and lasts for about
three minutes when you insert batteries for the rst time.
2. During these three minutes the
receiver emits an audible signal,
intercepts the temperature in-
formation and displays it on the
readout.
NOTE: If the receiver does not receive any signals within
three minutes “- - -” appears instead of the temperature.
Position the units closer together and start the automatic
synchronisation again by removing and inserting the batteries
once more.
Manual synchronisation (searching for signals):
If you add another sensor to the system or if the receiver
loses the signal (digits for the outdoor temperature ash) you
need to synchronise the system again.
1. Hold in the Channel button
for three seconds when the
receiver is in clock mode 1.
2. An audible signal lets you
know that the synchronisa-
tion has begun.
3. The “CH” icon ashes and
the receiver emits an audible
signal when it has located
the new sensor.
4. The temperature at the sensor are displayed on the readout.
NOTE. The synchronisation procedure lasts about three
minutes. If the units have not found one another within that
time, try new positions until the signal is received.
Receiver
Sensor
Channel
