manuals.online logo
Brands
  1. Home
  2. •
  3. Brands
  4. •
  5. Cree
  6. •
  7. Lantern
  8. •
  9. Cree CPY Series User manual

Cree CPY Series User manual

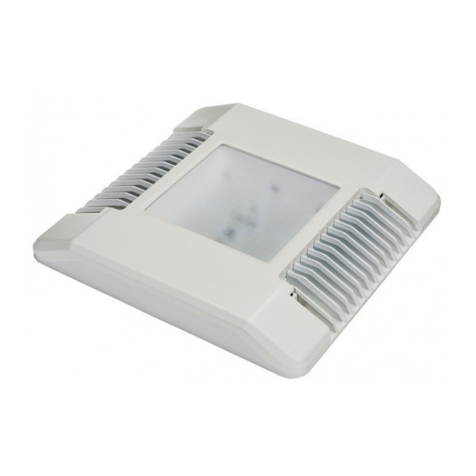
CPY Series
LED Canopy Luminaire
Includes: CPY250TM Luminaires
1 of 2 CI391X01R2
INSTALLATION INSTRUCTIONS
INSTRUCTIONS D’INSTALLATION
TO INSTALL:
DIRECT MOUNT - CANOPY APPLICATIONS
NOTE: For use with XA-BXCCJBOX accessory or customer
supplied junction box and stem.
STEP 1:
Remove bushing from threaded hub.
STEP 2:
Cut a 2.0” hole for stem into canopy. For installation using
alignment template instructions refer to “Alignment
Template (Optional)” section.
NOTE: Luminaire can be mounted to an existing hole in
canopy up to 4” diameter.
STEP 3:
To mount luminaire to canopy, insert and tighten (4)
supplied Phillips hex head self-drilling sheet metal
screws as shown in Figure 1.
STEP 4:
From above canopy feed leads from luminaire through
customer supplied 3/4” NPT Stem. Screw customer
supplied NPT Stem into luminaire hub. See Figure 2.
STEP 5:
Attach customer supplied junction box to the other end of
the customer supplied 3/4” NPT Stem and make wiring
connections into customer supplied junction box per
“Electrical Connections” section.
STEP 6:
Apply sealant around stem, hub and alignment screw for a
complete seal.
ALIGNMENT TEMPLATE (OPTIONAL)
STEP 1:
Reference Figure 3 for alignment. Insert supplied #8
screw into alignment hole on luminaire. See Figure 4 (on
back page).
STEP 2:
Cut a 2.0” hole into the desired location of the canopy to
mount the threaded hub of the luminaire. See Figure 3.
STEP 3:
4” away from the Stem Hole, drill a 0.325” hole, Alignment
Hole, using a 11/32” drill bit for the alignment screw. See
Figure 3.
1
Insert
Mounting
Screws
2
3/4” NPT Stem
(Provided by customer)
Canopy
Luminaire Hub
2.00”
0.325”
4.00”
3
Stem Hole
Alignment Hole
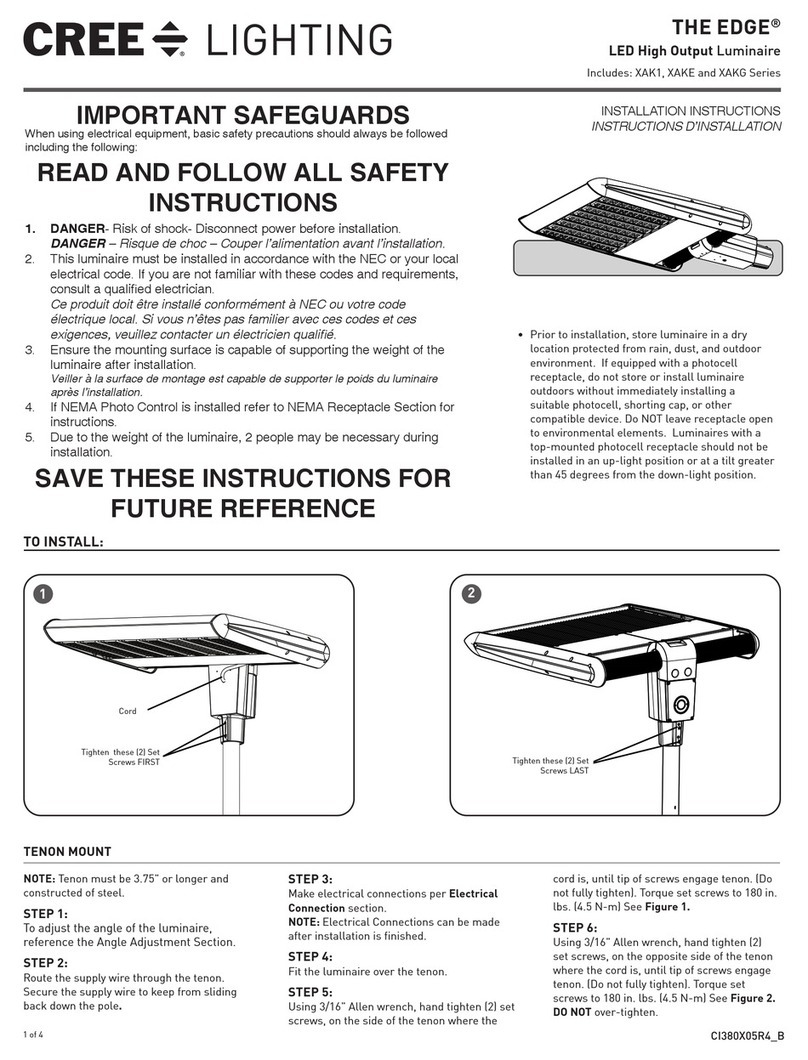
IMPORTANT SAFEGUARDS
When using electrical equipment, basic safety precautions should always be followed including the
following:
READ AND FOLLOW ALL SAFETY INSTRUCTIONS
1. DANGER- Risk of shock- Disconnect power before installation.
DANGER – Risque de choc – Couper l’alimentation avant l’installation.
2. This luminaire must be installed in accordance with the NEC or your local electrical code. If you
are not familiar with these codes and requirements, consult a qualied electrician.
Ce produit doit être installé conformément à NEC ou votre code électrique local. Si vous n’êtes
pas familier avec ces codes et ces exigences, veuillez contacter un électricien qualié.
3. DO NOT lift luminaire by the power leads or cord.
SAVE THESE INSTRUCTIONS FOR FUTURE
REFERENCE
NOTE:
No user maintenance is required. Do not
remove the enclosure cover after installation.
2 of 2 CI391X01R2
www.cree.com/lighting
© 2015 Cree, Inc. All rights reserved. For informational purposes only. Content is subject to change.
See www.cree.com/lighting/products/warranty for warranty and specifications. Cree® is a registered
trademark, and the Cree logo is a trademark of Cree, Inc.
STEP 4:
Bring luminaire to canopy and insert threaded
hub into the 2.0” Stem Hole that was cut in Step
2. Rotate luminaire until alignment screw seats
into the 0.325” Alignment Hole that was cut in
Step 3. See Figure 4.
STEP 5:
Continue to Step 2 in “Direct Mount - Canopy
Applications” section.
DIRECT MOUNT OVER JUNCTION BOX
NOTE: For use with customer supplied
junction box. Junction box must be 4” square or
octagon.
STEP 1:
Attach Air Craft Cable, provided in the hardware
bag, using supplied #8 pan head screw to
luminaire near the threaded hub as shown in
Figure 5.
STEP 2:
Attach other end of the Air Craft Cable to the
customer supplied junction box using supplied
#8 pan head screw. Then carefully let the
fixture hang down for wiring. See Figure 5.
STEP 3:
Make wiring connections into junction box per
“Electrical Connections” section.
STEP 4:
To mount luminaire to ceiling, feed the
threaded hub into the junction box, making sure
no wires are pinched and luminaire is flushed
with ceiling.
STEP 5:
Insert and tighten (4) supplied sheet metal
screws to metal ceiling. If ceiling isn’t metal
use appropriate customer supplied hardware.
See Figure 6.
Junction Box
5
6
Insert
Mounting
Screws
4Alignment Hole
Threaded Hub
Air Craft
Cable
Threaded
Hub
Cable
Hole
ELECTRICAL CONNECTIONS
STEP 1:
Make the following Electrical Connections :
a. Connect the black fixture lead to the voltage supply position
of the terminal block or Hot 1 (for 208/240V wiring).
b. Connect the white fixture lead to the neutral supply position
of the terminal block or Hot 2 (for 208/240V wiring).
c. Connect the green or green/yellow ground lead to the green
wire position of the terminal block.
d. If Dimming is an option; connect the violet dimming positive
lead to the supply dimming positive lead.
e. If Dimming is an option; connect the grey dimming negative
lead to the supply dimming negative lead.
LINE
OR HOT 1
GREEN
LINE-BLACK
GROUND-GREEN
NEUTRAL-WHITE
DIM (-) GREY
DIM (+) VIOLET
NEUTRAL
OR HOT 2
VIOLET
GREY
SUPPLY WIRING
(DIMMING OPTIONAL)
LUMINAIRE
TERMINAL
BLOCK

This manual suits for next models

1

Other Cree Lantern manuals

Cree IG Series User manual

Cree

Cree IG Series User manual

Cree RUL Series User manual

Cree

Cree RUL Series User manual

Cree CR Series User manual

Cree

Cree CR Series User manual

Cree XSP Series User manual

Cree

Cree XSP Series User manual

Cree RUL Series User manual

Cree

Cree RUL Series User manual

Cree CS14 User manual

Cree

Cree CS14 User manual

Cree CPY250 User manual

Cree

Cree CPY250 User manual

Cree XRAAF Series User manual

Cree

Cree XRAAF Series User manual

Cree DPT Series User manual

Cree

Cree DPT Series User manual

Cree KBL Series Installation instructions

Cree

Cree KBL Series Installation instructions

Cree Essentia FP Series User manual

Cree

Cree Essentia FP Series User manual

Cree WS Series User manual

Cree

Cree WS Series User manual

Cree XAK Series User manual

Cree

Cree XAK Series User manual

Cree LS8 User manual

Cree

Cree LS8 User manual

Cree ZR Series User manual

Cree

Cree ZR Series User manual

Cree FLEX Series User manual

Cree

Cree FLEX Series User manual

Cree 228 Series User manual

Cree

Cree 228 Series User manual

Cree Edge User manual

Cree

Cree Edge User manual

Cree C-Lite C-TR-A-FP User manual

Cree

Cree C-Lite C-TR-A-FP User manual

Cree Edge XAKE Series User manual

Cree

Cree Edge XAKE Series User manual

Cree 228 Series User manual

Cree

Cree 228 Series User manual

Cree THE EDGE Series User manual

Cree

Cree THE EDGE Series User manual

Popular Lantern manuals by other brands

Portfolio WL121MBKP manual

Portfolio

Portfolio WL121MBKP manual

Emos SSD-6605 instructions

Emos

Emos SSD-6605 instructions

Gardenic OZ-040238 user manual

Gardenic

Gardenic OZ-040238 user manual

SPITTLER SL 740 LED manual

SPITTLER

SPITTLER SL 740 LED manual

WAGNER KYOTO manual

WAGNER

WAGNER KYOTO manual

Philips HP 3147 manual

Philips

Philips HP 3147 manual

Coleman 4D XPS How to use

Coleman

Coleman 4D XPS How to use

StreamLight Super Siege 44947 operating instructions

StreamLight

StreamLight Super Siege 44947 operating instructions

Coleman 9975 Series Instructions for use

Coleman

Coleman 9975 Series Instructions for use

Mr. Christmas DECORATIVE MUSICAL LANTERN manual

Mr. Christmas

Mr. Christmas DECORATIVE MUSICAL LANTERN manual

Mobile Power 4059 instruction manual

Mobile Power

Mobile Power 4059 instruction manual

Bomma Pebbles installation manual

Bomma

Bomma Pebbles installation manual

Gama Sonic GS-111PL instruction manual

Gama Sonic

Gama Sonic GS-111PL instruction manual

GE Lumination Current LEL Series installation guide

GE

GE Lumination Current LEL Series installation guide

Touch Of ECO NITEWATCH PRO instructions

Touch Of ECO

Touch Of ECO NITEWATCH PRO instructions

Wetelux 89 27 89 instruction manual

Wetelux

Wetelux 89 27 89 instruction manual

Clas Ohlson TN-8069 instruction manual

Clas Ohlson

Clas Ohlson TN-8069 instruction manual

BEGA 99 595 Instructions for use

BEGA

BEGA 99 595 Instructions for use

manuals.online logo
manuals.online logoBrands
  • About & Mission
  • Contact us
  • Privacy Policy
  • Terms and Conditions

Copyright 2025 Manuals.Online. All Rights Reserved.