manuals.online logo
Brands
  1. Home
  2. •
  3. Brands
  4. •
  5. Crux
  6. •
  7. Automobile Accessories
  8. •
  9. Crux RVCCH-75E User manual

Crux RVCCH-75E User manual

RVCCH-75E
Rear View Integration Interface
for CHRYSLER & DODGE Vehicles with 8.4” Screen
R
INTERFACING SOLUTIONS
Sightline
Multi View Integration
Crux Interfacing Solutions • 21541 Nordhoff St., Unit C, Chatsworth, CA 91311
phone: (818) 609-9299 • fax: (818) 996-8188 • www.cruxinterfacing.com
rev.020520
1 of 4
• Acvates Uconnect Touchscreen Radio for enabling Video features
• Aermarket Rear-view Camera included
• Automacally switches to Rear-view when car is in Reverse mode
• Forced reverse camera view feature
• VIM funcon
• Plug & Play Installaon
PRODUCT FEATURES:
PARTS INCLUDED:
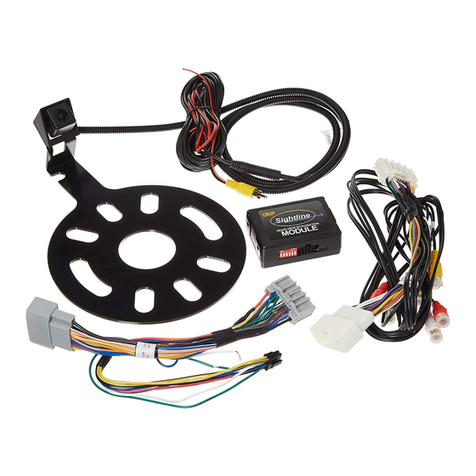
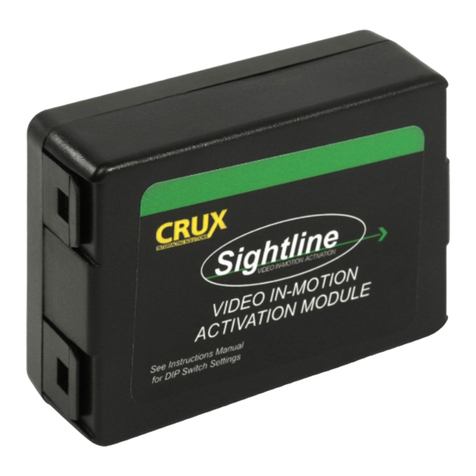
RVCCH-75E Module RVCCH-75E Harness
INSTALLATION DIAGRAM:
WHITE Wire
Parking Guideline
DP
ON
DIP
SWITCH
LED* *LED RED = Power ON Status
LED BLUE = Data Bus ON Status
Regulator
20 Ft. Coax Cable
8-Pin Molex
Represents Solder Joint
TO RADIO
WHITE
22-PIN
(MALE)
GRAY
22-PIN
(MALE)
WHITE
22-PIN
(FEMALE)
GRAY
22-PIN
(FEMALE)
TO FACTORY
HARNESS
GREEN WIRE
ACTIVATE VIDEO BYPASS
WHITE Wire*
(Camera Power Output
+12V 250mA)
RED Wire
Tape O
(Not Used)
CUB-01 Camera
Included
*White wire does not supply Reverse Trigger on Manual Transmissions.
Camera power must be connected to factory reverse light wire instead.
To Source Ground
(ground wire)
(not chassis ground)
Crux Interfacing Solutions • 21541 Nordhoff St., Unit C, Chatsworth, CA 91311
phone: (818) 609-9299 • fax: (818) 996-8188 • www.cruxinterfacing.com
rev.020520
2 of 4
R
INTERFACING SOLUTIONS
Sightline
Multi View Integration
DIP SWITCH SETTINGS:
INSTALLATION INSTRUCTIONS:
INSTALLING THE BULLET CAMERA AND CABLE
The kit includes a universal bullet camera that can be mounted in dierent ways. On way is to mount it on the
third brake light. Please see page 3 for installaon instrucons. Once the camera has been installed, route the
camera cable towards the radio.
INSTALLING THE RVCCH-75E MODULE
Remove the radio to gain access to the connectors. Unplug the factory WHITE and GRAY connectors and plug
them into the WHITE and GRAY connectors of the RVCCH-75E T-harness. Mate the YELLOW male and female
video RCAs of the RVCCH-75E T-harness and the camera cable. Use the thin RED wire on the camera cable to
power the camera. Connect the thin RED wire to the WHITE wire on the RVCCH-75E harness. The RED wire near
the camera is not used and needs to be insulated with tape. Connect the BLACK ground wire near the camera to
chassis ground. See diagram on page 1. Test the system for funconality before reinstalling the radio.
FORCED VIEW OF REVERSE CAMERA
The RVCCH-75E has a feature that allows the user to view the reverse camera while driving.
To acvate this feature, set DIP#4 to ON. Press and hold the middle buon on the le side
SWC behind the steering wheel for 2-3 seconds. Press it again to deacvate this feature.
The camera is defaulted to power o aer 10 seconds.
DIP SWITCH FUNCTIONS:
DIP 1 = Video in Moon Acvaon ON / OFF
DIP 2 = Rear View Camera ON / OFF
DIP 3 = Not Used
DIP 4 = Forced RVC ON / OFF
DIP 5 = Camera/ParkAssist Coding (see page 5)
DIP 6 = Varies - Defaulted to both OFF*
RVCCH-75E
Rear View Integration Interface
for CHRYSLER & DODGE Vehicles with 8.4” Screen
*DIP 5 & 6
If the radio is having turn-on issues, please try the following:
Aempt 1: Set 5 & 6 to ON
Aempt 2: Set 5 to ON and 6 to OFF
Aempt 3: Set 5 to OFF and 6 to ON
1 2 3 4 5 6
ON
Crux Interfacing Solutions • 21541 Nordhoff St., Unit C, Chatsworth, CA 91311
phone: (818) 609-9299 • fax: (818) 996-8188 • www.cruxinterfacing.com
rev.020520
3 of 4
R
INTERFACING SOLUTIONS
Sightline
Multi View Integration
RVCCH-75E
Rear View Integration Interface
for CHRYSLER & DODGE Vehicles with 8.4” Screen
1. Remove the third brake light assembly. Use the supplied
drill saw and drill a hole on the back side of the third brake
light housing.
2. Connue drilling unl the pilot drill bit is visible on the
front side of the third brake light.
3. Turn over the third brake light assembly start drilling from
the front side. Carefully drill thru the red plasc lens.
4. Insert the camera cable and the camera thru the hole
but DO NOT FULLY INSERT. This will allow you to rotate the
camera to the right posion. Turn the ignion key to ON but
do not start the engine. Put the gear in reverse and check
the camera view. Adjust as necessary.
6. The CUB-01 bullet camera has parking guide lines that
can be turned ON or OFF. The parking guide line is defaulted
to ON from the factory. To turn OFF the parking guide lines,
cut the thin WHITE wire on the camera cable around 4 feet
away from the camera. Insulate with tape. Unplug the 4-pin
barrel connector near the thin WHITE wire. Align the arrows
on the 4 pin barrel connector and plug them together.
Make sure that the connectors are plugged in all the way.
5. Route the camera cable towards the radio/RVCCH-75E
locaon.
Crux Interfacing Solutions • 21541 Nordhoff St., Unit C, Chatsworth, CA 91311
phone: (818) 609-9299 • fax: (818) 996-8188 • www.cruxinterfacing.com
rev.020520
4 of 4
R
INTERFACING SOLUTIONS
Sightline
Multi View Integration
RVCCH-75E
Rear View Integration Interface
for CHRYSLER & DODGE Vehicles with 8.4” Screen
VEHICLE APPLICATIONS:
CHRYSLER
2011 - 2015 300 (see note below)
DODGE
2011 - 2014 Charger
2011 - 2016 Journey
NOTES:
1) On 2015 Chrysler 300 without a separate CD slot (one piece radio), use part# RVCCH-75C instead.
2) Not compable on vehicles with heated seats or heated steering wheel.
Separate CD slot
COMPATIBLE RADIOS:
8.4” Screen with separate CD slot (two piece radio).
For radios without a separate CD slot (one piece radio) use part# RVCCH-75C.
No CD slot

Other Crux Automobile Accessories manuals

Crux Sightline VIMFD-95 User manual

Crux

Crux Sightline VIMFD-95 User manual

Crux RVCCH-75B User manual

Crux

Crux RVCCH-75B User manual

Crux RVCVL-82S User manual

Crux

Crux RVCVL-82S User manual

Crux Sightline RVCHN-76D User manual

Crux

Crux Sightline RVCHN-76D User manual

Crux RVCCH-75 User manual

Crux

Crux RVCCH-75 User manual

Crux ACPBM-77X User manual

Crux

Crux ACPBM-77X User manual

Crux SWRHN-62L User manual

Crux

Crux SWRHN-62L User manual

Crux RVCMZ-72D User manual

Crux

Crux RVCMZ-72D User manual

Crux RVCCH-75 User manual

Crux

Crux RVCCH-75 User manual

Crux F Series User manual

Crux

Crux F Series User manual

Crux BEECR-35 User manual

Crux

Crux BEECR-35 User manual

Crux RVCAD-81T User manual

Crux

Crux RVCAD-81T User manual

Crux Sightline VIMMB-85N User manual

Crux

Crux Sightline VIMMB-85N User manual

Crux RVCCH-75F User manual

Crux

Crux RVCCH-75F User manual

Crux RVCTY-71L User manual

Crux

Crux RVCTY-71L User manual

Crux BEELINE Series User manual

Crux

Crux BEELINE Series User manual

Crux AVICH-03 + VCIP5 User manual

Crux

Crux AVICH-03 + VCIP5 User manual

Crux VIMGM-94M User manual

Crux

Crux VIMGM-94M User manual

Crux DKGM-51 User manual

Crux

Crux DKGM-51 User manual

Crux Sightline MRVBM-77Q User manual

Crux

Crux Sightline MRVBM-77Q User manual

Crux SWRTY-61N User manual

Crux

Crux SWRTY-61N User manual

Crux Sightline VIMGM-94 User manual

Crux

Crux Sightline VIMGM-94 User manual

Crux BEECR-35D User manual

Crux

Crux BEECR-35D User manual

Crux RVCCH-75 User manual

Crux

Crux RVCCH-75 User manual

Popular Automobile Accessories manuals by other brands

Century 15 SERIES 15 Installation and operation manual

Century

Century 15 SERIES 15 Installation and operation manual

Iron Cross GP-2000 installation instructions

Iron Cross

Iron Cross GP-2000 installation instructions

Slingshot Field Hub installation guide

Slingshot

Slingshot Field Hub installation guide

Fortin EVO ONE installation guide

Fortin

Fortin EVO ONE installation guide

Lippert Components In-Wall Slide-Out Winnebago Repair manual

Lippert Components

Lippert Components In-Wall Slide-Out Winnebago Repair manual

Sony XS-H20S instructions

Sony

Sony XS-H20S instructions

EZ Recreational Racks EZ-Rec Rack HD owner's manual

EZ Recreational Racks

EZ Recreational Racks EZ-Rec Rack HD owner's manual

Yakima K896 instructions

Yakima

Yakima K896 instructions

Cruz Evo Rack Alu A15-126 Assembly instructions

Cruz

Cruz Evo Rack Alu A15-126 Assembly instructions

Iqua Snake 2 user guide

Iqua

Iqua Snake 2 user guide

Rugged Ridge 13551.35 manual

Rugged Ridge

Rugged Ridge 13551.35 manual

FALCON RIDGE HO-P500-FC04 Instructions for Installation and Care

FALCON RIDGE

FALCON RIDGE HO-P500-FC04 Instructions for Installation and Care

Clas Ohlson JS036-11 quick start guide

Clas Ohlson

Clas Ohlson JS036-11 quick start guide

Fishbone Offroad FB33007 installation instructions

Fishbone Offroad

Fishbone Offroad FB33007 installation instructions

Thule HangOn 9708 Fitting instructions

Thule

Thule HangOn 9708 Fitting instructions

PNEUMATIC KU-OP-MO00-00 Installation instruction

PNEUMATIC

PNEUMATIC KU-OP-MO00-00 Installation instruction

S2G KZF user manual

S2G

S2G KZF user manual

Jabra TOUR Instruction

Jabra

Jabra TOUR Instruction

manuals.online logo
manuals.online logoBrands
  • About & Mission
  • Contact us
  • Privacy Policy
  • Terms and Conditions

Copyright 2025 Manuals.Online. All Rights Reserved.