Crux SOOGM-16V User manual

SOOGM-16V
Radio Replacement with OnStar, SWC Retention and
Video Switcher for GM LAN 29 Bit Vehicles
RADIO REPLACEMENT
SWC RETENTION
+
R
INTERFACING SOLUTIONS
- Retains factory features in select GM LAN 29 Bit vehicles while functioning with an aftermarket radio.
- Pre-programmed to retain factory Steering Wheel Controls.
- Retains OnStar, factory Rear view camera and chime functions.
- Adds automatic speed/time sense front camera view after reverse process.
- Adds Forced front and rear view aftermarket camera inputs while in motion using the factory side mirror controls.
- Supports Bose, non-Bose and Y-91 audio systems.
- EIA color coded wiring for easy installation.
PRODUCT FEATURES:
1. The Front and Rear fading are not retained on Y-91 Bose System.
2. Chime includes: seat belt, check engine, key in ignition, low fuel, low oil and lights on.
NOTES:
PARTS INCLUDED:
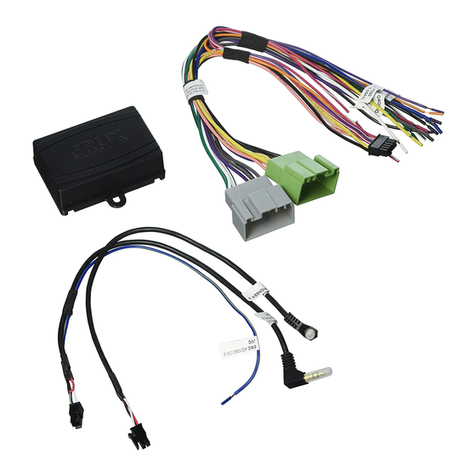
SOOGM-16V Module SOOGM-16V Harness Video Harness Antenna Adaptor SWC Cable
SETTING THE AFTERMARKET RADIO BRAND
With the key in the o position, set the DIP switches to the corresponding aftermarket radio setting.
RADIO BRAND: DIP: 1 2 3 4
Dual, Fahrenheit, Jensen, Pioneer
Power Acoustik, Soundstream
Alpine
Clarion
Kenwood
JVC
Sony, Boss
AFTERMARKET
RADIO SELECTOR
1 2 3 4
ON
SWC DIP SWC CAM
OFF OFF ON ON
OFF OFF ON ON
OFF OFF OFF OFF
OFF ON ON OFF
OFF ON ON ON
OFF ON OFF ON
OFF ON OFF OFF
DIP SWITCH SETTINGS:
Crux Interfacing Solutions • 6860 Canby Ave., Suite 104, Reseda, CA 91335
phone: (818) 609-9299 • fax: (818) 996-8188 • www.cruxinterfacing.com
rev.122518
1 of 6
SWC 3.5MM PLUG ADAPTER
RED to SWC Key 1
WHITE to SWC Key 2
SHIELD to SWC Ground
(included in kit)
NOTE: Cap or Insulate the 3.5mm plug, Blue/Yellow or Green wires if not being used.
3.5MM SWC CABLE
Plug in the 3.5MM to 4-Pin SWC cable to the SWC module.

SOOGM-16V
Radio Replacement with OnStar, SWC Retention and
Video Switcher for GM LAN 29 Bit Vehicles
RADIO REPLACEMENT
SWC RETENTION
+
R
INTERFACING SOLUTIONS
Crux Interfacing Solutions • 6860 Canby Ave., Suite 104, Reseda, CA 91335
phone: (818) 609-9299 • fax: (818) 996-8188 • www.cruxinterfacing.com
INSTALLATION DIAGRAM:
AFTERMARKET
RADIO
Reverse Gear Red/White
Parking Brake Yellow/Black
Ground Black
TO FACTORY
HARNESS
24-Pin
Connector
8-Pin
Connector
BOSE NON
BOSE
10-Pin
Connector SWC DIP SWC CAM
1 2 3 4
ON
Video Out
Front Camera
Rear Camera
To OEM Camera
Harness
Brown 16-Pin
Connector VIDEO HARNESS
Chime Volume
Adjustment
1 2 3
ON VR Activation
for OnStar (set DIP#1 to ON)
4-Pin
Connector
Cap or insulate if
not being used
3.5MM SWC CABLE
Plug in the 3.5MM SWC cable to the 4-pin port
on the module. See “DIP SWITCH SETTINGS” section.
LIN BUS (Green/Black)
JVC/Kenwood (Blue / Yellow) Insulate if not
being used
If the vehicle is equipped with a Bose system, the SOOGM-16V
has a built-in Bose adaptor that allows the proper audio input
gain from the aftermarket radio to the Bose amplier. To use
this feature, plug in the male 8-pin connector on the harness to
the GRAY female 8-pin connector on the SOOGM-16V module.
The module is also labeled “Bose” and “Non Bose” to avoid
confusion. (see picture below)
If the vehicle is NOT equipped with a Bose system, plug in
the male 8-pin connector to the BLACK female 8-pin on the
SOOGM-16V module.
Bose
Connection
Non Bose
Connection
SELECTING THE AUDIO SYSTEM:
2 of 6
rev.122518

The SOOGM-16V has a potentiometer to adjust the chime
volume. It is set at half way by default. To adjust the
volume, simply use a suitable screw driver and turn the
potentiometer clockwise to increase the volume and counter-
clockwise to decrease the volume.
Chime
Volume
Adjustment
CHIME VOLUME ADJUSTMENT:
To adjust the OnStar volume, turn on OnStar and adjust the volume using the Steering Wheel Control volume
adjustment. Once it is set, the SOOGM-16V will memorize this level.
ONSTAR VOLUME ADJUSTMENT:
Part# CJA2333A can be special ordered to retain the Rear Seat Entertainment (RSE).
1. Connect the rear seat entertainment 16-pin connector to the vehicle’s 16-pin factory connector.
2. Connect the RCAs to the aftermarket radio audio and video inputs.
3. Test the audio and video before installing the radio into the dashboard.
REAR SEAT ENTERTAINMENT (RSE):
Connect to
Ground
OEM Overhead
Screen
BACKUP CAMERA CONNECTION:
The SOOGM-16V includes a video harness that allows a front and rear view camera to be plugged in and viewed on
the aftermarket radio screen. The video harness includes a 16-pin brown connector that plugs into the OEM rear view
camera harness to retain the use of the OEM rear view camera (if equipped). The two female video RCAs are used to
connect an aftermarket front and rear view camera (if vehicle is not equipped with an OEM rear view camera).
3 of 6
Video Out
Front Camera
Rear Camera
To OEM Camera
Harness
Brown 16-Pin
Connector
To SOOGM-16V
Module (CAM)
1 2 3 4
ON
SWC DIP SWC CAM
SOOGM-16V
Radio Replacement with OnStar, SWC Retention and
Video Switcher for GM LAN 29 Bit Vehicles
RADIO REPLACEMENT
SWC RETENTION
+
R
INTERFACING SOLUTIONS
Crux Interfacing Solutions • 6860 Canby Ave., Suite 104, Reseda, CA 91335
phone: (818) 609-9299 • fax: (818) 996-8188 • www.cruxinterfacing.com
rev.122518
1 2 3
ON
DIP 1: ON = OnStar Activation
OFF = Aftermarket Radio VR*
DIP 2: ON = Front Camera ON
DIP 3: No Function
*NOTE: If DIP 1 is set to OFF, use the OnStar button on the rear view mirror to activate OnStar.

SOOGM-16V
Radio Replacement with OnStar, SWC Retention and
Video Switcher for GM LAN 29 Bit Vehicles
RADIO REPLACEMENT
SWC RETENTION
+
R
INTERFACING SOLUTIONS
Crux Interfacing Solutions • 6860 Canby Ave., Suite 104, Reseda, CA 91335
phone: (818) 609-9299 • fax: (818) 996-8188 • www.cruxinterfacing.com
rev.122518
For vehicles with a factory reverse camera installed, the factory camera module must be powered up to enable the
forced view feature of the SOOGM-16V. Connect the Reverse Gear Wire (RED/WHITE) on the SOOGM-16V harness
to the reverse camera power wire located on the reverse camera module or BCM. The factory reverse camera
module or BCM can be found in dierent locations in the vehicle depending on the year and model. The chart below
will aid in locating the reverse camera module or BCM.
Use a 1N4001 diode to isolate the factory reverse camera power wire. See diagram below.
REVERSE WIRE CONNECTION:
Factory
Reverse
Camera
Module
Reverse Gear Wire on
SOOGM-16V (RED/WHITE)
Factory Reverse Camera Wire
(BLUE or Light Green)
1N4001 Diode
YEAR/MODEL LOCATION WIRE COLOR
2007 – 2008
All Models
Under front passenger
seat
BLUE
Pin 1 of 8-pin Connector
2009
Avalanche, Escalade,
Suburban, Tahoe, Yukon
2011
Tahoe
Junction block next to the
steering column
(See wiring connection
diagram on the next page)
BLUE
Pin 8 of Gray Connector
DARK BLUE
PIN 5 of Gray (X11) Con-
nector
2009
Hummer H2
BCM to the left of the
steering column
BLUE
Pin 4 of Brown Connector
2009
Acadia, Enclave, Outlook,
Traverse
BCM to the left of the
steering column
BLUE
Pin 3 of Gray Connector
2009
Silverado, Sierra
BCM to the left of the
steering column
LIGHT GREEN
Pin 2 of Connector 7
2009
Vue
BCM under the radio LIGHT GREEN
Pin 2 of Connector 6
4 of 6

Use the RED/WHITE wire on the SOOGM-16V harness to power the cameras. Please see wiring diagram below:
SOOGM-16V
Radio Replacement with OnStar, SWC Retention and
Video Switcher for GM LAN 29 Bit Vehicles
RADIO REPLACEMENT
SWC RETENTION
+
R
INTERFACING SOLUTIONS
Crux Interfacing Solutions • 6860 Canby Ave., Suite 104, Reseda, CA 91335
phone: (818) 609-9299 • fax: (818) 996-8188 • www.cruxinterfacing.com
rev.122518
I/P Junction Box
Reverse Gear Wire on
SOOGM-16V (RED/WHITE)
1N4001 Diode
Rear View Camera
+12V Power Wire
Front Camera
+12V Power Wire
(Optional)
1N4001 Diode
1N4001 diode is required
here if using a front camera.
1. Set the power mirror selection to o (both LED lights must be o on the power mirror
switch). You can turn o the LED by pressing the button on the same side that the LED
is currently lit. Note: Turning o the mirror selection will prevent the mirrors from being
adjusted while forcing the front/rear camera mode.
2. To force the Front camera mode, press and hold the Up arrow on the 4-way joystick
until the video shows on the aftermarket radio.
3. To force the Rear camera mode, press and hold the Down arrow on the 4-way joystick
until the video shows on the aftermarket radio. (If the vehicle is not equipped with a fac-
tory backup camera, an aftermarket backup camera can be installed and plugged into the
SOOGM-16V backup camera video harness)
4. To turn O forced camera mode, press and hold the 4-way joystick Up arrow if in front
camera mode or Down arrow if in rear camera mode. Wait until the video turns o on the
aftermarket radio then release the 4-way joystick.
5. The reverse camera has priority over the front camera when driving the vehicle in
reverse.
1 (Requires installation of aftermarket camera)
FORCED CAMERA FEATURE:
The SOOGM-16V can force the aftermarket radio to show the front1 or rear video camera on select GM trucks and SUV’s
with power mirror controls at any time while driving. To force the front or rear camera while driving do the following:
To retain the use of the IR headphones with the factory overhead entertainment system you will need to connect a
+12 volt switched accessory power wire to the rear entertainment panel wire harness located in the rear of the center
console. You will need a 1 amp fuse and a 1N4001 diode to complete the installation. Remove the RSE control panel
in the center console. Tools will be required such as a panel remover tool and/or 7mm socket. Locate the (pink) wire
located in pin 14 of the (gray) connector. Connect the diode’s stripe side to the pink wire. Connect the other end of the
diode to one side of the 1 amp fuse. Connect the remaining side of the fuse to a +12 switched accessory wire. Refer
to the wiring diagram below.
ENABLING THE IR SYSTEM:
PINK WIRE
PIN# 14
1A
TO 12V
ACC
POWER
FUSE 1N4001
16 PIN RSE CONNECTOR
5 of 6
SOOGM-16V
Radio Replacement with OnStar, SWC Retention and
Video Switcher for GM LAN 29 Bit Vehicles
RADIO REPLACEMENT
SWC RETENTION
+
R
INTERFACING SOLUTIONS
Crux Interfacing Solutions • 6860 Canby Ave., Suite 104, Reseda, CA 91335
phone: (818) 609-9299 • fax: (818) 996-8188 • www.cruxinterfacing.com
rev.122518
SWC buttons All radios except Sony Sony
Short press
VOICE Mute Mute
VOLUME_DOWN Volume Down Volume Down
VOLUME_UP Volume Up Volume Up
TRACK_UP Track up/Seek Up Track up/Seek Up
TRACK_DOWN Track dn/Seek dn Track dn/Seek dn
SOURCE Source Source **
RIGHT_ARROW Preset up Preset up
Long press
VOICE VR/OnStar * VR/OnStar *
VOLUME_DOWN Volume Down Continuous Volume Down Con-
tinuous
VOLUME_UP Volume Up Continuous Volume Up Continu-
ous
TRACK_UP Answer Call
TRACK_DOWN End Call Reject call
SOURCE
RIGHT_ARROW
1 = VOICE
2 = VOLUME UP/DN
3 = TRACK UP/DN
4 = SOURCE
5 = RIGHT ARROW
1
2
2
3
3
4
5
* You can enable the factory steering wheel Voice button to activate Voice Recognition (VR) on the aftermarket radio. If your radio
doesn't support VR you can assign the Voice button to activate OnStar by turning on DIP switch #1 on the 3 position DIP Switch.
See diagram on page 2.
** During an incoming/current call the Source button will Answer and End call.
STEERING WHEEL CONTROL BUTTON FUNCTIONS:
BUICK
2008-2014 Enclave
2006-2011 Lucerne
CADILLAC
2006-2010 DTS
2007-2014 Escalade
2007-2009 SRX
CHEVROLET
2007-2013 Avalanche*
2007-2009 Equinox
2008-2011 Express Van
2006-2013 Impala
2006-2007 Monte Carlo
2007-2014 Silverado 1500-3500 Pickup*
2007-2014 Suburban*
2007-2014 Tahoe*
2009-2014 Traverse
GMC
2007-2014 Acadia
2008-2011 Savana
2007-2014 Sierra 1500-3500 Pickup*
2007-2014 Yukon*
HUMMER
2008-2009 H2
PONTIAC
2007-2009 Torrent
SATURN
2007-2010 Outlook
2008-2010 Vue
SUZUKI
2007-2008 XL7
VEHICLE APPLICATIONS:
6 of 6
Table of contents
Other Crux Automobile Accessories manuals

Crux
Crux DKGM-51 User manual

Crux
Crux F Series User manual

Crux
Crux RVCVL-82S User manual

Crux
Crux Sightline RVCAD-81B Instruction Manual

Crux
Crux RVCAD-81M Use and care manual

Crux
Crux BEECR-35P User manual

Crux
Crux Sightline RVCMB-78S User manual

Crux
Crux Logic ACPBM-77Y User manual

Crux
Crux SWRHN-62L User manual

Crux
Crux Sightline VIMCF-93C User manual

Crux
Crux RVCCH-75D User manual

Crux
Crux RVCMZ-72 User manual

Crux
Crux ACPBM-77X User manual

Crux
Crux Sightline RVCAD-81 User manual

Crux
Crux BEECR-35 User manual

Crux
Crux ACPGM-80N User manual

Crux
Crux SWRGM-49L User manual

Crux
Crux AVIGM-04S User manual

Crux
Crux CFD-03E User manual

Crux
Crux TDR-RVM32 User manual