2
5. Features
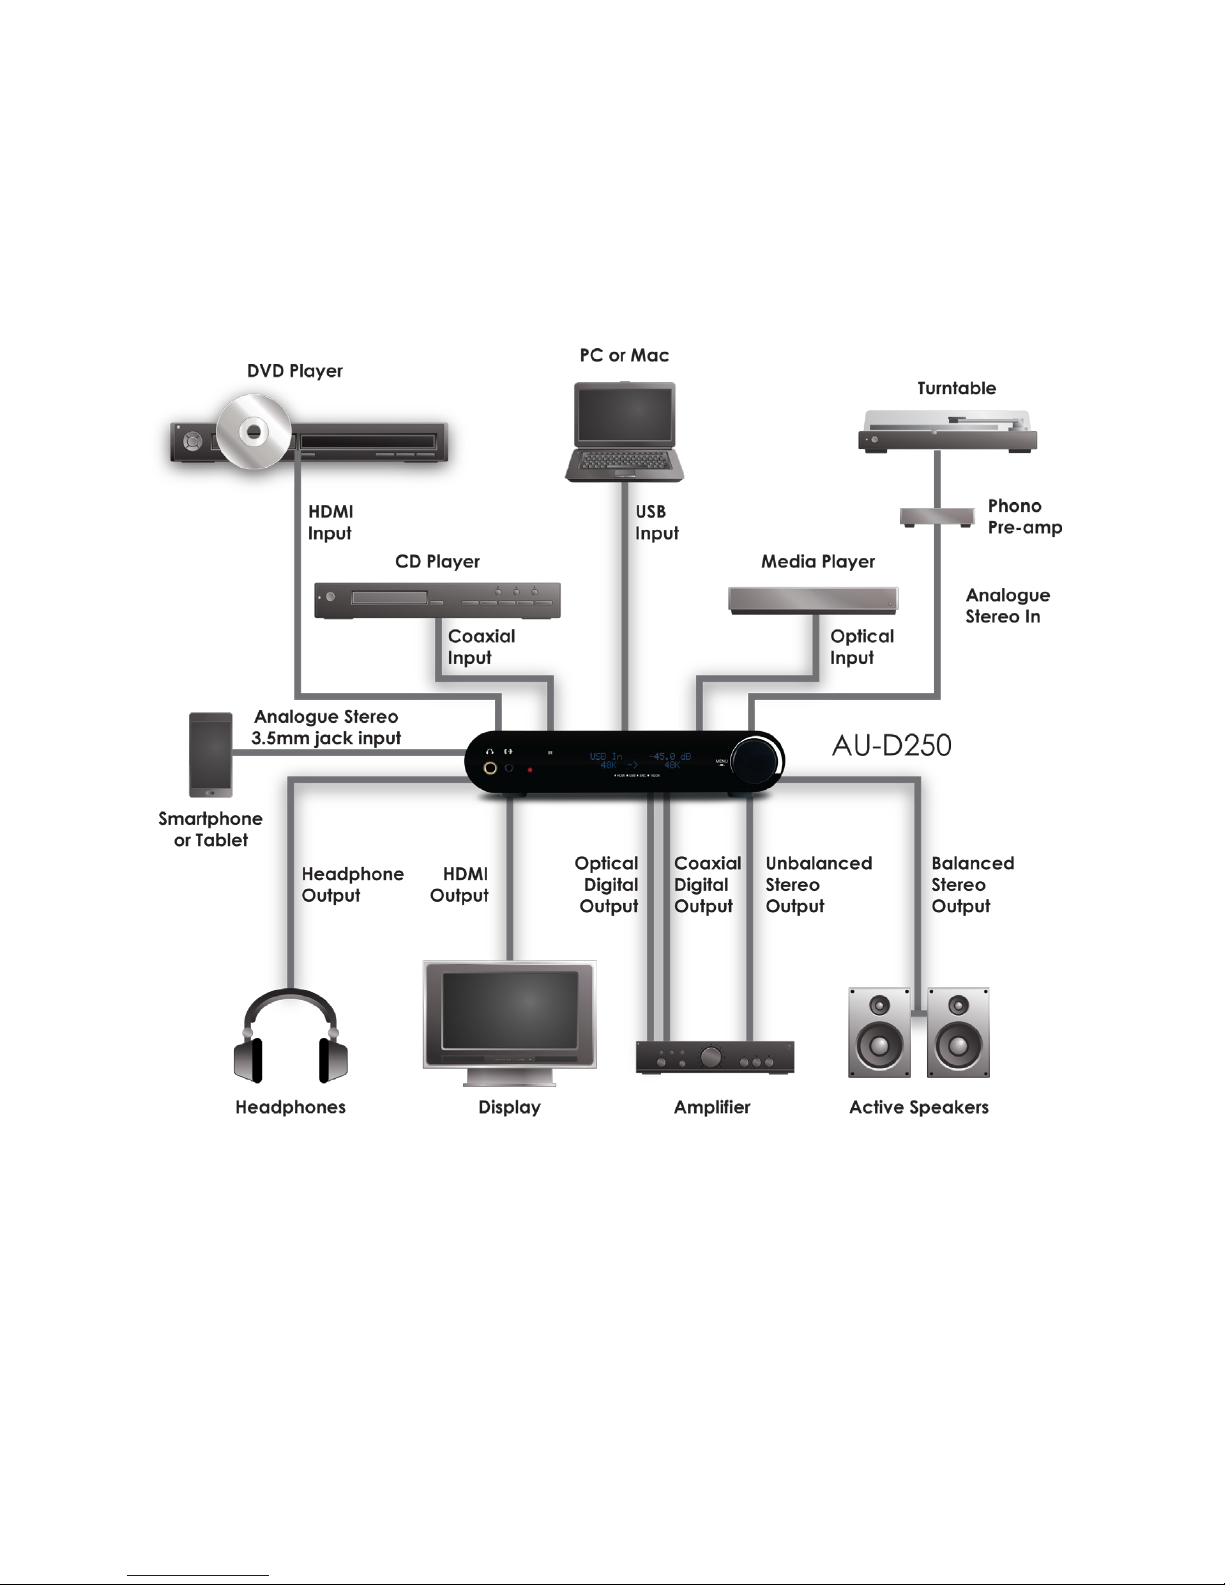
Digital
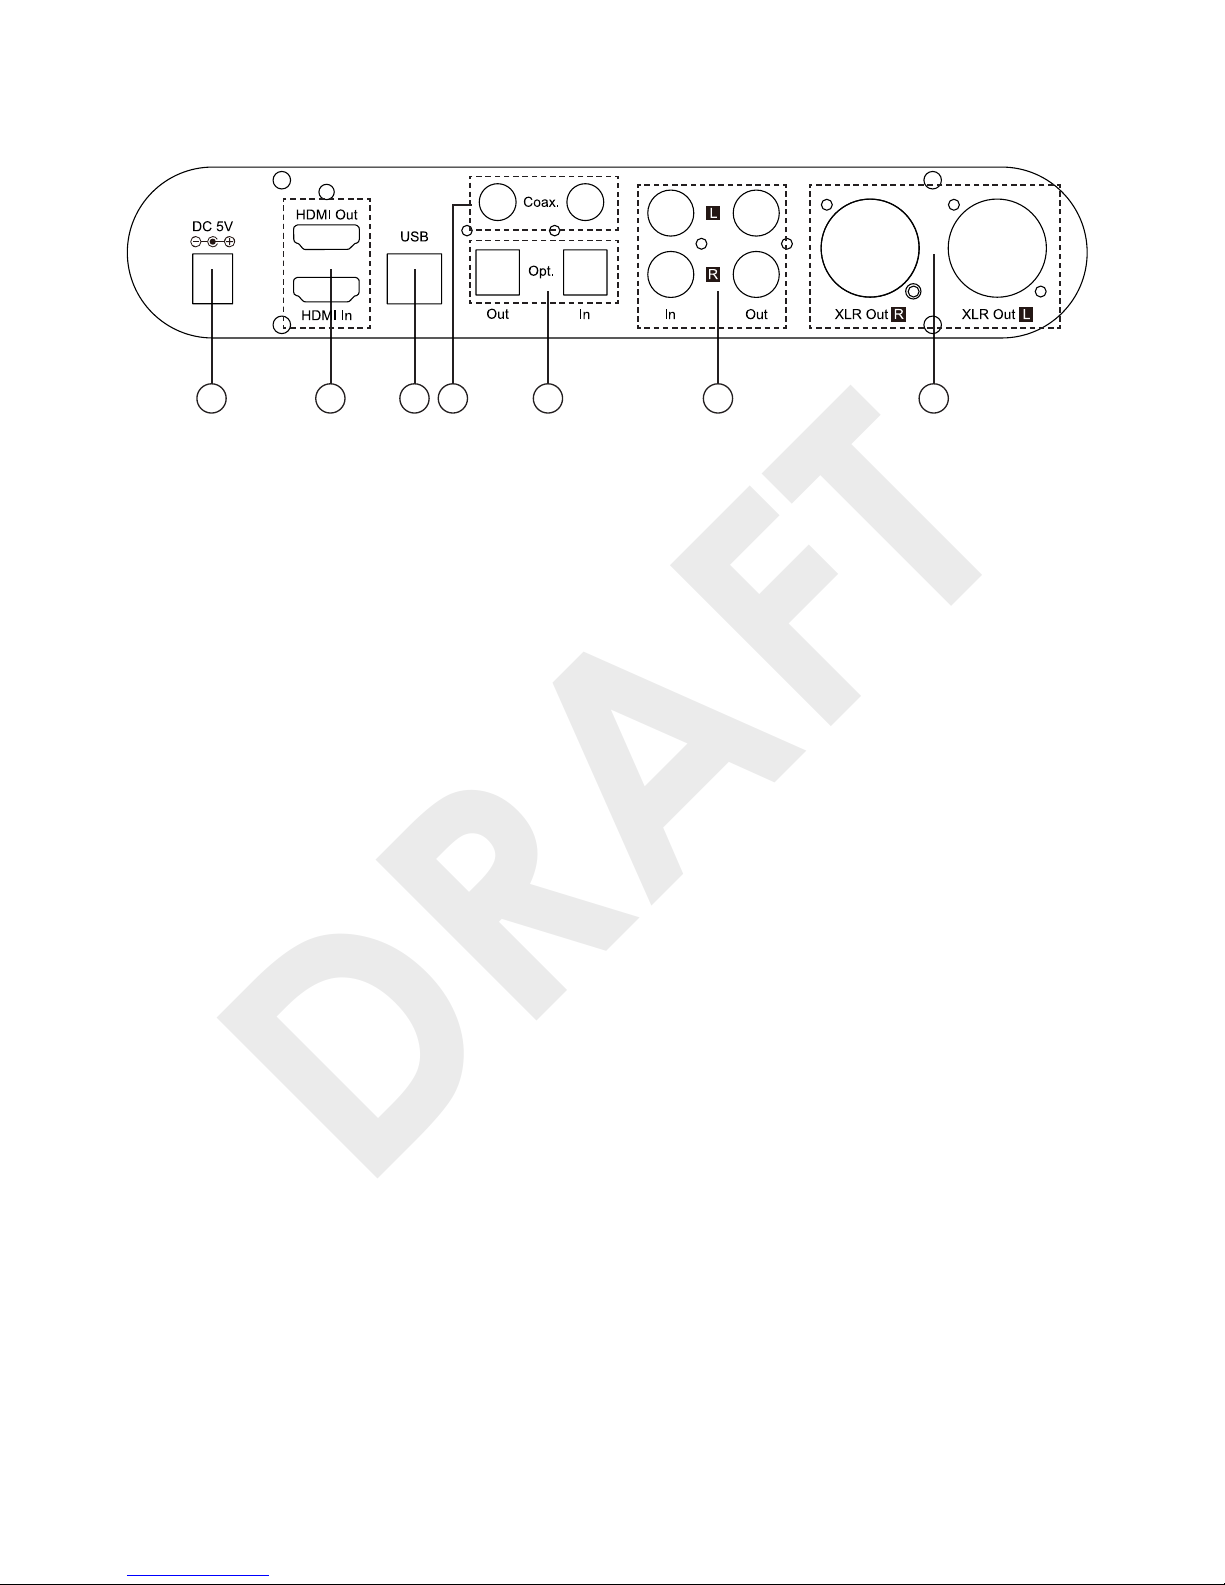
• Support 2 Channels PCM HDMI, USB Audio 2.0, Optical, and Coaxial digital
interface input / output
• All digital interface sampling rate up to 192KHz, and resolution up to 24Bits
• All digital interface can be SRC(Sampling Rate Converter) to 44.1KHz,
48KHz, 88.2KHz, 96KHz, 176.4KHz or 192KHz output
• High accurate PLL and low Jitter reduction clock system
Analog
• Built-in Ti TPA6120A2 high quality headphone amplier, and 6.3mm Phone
jack output
• Support Low noise Professional Balance-XLR and RCA analog stereo output
• Support RCA and 3.5mm phone-jack analog input, sampling up to 192KHz
• Total harmonic distortion or less than 100dB
MISC
• Support IR control
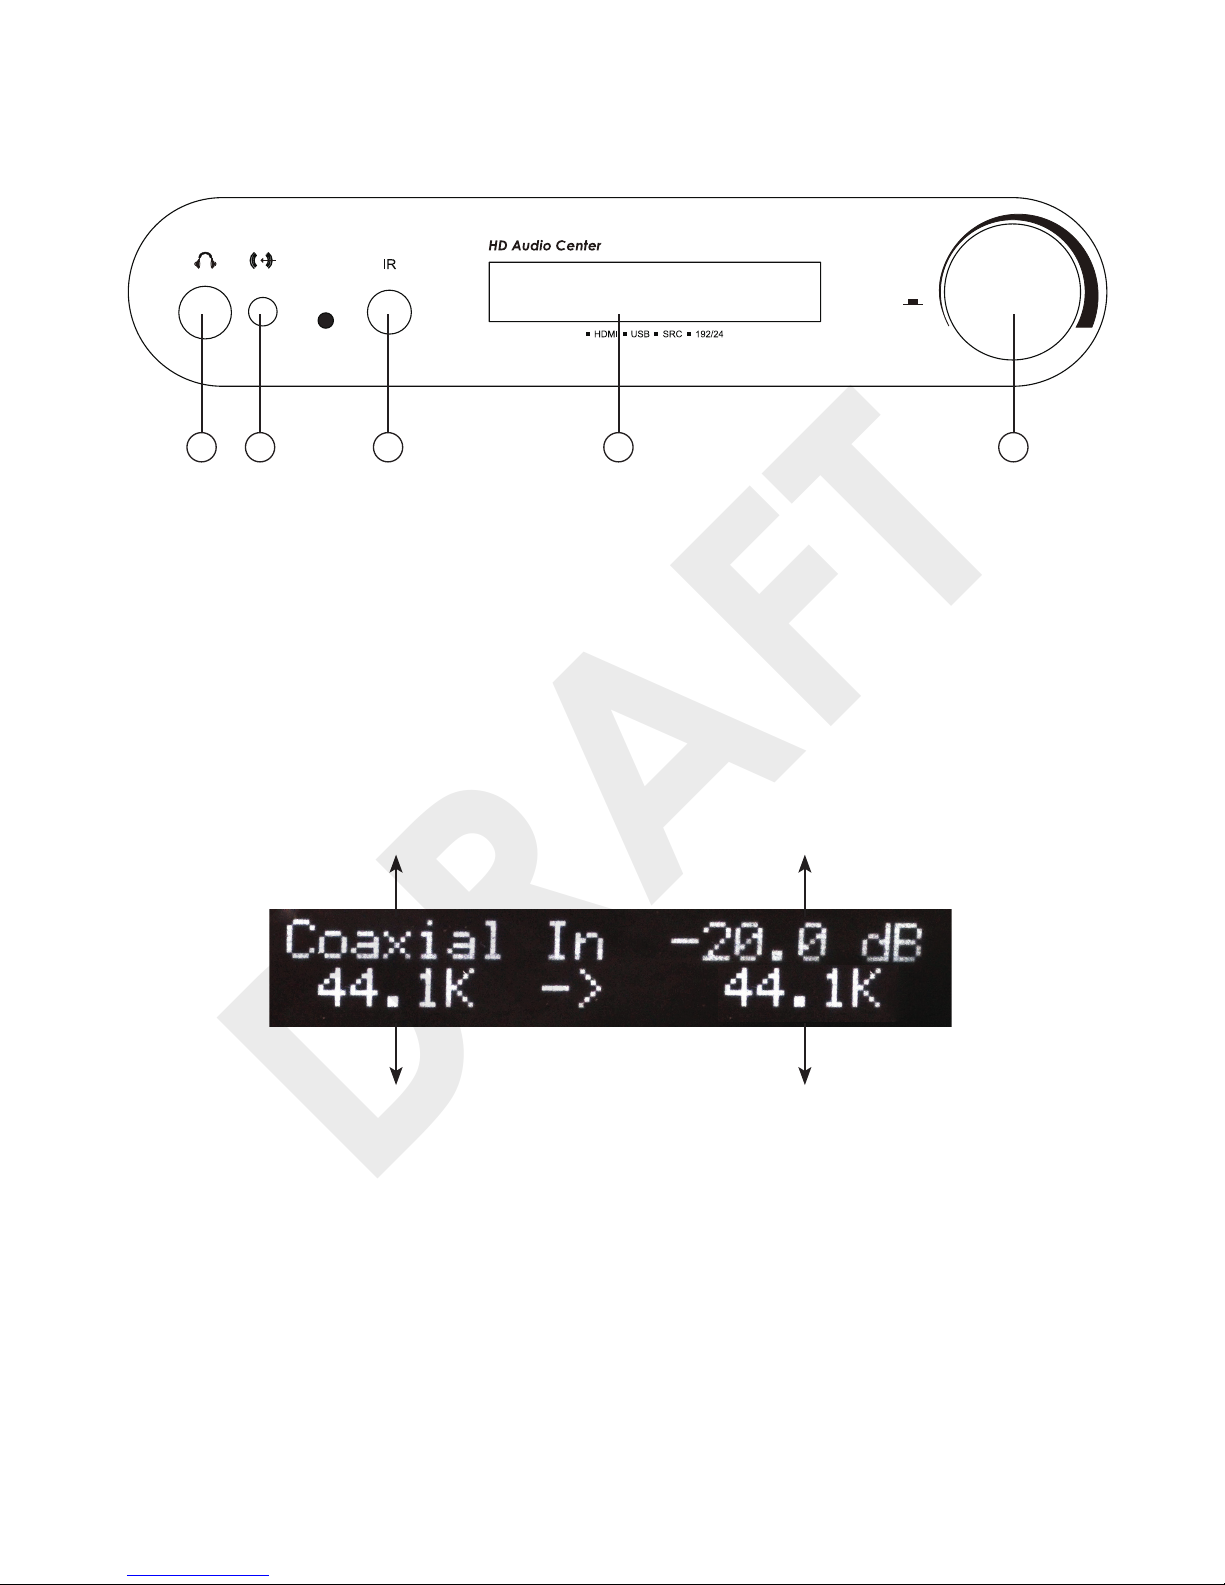
• High viewing angle OLED Display
6. Specications
Input Ports 1xHDMI,1xUSB, 1xCoaxial, 1xOptical, 1xR/L & 1xLine-in
Output Ports 1xHDMI,1xUSB, 1xCoaxial, 1xOptical, 1xR/L & 1xXLR,
1x6.3mm headphone jack
HDMI Video Bypass
Digital Audio Input/Output PCM 2CH
Stereo Input/Output Level 2Vrms
Stereo XLR Input/Output level 4Vrms
Headphone Impedance 16Ω ~ 600Ω
ESD Protection Human body model: ± 8kV (air-gap discharge)
± 6kV(contact discharge)
Power Supply 5V DC/3.6A (US/EU standards, CE/FCC/UL certied)
Dimensions (mm) 138 (W) x 223 (D) x 50 (H)
Weight (g) 680
Chassis Material Aluminum
Silkscreen Color Black
Power Consumption 15W