DeLOCK 62848 User manual

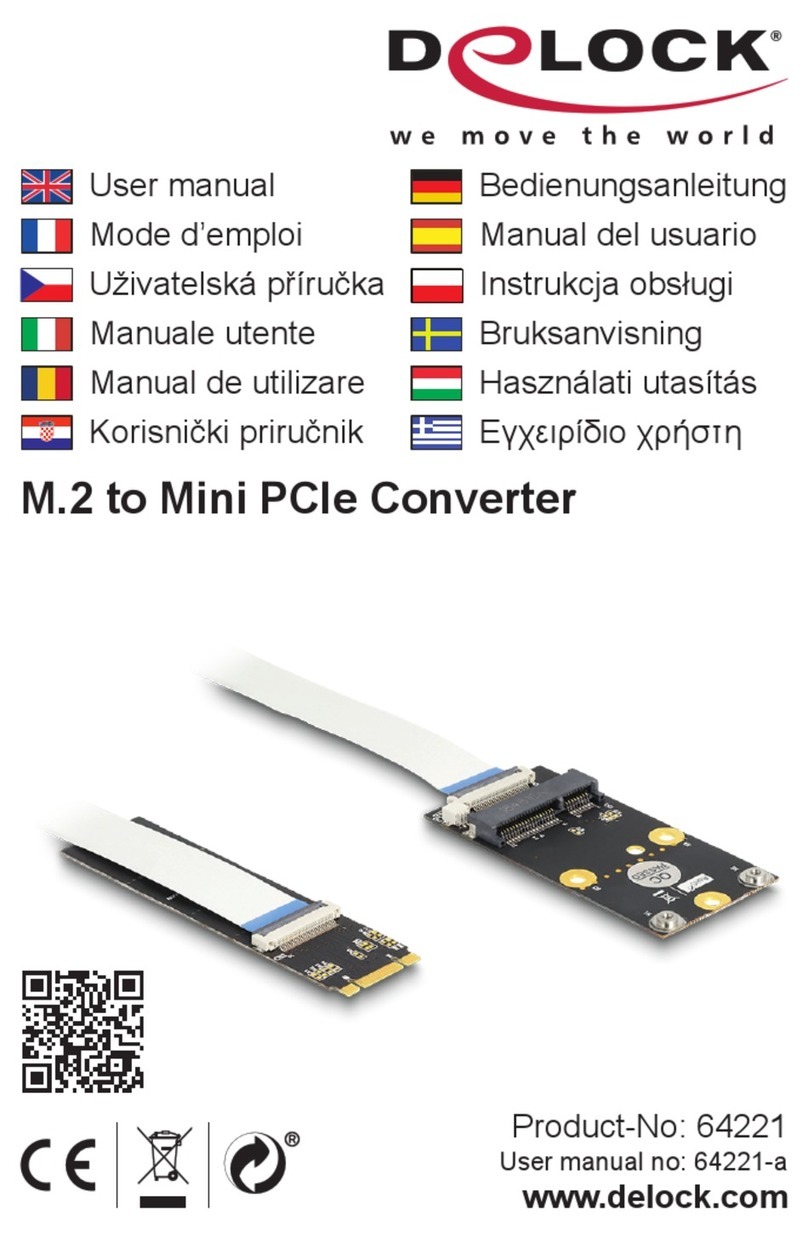
M.2 Key A+E to Mini PCIe Converter
Product-No:62848
User manual no:62848-a
www.delock.com
User manual
Mode d’emploi
Uživatelská příručka
Manuale utente
Manual de utilizare
Korisnički priručnik
Bedienungsanleitung
Manual del usuario
Instrukcja obsługi
Bruksanvisning
Használati utasítás
Εγχειρίδιο χρήστη

-2-
English
Description
This converter by Delock changes the M.2 key A or key E interface
into a Mini PCIe interface. Dierent Mini PCIe modules with USB
and PCIe signals can be inserted in the converter. On the M.2 key
A or key E interface can be used e.g. WLAN, Bluetooth, GNSS, 3G,
HSPA and NFC modules. Further it is possible to use both functions
of a module which has e.g. WLAN and Bluetooth.
Specication
• Connectors:
1 x 59 pin M.2 key A+E male >
1 x Mini PCIe slot
• PCI Express Rev. 1.1
• Interface: PCIe + USB
• Form factor M.2: 2230
• Form factor Mini PCIe: half size and full size
• Suitable for M.2 slot with key A or key E based on PCIe and USB
• Operating temperature: 0 °C ~ 80 °C
• Dimensions (LxWxH):
M.2 board: ca. 30 x 22 x 3 mm
Mini PCIe board: ca. 69 x 45 x 6 mm
• OS independent, no driver installation necessary
System requirements
• A free M.2 key A or key E slot

-3-
English
Package content
• Converter board M.2
• Mini PCIe board
• 3 x at cable, length ca.: 1 x 10 cm, 1 x 20 cm, 1 x 30 cm
• Screws
• User manual
Safety instructions
• Protect the product against moisture
• Avoid anti-static electricity when installing the product
Hardware Installation
Note:
Make sure your M.2 slot supports PCIe and USB, in order which
Mini PCIe module you want to install.
1. First you need to insert your Mini PCIe module in the Mini PCIe
slot and x it.
2. Choose the at cable with the needed length.
3. Fix the at cable on both ports of the boards. Therefor you
need to put up the black bar, insert the cable and put down the
bar.
4. Install the M.2 converter into a free M.2 slot.
Driver Installation
1. Depending on the module you are using, you may need to
install the appropriate drivers.

-4-
English
Support Delock
If you have further questions, please contact our customer support
You can nd current product information on our homepage:
www.delock.com
Final clause
Information and data contained in this manual are subject to change
without notice in advance. Errors and misprints excepted.
Copyright
No part of this user manual may be reproduced, or transmitted
for any purpose, regardless in which way or by any means,
electronically or mechanically, without explicit written approval of
Delock.
Edition: 08/2022

-5-
Deutsch
Systemvoraussetzungen
• Ein freier M.2 Key A oder Key E Slot
Packungsinhalt
• Konverterboard M.2
• Mini PCIe Board
• 3 x Flachband Kabel, Länge ca.: 1 x 10 cm , 1 x 20 cm, 1 x 30 cm
• Schrauben
• Bedienungsanleitung
Sicherheitshinweise
• Produkt vor Feuchtigkeit schützen
• Vermeiden Sie antistatische Auadung beim Einbau des
Produktes
Hardwareinstallation
Hinweis:
Achten Sie darauf, dass Ihr M.2 Slot PCIe und USB unterstützt, je
nachdem welches Mini PCIe Modul Sie installieren wollen.
1. Setzen Sie zuerst Ihr Mini PCIe Modul in den Mini PCIe Slot
ein und befestigen Sie es.
2. Wählen Sie das Flachbandkabel mit der benötigten Länge aus.
3. Befestigen Sie das Flachbandkabel an beiden Anschlüssen der
Boards. Dazu klappen Sie einfach die schwarze Leiste hoch,
führen das Kabel ein und klappen die Leiste wieder herunter.
4. Installieren Sie den M.2 Konverter in einem freien M.2 Slot.
Treiberinstallation
1. In Abhängigkeit von Ihrem genutzten Modul müssen Sie unter
Umständen die entsprechenden Treiber installieren.

-6-
Français
Conguration système requise
• Un emplacement M.2 touche A ou touche E libre
Contenu de l’emballage
• Carte convertisseur M.2
• Carte Mini PCIe
• 3 x câbles plats, longueur env. : 1 x 10 cm, 1 x 20 cm, 1 x 30 cm
• Vis
• Mode d’emploi
Instructions de sécurité
• Protéger le produit contre l’humidité
• Evitez l’électricité électrostatique lorsque vous installez le produit
Installation matérielle
Remarque :
Assurez-vous que votre emplacement M.2 prend en charge PCIe
et USB, dans l'ordre du module Mini PCIe que vous souhaitez
installer.
1. Vous devez d'abord insérer votre module Mini PCIe dans
l'emplacement Mini PCIe et le xer.
2. Choisissez le câble plat avec la longueur nécessaire.
3. Fixez le câble plat sur les deux ports des cartes. À cet eet,
vous devez lever la barre noire, insérer le câble et baisser la
barre.
4. Installez le convertisseur M.2 dans un emplacement M.2 libre.
Installation du pilote
1. En fonction du module que vous utilisez, vous devrez peut-être
installer les pilotes appropriés.

-7-
Español
Requisitos del sistema
• Una ranura M.2 clave A o clave E disponible
Contenido del paquete
• Tarjeta de convertidor M.2
• Tarjeta Mini-PCIe
• 3 x Cable plano con una longitud aproximada de 1 x 10 cm,
1 x 20 cm, 1 x 30 cm
• Tornillos
• Manual del usuario
Instrucciones de seguridad
• Proteja el producto contra el polvo
• Evite la electricidad antiestática al instalar el producto
Hardware Instalación
Nota:
Asegúrese de que la ranura M.2 admite PCIe y USB, para saber
qué el módulo Mini-PCIe desea instalar.
1. En primer lugar necesita insertar el módulo Mini-PCIe en la
ranura Mini-PCIe y jarlo.
2. Elija el cable plano con la longitud necesaria.
3. Fije el cable plano en ambos puertos de las tarjetas. Necesita
levantar la barra negra, insertar el cable y bajar la barra.
4. Instale el convertidor M.2 en una ranura M.2 disponible.
Instalación del controlador
1. Dependiendo del módulo que utilice, puede que tenga que
instalar los controladores apropiados.

-8-
České
Systémové požadavky
• Jeden volný slot M.2 key A nebo key E
Obsah balení
• Převodník deska M.2
• Mini PCIe deska
• 3 x plochý kabel, délka cca.: 1 x 10 cm, 1 x 20 cm, 1 x 30 cm
• Šroubky
• Uživatelská příručka
Bezpečnostní pokyny
• Chraňte produkt před vlhkostí
• Při instalaci produktu se vyvarujte antistatické elektřině
Instalace hardware
Poznámka:
Ujistěte se, že váš slot M.2 podporuje PCIe a USB, dle toho, který
Mini PCIe modul chcete instalovat.
1. Nejprve je třeba vložit váš Mini PCIe modul do Mini PCIe slotu
a připevnit jej.
2. Vyberte plochý kabel s potřebnou délkou.
3. Připevněte plochý kabel na oba porty obou desek. Vytáhněte
černou kostku, vložte kabel a vložte černou kostku zpět.
4. Nainstalujte M.2 převodník do volného slotu M.2.
Instalace ovladače
1. Závisí na použitém modulu, možná budete potřebovat
příslušné ovladače.

-9-
Polsku
Wymagania systemowe
• Jedno wolne gniazdo M.2 z kluczem A lub E
Zawartość opakowania
• Płyta konwertera M.2
• Płyta Mini PCIe
• 3 x płaski przewód, ok.: 1 x 10 cm, 1 x 20 cm, 1 x 30 cm
• Śruby
• Instrukcja obsługi
Instrukcje bezpieczeństwa
• Produkt należy zabezpieczyć przed wilgocią
• Podczas instalacji produktu należy unikać elektryczności
statycznej
Instalacja sprzętu
Uwaga:
Upewnij się, że gniazdo M.2 obsługuje PCIe oraz USB, w
kolejności, w jakiej moduł Mini PCIe ma być zainstalowany.
1. Najpierw należy włożyć moduł Mini PCIe do gniazda Mini PCIe
i go przymocować.
2. Wybierz płaski kabel o wymaganej długości.
3. Podepnij płaski kabel do obu portów płyt. W tym celu należy
unieść czarną listwę, włożyć kabel i opuścić listwę.
4. Zainstaluj konwerter M.2 w wolnym gnieździe M.2.
Instalacja sterownika
1. Zależnie od używanego modułu, konieczna może być instalacja
odpowiednich sterowników.

-10-
Italiano
Requisiti di sistema
• Uno slot M.2 chiave A o E disponibile
Contenuto della confezione
• Scheda convertitore M.2
• Scheda Mini PCIe
• 3 x cavo piatto, lunghezza ca.: 1 x 10 cm, 1 x 20 cm, 1 x 30 cm
• Viti
• Manuale utente
Istruzioni per la sicurezza
• Proteggere il prodotto dall'umidità
• Evitare l'elettricità antistatica durante l'installazione del prodotto
Installazione dell'hardware
Nota:
Assicurarsi che lo slot M.2 supporti PCIe e USB, nell'ordine di
installazione del modulo Mini PCIe.
1. Prima è necessario inserire il modulo Mini PCIe nello slot Mini
PCIe e ssarlo.
2. Selezionare il cavo piatto della lunghezza necessaria.
3. Fissare il cavo piatto su entrambe le porte delle schede.
Pertanto, è necessario sollevare la barra nera, inserire il cavo
e abbassare la barra.
4. Installare il convertitore M.2 in uno slot M.2 libero.
Installazione del driver
1. A seconda del modulo utilizzato, potrebbe essere necessario
installare i driver adeguati.

-11-
Svenska
Systemkrav
• En ledig M.2 A- eller E-nyckelplats
Paketets innehåll
• Konverterarkort M.2
• Mini PCIe-kort
• 3 x atkabel, längd ca: 1 x 10 cm, 1 x 20 cm, 1 x 30 cm
• Skruvar
• Bruksanvisning
Säkerhetsinstruktioner
• Skydda produkten mot fukt
• Undvik antistatisk elektricitet när du installerar produkten
Hårdvaruinstallation
Obs:
Se till att din M.2-plats stödjer PCIe och USB, för den Mini PCIe-
modul som ska installeras.
1. Först måste du föra in din Mini PCIe-modul i Mini PCIe-platsen
och fästa den.
2. Välj en atkabel med den längd som krävs.
3. Fäst atkabeln på båda portarna på korten. Därför måste du
föra upp den svarta listen, trycka in kabeln och sedan fälla ner
listen.
4. Installera M.2-omvandlaren i en ledig M.2-kortplats.
Installation av drivrutiner
1. Du måste kanske installera korrekta drivrutiner, beroende på
vilken modul som används.

-12-
Română
Cerinte de sistem
• O fantă M.2 cu cheie tip A sau cu cheie tip E liberă
Pachetul contine
• Placă M.2 pentru convertor
• Placă Mini PCIe
• 3 x cabluri plate, lungime aprox.: 1 x 10 cm, 1 x 20 cm, 1 x 30 cm
• Şuruburi
• Manual de utilizare
Instrucţiuni de siguranţă
• Protejaţi produsul împotriva umidităţii
• Evitaţi electricitatea antistatică atunci când instalaţi produsului
Instalarea componentelor hardware
Notă:
Asiguraţi-vă că fanta M.2 acceptă PCIe şi USB, pentru a alege
modulul Mini PCIe pe care doriţi să îl instalaţi.
1. Mai întâi, trebuie să introduceţi modulul Mini PCIe în fanta Mini
PCIe şi să îl xaţi.
2. Alegeţi cablul plat cu lungimea necesară.
3. Fixaţi cablul plat pe ambele porturi ale plăcilor. Astfel, trebuie
să ridicaţi bara neagră, să introduceţi cablul şi să coborâţi bara.
4. Instalaţi convertorul M.2 într-o fantă M.2 liberă.
Instalarea driverului
1. În funcţie de modulul utilizat, este posibil să e necesară
instalarea driverelor adecvate.

-13-
Magyar
Rendszerkövetelmények
• Egy szabad M.2 aljzat A vagy E nyílással
A csomag tartalma
• M.2 átalakítólap
• Mini PCIe lap
• 3 x laposkábel, hosszúsága kb.: 1 x 10 cm, 1 x 20 cm, 1 x 30 cm
• Csavarok
• Használati utasítás
Biztonsági óvintézkedések
• Óvja a terméket a nedvességtől.
• Kerülje az elektrosztatikus kisüléseket a termék üzembe
helyezése közben
Hardvertelepítés
Megjegyzés:
Győződjön meg arról, hogy az M.2 nyílás támogatja a PCIe és az
USB használatát, attól függően, hogy melyik Mini PCIe modult
szeretné telepíteni.
1. Először helyezze be a Mini PCIe modult a Mini PCIe nyílásba,
és rögzítse.
2. Válassza ki a megfelelő hosszúságú laposkábelt.
3. Rögzítse a laposkábelt a lapok mindkét portján. Ehhez emelje
fel a fekete sávot, helyezze be a kábelt, majd engedje le a
sávot.
4. Az M.2 átalakítót egy szabad M.2 aljzatba telepítse.
Illesztőprogram telepítése
1. Az adott modultól függően előfordulhat, hogy telepítenie kell a
megfelelő illesztőprogramokat.

-14-
Hrvatski
Preduvjeti sustava
• Jedan slobodan M.2 utor s ključem A ili ključem E
Sadržaj pakiranja
• ploča pretvarača M.2
• Mini PCIe ploča
• 3 x ravni kabel, duljina oko: 1 x 10 cm, 1 x 20 cm, 1 x 30 cm
• Vijci
• Korisnički priručnik
Sigurnosne upute
• Zaštitite proizvod od vlage
• Izbjegavajte statički elektricitet kod ugradnje proizvoda
Ugradnja hardvera
Napomena:
Pobrinite se da M.2 utor podržava PCIe i USB, u redoslijedu Mini
PCIe modula koji želite instalirati.
1. Prvo je potrebno umetnuti Mini PCIe modul u Mini PCIe utor i
pričvrstiti ga.
2. Odaberite ravni kabel odgovarajuće duljine.
3. Pričvrstite ravni kabel na oba priključka ploče. Potrebno je
podignuti crnu traku, umetnuti kabel i vratiti traku.
4. Ugradite M.2 pretvarač u slobodan M.2 utor.
Instalacija upravljačkog programa
1. Ovisno o korištenom modulu, možda će biti potrebna instalacija
odgovarajućih upravljačkih programa.

-15-
ελληνικά
Απαιτήσεις συστήματος
• Μια ελεύθερη υποδοχή M.2 key A ή key E
Περιεχόμενα συσκευασίας
• Πλακέτα μετατροπέα M.2
• Πλακέτα Mini PCIe
• 3 x επίπεδο καλώδιο, μήκος περ.: 1 x 10 cm, 1 x 20 cm, 1 x 30 cm
• βίδες
• Εγχειρίδιο χρήστη
Οδηγίες ασφάλειας
• Προστατεύστε το προϊόν από την υγρασία
• Αποφύγετε αντιστατικό ηλεκτρισμό όταν εγκαθιστάτε το προϊόν
Εγκατάσταση υλικού
Σημείωση:
Βεβαιωθείτε ότι η θύρα M.2 υποστηρίζει PCIe και USB, ανάλογα
ποια μονάδα Mini PCIe θέλετε να εγκαταστήσετε.
1. Πρώτα πρέπει να εισάγετε τη μονάδα PCIe Mini στην υποδοχή
PCIe Mini και να τη στερεώσετε.
2. Επιλέξτε το επίπεδο καλώδιο με το απαιτούμενο μήκος.
3. Στερεώστε το επίπεδο καλώδιο και στις δύο θύρες της
πλακέτας. Συνεπώς, θα πρέπει να σηκώσετε τη μαύρη μπάρα,
να τοποθετήσετε το καλώδιο και να αφήσετε κάτω την μπάρα.
4. Εγκαταστήστε τον μετατροπέα Μ.2 σε μια ελεύθερη υποδοχή
Μ.2.
Εγκατάσταση προγράμματος οδήγησης
1. Ανάλογα με τη μονάδα που χρησιμοποιείτε, ενδέχεται να
χρειαστεί να εγκαταστήσετε τα κατάλληλα προγράμματα
οδήγησης.

Declaration of conformity
Products with a CE symbol fulll the EMC directive (2014/30/EU)
and RoHS directive (2011/65/EU+2015/863+2017/2102), which
were released by the EU-comission.
The declaration of conformity can be downloaded here:
https://www.delock.de/produkte/G_62848/merkmale.html
WEEE-notice
The WEEE (Waste Electrical and Electronic Equipment)-directive,
which became eective as European law on February 13th 2003,
resulted in an all out change in the disposal of disused electro
devices. The primarily purpose of this directive is the avoidance
of electrical waste (WEEE) and at the same time the support of
recycling and other forms of recycling in order to reduce waste.
The WEEE-logo on the device and the package indicates that the
device should not be disposed in the normal household garbage.
You are responsible for taking the disused electrical and electronical
devices to a respective collecting point. A separated collection
and reasonable recycling of your electrical waste helps handling
the natural resources more economical. Furthermore recycling
of electrical waste is a contribution to keep the environment and
thus also the health of men. Further information about disposal of
electrical and electronical waste, recycling and the collection points
are available in local organizations, waste management enterprises,
in specialized trade and the producer of the device.
Cet appareil
se recycle
Points de collecte sur www.quefairedemesdechets.fr
EU Import: Tragant Handels- und Beteiligungs GmbH
Beeskowdamm 13/15, 14167 Berlin, Germany
Table of contents
Languages:
Other DeLOCK Media Converter manuals

DeLOCK
DeLOCK 63343 User manual

DeLOCK
DeLOCK 61769 User manual

DeLOCK
DeLOCK 95272 User manual

DeLOCK
DeLOCK 86440 User manual

DeLOCK
DeLOCK 87754 User manual

DeLOCK
DeLOCK 64051 User manual

DeLOCK
DeLOCK 87719 User manual

DeLOCK
DeLOCK 64081 User manual

DeLOCK
DeLOCK 61971 User manual

DeLOCK
DeLOCK 62783 User manual

DeLOCK
DeLOCK 62495 User manual

DeLOCK
DeLOCK 62687 User manual

DeLOCK
DeLOCK 61511 User manual

DeLOCK
DeLOCK 64069 User manual

DeLOCK
DeLOCK 63468 User manual

DeLOCK
DeLOCK 62551 User manual

DeLOCK
DeLOCK 87768 User manual

DeLOCK
DeLOCK 62985 User manual

DeLOCK
DeLOCK 62590 User manual

DeLOCK
DeLOCK 61042 User manual