DeLOCK 11476 User manual

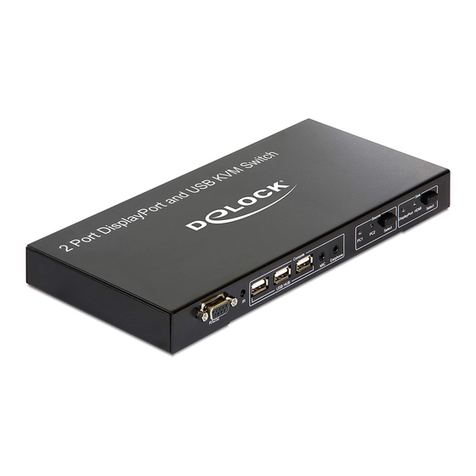
DisplayPort 1.4 KVM Switch
Product-No: 11476
User manual no: 11476-a
www.delock.com
User manual
Mode d’emploi
Uživatelská příručka
Manuale utente
Manual de utilizare
Korisnički priručnik
Bedienungsanleitung
Manual del usuario
Instrukcja obsługi
Bruksanvisning
Használati utasítás
Εγχειρίδιο χρήστη

-2-
English
Description
This KVM switch by Delock is a convenient solution for connecting two computers with DisplayPort output to a
DisplayPort monitor. By using the button or a hotkey you can switch between both computers. Furthermore, two USB
2.0 ports for a mouse and keyboard, and two USB 3.2 ports for a hard drive or USB memory can be connected. With the
support of MST (Multi-Stream Transport), multiple monitors can be used at the DisplayPort output with an optional MST
hub.
Note
MST (Multi-Stream Transport) requires either monitors that are capable of DisplayPort daisy-chaining, or use of a
powered DisplayPort MST Hub. The PC source must be DisplayPort MST compliant.
Specication
• Connectors:
Input:
2 x DisplayPort female
2 x SuperSpeed USB 5 Gbps (USB 3.2 Gen 1) Type-B female
2 x 3.5 mm 3 pin stereo jack female (audio)
1 x DC 5 V power connector
Output:
1 x DisplayPort female
2 x SuperSpeed USB 5 Gbps (USB 3.2 Gen 1) Type-A female (USB Hub)
2 x USB 2.0 Type-A female (keyboard + mouse)
1 x 3.5 mm 3 pin stereo jack female (audio)
1 x 3.5 mm 4 pin stereo jack female (selector)
• Switch button with 2-colour LED indicator for source
• Switching via button or hotkey
• Automatic switching when turning a PC on or o
• Independent switching of source, audio and USB hub
• 2 x SuperSpeed USB 5 Gbps (USB 3.2 Gen 1) Type-A female - Battery Charging specication BC1.2
• Data transfer rate up to SuperSpeed USB 5 Gbps
• DisplayPort 1.4 specication
• Supports Display Stream Compression 1.2 (DSC)
• Supports HDR
• Supports HDCP 1.4 and 2.2
• Resolution up to:
Display with DSC support:
7680 x 4320 @ 60 Hz
3840 x 2160 @ 144 Hz
Display without DSC support:
7680 x 4320 @ 30 Hz
3840 x 2160 @ 120 Hz
(depending on the system and the connected hardware)
• DisplayPort output supports Dual Mode DP++
• Supports MST (Multi-Stream Transport)
• Robust metal housing
• Colour: black
• Dimensions (LxWxH): ca. 170 x 74 x 30 mm
Power supply specication
• Wall power supply
• Input: AC 100 ~ 240 V / 50 ~ 60 Hz / 0.8 A
• Output: 5.0 V / 4.0 A / 20.0 W
• Ground outside, plus inside
• Dimensions:
inside: ø ca. 2.1 mm
outside: ø ca. 5.5 mm
System requirements
• PC with DisplayPort female + USB Type-A female
• Monitor or TV with DisplayPort connector

-3-
English
Package content
• KVM switch with USB and audio
• 2 x cable USB 3.2 A male to USB 3.2 B male, length ca. 1.5 m
• 2 x cable DisplayPort male to DisplayPort male, length ca. 1.5 m
• 2 x cable 3.5 mm stereo jack male to 3.5 mm stereo jack male, length ca. 1.5 m
• 1 x selector with cable, length ca. 1.8 m
• External power supply
• User manual
Safety instructions
• Protect the product against moisture
• Protect the product against direct sunlight
Hardware Installation
1. Connect a USB keyboard and mouse to the console ports of the KVM.
2. Connect the selector pushbutton to the front port of the KVM.
3. Connect all audio cables to each computer, the KVM, and speakers if necessary.
4. Connect other USB devices to the USB Hub if necessary.
5. Connect the DisplayPort monitor to the DisplayPort output of the KVM.
6. Connect the included DC 5V power adapter to the DC port of the KVM.
7. Connect the DisplayPort cable between the DisplayPort output of the computer and the DisplayPort input of the
KVM.
8. Connect the USB cable to the USB-A port of the computer and to the USB-B upstream port of the KVM.
9. Turn on the computer and make sure that the USB ports are enabled and working properly.
Note
This KVM Switch supports USB plug & play; all the components can be added and removed at any time without the need
to shut down the unit. However, it will take several seconds to enumerate the USB devices; the time depends on the
number of USB devices and the speed of the computer.
Operation
Port Selection
Press the selector button to switch between CPU ports. The button LED indicates the port: white (CPU1) or green (CPU2).
The orange LED on the KVM top also indicates the active host port.
Hotkey Support
The hotkey function is working with a USB keyboard which is plugged in at the front port marked with a keyboard logo.
There is no hotkey support for a USB keyboard plugged into the USB Hub downstream ports of the KVM.
You can select the computer you want to control with the following hot keys.
Channel selection
Press [Ctrl] + [Ctrl] + Enter to switch all channels (PC + USB Hub + Audio) to the next port
Press [Ctrl] + [Ctrl] + [D] + Enter to switch the DP channel (PC only) to the next port
USB Hub Selection
Press [Ctrl] + [Ctrl] + [Z] + Enter to switch the USB hub to the next port.
Audio Selection
Press [Ctrl] + [Ctrl] + [A] + Enter to switch Audio to the next port.
Host USB Power on detect Function
Press [Ctrl] + [Ctrl] + [P] + [W] + [1] to enable port switching by Host USB Power on detect. (Default)
Press [Ctrl] + [Ctrl] + [P] + [W] + [0] to disable Host USB Power on detect.

-4-
English
Auto-Scan Function
Press [Ctrl] + [Ctrl] + [S] + Enter to activate the Auto-Scan function; the KVM will cycle through the 2 display ports
sequentially.
Press [Ctrl] + [Ctrl] + [S] + [n] + Enter to adjust the time interval during Auto-Scan, where [n] can be 5 ~ 999.
Press any other key on the keyboard to turn o the Auto-Scan function.
Buzzer Function
Press [Ctrl] + [Ctrl] + [B] + [1] to enable the buzzer function. (Default)
Press [Ctrl] + [Ctrl] + [B] + [0] to disable the buzzer function.
The buzzer sound:
(a) activate leading hotkey beeps once;
(b) accomplish setting hotkey and Enter beeps once;
(c) error hotkey beeps once and quit;
(d) only press leading hotkey in a few seconds without further step beeps once and quit.
Hotkey Summary
Step 1 Step 2 Action
Ctrl Ctrl Enter Switch to next host (PC + USB Hub + Audio)
Ctrl Ctrl [A]+Enter Switch Audio to next Host
Ctrl Ctrl [Z]+Enter Switch USB Hub to next Host
Ctrl Ctrl [D]+Enter Switch DP to next Host (PC only)
Ctrl Ctrl [P]+[W]+[ 1/0] Enable / Disable Host USB power detect
Ctrl Ctrl [S]+Enter Start Auto-Scan
Ctrl Ctrl [S]+[n]+Enter Auto-Scan time interval (Default: 20 sec)
n=5~999 sec
Ctrl Ctrl [B]+[1/0] Enable / Disable buzzer
The two-step hotkey sequence is used for quick function execution. The leading key (Step 1) is [Ctrl] + [Ctrl] by default.
However, you may change the leading hotkey if you want, by pressing [Ctrl] twice, [H] + mode A or B (see below), then
pressing Enter. The available leading hotkey modes are shown below.
Set leading hotkey to mode A (for Mac keyboard only):
Press and hold [Command] + [F12] + [F12] + release [Command]
Set leading hotkey to mode B:
[Ctrl] + [Ctrl]
Support Delock
If you have further questions, please contact our customer support [email protected]
You can nd current product information on our homepage: www.delock.com
Final clause
Information and data contained in this manual are subject to change without notice in advance. Errors and misprints
excepted.
Copyright
No part of this user manual may be reproduced, or transmitted for any purpose, regardless in which way or by any
means, electronically or mechanically, without explicit written approval of Delock.
Edition: 01/2023

-5-
Deutsch
Kurzbeschreibung
Dieser KVM Switch von Delock ist eine praktische Lösung, um zwei Computer mit DisplayPort Ausgang an einem
DisplayPort Monitor zu betreiben. Per Tastendruck am Gerät oder per Hotkey kann man von einem Computer zum
anderen schalten. Des Weiteren können über zwei USB 2.0 Anschlüsse Maus und Tastatur, und über zwei USB 3.2
Anschlüsse Festplatten oder USB Speicher angeschlossen werden. Durch die Unterstützung von MST (Multi-Stream
Transport) können mit einem optionalem MST-Hub auch mehrere Monitore am DisplayPort Ausgang verwendet werden.
Hinweis
MST (Multi-Stream Transport) erfordert entweder Monitore, die in der Lage sind, DisplayPort Daisy-Chaining
durchzuführen, oder einen aktiven DisplayPort MST Hub. Die PC-Quelle muss mit DisplayPort MST kompatibel sein.
Spezikation
• Anschlüsse:
Eingang:
2 x DisplayPort Buchse
2 x SuperSpeed USB 5 Gbps (USB 3.2 Gen 1) Typ-B Buchse
2 x 3,5 mm 3 Pin Klinkenbuchse (Audio)
1 x DC 5 V Stromanschluss
Ausgang:
1 x DisplayPort Buchse
2 x SuperSpeed USB 5 Gbps (USB 3.2 Gen 1) Typ-A Buchse (USB Hub)
2 x USB 2.0 Typ-A Buchse (Tastatur + Maus)
1 x 3,5 mm 3 Pin Klinkenbuchse (Audio)
1 x 3,5 mm 4 Pin Klinkenbuchse (Umschalter)
• Umschalttaste mit zweifarbiger LED Anzeige für Quelle
• Umschaltung durch Taste oder Hotkey
• Automatisches Umschalten beim Ein- oder Ausschalten eines PCs
• Unabhängiges Umschalten von Quelle, Audio und USB Hub
• 2 x SuperSpeed USB 5 Gbps (USB 3.2 Gen 1) Typ-A Buchse - Battery Charging Spezikation BC1.2
• Datentransferrate bis zu SuperSpeed USB 5 Gbps
• DisplayPort 1.4 Spezikation
• Unterstützt Display Stream Compression 1.2 (DSC)
• Unterstützt HDR
• Unterstützt HDCP 1.4 und 2.2
• Auösung bis zu:
Monitor mit DSC Unterstützung:
7680 x 4320 @ 60 Hz
3840 x 2160 @ 144 Hz
Monitor ohne DSC Unterstützung:
7680 x 4320 @ 30 Hz
3840 x 2160 @ 120 Hz
(abhängig vom System und der angeschlossenen Hardware)
• DisplayPort Ausgang unterstützt Dual Mode DP++
• Unterstützt MST (Multi-Stream Transport)
• Robustes Metallgehäuse
• Farbe: schwarz
• Maße (LxBxH): ca. 170 x 74 x 30 mm
Netzteilspezikation
• Steckernetzteil
• Eingang: AC 100 ~ 240 V / 50 ~ 60 Hz / 0,8 A
• Ausgang: 5,0 V / 4,0 A / 20,0 W
• Masse außen, Plus innen
• Maße:
innen: ø ca. 2,1 mm
außen: ø ca. 5,5 mm
Systemvoraussetzungen
• PC mit DisplayPort Buchse + USB Typ-A Buchse
• Monitor oder TV mit DisplayPort Anschluss

-6-
Deutsch
Packungsinhalt
• KVM Switch mit USB und Audio
• 2 x Kabel USB 3.2 A Stecker zu USB 3.2 B Stecker, Länge ca. 1,5 m
• 2 x Kabel DisplayPort Stecker zu DisplayPort Stecker, Länge ca. 1,5 m
• 2 x Kabel 3,5 mm Klinkenstecker zu 3,5 mm Klinkenstecker, Länge ca. 1,5 m
• 1 x Umschalter mit Kabel, Länge ca. 1,8 m
• Externes Netzteil
• Bedienungsanleitung
Sicherheitshinweise
• Produkt vor Feuchtigkeit schützen
• Produkt vor direkter Sonneneinstrahlung schützen
Hardwareinstallation
1. Verbinden Sie eine USB Tastatur und Maus mit dem Konsolen-Port des KVM.
2. Verbinden Sie den Umschalter mit dem Port an der Vorderseite des KVM.
3. Verbinden Sie alle Audio Kabel mit jedem Computer, dem KVM und den Lautsprechern, falls gewünscht.
4. Verbinden Sie weitere USB Geräte mit dem USB Hub, falls gewünscht.
5. Verbinden Sie den DisplayPort Monitor mit dem DisplayPort Ausgang des KVM.
6. Verbinden Sie das mitgelieferte DC 5V Netzteil mit dem DC Eingang des KVM.
7. Schließen Sie ein DisplayPort Kabel zwischen dem DisplayPort Ausgang des Computers und dem DisplayPort
Eingang des KVM an.
8. Schließen Sie ein USB Kabel zwischen einem USB-A Port des Computers und dem USB-B Upstream-Port des KVM
an.
9. Schalten Sie den Computer an und stellen Sie sicher, dass die USB Ports aktiv sind und ordnungsgemäß
funktionieren.
Hinweis
Dieser KVM Switch unterstützt USB-Plug & Play; alle Komponenten können jederzeit hinzugefügt und entfernt werden,
ohne dass das Gerät heruntergefahren werden muss. Die Erkennung der USB-Geräte dauert jedoch einige Sekunden;
die Zeit hängt von der Anzahl der USB-Geräte und der Geschwindigkeit des Computers ab.
Bedienung
Port Auswahl
Drücken Sie die Umschalttaste, um zwischen den PC Ports zu wechseln. Die Tasten-LED zeigt den Port an: weiß (CPU1)
oder grün (CPU2). Auch die orange LED auf der Oberseite des KVM zeigt den aktiven Host Port an.
Hotkey Unterstützung
Die Hotkey-Funktion arbeitet mit einer USB-Tastatur, die in den vorderen Port eingesteckt ist, der mit einem Tastatur-
Logo versehen ist. Es gibt keine Hotkey-Unterstützung für eine USB-Tastatur, die an den USB Hub Downstream-Ports
des KVM angeschlossen ist.
Sie können den Computer, den Sie steuern möchten, mit den folgenden Tastenkombinationen auswählen.
Eingangsauswahl
Drücken Sie [Strg] + [Strg] + Eingabe um alle Kanäle (PC + USB Hub + Audio) auf den nächsten Eingang umzuschalten
Drücken Sie [Strg] + [Strg] + [D] + Eingabe um den DP Kanal (nur PC) auf den nächsten Eingang umzuschalten
USB Hub Auswahl
Drücken Sie [Strg] + [Strg] + [Z] + Eingabe um den USB Hub auf den nächsten Eingang zu schalten

-7-
Deutsch
Audio Selection
Drücken Sie [Strg] + [Strg] + [A] + Eingabe um Audio auf den nächsten Eingang zu schalten
Host USB Power on Erkennungs-Funktion
Drücken Sie [Strg] + [Strg] + [P] + [W] + [1] um die Portumschaltung bei Host USB Power on Erkennung zu aktivieren.
(Voreinstellung)
Drücken Sie [Strg] + [Strg] + [P] + [W] + [0] um die Portumschaltung bei Host USB Power on Erkennung zu deaktivieren.
Auto-Scan Funktion
Drücken Sie [Strg] + [Strg] + [S] + Eingabe um die Auto-Scan Funktion zu aktivieren; der KVM schaltet nacheinander
zwischen den 2 Display Ports um.
Drücken Sie [Strg] + [Strg] + [S] + [n] + Eingabe um das Zeitintervall bei Auto-Scan einzustellen, [n] darf dabei zwischen
5 ~ 999 sein.
Drücken Sie eine beliebige Taste auf der Tastatur, um die Auto-Scan Funktion abzuschalten.
Lautsprecher Funktion
Drücken Sie [Strg] + [Strg] + [B] + [1] um den Lautsprecher zu aktivieren. (Default)
Drücken Sie [Strg] + [Strg] + [B] + [0] um den Lautsprecher zu deaktivieren.
Lautsprecher Signale:
(a) Aktivierung des ersten Hotkey piept einmal;
(b) Eingabe des Hotkey und Eingabe piept einmal;
(c) Fehler Hotkey piept einmal und beendet;
(d) Aktivierung des ersten Hotkey ohne weitere Eingabe innerhalb weniger Sekunden piept einmal und beendet.
Hotkey Summary
Schritt 1 Schritt 2 Aktion
Strg Strg Eingabe Zum nächsten Host schalten (PC + USB Hub + Audio)
Strg Strg [A]+Eingabe Audio zum nächsten Host schalten
Strg Strg [Z]+ Eingabe USB Hub zum nächsten Host schalten
Strg Strg [[D]+Eingabe DP zum nächsten Host schalten (nur PC)
Strg Strg [[P]+[W]+[1/0] Host USB Power Erkennung aktivieren / deaktivieren
Strg Strg [S]+Eingabe Start Auto-Scan
Strg Strg [S]+[n]+Eingabe Auto-Scan Zeitintervall (Voreinstellung: 20 sec)
n=5~999 sec
Strg Strg [B]+[1/0] Lautsprecher aktivieren / deaktivieren
Die zweiteilige Hotkey-Sequenz dient der schnellen Funktionsausführung. Die erste Taste (Schritt 1) ist standardmäßig
[Strg] + [Strg]. Sie können jedoch den ersten Hotkey ändern, indem Sie zweimal [Strg], [H] + Modus A oder B (siehe
unten) und dann Eingabe drücken. Die verfügbaren Hotkey-Modi sind unten aufgeführt.
Einstellung der ersten Tastensequenz auf Mode A (nur für Mac Tastaturen):
Drücken und halten Sie [Command] + [F12] + [F12] + lassen Sie [Command] los
Einstellung der ersten Tastensequenz auf Mode B:
[Strg] + [Strg]
Support Delock
Bei weitergehenden Supportanfragen wenden Sie sich bitte an [email protected]
Aktuelle Produktinformationen nden Sie auf unserer Homepage: www.delock.de
Schlussbestimmung
Die in diesem Handbuch enthaltenen Angaben und Daten können ohne vorherige Ankündigung geändert werden.
Irrtümer und Druckfehler vorbehalten.
Copyright
Ohne ausdrückliche schriftliche Erlaubnis von Delock darf kein Teil dieser Bedienungsanleitung für irgendwelche
Zwecke vervielfältigt oder übertragen werden, unabhängig davon, auf welche Art und Weise oder mit welchen Mitteln,
elektronisch oder mechanisch, dies geschieht.
Stand: 01/2023

-8-
Français
Conguration système requise
• PC avec DisplayPort femelle + USB Type-A femelle
• Moniteur ou télévision avec connecteur DisplayPort
Contenu de l’emballage
• Commutateur KVM avec USB et audio
• 2 câbles USB 3.2 A mâle à USB 3.2 B mâle, longueur env. 1,5 m
• 2 câbles DisplayPort mâle à DisplayPort mâle, longueur env. 1,5 m
• 2 x câbles 3,5 mm stéréo jack mâle à 3,5 mm stéréo jack mâle, longueur env. 1,5 m
• 1 x sélecteur avec câble, longueur env. 1,8 m
• Alimentation électrique externe
• Mode d’emploi
Instructions de sécurité
• Protéger le produit contre l’humidité
• Protéger le produit contre la lumière directe du soleil
Installation matérielle
1. Connecter un clavier et une souris USB aux ports de la console du KVM.
2. Connecter le sélecteur au port avant du KVM.
3. Connecter tous les câbles audio à chaque ordinateur, au KVM et aux haut-parleurs le cas échéant.
4. Connecter les autres appareils USB au Hub USB le cas échéant.
5. Connecter le moniteur DisplayPort à la sortie DisplayPort du KVM.
6. Connecter l’adaptateur 5 VDC inclus au port DC du KVM.
7. Connecter la câble DisplayPort entre la sortie DisplayPort de l’ordinateur et l’entrée DisplayPort du KVM.
8. Connecter le câble USB au port USB-A de l’ordinateur et au port amont USB-B du KVM.
9. Allumer l’ordinateur et s’assurer que les ports USB sont activés et fonctionnent correctement.
Remarque
Ce commutateur KVM supporte brancher et utiliser USB ; tous les composants peuvent être ajoutés et retirés à tout
moment sans avoir à fermer l’unité. Cependant, il faudra plusieurs secondes pour énumérer les appareils USB ; la durée
dépend du nombre d’appareils USB et de la vitesse de l’ordinateur.
Fonctionnement
Sélection de port
Appuyer sur le sélecteur pour passer d’un port CPU à un autre. La LED indique le port : blan (CPU1) ou vert (CPU2). La
LED orange sur le dessus du KVM indique aussi le port hôte activé.
Support de raccourci-clavier
La fonction raccourci-clavier fonctionne avec un clavier USB branché sur le port avant marqué d’un logo de clavier. Il n’y
a pas de support pour un clavier branché dans le Hub USB dans les ports aval du KVM.
Vous pouvez sélectionner l’ordinateur que vous voulez contrôler avec les clés suivantes.
Sélection de canal
Appuyer sur [Ctrl] + [Ctrl] + Enter pour commuter de tous les canaux (PC + USB Hub + Audio) au port suivant
Appuyer sur [Ctrl] + [Ctrl] + [D] + Enter pour commuter du canal DP (uniquement PC) au port suivant
Sélection de Hub USB Hub
Appuyer sur [Ctrl] + [Ctrl] + [Z] + Enter pour passer du hub USB au port suivant.
Sélection audio
Appuyer sur [Ctrl] + [Ctrl] + [A] + Enter pour passer d’Audio au port suivant.
Fonction de détection d’alimentation USB de l’hôte
Appuyer sur [Ctrl] + [Ctrl] + [P] + [W] + [1] pour activer la commutation de port par détection d’alimentation d’hôte USB. (par
défaut)
Appuyer sur [Ctrl] + [Ctrl] + [P] + [W] + [0] pour désactiver la commutation de port par détection d’alimentation d’hôte
USB.

-9-
Français
Fonction Auto-Scan
Appuyer sur [Ctrl] + [Ctrl] + [S] + Enter pour active la fonction Auto-Scan ; le KVM passe séquentiellement par les 2
DisplayPort.
Appuyer sur [Ctrl] + [Ctrl ]+ [S] + [n] + Enter pour ajuster l’intervalle de temps de l’Auto-Scan, où [n] peut être de 5 à 999.
Appuyer sur n’importe quelle autre touche du clavier pour arrêter la fonction d’Auto-Scan.
Fonction Buzzer
Appuyer sur [Ctrl] + [Ctrl] + [B] + [1] pour activer la fonction de Buzzer (par défaut).
Appuyer sur [Ctrl] + [Ctrl] + [B] + [0] pour désactiver la fonction de Buzzer.
Le Buzzer retentit :
(a) activer une touche, un bip ;
(b) accomplir le raccourci-clavier puis Enter, un bip ;
(c) touche erronée, un bip puis quitte ;
(d) appuyer une fois sur une touche quelques secondes sans rien d’autre, un bip et quitte.
Résumé des raccourcis-clavier
Etape 1 Etape 2 Action
Ctrl Ctrl Entrer Passe à l’hôte suivant (PC + USB Hub + Audio)
Ctrl Ctrl [A]+Enter Passe de l’Audio à l’hôte suivant
Ctrl Ctrl [Z]+Enter Passe du Hub USB à l’hôte suivant
Ctrl Ctrl [D]+Enter Passe du DP à l’hôte suivant (uniquement PC)
Ctrl Ctrl [P]+[W]+[ 1/0] Active / Désactive la détection d’alimentation de l’USB hôte
Ctrl Ctrl [S]+Enter Démarre Auto-Scan
Ctrl Ctrl [S]+[n]+Enter Intervalle de temps d’Auto-Scan (par défaut : 20 sec)
n = 5 à 999 sec
Ctrl Ctrl [B]+[1/0] Active / Désactive le buzzer
La séquence en deux étapes de raccourci-clavier est utilisée pour une exécution rapide de fonction. La touche de tête
(étape 1) est [Ctrl] + [Ctrl] par défaut. Cependant, vous pouvez changer la touche de tête si vous le voulez, en appuyant
sur [Ctrl] deux fois, [H] + mode A ou B (voir ci-dessous), puis appuyer sur Enter. Les modes de touches de tête sont
indiqués ci-dessous.
Mettre la touche de tête en mode A (pour clavier Mac uniquement) :
Appuyer et maintenir [Command] + [F12] + [F12] + relâcher [Command]
Mettre la touche de tête en mode B :
[Ctrl] + [Ctrl]
Assistance Delock
Si vous avez d'autres questions, veuillez contacter notre assistance client : [email protected]
Vous pouvez trouver les informations sur nos produits actuels sur notre page d'accueil : www.delock.fr
Clause nale
Les informations et données contenues dans ce manuel sont sujettes à modications sans préavis. Sont exclues les
erreurs et les fautes d'impression.
Copyright
Aucune partie de ce manuel d'utilisation ne peut être reproduite ou transmise, quel qu'en soit le but, et sous quelque
moyen que ce soit, électronique ou mécanique, sans l'approbation écrite expresse de Delock.
Version : 01/2023

-10-
Español
Requisitos del sistema
• PC con DisplayPort hembra + USB Tipo-A hembra
• Monitor o TV con conector DisplayPort
Contenido del paquete
• Conmutador KVM con USB y audio
• 2 x cable USB 3.2 A macho a USB 3.2 B macho, longitud aprox. 1,5 m
• 2 x cable DisplayPort macho a DisplayPort macho, longitud aprox. 1,5 m
• 2 x cable conector estéreo de 3,5 mm macho a conector estéreo de 3,5 mm macho, longitud aprox. 1,5 m
• 1 x selector con cable, longitud aprox. 1,8 m
• Fuente de alimentación externa
• Manual del usuario
Instrucciones de seguridad
• Proteja el producto contra el polvo
• Proteja el producto contra la luz solar directa
Hardware Instalación
1. Conecte un teclado y mouse USB a los puertos de la consola del KVM.
2. Conecte el botón selector al puerto frontal del KVM.
3. Conecte todos los cables de audio a cada computadora, KVM y parlantes si es necesario.
4. Conecte otros dispositivos USB al concentrador USB si es necesario.
5. Conecte el monitor DisplayPort a la salida DisplayPort del KVM.
6. Conecte el adaptador de corriente DC 5V incluido al puerto DC del KVM.
7. Conecte el cable DisplayPort entre la salida DisplayPort de la computadora y la entrada DisplayPort del KVM.
8. Conecte el cable USB al puerto USB-A de la computadora y al puerto USB-B ascendente del KVM.
9. Encienda la computadora y asegúrese de que los puertos USB estén habilitados y funcionen correctamente.
Nota
Este conmutador KVM admite USB Plug & Play; todos los componentes se pueden agregar y eliminar en cualquier
momento sin la necesidad de apagar la unidad. Sin embargo, llevará varios segundos enumerar los dispositivos USB; el
tiempo depende de la cantidad de dispositivos USB y la velocidad de la computadora.
Funcionamiento
Selección de puerto
Presione el botón selector para cambiar entre los puertos de la CPU. El botón LED indica el puerto: blanco (CPU1) o
verde (CPU2). El LED naranja en la parte superior de KVM también indica el puerto de host activo.
Soporte para teclas de acceso rápido
La función de tecla de acceso rápido funciona con un teclado USB que está conectado en el puerto frontal marcado
con un logotipo de teclado. No hay soporte para teclas de acceso rápido para un teclado USB conectado a los puertos
posteriores del concentrador USB del KVM.
Puede seleccionar la computadora que desea controlar con las siguientes teclas rápidas.
Selección del canal
Presione [Ctrl] + [Ctrl] + Enter para cambiar todos los canales (PC + USB Hub + Audio) al siguiente puerto
Presione [Ctrl] + [Ctrl] + [D] + Enter para cambiar el canal DP (PC solamente) al siguiente puerto
Selección de concentrador USB
Presione [Ctrl] + [Ctrl] + [Z] + Enter para cambiar el concentrador USB al siguiente puerto.
Selección de audio
Presione [Ctrl] + [Ctrl] + [A] + Enter para cambiar el audio al siguiente puerto.
Función de detección de encendido del Host USB
Presione [Ctrl] + [Ctrl] + [P] + [W] + [1] para habilitar la conmutación de puerto mediante la detección de encendido del
Host USB. (Predeterminada)
Presione [Ctrl] + [Ctrl] + [P] + [W] + [0] para deshabilitar la detección de encendido del Host USB.
-11-
Español
Función de escaneo automático
Presione [Ctrl] + [Ctrl] + [S] + Enter para activar la función de escaneo automático; el KVM recorrerá los 2 puertos de
visualización secuencialmente.
Presione [Ctrl] + [Ctrl] + [S] + [n] + Enter para ajustar el intervalo durante el escaneo automático, donde [n] puede ser de
5 ~ 999.
Presione cualquier otra tecla en el teclado para desactivar la función de escaneo automático.
Función de zumbador
Presione [Ctrl] + [Ctrl] + [B] + [1] para activar la función de zumbador. (Predeterminada)
Presione [Ctrl] + [Ctrl] + [B] + [0] para desactivar la función de zumbador.
El sonido del timbre:
(a) activar pitidos de la tecla de acceso directo una vez;
(b) lograr congurar la tecla de acceso rápido y Enter pita una vez;
(c) pitidos de tecla de acceso rápido error una vez y salir;
(d) solo presione la tecla de acceso directo en unos pocos segundos sin más pitidos una vez y salir.
Resumen de teclas rápidas
Paso 1 Paso 2 Acción
Ctrl Ctrl Entrar Cambiar al siguiente host (PC + USB Hub + Audio)
Ctrl Ctrl [A]+Enter Cambiar audio al próximo host
Ctrl Ctrl [Z]+Enter Cambie el concentrador USB al próximo host
Ctrl Ctrl [D]+Enter Cambie DP al siguiente host (solo PC)
Ctrl Ctrl [P]+[W]+[ 1/0] Habilitar / deshabilitar la detección de encendido del Host USB
Ctrl Ctrl [S]+Enter Iniciar el escaneo automático
Ctrl Ctrl [S]+[n]+Enter Intervalo de escaneo automático (valor predeterminado: 20 segundos)
n = 5 ~ 999 segs.
Ctrl Ctrl [B]+[1/0] Activar / desactivar el zumbador
La secuencia de teclas de acceso rápido de dos pasos se usa para la ejecución rápida de funciones. La tecla de avance
(Paso 1) es [Ctrl] + [Ctrl] de manera predeterminada. Sin embargo, puede cambiar la tecla de acceso directo si lo desea,
presionando [Ctrl] dos veces, [H] + modo A o B (consulte a continuación) y luego presione Entrar. Los modos de teclas
rápidas disponibles se muestran a continuación.
Establezca la tecla de acceso directo al modo A (solo para el teclado de Mac):
Mantenga presionado [Comando] + [F12] + [F12] + suelte [Comando]
Establezca la tecla de acceso directo al modo B:
[Ctrl] + [Ctrl]
Soporte técnico Delock
Si tiene alguna pregunta, póngase en contacto con nuestro servicio de atención al cliente [email protected]
Puede encontrar información actual del producto en nuestra página Web: www.delock.es
Cláusula nal
La información y los datos contenidos en este manual están sujetos a cambios sin previo aviso. Exceptuando errores y
erratas.
Copyright
Queda prohibida la reproducción o transmisión para cualquier n de parte alguna de este manual del usuario,
independientemente de la forma en que se realice, ya sea, electrónicamente o mecánicamente, sin el consentimiento
escrito de Delock.
Versión: 01/2023

-12-
České
Systémové požadavky
• PC s DisplayPort samicí + USB Typ-A samicí
• Monitor nebo TV s DisplayPort konektorem
Obsah balení
• KVM switch s USB a audio
• 2 x kabel USB 3.2 A samec na USB 3.2 B samec, délka cca. 1,5 m
• 2 x kabel DisplayPort samec na DisplayPort samec, délka ca. 1,5 m
• 2 x kabel 3,5 mm stereo jack samec na 3,5 mm stereo jack samec, délka cca. 1,5 m
• 1 x selector s kabelem, délka cca. 1,8 m
• Externí napájecí zdroj
• Uživatelská příručka
Bezpečnostní pokyny
• Chraňte produkt před vlhkostí
• Chraňte produkt před přímým slunečním světlem
Instalace hardware
1. Připojte USB klávesnici a myš k portům konzoly KVM.
2. Připojte tlačítko selector k přednímu portu KVM.
3. Připojte všechny audio kabely ke každému počítači, KVM a reproduktorům, pokud je to nutné.
4. Připojte další zařízení USB k rozbočovači USB pokud je to nutné.
5. Připojte monitor DisplayPort k výstupu DisplayPort KVM.
6. Připojte dodaný napájecí adapter DC 5V k portu DC KVM.
7. Připojte kabel DisplayPort mezi výstupem DisplayPort počítače a DisplayPort vstupem KVM.
8. Připojte kabel USB k portu USB-A počítače a upstream portu USB-B KVM.
9. Zapněte počítač a ujistěte se, že porty USB jsou aktivní a správně fungují.
Poznámka
Tento KVM Switch podporuje USB plug & play; všechny komponenty mohou být připojeny a odpojeny bez nutnosti
vypnutí jednotky. Bude však trvat několik vteřin, než se USB zařízení přihlásí; čas závisí na počtu připojených USB
zařízení a rychlosti počítače.
Operace
Výběr portu
Stisknutím tlačítka voliče přepnete mezi porty CPU. LED dioda tlačítka označuje port: bílá (CPU1) nebo zelená (CPU2).
Oranžová LED na vrchu KVM označuje aktivní hostitelský port.
Podpora Hotkey
Funkce klávesové zkratky pracuje s klávesnicí USB, která je připojena k přednímu portu označeném logem klávesnice.
Není podpora klávesové zkratky pro USB klávesnici připojenou k portůmUSB Hubu navazujících portů KVM.
Pomocí následujících klávesových zkratek můžete vybrat počítač, který chcete ovládat.
Výběr kanálů
Stisknutím [Ctrl] + [Ctrl] + Enter přepnete všechny kanály (PC + USB Hub + Audio) na další port
Stisknutím [Ctrl] + [Ctrl] + [D] + Enter přepnete DP kanály (jen PC) na další port
Výběr USB Hubu
Stisknutím [Ctrl] + [Ctrl] + [Z] + Enter přepnete rozbočovač USB na další port.
Výběr Audio
Stisknutím [Ctrl] + [Ctrl] + [A] + Enter přepnete Audio na další port.
Host USB Power funkce rozpoznání
Stisknutím [Ctrl] + [Ctrl] + [P] + [W] + [1] umožňuje detekci přepnutí portu napájení Host USB. (Výchozí)
Stisknutím [Ctrl] + [Ctrl] + [P] + [W] + [0] zakážete rozpoznání napájení Host USB.

-13-
České
Funkce automatického skenování
Stisknutím [Ctrl] + [Ctrl] + [S] + Enter aktivujete funkci automatického skenování; KVM bude postupně procházet dvěma
porty zobrazení.
Stisknutím [Ctrl] + [Ctrl] + [S] + [n] + Enter nastavíte časový interval pro automatické skenování, kde [n] může být 5 ~
999.
Stisknutím jiného libovolného tlačítka klávesnice vypnete funkci automatického skenování.
Funkce bzučáku
Stisknutím [Ctrl] + [Ctrl] + [B] + [1] umožníte funkci bzučáku. (Výchozí)
Stisknutím [Ctrl] + [Ctrl] + [B] + [0] vypnete funkci bzučáku.
Zvuk bzučáku:
(a) aktivace hlavních hotkey (klávesových zkratek) jednou pípne;
(b) dokončení nastavení hotkey a Enter jednou pípne;
(c) chybová hotkey jednou pípne a ukončí;
(d) pouze stisknutí hlavní hotkey během pár vteřin bez dalších kroků jednou pípne a ukončí.
Přehled klávesových zkratek
Krok 1 Krok 2 Akce
Ctrl Ctrl Vložit Přepne na další host (PC + USB Hub + Audio)
Ctrl Ctrl [A]+Enter Přepne Audio na další Host
Ctrl Ctrl [Z]+Enter Přepne USB Hub na další Host
Ctrl Ctrl [D]+Enter Přepne DP na další Host (jen PC)
Ctrl Ctrl [P]+[W]+[ 1/0] Povolí / Zakáže detekci napájení Host USB
Ctrl Ctrl [S]+Enter Spustí automatické skenování
Ctrl Ctrl [S]+[n]+Enter Časový interval automatického skenování (Výchozí: 20 sec)
n=5~999 sec
Ctrl Ctrl [B]+[1/0] Povolí / Zakáže bzučák (pípnutí)
Dvoukroková klávesová zkratka se používá pro rychlé spuštění funkce. Hlavní klávesa (Krok 1) je [Ctrl] + [Ctrl] ve
výchozím nastavení. Pokud chcete, můžete změnit hlavní klávesovou zkratku, stisknutím dvakrát [Ctrl], [H] + režim A
nebo B (viz níže),a stisknutím klávesy Enter. Dostupné přednastavené režimy klávesových zkratek jsou uvedeny níže.
Nastavte hlavní klávesovou zkratku do režimu A (pouze pro klávesnici Mac):
Stisknutím a přidržením [Příkaz] + [F12] + [F12] + uvolnění [Příkaz]
Nastavení klávesové zkratky do režimu B:
[Ctrl] + [Ctrl]
Podpora Delock
S dalšími technickými otázkami můžete kontaktovat naše středisko podpory: [email protected]
Aktuální informace o produktu můžete nalézt i na našich webových stránkách: www.delock.cz
Závěrečné upozornění
Informace a data obsažená v této příručce mohou být změněny bez předchozího upozornění. Za tiskové chyby
neručíme.
Copyright
Žádná část této uživatelské příručky nesmí být reprodukována, přenášena ani pro jakýkoli účel, bez ohledu na to, jakým
způsobem nebo jakými prostředky, elektronicky nebo mechanicky, bez výslovného písemného souhlasu Delock.
verze: 01/2023

-14-
Polsku
Wymagania systemowe
• Komputer PC z żeńskim gniazdem DisplayPort + żeńskim USB Typ-A
• Monitor lub telewizor ze złączem DisplayPort
Zawartość opakowania
• Przełącznik KVM ze złączem USB i audio
• 2 x kabel USB 3.2 A męski do USB 3.2 B męski, długość ok. 1,5 m
• 2 x kabel DisplayPort męski do DisplayPort męski, ok. 1,5 m
• 2 x kable stereo jack męskie 3,5 mm do stereo jack męski 3,5 mm, długości ok. 1,5 m
• 1 x wybierak z kablem, długości ok. 1,8 m
• Zewnętrzny zasilacz
• Instrukcja obsługi
Instrukcje bezpieczeństwa
• Produkt należy zabezpieczyć przed wilgocią
• Produkt należy zabezpieczyć przed bezpośrednim światłem słonecznym
Instalacja sprzętu
1. Połączyć klawiaturę USB i mysz do portów konsoli KVM.
2. Połączyć przycisk wybieraka do przedniego portu KVM.
3. Połączyć wszystkie kable audio do każdego komputera, KVM i głośników, gdy potrzeba.
4. Połączyć urządzenia USB z hubem USB gdy potrzeba.
5. Połączyć monitor DisplayPort do wyjścia DisplayPort KVM.
6. Połączyć załączony zasilacz 5V DC do portu DC KVM.
7. Połączyć kabel DisplayPort pomiędzy wyjściem DisplayPort komputera a wejściem DisplayPort KVM.
8. Połączyć kabel USB do portu USB-A komputera i do portu USB-B KVM.
9. Włączyć komputer i sprawdzić, czy wszystkie porty USB działają poprawnie.
Uwaga
Przełącznik KVM obsługuje plug & play; wszystkie elementy mogą być wprowadzane i usuwane w dowolnej chwili
bez potrzeby wyłączania urządzenia. Niemniej, identykacja urządzeń USB zajmie kilka sekund; czas zależy od liczby
urządzeń USB i prędkości komputera.
Obsługa
Wybór portu
Aby przełączyć się pomiędzy portami CPU nacisnąć przycisk wybieraka. Dioda przycisku wskazuje port: biała (CPU1),
zielona (CPU2). Dioda na KVM również wskazuje port aktywnego hosta.
Obsługa hotkeys
Funkcja hotkey działa z klawiaturą USB włączoną do portu przedniego oznaczonego obrazkiem klawiatury. Hotkey nie
jest obsługiwana dla klawiatur USB włączonych do USB huba za portami KVM.
Następujące hotkey (klawisze) pozwalają wybrać komputer.
Wybór kanału
Nacisnąć [Ctrl] + [Ctrl] + Enter aby przełączyć się pomiędzy kanałami (PC + USB Hub + Audio) do następnego portu
Nacisnąć [Ctrl] + [Ctrl] + [D] + Enter aby przełączyć kanał DP (tylko PC) do następnego portu.
Wybór huba USB
Nacisnąć [Ctrl] + [Ctrl] + [Z] + Enter aby przełączyć kanał hub USB do następnego portu.
Wybór audio
Nacisnąć [Ctrl] + [Ctrl] +[ A] + Enter aby przełączyć audio do następnego portu.
Funkcja wykrywania zasilania hosta USB
Nacisnąć [Ctrl] + [Ctrl] + [P] + [W] + [1] aby umożliwić przełączanie portów po wykryciu zasilania na USB hosta. (Domyślny)
Nacisnąć [Ctrl] + [Ctrl] + [P] + [W] + [0] aby uniemożliwić przełączanie portów po wykryciu zasilania na USB hosta.
Funkcja Auto-Scan
Nacisnąć [Ctrl] + [Ctrl] + [S] + Enter aby aktywować funkcję Auto-Scan; KVM kolejno sprawdzi 2 porty ekranu.
Nacisnąć [Ctrl] + [Ctrl] + [S] + [n] + Enter aby ustawić ostęp czasu dla Auto-Scan, gdzie [n] przyjmuje wartości 5 ~ 999.
Nacisnąć dowolny inny klawisz klawiatury aby wyłączyć Auto-Scan.

-15-
Polsku
Brzęczyk
Nacisnąć [Ctrl] + [Ctrl] + [B] + [1] aby umożliwić funkcję brzęczyka. (Domyślny)
Nacisnąć [Ctrl] + [Ctrl] + [B] + [0] aby uniemożliwić funkcję brzęczyka.
Dźwięk brzęczyka:
(a) aktywacja 1 kroku sekwencji klawiszy - piśnie raz;
(b) wprowadzenie 2 kroku sekwencji klawiszy i Enter - piśnie raz;
(c) błędna sekwencja - piśnie raz i wyłącza się;
(d) przytrzymacie 1 kroku sekwencji klawiszy przez kilka sekund, bez drugiego kroku - piśnie raz i wyłącza się;
Podsumowanie sekwencji klawiszy
Krok 1 Krok 2 Działanie
Ctrl Ctrl Zatwierdzić Przełącza do następnego hosta (PC + USB Hub + Audio)
Ctrl Ctrl [A]+Enter Przełącza audio do następnego hosta
Ctrl Ctrl [Z]+Enter Przełącza hub USB do następnego hosta
Ctrl Ctrl [D]+Enter Przełącza DP do następnego hosta (tylko PC)
Ctrl Ctrl [P]+[W]+[ 1/0] Umożliwia / Uniemożliwia wykrywanie zasilania hosta USB
Ctrl Ctrl [S]+Enter Start Auto-Scan
Ctrl Ctrl [S]+[n]+Enter Odstęp czasowy Auto-Scan (Domyślny: 20 sec)
n=5~999 sec
Ctrl Ctrl [B]+[1/0] Umożliwia / Uniemożliwia brzęczyk
Dwustopniowa sekwencja klawiszy jest wykorzystywana do szybkiego wywołania funkcji. Pierwszy stopień to domyślnie
[Ctrl] + [Ctrl] Można zmienić pierwszy stopień naciskając [Ctrl] dwukrotnie, [H] + tryb A lub B (poniżej), a potem Enter.
Dopuszczalne sekwencje pierwszego kroku są poniżej.
Ustawienie na tryb A (tylko klawiatury Mac):
Przytrzymać [Command] + [F12] + [F12] + zwolnić [Command]
Ustawienie na tryb B:
[Ctrl] + [Ctrl]
Wsparcie Delock
W przypadku dodatkowych pytań proszę skontaktować się z naszym obsługi klienta pod adresem [email protected]
Aktualną informację o produktach można znaleźć na naszej stronie internetowej: www.delock.pl
Zastrzeżenia końcowe
Zawarte w niniejszej instrukcji informacje i parametry mogą ulec zmianie bez wcześniejszego uprzedzenia. Błędy i
pomyłki w druku zastrzeżone.
Copyright
Żadna z części niniejszej instrukcji nie może być kopiowana lub przesyłana do jakichkolwiek celów, niezależnie od tego
jaką drogą lub w jakim znaczeniu, elektronicznie lub mechanicznie, bez specjalnej pisemnej zgody rmy Delock.
Wydanie: 01/2023

-16-
Italiano
Requisiti di sistema
• PC con DisplayPort femmina + USB Tipo-A femmina
• Monitor o TV con interfaccia DisplayPort
Contenuto della confezione
• Switch KVM con USB e audio
• 2 x cavo USB 3.2 A maschio per USB 3.2 tipo B maschio, lunghezza ca. 1,5 m
• 2 x cavo DisplayPort maschio per DisplayPort maschio, lunghezza ca. 1,5 m
• 2 x cavo jack stereo da 3,5 mm maschio da 3,5 mm maschio, lunghezza ca. 1,5 m
• 1 x selettore con cavo, lunghezza ca. 1,8 m
• Alimentatore esterno
• Manuale utente
Istruzioni per la sicurezza
• Proteggere il prodotto dall'umidità
• Proteggere il prodotto dalla luce solare diretta
Installazione dell'hardware
1. Collegare una tastiera e un mouse USB alle porte della console del KVM.
2. Collegare il pulsante del selettore alla porta anteriore del KVM.
3. Collegare tutti i cavi audio a ciascun computer, al KVM e agli altoparlanti, se necessario.
4. Se necessario, collegare altri dispositivi USB all'hub USB.
5. Collegare il monitor DisplayPort all'uscita DisplayPort del KVM.
6. Collegare l'adattatore di alimentazione DC 5V fornito in dotazione alla porta DC del KVM.
7. Collegare il cavo DisplayPort tra l'uscita DisplayPort del computer e l'ingresso DisplayPort del KVM.
8. Collegare il cavo USB alla porta USB-A del computer e alla porta USB-B a monte del KVM.
9. Accendere il computer e assicurarsi che le porte USB siano abilitate e funzionino correttamente.
Nota
Questo switch KVM supporta l'USB plug & play; tutti i componenti possono essere aggiunti e rimossi in qualsiasi
momento senza dover spegnere l'unità. Tuttavia, sono necessari alcuni secondi per riconoscere i dispositivi USB; il
tempo dipende dal numero di dispositivi USB e dalla velocità del computer.
Funzionamento
Selezione della porta
Premere il pulsante di selezione per passare da una porta CPU all'altra. Il LED del pulsante indica la porta: bianca (CPU1)
o verde (CPU2). Il LED arancione sulla parte superiore del KVM indica anche la porta attiva del host.
Supporto con tasti di scelta rapida
La funzione dei tasti di scelta rapida funziona con una tastiera USB collegata alla porta anteriore contrassegnata con il
logo della tastiera. Non vi è supporto con tasti di scelta rapida per una tastiera USB collegata alle porte USB Hub a valle
del KVM.
Si può selezionare il computer che si desidera controllare con i seguenti tasti di scelta rapida.
Selezione del canale
Premere [Ctrl] + [Ctrl] + Invio per far passare tutti i canali (PC + USB Hub + Audio) alla porta successiva
Premere [Ctrl] + [Ctrl] + [D] + Invio per far passare il canale DP (solo per PC) alla porta successiva
Selezione Hub USB
Premere [Ctrl] + [Ctrl] + [Z] + Invio per far passare l'hub USB alla porta successiva.
Selezione Audio
Premere [Ctrl] + [Ctrl] + [A] + Invio per far passare l'Audio alla porta successiva.
Host ad alimentazione USB su funzione di rilevamento
Premere [Ctrl] + [Ctrl] + [P] + [W] + [1] per abilitare la commutazione delle porte tramite Host ad alimentazione USB su
funzione di rilevamento. (Impostazione predenita)
Premere [Ctrl] + [Ctrl] + [P] + [W] + [0] per disattivare l'Host ad alimentazione USB su funzione di rilevamento.

-17-
Italiano
Funzione di scansione automatica
Premere [Ctrl] + [Ctrl] + [S] + Invio per attivare la funzione di scansione automatica; il KVM scorrerà attraverso le 2 porte
del display in sequenza.
Premere [Ctrl] + [Ctrl] + [S] + [n] + Invio per regolare l'intervallo di tempo durante la scansione automatica, dove [n] può
essere compreso tra 5 e 999.
Premere un qualsiasi altro tasto della tastiera per disattivare la funzione della scansione automatica.
Funzione buzzer
Premere [Ctrl] + [Ctrl] + [B] + [1] per attivare la funzione buzzer. (Impostazione predenita)
Premere [Ctrl] + [Ctrl] + [B] + [0] per disattivare la funzione buzzer.
Il suono del buzzer:
(a) una volta attiva i bip dei tasti di scelta rapida principali;
(b) completa l'impostazione dei tasti di scelta rapida e avviare i bip una volta;
(c) segnala i bip di errore dei tasti di scelta rapida una volta e s'interrompe;
(d) soltanto pressione del tasto di scelta rapida principale per pochi secondi, senza ulteriori passaggi, emette un bip e
s'interrompe.
Riepilogo dei tasti di scelta rapida
Passaggio 1 Passaggio 2 Azione
Ctrl Ctrl Invio Passaggio al prossimo host (PC + USB Hub + Audio)
Ctrl Ctrl [A]+Invio Passaggio Audio al prossimo host
Ctrl Ctrl [Z]+Invio Passaggio dal Hub USB al host successivo
Ctrl Ctrl [D]+Invio Passaggio DP al prossimo Host (soltanto PC)
Ctrl Ctrl [P]+[W]+[ 1/0] Abilita / Disabilita il rilevamento dell'alimentazione USB del host
Ctrl Ctrl [S]+Invio Avvia la scansione automatica
Ctrl Ctrl [S]+[n]+Invio Intervallo di tempo scansione automatica (Predenito: 20 sec)
n=5~999 sec
Ctrl Ctrl [B]+[1/0] Abilita / Disabilita il buzzer
La sequenza di tasti di scelta rapida in due fasi viene utilizzata per l'esecuzione rapida delle funzioni. Il tasto principale
(Passaggio 1) è [Ctrl] + [Ctrl] per impostazione predenita. Tuttavia, se si desidera è possibile modicare il tasto di scelta
rapida principale, premendo per due volte [Ctrl], [H] + modalità A o B (vedere di seguito), quindi premere Invio. Di seguito
sono riportate le modalità disponibili per i tasti di scelta rapida principali.
Impostare il tasto di scelta rapida principale in modalità A (soltanto per tastiera Mac):
Premere e tenere premuto [Comando] + [F12] + [F12] rilasciare [Comando]
Impostare il tasto di scelta rapida principale in modalità B:
[Ctrl] + [Ctrl]
Supporto Delock
Per ulteriori domande, contattare la nostra assistenza clienti sul sito [email protected]
È possibile trovare le informazioni attuali sul prodotto nella nostra homepage: www.delock.com
Clausola nale
Le informazioni e i dati contenuti in questo manuale sono soggetti a modiche senza preavviso. Errori e refusi esclusi.
Copyright
Nessuna parte di questo manuale può essere riprodotta o trasmessa per qualsiasi scopo, indipendentemente dal modo
o i mezzi, elettronici o meccanici, senza l'esplicita autorizzazione scritta da parte di Delock.
Edizione: 01/2023

-18-
Svenska
Systemkrav
• PC med DisplayPort (hona) + USB Typ-A (hona)
• Bildskärm eller TV med DisplayPort-kontakt
Paketets innehåll
• KVM-brytare med USB och ljud
• 2 x kabel USB 3.2 A (hane) till USB 3.2 B (hane), längd ca 1,5 m
• 2 x kabel DisplayPort (hane) till DisplayPort (hane), längd ca 1,5 m
• 2 x kabel 3,5 mm stereojack hane till 3,5 mm stereojack hane, längd ca 1,5 m
• 1 x väljare med kabel, längd ca 1,8 m
• Extern strömkälla
• Bruksanvisning
Säkerhetsinstruktioner
• Skydda produkten mot fukt
• Skydda produkten mot direkt solljus
Hårdvaruinstallation
1. Anslut ett USB-tangentbord och en USB-datormus till konsolportarna på KVM-switchen.
2. Anslut väljarens tryckknapp på frontporten på KVM-switchen.
3. Anslut alla audiokablar till varje dator, KVM och högtalare, om nödvändigt.
4. Anslut övriga USB-enheter till USB-hubben, om nödvändigt.
5. Anslut DisplayPort-skärmen till DisplayPort-uttaget på KVM-switchen.
6. Anslut den medföljande DC 5 V-strömadapter till DC-uttaget på KVM-switchen.
7. Anslut DisplayPort-kabeln mellan DisplayPort-uttaget på datorn och DisplayPort-anslutningen på KVM-switchen.
8. Anslut USB-kabeln till USB-A-porten på datorn och till USB-B-porten på KVM-switchen.
9. Sätt på datorn och säkerställ att USB-portarna är aktiverade och fungerar som de ska.
Obs
KVM-switchen har stöd för USB-plug & play - alla komponenter kan läggas till och tas bort när som helst utan att enheten
måste stängas av. Det kan dock ta några sekunder att räkna upp USB-enheterna - den tid det tar är beroende av antalet
USB-enheter och datorns hastighet.
Drift
Portval
Tryck på väljarknappen för att växla mellan CPU-portarna. Knappens LED indikerar port: vit (CPU1) eller grön (CPU2).
Den orangea LED-indikatorn på KVM-switchen indikerar även den aktiva värdporten.
Stöd för snabbvalstangent
Snabbvalstangentfunktionen fungerar med ett USB-tangentbord som är inkopplat i den frontport som är märkt med
en tangentbordslogotyp. Det nns inget stöd för snabbvalstangenter för USB-tangentbord som är inkopplade till USB-
hubbsanslutningarna på KVM-switchen.
Du kan välja den dator som du vill styra med hjälp av följande snabbvalstangenter.
Kanalväljare
Tryck på [Ctrl] + [Ctrl] + Enter för att växla samtliga kanaler (PC + USB-hubb + Audio) till nästa port
Tryck på [Ctrl] + [Ctrl] + [D] + Enter för att växla DP-kanal (endast PC) till nästa port
USB-hubbväljare
Tryck på [Ctrl] + [Ctrl] + [Z] + Enter för att växla USB-hubb till nästa port.
Audioväljare
Tryck på [Ctrl] + [Ctrl] + [A] + Enter för att växla Audio till nästa port.
Funktionen Värd USB-energi vid detektering
Tryck på [Ctrl] + [Ctrl] + [P] + [W] + [1] för att aktivera portväxling med hjälp av Värd USB-energi vid detektering. (Standard)
Tryck på [Ctrl] + [Ctrl] + [P] + [W] + [0] för att avaktivera Värd USB-energi vid detektering.

-19-
Svenska
Funktionen automatisk avsökning
Tryck på [Ctrl] + [Ctrl] + [S] + Enter för att aktivera funktionen automatisk avsökning - KVM-switchen kommer att cykla
igenom 2 skärmportar sekventiellt.
Tryck på [Ctrl] + [Ctrl] + [S] + [n] + Enter för att justera tidsintervallet vid automatiskt avsökning, där [n] kan vara 5 ~ 999.
Tryck på valfri tangent på tangentbordet för att avbryta funktionen automatiskt avsökning.
Summerfunktionen
Tryck på [Ctrl] + [Ctrl] + [B] + [1] för att aktivera summerfunktionen. (Standard)
Tryck på [Ctrl] + [Ctrl] + [B] + [0] för att avaktivera summerfunktionen.
Summerns ljud:
(a) piper en gång när den huvudsakliga snabbvalstangenten aktiveras,
(b) piper en gång när en snabbvalstangent och Enter ställs in,
(c) piper en gång och stänger vid snabbvalstangentfel,
(d) piper en gång och stänger när en huvudsaklig snabbvalstangent endast hålls in ett par sekunder utan efterföljande
steg.
Sammanfattning av snabbvalstangenter
Steg 1 Steg 2 Åtgärd
Ctrl Ctrl Enter Växla till nästa värd (PC + USB-hubb + Audio)
Ctrl Ctrl [A]+Enter Växla Audio till nästa värd
Ctrl Ctrl [Z]+Enter Växla USB-hubb till nästa värd
Ctrl Ctrl [D]+Enter Växla DP till nästa värd (endast PC)
Ctrl Ctrl [P]+[W]+[ 1/0] Aktivera / avaktivera Värd USB-energi vid detektering
Ctrl Ctrl [S]+Enter Starta automatisk avsökning
Ctrl Ctrl [S]+[n]+Enter Tidsintervall för automatiskt avsökning (Standard: 20 sek)
n=5~999 sek
Ctrl Ctrl [B]+[1/0] Aktivera / avaktivera summer
Snabbvalstangentsekvenser med två steg används för körning av snabbfunktioner. Den huvudsakliga tangenten (Steg 1)
är [Ctrl]+[Ctrl] är standardinställning. Du kan du ändra den huvudsakliga snabbvalstangenten om du vill genom att trycka
på [Ctrl] två gånger, [H] + läge A eller B (se nedan), och sedan trycka på Enter. De tillgängliga huvudsakliga lägena för
snabbvalstangenter visas nedan.
Ställ in huvudsakliga snabbvalstangenter till läge A (endast för Mac-tangentbord):
Tryck på och håll in [Command] + [F12] + [F12] + släpp [Command]
Ställ in huvudsaklig snabbvalstangent till läge B:
[Ctrl] + [Ctrl]
Support Delock
Om du har ytterligare frågor, kontakt vår kundtjänst på [email protected]
Du hittar aktuell produktinformation på vår hemsida: www.delock.com
Slutparagraf
Information och data som nns i denna manual kan ändras utan vidare meddelande. Fel och tryckfel undantagna.
Upphovsrätt
Ingen del av denna manual får reproduceras eller sändas för något syfte oavsett på vilket sätt eller i vilket syfte,
elektroniskt eller mekaniskt utan uttryckligt skriftligt godkännande av Delock.
Utgåva: 01/2023

-20-
Română
Cerinte de sistem
• PC cu DisplayPort mamă + USB tip A-mamă
• Monitor sau televizor cu interfață DisplayPort
Pachetul contine
• Comutator KVM cu USB și audio
• 2 x cabluri USB 3.2 A tată la USB 3.2 B tată, lungime aprox. 1,5 m
• 2 x cabluri DisplayPort tată la DisplayPort tată, lungime aprox. 1,5 m
• 2 x cabluri cu mufă stereo de 3,5 mm la mufă stereo de 3,5 mm, lungime aprox. 1,5 m
• 1 x selector cu cablu, lungime aprox. 1,8 m
• Sursă de alimentare externă
• Manual de utilizare
Instrucţiuni de siguranţă
• Protejaţi produsul împotriva umidităţii
• Protejaţi produsul împotriva luminii directe a soarelui
Instalarea componentelor hardware
1. Conectați o tastatură și un mouse USB la porturile consolei ale KVM.
2. Conectați butonul de selecție la portul frontal al KVM.
3. Conectați toate cablurile audio la ecare calculator, KVM și difuzoarele, dacă este necesar.
4. Conectați alte dispozitive USB la Hub USB, dacă este necesar.
5. Conectați monitorul DisplayPort la ieșirea DisplayPort a KVM.
6. Conectați adaptorul de alimentare DC 5V inclus la portul DC al KVM.
7. Conectați cablul DisplayPort între ieșirea DisplayPort a computerului și intrarea DisplayPort a KVM.
8. Conectați cablul USB la portul USB-A al calculatorului și la portul USB-B din amonte al KVM.
9. Porniți computerul și asigurați-vă că porturile USB sunt activate și funcționează corect.
Notă
Acest comutator KVM acceptă plug & play USB; toate componentele pot adăugate și îndepărtate în orice moment fără
a necesară oprirea aparatului. Cu toate acestea, va dura câteva secunde pentru a enumera dispozitivele USB; timpul
depinde de numărul de dispozitive USB și de viteza calculatorului.
Funcţionarea
Selecția portului
Apăsați butonul selector pentru a comuta între porturile procesorului. Butonul LED indică portul: alb (CPU1) sau verde
(CPU2). LED-ul portocaliu de pe partea superioară a KVM-ului indică și portul gazdă activ.
Acceptă funcția de taste rapide
Funcția de taste rapide funcționează cu o tastatură USB care este conectată la portul frontal, marcat cu logo-ul tastaturii.
Nu există suport pentru o tastatură USB conectată în porturile USB Hub din portul KVM.
Puteți selecta computerul pe care doriți să îl controlați cu următoarele taste rapide.
Selecția canalelor
Apăsați [Ctrl] + [Ctrl] + Enter pentru a comuta toate canalele (PC + USB Hub + Audio) la următorul port
Apăsați [Ctrl] + [Ctrl] + [D] + Enter pentru a comuta canalul DP (doar pentru PC) la următorul port
Selecția Hub-ului USB
Apăsați [Ctrl] + [Ctrl] + [Z] + Enter pentru a comuta hub-ul USB la următorul port.
Audio Selection
Apăsați [Ctrl] + [Ctrl] + [A] + Enter pentru a comuta Audio la următorul port.
Gazda alimentării USB pentru funcția de detectare
Apăsați [Ctrl] + [Ctrl] + [P] + [W] + [1] pentru a activa detectarea comutării portului de alimentare către Host USB. (implicit)
Apăsați [Ctrl] + [Ctrl] + [P] + [W] + [0] pentru a activa detectarea comutării portului de alimentare către Host USB.
Table of contents
Languages:
Other DeLOCK Switch manuals

DeLOCK
DeLOCK 64234 User manual

DeLOCK
DeLOCK 11488 User manual

DeLOCK
DeLOCK 11500 User manual

DeLOCK
DeLOCK 63264 User manual

DeLOCK
DeLOCK 87761 User manual

DeLOCK
DeLOCK 18600 User manual

DeLOCK
DeLOCK 18683 User manual

DeLOCK
DeLOCK 63919 User manual

DeLOCK
DeLOCK 62440 User manual

DeLOCK
DeLOCK 87765 User manual

DeLOCK
DeLOCK 64226 User manual

DeLOCK
DeLOCK 87637 User manual

DeLOCK
DeLOCK 87588 User manual

DeLOCK
DeLOCK 63261 User manual

DeLOCK
DeLOCK 88015 User manual

DeLOCK
DeLOCK 64157 User manual

DeLOCK
DeLOCK 64236 User manual

DeLOCK
DeLOCK 11482 User manual

DeLOCK
DeLOCK 18751 User manual

DeLOCK
DeLOCK 87729 User manual