manuals.online logo
Brands
  1. Home
  2. •
  3. Brands
  4. •
  5. Dorma
  6. •
  7. Door Lock
  8. •
  9. Dorma ARCOS Universal PT 10 User manual

Dorma ARCOS Universal PT 10 User manual

DORMA-Glas 800.52.060.6.32 Stand/Issue 06/03 Seite/Page 1/2
Montageanleitung ARCOS UNIVERSAL
PT 10 + PT 20
Sie erhalten die Eckbeschläge montiert.
Unterer Eckbeschlag PT 10 und oberer Eckbeschlag PT 20
Grundplatten (9) und (12) auseinanderschrauben.
Schutzfolie von Doppelklebeband (10) auf beiden
Grundplatten abziehen und Zwischenlagen (13) aufdrücken.
Schlauchabschnitt (14) mit Grundplatten in Glasbohrung
stecken. Grundplatten im Abstand von je 1 mm zu beiden
Glaskanten ausrichten und mit Senkschrauben (7) (sw = 5)
verschrauben. Anzugsmoment 15 Nm.
(Abdeckkappen bündig mit Glaskanten)
Der Einsatz (6) im PT 10 sowohl für die flachkonische
Achse (1) eines BTS (Bodentürschließer) als auch für die
flachkonische oder runde Achse (2) eines Bodenlagers
verwendbar. Der Einsatz (15) im PT 20 passt zum Zapfen
eines PT 21 sowie zum festen Zapfen mit Anschraublasche
PT 24.
Die Einsätze jeweils entsprechend gewünschtem Drehpunkt
ausrichten.
65 mm Drehpunkt = Langer Anschraubsteg zeigt zur
Glaskante
55 mm Drehpunkt = Kurzer Anschraubsteg zeigt zur
Glaskante
Einsätze mit Senkschrauben (4) an den Grundplatten
verschrauben. Anzugsmoment 15 Nm. Aus Gründen der
Einbruchsicherheit sollten die Verschraubungen immer von
der Innenseite des Raumes erfolgen.
Einsetzen der Glastür
1. Bei Einsatz eines PT 21 mit hochdrehbarem Zapfen
als oberem Lager:
Zapfen des Lagers hochdrehen. Die Tür auf BTS-Achse (oder
Bodenlager-Achse) setzen und unter dem Zapfen ausrichten.
Zapfen herunterdrehen und in Eckbeschlag PT 20 führen.
Der Zapfen muss mit etwas Kraft in die Kunststoffbuchse
des PT 20 gedreht werden um die Wulst in der Buchse zu
überbrücken. Diese dient zur Sicherung des Beschlages bei
evtl. Glasbruch. Sollte die obere Lagerung z.B. PT 21 einen
zylindrischen Bolzen haben, muss vor der Montage der
Wulst aus der Kunststoffbuchse entfernt werden.
Mounting instructions ARCOS UNIVERSAL
PT 10 + PT 20
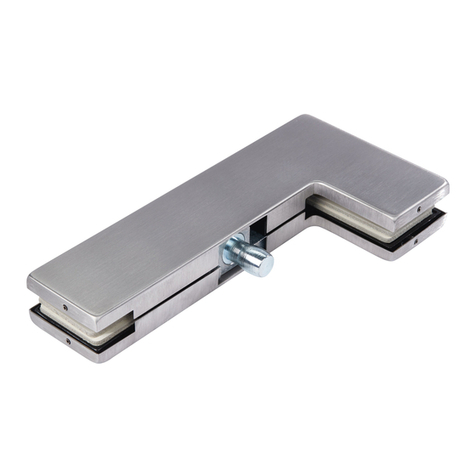
The patch fittings are pre-assembled.
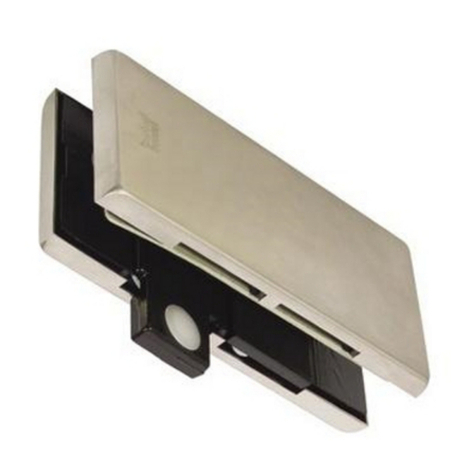
Lower patch fitting PT 10 and upper patch fitting PT 20
Unscrew base plates (9) and (12). Pull backing tape off
double-sided adhesive tape (10) on both base plates and
press intermediate layers (13) into place.
Insert hose section (14) through hole in glass together with
base plates. Align base plates so that they are 1 mm from
both edges of the glass. Fix with countersunk screws (7)
(with 5 mm Allan key). Tightening torque = 15 Nm.
(Cover caps are flush with glass edges)
The insert (6) in the PT 10 can be used for both the
flat-tapered axis (1) of a BTS (ground-level door lock) and
for the flat-tapered or round axis (2) of a bottom bearing.
The insert in the PT 20 matches the pin of a PT 21 as well
as the fixed hinge pin with screw-down tab.
The inserts must be aligned in accordance with the required
pivot.
65 mm pivot = Long screw-down tab points towards the
glass edge
55 mm pivot = Short screw-down tab points towards the
glass edge
Secure inserts to base plates with countersunk screws (4).
Tightening torque 15 Nm. Screws should always be fitted
from inside the room to ensure safety against breaking and
entering.
Fitting the glass door
1. When using a PT 21 with movable upper pin:
Turn hinge pin up. Fit door on BTS spindle (or bottom
bearing spindle) and align under pin. Turn hinge pin down
and insert in corner hinge PT 20.
To overcome the rim in the PT 20 bushing, the pivot bolt
has to be pressed in slightly with small force. This creates
protection for the top fitting when glass breaks. If a PT 21 is
used with a cylindrical bolt the rim in the bushing should be
removed.
DORMA-Glas 800.52.060.6.32 Stand/Issue 06/03 Seite/Page 2/2
2. Bei Einsatz eines PT 24, fester Zapfen mit
Anschraublasche als oberem Lager:
PT 24 an Decke schrauben. Einsatz aus Eckbeschlag PT 20
lösen und herausnehmen.
Die Tür auf BTS-Achse (oder Bodenlager-Achse) setzen und
den Einsatz mit der Buchse auf den festen Zapfen vom PT
24 stecken. Der Einsatz muss mit etwas Kraft auf den
Zapfen gedrückt werden um die Wulst in der Buchse zu
überbrücken. Diese dient zur Sicherung des Beschlages bei
evtl. Glasbruch. Die Tür ausrichten und den Einsatz wieder
in Beschlag befestigen.
Befestigung der Abdeckkappen
Abdeckkappen (3) mit der ungelochten Seite (5) in
Federstifte (11) einhängen, Federstifte eindrücken und
Gegenseite an den Stiften (8) einrasten.
2. When using a PT 24, fixed pin with screw-down tab as
upper hinge:
Secure PT 24 to ceiling. Unscrew and remove insert from
corner hinge PT 20 .
Fit door on BTS shaft (or bottom bearing shaft) and fit insert
with bushing on fixed patch fitting pin of PT 24.
To overcome the rim in the PT 20 bushing, the insert should
be pressed slightly with small force. This creates protection
if glass should break.
Align door and re-secure insert in patch fitting.
Securing the cover caps
Hook the unpierced side (5) of the cover caps (3) into the
spring pins (11), press spring pins down and engage other
side in pins (8).

This manual suits for next models

1

Other Dorma Door Lock manuals

Dorma HZ 43-F Series User manual

Dorma

Dorma HZ 43-F Series User manual

Dorma ARCOS UNIVERSAL PT 30 User manual

Dorma

Dorma ARCOS UNIVERSAL PT 30 User manual

Dorma RTS Series User manual

Dorma

Dorma RTS Series User manual

Dorma EM 6900 AM B User manual

Dorma

Dorma EM 6900 AM B User manual

Dorma SVP 7000 Air Installation and operation manual

Dorma

Dorma SVP 7000 Air Installation and operation manual

Dorma RTS Series User manual

Dorma

Dorma RTS Series User manual

Dorma D860 User manual

Dorma

Dorma D860 User manual

Dorma Duo HOME User manual

Dorma

Dorma Duo HOME User manual

Dorma RTS Series User manual

Dorma

Dorma RTS Series User manual

Dorma ARCOS Universal PT 40 User manual

Dorma

Dorma ARCOS Universal PT 40 User manual

Dorma MUNDUS PREMIUM US 10 User guide

Dorma

Dorma MUNDUS PREMIUM US 10 User guide

Dorma RTS Series User manual

Dorma

Dorma RTS Series User manual

Dorma RTS Series User manual

Dorma

Dorma RTS Series User manual

Dorma SVP 22 DCW Series User manual

Dorma

Dorma SVP 22 DCW Series User manual

Dorma PHA Glas Kit User manual

Dorma

Dorma PHA Glas Kit User manual

Dorma MUNDUS PREMIUM PT 60 User guide

Dorma

Dorma MUNDUS PREMIUM PT 60 User guide

Dorma RTS Series User manual

Dorma

Dorma RTS Series User manual

Dorma C301 User manual

Dorma

Dorma C301 User manual

Dorma MUNDUS PREMIUM US 10 User guide

Dorma

Dorma MUNDUS PREMIUM US 10 User guide

Dorma MATRIX AIR Standard User manual

Dorma

Dorma MATRIX AIR Standard User manual

Dorma MATRIX AIR User manual

Dorma

Dorma MATRIX AIR User manual

Dorma MUNDUS PREMIUM GK 50 User guide

Dorma

Dorma MUNDUS PREMIUM GK 50 User guide

Dorma STE 400 User manual

Dorma

Dorma STE 400 User manual

Dorma TENSOR User manual

Dorma

Dorma TENSOR User manual

Popular Door Lock manuals by other brands

DOM ENiQ EasyFlex Booklet

DOM

DOM ENiQ EasyFlex Booklet

IULOCK IU-20 Installation and user guide

IULOCK

IULOCK IU-20 Installation and user guide

Schlage ND40 How to Install Button in Field

Schlage

Schlage ND40 How to Install Button in Field

FingerTec ML-10B Admin & user guide

FingerTec

FingerTec ML-10B Admin & user guide

KEYA ELOCK PLUS manual

KEYA

KEYA ELOCK PLUS manual

Techno CNC Systems Patriot Troubleshooting

Techno CNC Systems

Techno CNC Systems Patriot Troubleshooting

Strand PH381 instructions

Strand

Strand PH381 instructions

SDC E72K-A CIVIC SERIES Programming instructions

SDC

SDC E72K-A CIVIC SERIES Programming instructions

SECO-LARM SD-995C-LE25 manual

SECO-LARM

SECO-LARM SD-995C-LE25 manual

ERA TOUCHKEY installation guide

ERA

ERA TOUCHKEY installation guide

Samsung SHS-3321 quick guide

Samsung

Samsung SHS-3321 quick guide

Assa Abloy Arrow Revolution U4A-YRHCPZW0 Installation and programming instructions

Assa Abloy

Assa Abloy Arrow Revolution U4A-YRHCPZW0 Installation and programming instructions

ABB Knox Original instructions

ABB

ABB Knox Original instructions

AYR int_LOCK BT user manual

AYR

AYR int_LOCK BT user manual

EVA M5 user manual

EVA

EVA M5 user manual

CodeLock CL500 instructions

CodeLock

CodeLock CL500 instructions

hager 46CE installation instructions

hager

hager 46CE installation instructions

PERCo LB-72.4 Operation manual

PERCo

PERCo LB-72.4 Operation manual

manuals.online logo
manuals.online logoBrands
  • About & Mission
  • Contact us
  • Privacy Policy
  • Terms and Conditions

Copyright 2025 Manuals.Online. All Rights Reserved.