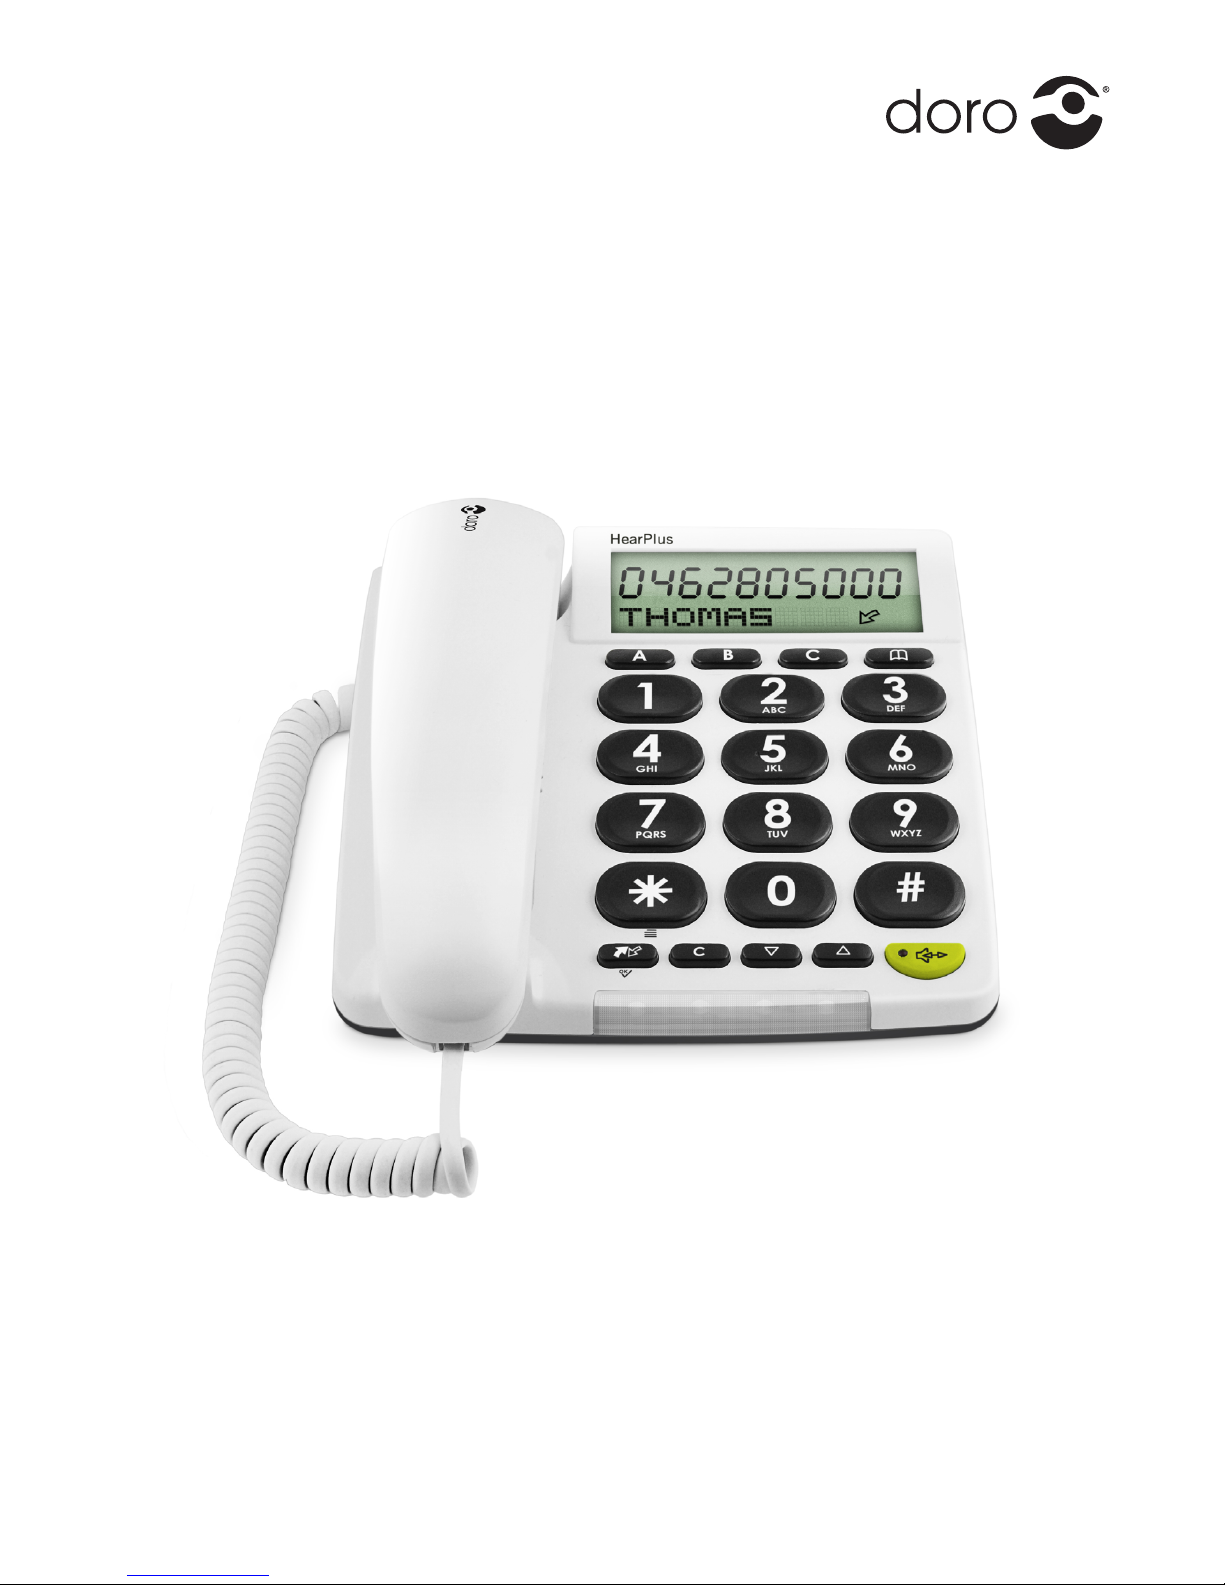
Doro HEARPLUS 313CI User manual
Other Doro Telephone manuals

Doro
Doro HearPlus 317c User manual

Doro
Doro PhoneEasy 311C User manual

Doro
Doro PHONEEASY RECORD 327CR User manual

Doro
Doro 80 User manual

Doro
Doro SECURE 350 User manual

Doro
Doro CONGRESS 150 User manual

Doro
Doro 313C User manual

Doro
Doro X30 User manual

Doro
Doro AUB 300i User manual

Doro
Doro 914c User manual

Doro
Doro HANDLEPLUS 326I GSM User manual

Doro
Doro AFTI 45 User manual

Doro
Doro Magna 2005 User manual

Doro
Doro MemoryPlus 319ph User manual

Doro
Doro PhoneEasy Display 312C User manual

Doro
Doro PhoneEasy 312ci User manual

Doro
Doro 313C User manual

Doro
Doro 501 User manual

Doro
Doro AlertEasy 314C User manual

Doro
Doro Congress 100 User manual