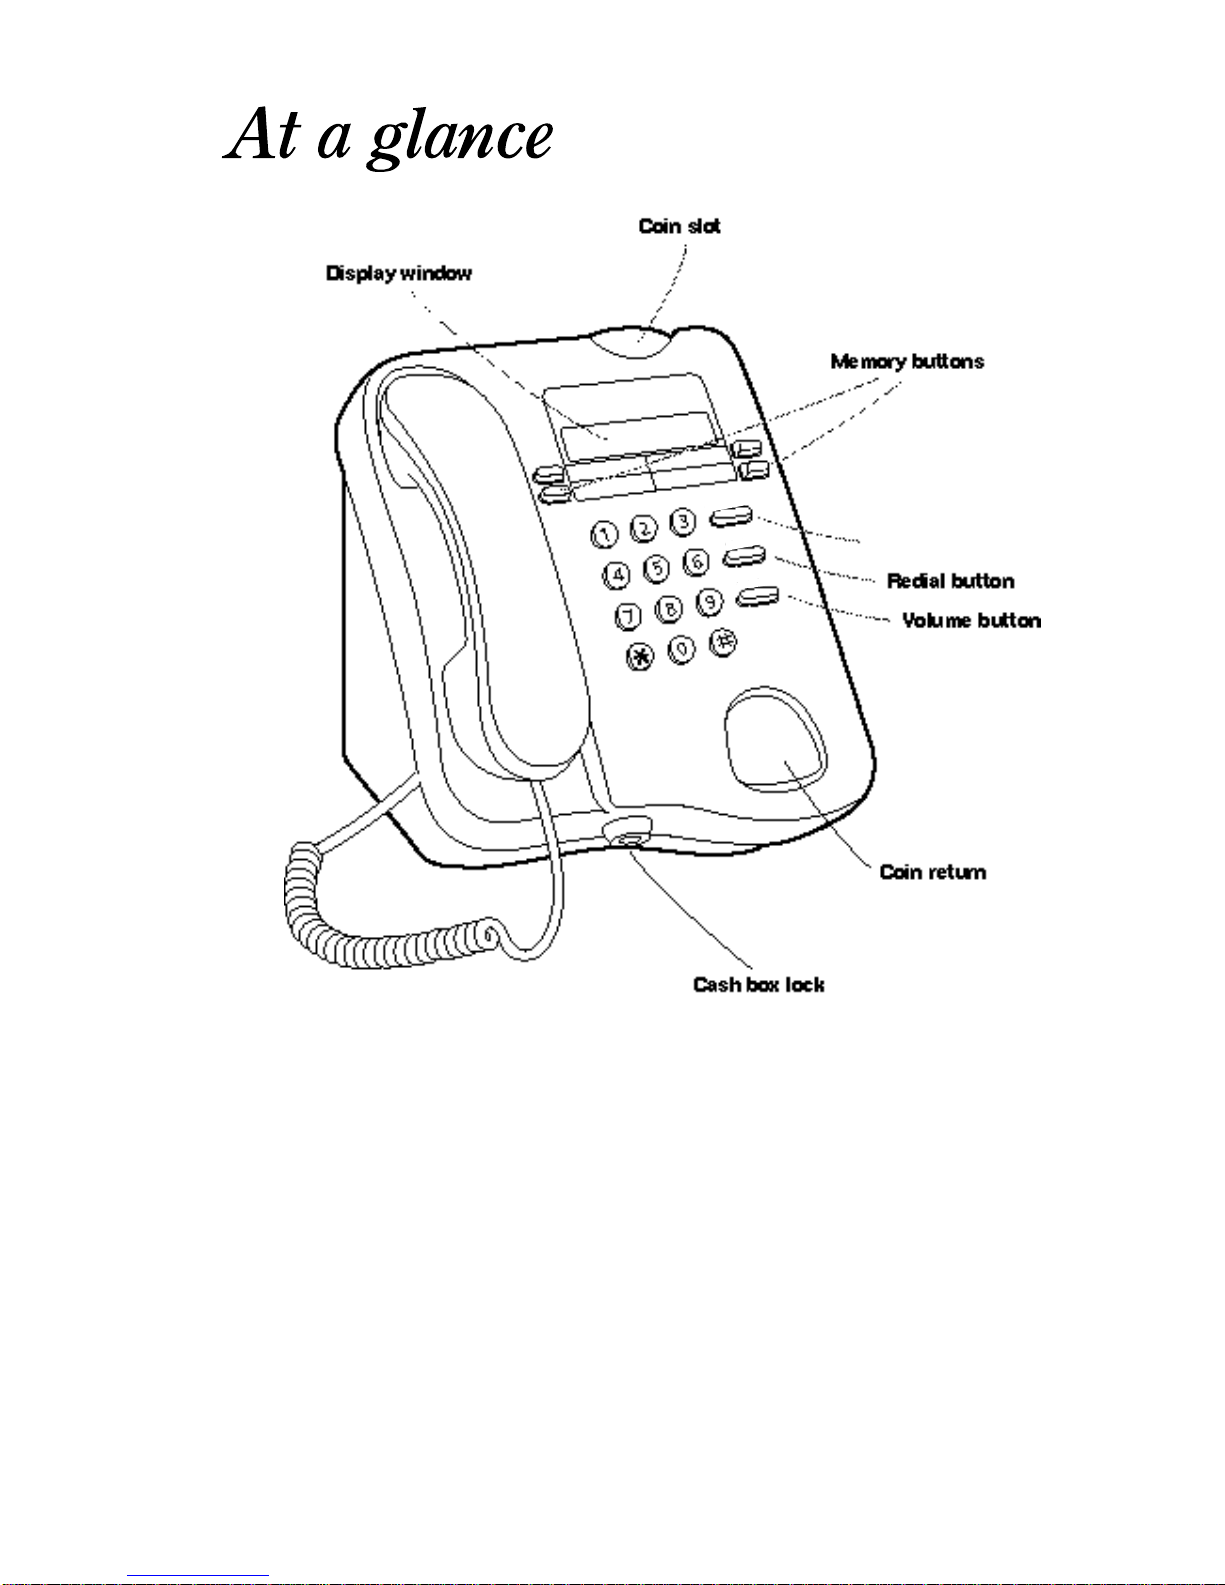
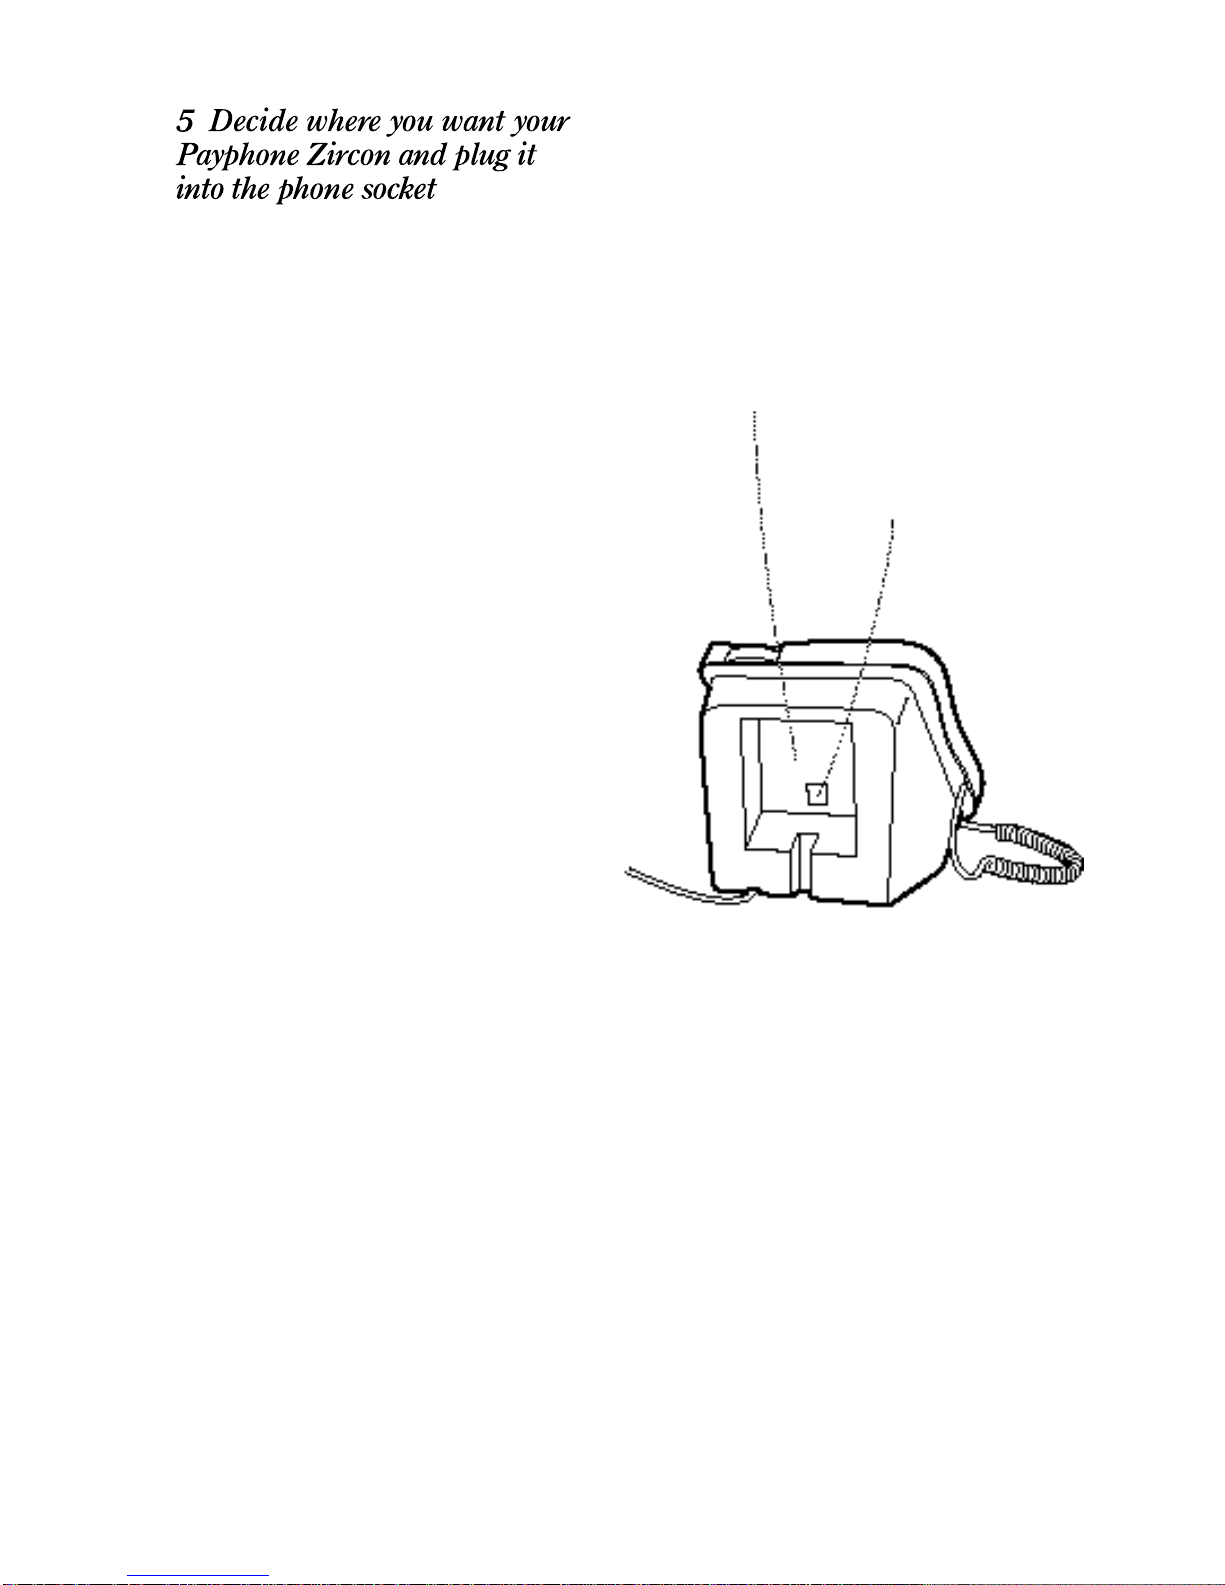
Doro PAYPHONE ZIRCON User manual
Other Doro Telephone manuals

Doro
Doro AlertEasy 314C User manual

Doro
Doro 516CR User manual

Doro
Doro HEARPLUS 313CI User manual

Doro
Doro Magna 4000 User manual

Doro
Doro Congress 100 User manual

Doro
Doro PhoneEasy 311C User manual

Doro
Doro COMFORT 4005 User manual

Doro
Doro PhoneEasy 311 User manual

Doro
Doro 6620 User manual

Doro
Doro PhoneEasy Display 312C User manual

Doro
Doro SeePlus 314ci User manual

Doro
Doro MATRA 25 User manual

Doro
Doro SECURE 350 User manual

Doro
Doro PhoneEasy 331ph User manual

Doro
Doro congress 205 User manual

Doro
Doro AFTI 20 User manual

Doro
Doro CONGRESS 305 User manual

Doro
Doro CONGRESS 200 User manual

Doro
Doro PHONEEASY 410GSM User manual

Doro
Doro 6521 User manual