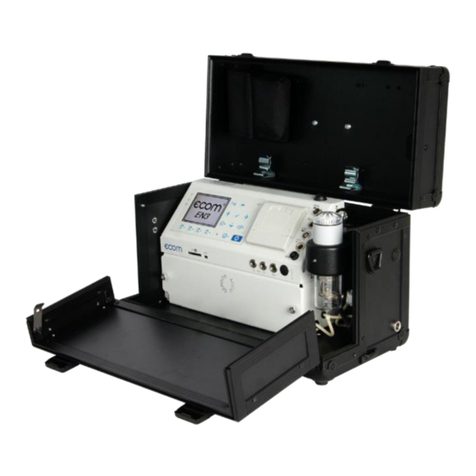
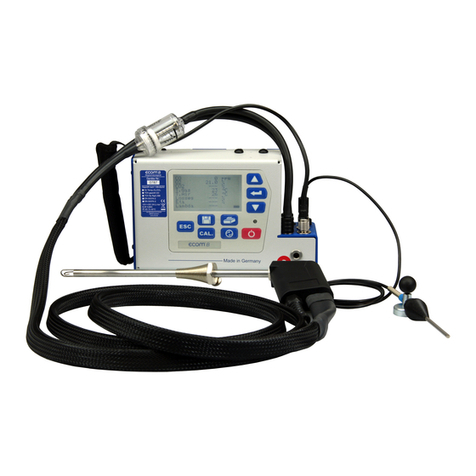
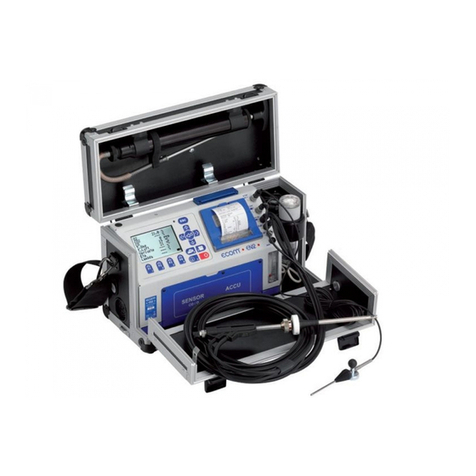
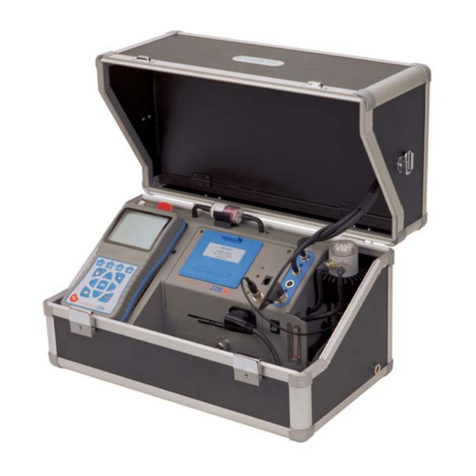
Ecom EN2 User manual

Operating Instructions
Intelligent analysis!

Page 2 ecom-EN2
Index Page
Important Hints 3
1. Instrument Design 5
2. Remote monitor ecom-R 7
3. Gas Cooler (option) 9
4. Power Supply 10
5. Data Memory 10
6. Instrument Start 11
7. Input or Selection of combustion plants 13
8. Flue Gas Analysis
8.1. Gas analysis 16
8.2. CO measurement (gas path check) 19
8.3. O
2
check 20
8.4. Draught measurement 20
8.5. Flow measurement (Option) 21
8.6. Soot dot...Oil trace 22
8.7. Measurement record and printout 23
8.8. After Measurement 24
9. Mean Value Measurement 25
10. Adjustments 27
11. Control 31
12. Data Processing
12.1 Communication 32
12.2. Data logger 33
12.3. Data logging with DASNT2 34
12.4. Data processing with DAS5 34
12.5. Data processing with Remote Display App 35
13. Diagnostics
13.1. Fault diagnostic 36
13.2. delta-T measurement 38
13.3. Heating check (Option) 38
13.4. 4 Pa measurement (Option) 42
13.5. Pressure Tests (Option) 43
14. Maintenance Tips 50
15. Technical Data 53
16. FAQ 54

ecom-EN2 Page 3
Important Hints
The ecom
-
EN2 meets the requirements
of the DIN EN 50379 Part 2.
Observe the following minimum times in order to
get correct measurement values:
- 1 min. for sensors calibration at fresh air
- 2 min. for stable measurement values
The following subst
ances impair the instr
u-
ment´s operation:
- Solvent-containing vapours as:
- cleaning agents
- degreasers
- wax polishes
- adhesives
do contain
- Formaldehyde
Adjustments at burners and boilers
should be made only by specialists
who are familiar with these installations.
1. Charge the internal
battery
regularly.
(an unused analyser should be charged at least 1 x per month)!
2. Never store the unit with a discharged battery!
The ecom
-
EN2 should not be used for
continuous emission control!

Page 4 ecom-EN2
Do not lock fresh air opening
for fresh air pump!
Fresh air opening

ecom-EN2 Page 5
1. Instrument Design
Connection air
temperature
Slot for multi-
media card
Connections for
Pa pressure sensor
Connection gas
temperature
Connection
USB
Condensation trap
(with peltier cooler)
with fine dust filter
Connection
sampled gas
Connection
draught
Connection
pressure
Connection
AUX
Integral
printer
Battery and
sensors com-
partment
Graphic
display
Optical flow
control
Connection
charger

Page 6 ecom-EN2
Keyboard
ESC key
(quit/
exit menu)
In the input mode, the keys are
used for numerical inputs
Enter key
(confirm
selection)
Cursor keys
(Up/Down/Right/
Left/Scroll)
Values
recording
Print key
(access to
printing menu)
ON / OFF
key
Info key
(access to
control menu)
Function keys
(function shown on
display)

ecom-EN2 Page 7
2. Remote monitor ecom-R
Connection with ecom-EN2
(the ecom-R is only connectable with one ecom-EN2)
Program connection:
-switch on ecom-EN2 (only one instrument with Bluetooth near
the ecom-R )
-choose at the ecom-EN2 in menu „Adjustments/Internal/
Bluetooth“ the „ enhanced Protocol“
-switch on ecom-R (hold the red key approx. 1 s).
-hold the red key (approx. 5 s) until „Unpair:“ appears
-switch on ecom-R (programming will be done automatically)
-if there is no connection (READY does not appear at right bottom of
the display), switch ecom-R off and on again
Operating
ecom
-
EN2 must have Bluetooth option!
(possible data transfer distance approx. 10 m)
Change display:
Choose line
Adjust line
Store adjustment
Break off adjustment
Change display
Start printout
Choose display
Switch on/off ecom-R
(hold approx. 1 s)
READY = Connection exists
CALIB = EN2 in calibration phase
WAIT = Searching for connection
Battery voltage
Change functions
CO switch-off

Page 8 ecom-EN2
Battery Change
-open battery box (operate unlocking)
-take out used batteries
-put in new batteries (respect polarity)
-close battery box
Important: Always dispose of used batteries and accumulators in
official recycling containers only (e.g. in battery shops).
Model with integrated air temperature sensor
If there is no air temperature sensor connected at the ecom-EN2,
then the air temperature sensor of the ecom-R supplies the meas-
ured values.
Battery box
Batteries 1,5 V AA or
Batteries 1,2 V AA
Unlocking
Air temperature sensor

ecom-EN2 Page 9
3. Gas Cooler (option)
Exhaust gas with a temperature over the steam dew point (35 - 65
°C) is flown spiral via a long gas path thru a surface coated metal
body with good thermal conductivity. The gas radiates its heat to this
metal body. A Peltier element (semi-conductor cooling element)
flown by a continuous current is thermal connected with this body
and with a second metal body with cooling ribs and ventilation slots.
The flow thru the Peltier element creates a heat transfer from WARM
to COLD, drains the heat of the metal body flown by gas and con-
veys it to the outer cooling body. This heat is conveyed thru a vertical
forced ventilation to the surrounding air.
The condensation issued by the heat loss of the gas drops in a re-
ceptacle and is pumped out on request by a periodically working
hose pump.
By accumulator operation, the Peltier cooler can be switched off.
In the measurement menu press hereto <Enter>, select the menu
point „Peltier I/0“ and press again <Enter> (for Peltier cooler switch
on, just repeat this procedure).
Fan
WARM
COLD
Peltier
element
Gas
outlet
Gas inlet
Level
monitoring
Condensate
evacuation
The power needs
of the gas cooler being high,
the cooling performance shall be reduced
by accumulator operation!

Page 10 ecom-EN2
4. Power Supply
The ecom-EN2 comes with an external charger. The analyser can
also be powered via the internal accumulator for a while (6 V; 3.8
Ah). The accumulator recharge should be started when the instru-
ment requires to (acoustical warning and display indication). The
accumulator charging stand can be checked looking at the voltage
indication on the display (menu "Control" - Info key). The battery
warning is activated when the value „Accu“ is smaller than 5.7 V.
By 5.4 V the power operation via battery is no more possible; the
instrument must be further powered via the external charger.
5. Data Memory
The multi-media card enables the storage of punctual measure-
ments; the gathered values are written in a text file (J2KDV.txt). Data
format information is to be found in the appendix. The files can be
transferred to a PC via a card reader.
The following conditions must be fulfilled for using a multi-media
card:
- min. card volume 32 MB - max.32 GB (UHC)
- card formatted on 16 bit FAT or FAT32
- SD cards from SanDisk recommended
- PC with card reader
Used accumulators can either be returned
to us or brought to recycling stations of
public waste disposal companies
respectively to stores selling accumulators!

ecom-EN2 Page 11
Card insert
Insert the multi-media-card as shown.
Take care that the card does not stand
out and that it well hooks on.
6. Instrument Start
Never pull out cards during data record
- data loss and damaging of the
multi-media-card are possible!
Always position the probe in the exhaust pipe once
the calibration phase is over!
Always use a filtering system as per our recommend
a-
tion for combustion plants
firing solid combustibles!
ecom
-
EN2 with
filtering plate
ecom
-
EN2 with
washing bottle

Page 12 ecom-EN2
Once the instrument is switched on (key
<I/0>), the main menu is displayed.
6 sub-menus with the following func-
tions (non-visible sub-menus can be
called up while scrolling with the cursor
keys) are displayed:
- Gas analysis : Perform gas analysis
- Soot...Oil trace : Input of soot measurement results
- Data processing : Assign measurements / Data transfer
(only by inserted MM card)
- Adjustments : Modify instrument adjustments
- Control : Check operation state of instrument
- Diagnostics : Read-out of firing automate
(only in connection with ecom-AK) /
delta-T measurement / Heating check /
4 Pa test
To perform measurements, select with
the cursor keys the sub-menu "Gas
analysis" and confirm with <Enter>.
The instrument starts a 1- minute cali-
bration phase and it enquires if you wish
to use the data bank. If you want to
assign the sampled data to a specific
plant, so press <F1> (<F4> = no:
measurement will be performed without
assignment).
Fuel types acc. to 1
st
BImSchV
Fuel oil (B)
Natural gas (B)
City gas (B)
Coke oven gas (B)
Liquid gas (B)
Use the cursor keys to select the de-
sired fuel type and confirm with <En-
ter>.
Gas analysis
Soot..Oil trace
Data processing
Adjustments
Control
Diagnostics
Fuel type
Fuel oil (B)
CO2max
A1
B
15.4
0.50
0.007
Select: ↑↓
↑↓↑↓
↑↓
↵
↵↵
↵
Do you wish to
use the data
processing
JA
Auswählen:
<
↵
↵↵
↵
>
!
NEIN

ecom-EN2 Page 13
7. Input or selection of combustion plants
To call up plant data already recorded or to create a new file, the
following possibilities are available:
Create new (is automatically selected
by first use of a MM card): To create a
new file, a numerical number should be
assigned.
Select „Create new“ and confirm with
<Enter>. Input a random number (max.
16 figures) using the keyboard:
- use the cursor keys <Up/Down/Right/Left> to select
the figure (selected figure outlined by a black background)
- press <Enter> to accept the figure (press <F2> to delete
the last figure if needed)
- repeat this procedure until the desired number is complete.
Example: "25.09.2009"
Tip: We suggest a date-related input to easily find the data
record later on via the search function.
After confirming with <F1> it is possible to enter a text via the key-
board (max. 6 lines with 20 characters each) which is printed out and
can be used for data processing purposes. Proceed as follows:
- select text line 1 using the cursor keys <Up/Down> and
confirm with <Enter>
- select with <F3> the keyboard mode (4 keyboard modes
are available)
- select with the cursor keys <Up/Down/Right/Left> the desired
character (selected character outlined by a black background)
- press <Enter> to accept the character (press <F2> to delete the
last character)
- repeat this procedure until the desired text is complete.
Selection upon:
Search word
Memory number
Create new
Quit with: ESC

Page 14 ecom-EN2
- proceed as follows to correct a character:
- press <F4> to interrupt the character selection
- use the cursor keys <Right/Left> to select the
character requiring correction
- activate with <F4> the character selection and correct character
- return with <F1> to character selection and call up next line for
process
The input is closed with <ESC> and the next available data record is
activated. Press <ESC> to return to the gas analysis menu.
Memory number: For check of the
plant already stored in the instrument,
the selection upon record number is
most appropriate.
Select „Memory number“ and confirm
with <Enter>. Input a random data rec-
ord number:
Example: "3" for data record number 3
- Press <Enter> once the input is completed to call up said data
record number. The cursor keys <Up/Down> enable the check of
the record numbers.
- Press <F1> to select the first record number and <F2> for the last.
- Press <F4> to delete the content of the selected record number.
- Press <Enter> to activate the record number.
- Finally press <ESC> to start the gas analysis.
Search word
Memory number
Create new
Selection upon:
Quit with: ESC
Input number
3
Please use the
numerical keys!

ecom-EN2 Page 15
Search word: If the plant code is known, it is possible to find the
plant data stored with help of a search machine.
Select hereto "Search word" and confirm with <Enter>. Using the
software keyboard, input at least 3 connected figures of the plant:
Example: "25.09" for plant code 25.09.2009
After input completion, press <F1> to
start the search. All files matching this
code will be filtered. The resulting selec-
tion can be scrolled using the cursor
keys (F1 for selection start, F2 for selec-
tion end). Once found, activate the de-
sired data record with <Enter>. The last
measurement on this plant can be
viewed pressing <Enter> / „View
memory“ / <Enter>. All measured and
calculated values can be called up on 5
display pages, using the cursor keys to
step thru.
Press <ESC> to escape the previous measurement data and the
recording of the current data can start.
Measurement available
Memory number 1
25.09.2009
Memory number 1
25.09.2009
12:15 25.09.09
O2 value in air
O2 value in air 12:15 25.09.09
Memory number 1
O2
19.5
%
CO
3
ppm
Draught
0.01
hPa
dT-measurement
dT-measurement 12:15 25.09.09
Memory number 1
T1
70.4
°C
T2
56.3
°C
dT
14.1
°C
Soot..Oil trace
Soot..Oil trace 12:15 25.09.09
Memory number 1
Boiler temp. : 65°C
1.Soot meas. : 0.5
2.Soot meas. : 0.3
3.Soot meas. : 0.7
Oil trace : NEIN
Gas analysis 12:15 25.09.09
Memory number 1
O2 3.2 %
CO2 13.1 %
CO 0 ppm
Eff. 92.5 %
Losses 7.5 %
Exc. air 1.18
T.Gas 184 °C
T.Air 20 °C
CO measurement 12:15 25.09.09
Memory number 1
O2
17.5
%
CO 0%
738
ppm
CO
123
ppm
Exc. air
7.00

Page 16 ecom-EN2
8. Flue Gas Analysis
8.1. Gas analysis
After the 1-minute calibration phase, the instrument switches over to
the measurement mode. The gas measurement values can be
viewed on 4 display pages. Use the cursor keys to scroll the pages.
Pressing <F1> enables to switch, from the values display, to a menu
point selected before or on „Standby“ (see chapter Adjustments).
Possible menu points are: Soot...Oil trace, Data processing, View
memory, Display values, Fuel type, Efficiency (K), Internal, Adjust-
ments. Furthermore you can switch back from any random menu
point to the values display with <F1>.
Press <F2> to print out the values simultaneously to their recording
in the intermediate memory.
Press <F3> to cut the CO sensor from the gas path so that it is pro-
tected against too high concentrations.
Pressing <F4> also enables to switch, from the values display, to a
menu point selected before or on „Standby“ (see chapter Adjust-
ments). Possible menu points are: Soot...Oil trace, Data processing,
View memory, Display values, Fuel type, Efficiency (K), Internal,
Adjustments (back to values display with <F1>).
Hotkey
Key <F1>
Re
-
calibrate the instrument after each
measurement (after one hour at the latest)
to keep the accuracy of the results!
Hotkey
Taste <F4>
Store and print
values
key <F2>
Switch
-
off CO
sensor
key <F3>
Symbol
cooler
ON/OFF
O2
3.2
%
CO2
13.1
%
T.Gas
184
°C
T.Air
20
°C
BImSchV

ecom-EN2 Page 17
The position of the measured and calculated values (gas analysis
sub-menu) on the display pages is free selectable. For alteration of
the existing succession, proceed as follows:
- Press <Enter> / „Display values“ / <Enter> to activate the
function
- select line with cursor keys (Up/Down)
- select desired parameter with cursor keys (Right/Left)
- repeat procedure until desired layout is completed
- Press <Enter> to deactivate the function
Connect the sampling tubing on the instrument to the plug „Connec-
tion gas“. Position the sampling probe in the exhaust channel, so that
the thermocouple is fully surrounded with the gas (see drawing).
Perform the measurement in the core stream of the exhaust gas
channel (probe placed in the hottest gas temperature area). A trend
indication for T.Gas easies the core stream search. As long as the
display shows an arrow in upwards direction, the measured tempera-
ture increases, it means the probe tip moves towards the core
stream center. If an arrow in downwards direction is displayed, it
means you move the probe away from the core stream and the tem-
perature sinks. If no temperature change is shown for at least 3 sec-
onds, so the trend indication will disappear.
Core stream search
Gas stream
Protection bow
Probe tip
O2 3.2 %
CO2 13.1 %
CO 0 ppm
Eff. 92.5 %
Losses 7.5 %
Exc. air 1.18
T.Gas 184 °C
T.Air 20 °C
BImSchV

Page 18 ecom-EN2
CO
2
, efficiency, losses, excess air and dew point are calculated val-
ues. They can only be calculated if realistic values for the basic pa-
rameters like O
2
and the temperatures are available. It must be as-
certained that:
O
2
< 20,5 % and T.Gas - T.Air > + 5 °C
are given. The dew point can only be calculated accurately if, in the
menu "Adjustments", the current barometric air pressure value has
been inputted. If the gas temperature falls below the dew point (be-
tween 25 and 65 °C), so efficiency will be calculated with condensa-
tion gain. In this case a (K) is displayed after „Efficiency“.
Correct measurement values are displayed first after a short delay,
necessary for the gas transport and the build-up of a stable electro-
chemical reaction to the sensors. This time period lasts approx. 1 to
1.5 minute. For recording, printout and evaluation, wait until the val-
ues do not change anymore. If deviations higher than 2 ppm still
occur by the gas values, they can be due to unstable pressure condi-
tions in the exhaust channel.
If the measurement values are stable
and the results can be printed out, press
the key <Record> (disk symbol) to
transfer the values in the intermediate
memory (caution: store separately gas
analysis, CO, O
2
check and draught
measurements). They will be kept there
for a later printout and, if need be, for a
final data record storage.
If a printout of the values should be made simultaneously to the in-
termediate recording, so press <F2> (the complete content of the
intermediate memory will be printed).
Measurement stored in
intermediate memory
O2 3.2 %
CO2 13.1 %
CO 0 ppm
Eff. 92.5 %
Losses 7.5 %
Exc. air 1.18
T.Gas 184 °C
T.Air 20 °C
BImSchV

ecom-EN2 Page 19
The CO sensor is protected against overload thanks to an internal
programme. If the 4000 ppm limit value is exceeded, so a purging
pump is activated which provides the sensor with fresh air. After
sufficient purging time (X behinds CO disappears) the sensor can be
reintegrated into the measurement system with <F3> (if you choose
„Yes“ at „Adjustments“ / „Internal“ / „CO-Automatic“ the CO
sensor switches to measurement automatically). The sensor can
also be manually be excluded from the measurement system with
<F3>.
8.2. CO Measurement (gas path check)
The gas channel check, called also CO measurement, is used for the
technical check of gas-fired plants in regards of safety aspects.
Hereby the CO concentration in the gas channel is measured after
the flow safety device and calculated on an undiluted value (oxygen
rest content in flue gas = 0%). As the gas conditions after the flow
safety device are no more homogeneous because of the flow in of
secondary air and consequently the core stream measurement can
be erratic, the analysis of the exhaust gas is performed along the
totality of the exhaust pipe diameter. A multi-hole probe (optional
accessory) is hereby used as sampling probe.
The calculated value shown on the line
„CO 0 %“ corresponds to the measured
CO concentration supposed the oxygen
content would amount 0% by the same
exhaust gas volume. It is consequently
the undiluted CO content in exhaust
gas. If the values indication is stable,
press <Record> to store the result in
the intermediate memory. If a printout of
the values should occur simultaneously
to the recording in the intermediate
memory press <F2> (the complete con-
tent of the intermediate memory will be
printed out).
Measurement stored in
intermediate memory
O2
17.5
%
CO 0%
738
ppm
CO
123
ppm
Exc. air
7.00
CO
-
Messung

Page 20 ecom-EN2
8.3. O
2
check
This measurement is performed by room-independent plants like
gross calorific value plants. It is determined if exhaust gas flows into
the combustion air (O
2
content drops down / CO content can be pre-
sent) and herewith influence on the combustion quality.
For this analysis, a special multi-hole
probe (optional accessory) should be
used. If the value indicated is stable,
press <Record> to store the value in
the intermediate memory. If a printout of
the values should occur simultaneously
to the recording in the intermediate
memory, press <F2> (the complete
content of the intermediate memory will
be printed out).
8.4. Draught Measurement
A trend indication for the draught conditions in the exhaust channel
can already be viewed during the gas analysis. Nevertheless the
value for the chimney draught will not be stored together with the gas
values while pressing <Record> because the differential pressure
sensor tends to drifts because of its sensibility.
For an exact measurement, it is consequently advised to re-calibrate
this sensor just before sampling and documenting the value.
The display shows the current value as
well as the recommendation to re-set
the zero point of the sensor. Disconnect
the draught hose from the instrument for
a short moment and press <F4>. The
sensor is herewith re-calibrated.
O2 value in air
O2
19.5
%
CO
3
ppm
Draught
0.01
hPa
O2 val. in air
Measurement stored in
intermediate memory
Pressure
Draught
-0.12
hPa
Recorded value:
--
.
--
hPa
Other manuals for EN2
2
This manual suits for next models
1
Table of contents
Other Ecom Measuring Instrument manuals
Popular Measuring Instrument manuals by other brands
ANDERSON-NEGELE
ANDERSON-NEGELE FMQ operating manual

BURG WATCHER
BURG WATCHER ProfiScale CROSS operating instructions
Hanna Instruments
Hanna Instruments HI 9033 instruction manual
PCE Health and Fitness
PCE Health and Fitness PM 3 user manual
Hanna Instruments
Hanna Instruments HI 99161 instruction manual

Tunix
Tunix EO-250 instruction manual
