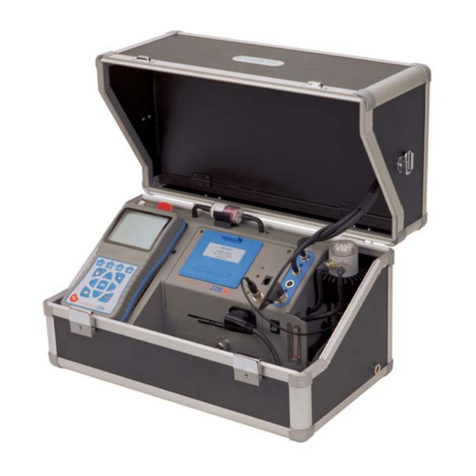
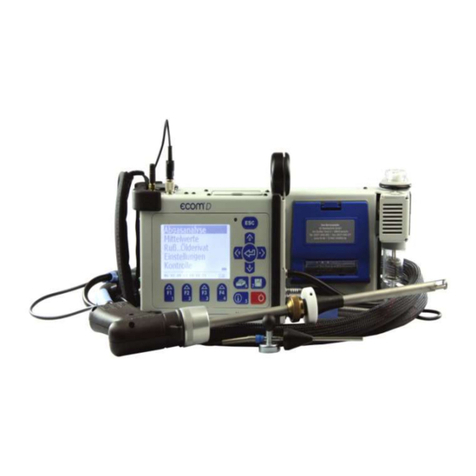
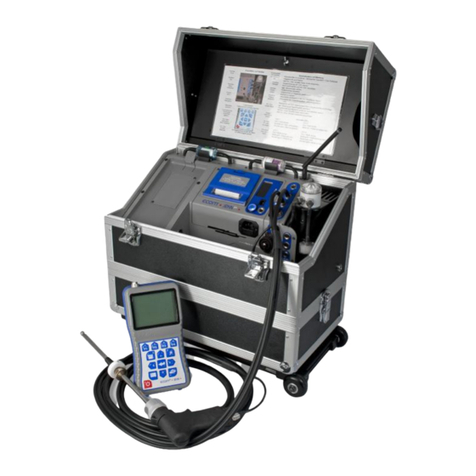
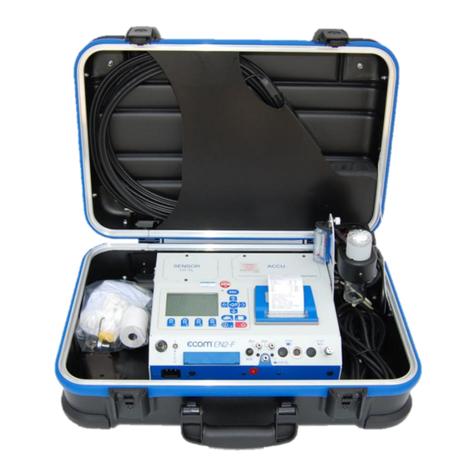
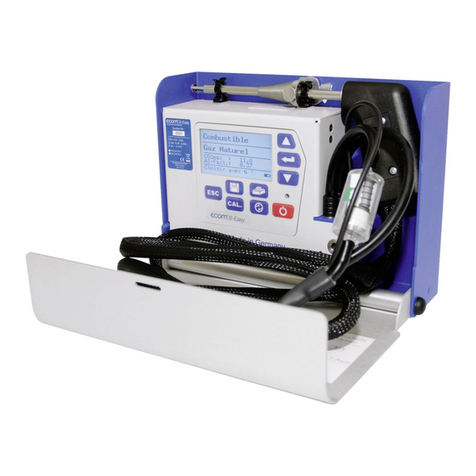
Ecom J2KNpro Tech User manual

ECOM America Ltd, 1628 Oakbrook Drive, Gainesville, GA 30507
Toll free (877) 326-6411 Phone (770) 532-3280 Fax (770) 532-3620
www.ecomusa.com
Operations Manual
version 3.3.3

Page 2

Page 3
Table of Contents Page(s)
J2KN PRO DESIGN AND HOW IT WORKS
1. Important Things to Remember 4
2. Instrument Design
2.1. J2KN Pro Base Unit 5
2.2. Remote Display Unit 6
2.3. Accessories 7
2.4. Consumables 8
3. Peltier Cooler 9
4. Gas Path Diagram 10
5. Power Supply 11
6. Radio Communication 12
EMISSIONS ANALYSIS AND RECORDING
7. J2KN Pro Start-up 13
8. Emissions Measurement
8.1 Gas Analysis 14-15
8.2 Printing 16
8.3 Soot Test 17
9. Data Logging onto Memory Card 18
10. Averaging Tests 19
11. Draft/Pressure 20
SETTINGS AND DIAGNOSTICS
12. Adjustments 20-21
12.1 Internal 22-23
13. Control 24
J2KN PRO TIPS AND TECHNICAL DATA
14. Maintenance Tips
14.1 Filters 25-26
14.2 Sample Line and Probe 26
14.3 Sensors 26-27
14.4 Printer Paper 27
14.5 Changing the Fuse 27
15. How to Change Sensors
15.1 O2 Sensor 28
15.2 A5F CO Sensor 29-30
15.3 MEM CO Sensor 31
15.4 NO, NO2, SO2, & High CO Sensors 32-34
16. How to Calibrate Sensors 35-36
17. Flow Velocity Measurement (Option) 37
18. Frequently Asked Questions 38-39
19. Technical Data 40
20. Description of Data on Memory Card 41
21. Calculations 42
22. Software Help 43

Page 4
1. Important Things to Remember
The J2KN Pro meets the requirements of EPA
CTM-030 and CTM-034 and ASTM D-6522 test-
ing protocols for portable emission analyzers.
In order to receive accurate measurements,
please allow reading to stabilize
for at least 2 minutes.
The J2KN Pro is not suitable for continuous
emission testing. Please allow at least 10
minutes of fresh air purge for each hour of
testing.
The following substances may cause damage
to the electrochemical sensors:
Cleaning agents
Degreasers
Wax polishes
Adhesives
Formaldehyde
1. Charge the battery after each use
2. Always store unit with fully charged battery
3. Charge the battery at least once a month if
not in frequent use

Page 5
2. Instrument Design
2.1 J2KN Pro Base Unit
Ambient air
temperature
sensor
Thermocouple
connection
Main gas
connection
Draft/Pressure
connection
Draft/Pressure
connection
Water trap
drain hose
connection
On-board
printer
Filter for
IR bench
(if applicable)
Remote Display
Unit
(see next page)
Power cord
socket
Info display
(see 13. Control)
ON / OFF
button
Analogue
inputs
(optional)
Auxiliary
temperature
connections
Nox/SOx
filter for
CO sensor
Pitot tube
connections
(see 17. Flow
Measurement)
Data cable
connection
(used by ECOM
personnel only)
Under case
(optional)
Trolley w/ wheels
(optional)
Heated line power
supply connection
(optional)
Fresh Air
Bypass Switch
(Pro IN only)

Page 6
2.2 Remote Display Unit
Escape
Note: All keypad
buttons are used for
input of numbers 0-9
and decimal point
OK
(press to confirm)
Up/Down/Right/Left
and Scroll
Turn on/off
data logging
Press to add custom
text to printout
(To print real-time
results, simply press
F2)
ON/OFF
Display
Backlight
ON/OFF
Function Keys
(See 8.1 Gas Analysis)
Memory card slot
LCD display
screen
USB
connection
Data cable sockets
(used by ECOM per-
sonnel only)
Air temperature
connection
(not an antenna)

Page 7
2.3 Accessories
Advanced DAS Compliance
Testing Software w/ Bluetooth
Part no. PRT90205
Calibration Gas Kit
Part no. CALGASKIT1
Under Case
Part no. RBR69825
Part no. RBR69829
(Pictured on page 5)
15ft Heated Sample Line
Part no. PRT79525-15
T-Gas Dummy Plug
Part no. CONNECT70280
T-Air Sensor Stick
Part no. TROOMSTICK
Extra Length Probes and Sample Lines
30-foot Standard Sample Line Part no. RBR71278
30-foot Heated Sample Line Part no. PRT79525-30
3-foot Probe Pipe w/ Thermocouple Part no. RBR71267
5-foot Probe Pipe w/ Thermocouple Part no. RBR71271
(Pro Easy)
(Pro IN)

Page 8
2.4 Consumables
PART
PART #
DESCRIPTION
Particulate
Filter (10/PK)
FILTER
75316
10/PK - Particulate
filter located on top of
water trap assembly
In-line Smoke
Filter (1 EACH)
RBR
71185
1 EACH - Standard 3/4"
in-line filter in clear
plastic casing.
Soot Test Paper
(100/PK)
SOOT
71283
100/PK - Round smoke
test filters for smoke
dot test
Soot Test Chart
SOOT
CHART
Soot Test Chart with 0-
9 Grayness Scale
NOx/SOx Filter
Media (1LB)
NOXSOX
79275
1LB - NOx/SOx filter
media refill container
(purple beads)
NOx/SOx
Media Tube
RBR
71286
NOx/SOx Media Tube
Thermal On-
board Printer
Paper (5/PK)
PRT
79274
5/PK - Printer paper for
on-board thermal
printer
J2KN-Pro Main
Battery
PRT
79291
Main Battery
J2KN-Pro
Remote Display
Batteries (3/PK)
PRT
79292
3/PK - Battery Pack for
Remote Display

Page 9
3. Peltier Cooler
J2KN Pro must be plugged in for the
Peltier cooler to operate.
Exhaust gas with a temperature above dew point is intro-
duced into a spiralling gas path with a coated metal surface
of good thermal conductivity. The hot gas radiates its heat to
this metal coating, which is thermally connected to a Peltier
element and a second metal body with cooling ribs and venti-
lation slots. The flow thru the Peltier element creates a heat
transfer from WARM to COLD and this takes the heat from
the metal coating and transfers it to the outer cooling body.
The heat is then released to the surrounding air via a ventila-
tion fan.
Condensation forms when the gas temperature drops be-
low dew point. This moisture drains into the water trap bowl
and is pumped out by a peristaltic pump when the water
reaches a high enough level to link both monitoring elec-
trodes.
The high speed pump allows for enough flow to avoid ex-
cess exposure time between the gas sample and water, so
that drop-out reactions (for example, NO2+H2O > H2NO3) do
not occur, which is necessary for measurement accuracy.
Fan
Peltier
Element
Gas
Outlet
Gas
Inlet
Water Level
Monitoring
Electrodes
Water drain
COLD

Page 10
4. Gas Path Diagram
Response Time
After inserting the probe into the sample gas, there is a
short delay before correct measurement values are dis-
played. This is necessary for the gas to pass through the
sampling system and build up a stable electrochemical reac-
tion at the sensors. This is referred to as response time, and
it usually lasts between 60 and 90 seconds. Before printing
or recording emission results, wait approximately 2 minutes
until the values have stabilized. Minor drifting of a few ppm
can be due to unstable pressure conditions in the exhaust
channel and may be negligible.
Since the CO sensor has an independent gas path with
NOx/SOx filter (see diagram above), the response time will
be slightly longer for CO measurement values.

Page 11
5. Power Supply
The J2KN Pro base unit has an internal power supply, and
it is recommended to always run the unit on AC power. For
testing locations where an AC plug-in is not available, the
instrument can be operated from 6-8 hours on battery power
when fully charged. Connecting the J2KN-Pro to AC power
charges the battery and is necessary to operate the Peltier
cooler and heated probe.
When the battery level gets low, the analyzer will start to
beep and display a low battery warning. The voltage reading
on the battery is displayed in the Control screen. The warn-
ing is activated when the charge drops below 6 V. When it
reaches 5.8V, the battery charge is not sufficient to power
the unit.
Only use batteries supplied by ECOM.
Contact ECOM with any questions.
The J2KN remote control unit is powered by 3 nickel-
metal-hydride batteries (type AA). These batteries are re-
charged by docking the remote control unit onto the J2KN
base unit. To change the settings for recharging these batter-
ies, go to:
Adjustments -> Internal -> Reload function -> OK
1. Recharging function ON (<F1> = YES)
- Batteries slowly and carefully recharged
- Recommended for frequent use
2. Recharging function OFF (<F4> = NO)
- Batteries quickly recharged
- Recommended for occasional use
- Note: Battery run-time is reduced on quick charge!
1. Charge the battery after each use
2. Always store unit with fully charged battery
3. Charge the battery at least once a month if
not in use

Page 12
6. Radio Communication
The J2KN Pro base unit communi-
cates wirelessly to the remote display
unit via radio transmisision. To unlock
the remote control unit, press on the tab
to unlock and release from the cradle on
the base unit.
The information exchange between
the remote control and base unit is
performed via radio transmission (915
MHz) with a coverage of approximately
100ft by free sight. The quality of the
radio transmission is documented by a
bar indication in the Main Menu.
If the J2KN base unit is switched off
and the remote control unit is on, the
display will show a message telling the
user to place the remote control unit
into the docking station (see below).
Troubleshooting Communication Issues
If there is interruption of the radio communication, an error
message is displayed (see below right). If this occurs frequently,
it may be necessary to re-sync the remote to the base unit:
1. Place remote unit into cradle
2. Go to Adjustments-> Internal->
RF Connect-> Standard-> OK
3. The base and remote are now synced
4. Go to Adjustments-> Internal->
RF Connect-> Remote -> OK
5. The remote can now be used as normal
Unlock
Bar indication
radio quality
-- ECOM-J2KN --
Radio connection
interrupted!
Use cable or
switch on basic
module!
Quit with:
-- ECOM-J2KN --
Place J2KN in
basic mod.!
Quit with:
Gas analysis
Averaging
Draft/Pressure
Soot Test
Automatic meas.
Adjustments
Control
Diagnostics

Page 13
7. J2KN Pro Start-up
Make sure the probe is in fresh air when you
turn on the J2KN Pro.
1. Switch on the J2KN base unit and the remote control
unit. The Main Menu is displayed with 8 sub-menus:
- Gas analysis View gas readings & calculations
- Averaging Perform averaging tests
- Draft/Pressure Calibrate pressure sensor
- Soot Test Perform soot/smoke density test
- Automatic meas. Data logging onto memory card
(Pro Easy & IN) and set up auto-
matic test cycles (Pro IN only)
- Adjustments Modify J2KN settings
- Control Diagnostic info/Calibration mode
- Diagnostics (Only used with ECOM AK tool)
2. Select Gas Analysis and press <OK>
3. Press Up/Down to select Fuel Type
and press <OK>
4. Analyzer will complete auto-zeroing
of all sensors, except the O2 sensor
which is calibrated to 20.9%
Fuel type
Gas-Natural
CO2max A1 B
11.7 0.35 0.006
Select: (
Radio Link
Quality Indicator
Battery Charging
Indicator
Display contrast:
Lighten F1
Darken F2
Gas analysis
Averaging
Draft/Pressure
Soot Test
Automatic meas.
Adjustments
Control
Diagnostics

Page 14
8. Emissions Measurement
8.1 Gas Analysis
Calibrate the sensors before
each emission test for best results.
After the 1-minute auto-zeroing phase, the instrument switches
to Gas Analysis mode. The measurement values can be viewed
on 3 display pages: a zoomed in 4-line display and 2 full 9-line
displays. All line items are user-selectable (see Display Values
below). Press Up/Down to scroll between the pages.
Bypass Switch (Pro IN)..Turn on/off fresh air bypass to purge
Info Screen (Pro Easy)....View diagnostic info on Control screen
Quick Print............Prints on-screen measurement values
CO Bypass.............Manually turn on/off CO bypass pump
Display Lines.......Choose measurement values to display by
pressing F4 then Up/Down/Right/Left
Quick
Print/Save to
memory
<F2>
CO Bypass
Pump ON/OFF
<F3>
O2 8.2 %
CO 431 ppm
NO 126 ppm
NO2 65 ppm
Gas Analysis 25.11.07
To change F1 hotkey from default, go to
Adjustments -> Internal -> F1 Hotkey
Turn on CO bypass pump to protect CO
sensor from high concentrations
Pump automatically activates at 4000ppm!
To change F4 hotkey from default, go to
Adjustments -> Internal -> F4 Hotkey
Edit Display
Lines
<F4>
Bypass Switch (Pro IN)
Info Screen (Pro Easy)
<F1>
F1:
F2:
F3:
F4:
Tip: To apply O2 correction,
go to Adjustments/Ref. O2
and input O2 correction %.
Then go to Adjustments/ Unit
and change unit to O2%
undiluted.

Page 15
8.1 Gas Analysis (continued)
Core Stream Search
To obtain the most accurate gas
sample, the end of the probe should be
positioned in the center of the exhaust
stream or the “core stream” where the
thermocouple is fully surrounded with
the highest gas temperature.
A + or – symbol displays in the core stream box (see fig-
ure above), indicating a trend towards positive or negative
temperature. As long as the display shows a + symbol, the
measured temperature is increasing and the probe tip is
moving towards the core stream. If a - symbol is displayed,
the measured temperature is decreasing and the probe tip is
past the core stream. Pull the probe back slightly to reach
the core stream, and adjust the probe cone so that the probe
is firmly in place. When no temperature change is recorded
for at least 3 seconds, the trend indication will clear.
Calculated Values
Calculated values include CO2, efficiency, losses, and ex-
cess air. They are defined only when realistic values for O2
and temperature are available. Otherwise, the values will be
dashed out on the display. For the calculated values to ap-
pear on the display, the O2 concentration must be less than
20.5% and gas temperature must be more than 5 degrees
hotter than ambient temperature:
O2< 20.5 % and T.Gas - T.Air > +5°C
When these conditions are met, all calculations will display.
Gas temp. trend indicator
O2 8.2 %
CO 431 ppm
NO 126 ppm
NO2 65 ppm
Gas analysis
25.11.07
+
Gas stream
Probe tip
Thermocouple hook

Page 16
8.2 Printing
Quick Print
The easiest and quickest way to print is to press <F2> for
quick print, which immediately prints the measurement values
currently on the screen. This also saves a snapshot to memory.
Print in Timed Intervals or Print an Average Over Time
To print in timed intervals (for example, every 10 seconds or
each minute) or to print an average over time, please refer to
10. Averaging Tests.
Print from Memory
1. Press 5/Save (disk icon)
2. Press Print key (printer icon)
3. Select Start printout
4. Press 5/Save to clear memory Measurement recorded
Print with Text (i.e. site and equipment)
1. Press Print key (printer icon) to display printing options
2. Select Insert Text and press OK to select first line of text
(maximum 6 lines of text, 20 characters per line)
3. Using the directional keys and OK, select the alphanumeric
characters to insert text. Press F3 to change grid to lower case,
numbers, or other characters. To delete a character, press F4 to
toggle up then F2 to delete. Press F1 to accept text. If you wish
to insert more lines of text, select the next line and repeat.
4. Press twice to return to Gas Analysis
5. When ready to print, press <F2> for quick print
6. To clear text from printout, press Print key, select Insert Text,
select text line, press F4 to toggle up, move the cursor to the
right of the text, and press F2 to delete each character.
Wait for the measurement values to stabilize
for at least 2 minutes before printing the
results.
O2 8.2 %
CO 431 ppm
NO 126 ppm
NO2 65 ppm
Gas Analysis
Recorded!

Page 17
8.3 Soot Test
The soot test is a measure of soot or
smoke density in the exhaust sample.
The soot test must be performed with the heated probe turned
on in order to prevent the filter paper from becoming wet due to
condensation. To turn probe heating on, go to
Adjustments -> Internal -> Probe heating -> F1
J2KN Pro must be plugged in for the probe
heating function to activate. Allow 3 minutes
for the probe to heat up before soot test.
Soot Test Procedure
1. Turn on probe heating: Adjustments->Internal->Probe heating->F1
2. Press the trigger on the probe handle to open the filter slot
and insert a filter paper (will insert about half-way)
3. Select the line 1st. Soot meas
4. Press <OK> to start the measurement.
The display shows flow volume and the
pump starts sampling
5. Once 1.63 liters have been sucked in,
the J2KN-Pro will prompt to input the
opacity number
6. Press the trigger on the probe handle
to open filter slot and pull out the filter
paper
7. Compare the greyness on the filter paper with the soot test
chart 0-9 opacity scale
8. Input the number and press <OK>
9. Repeat steps 2-8 until all 3 soot tests are completed. The
mean value will be calculated and automatically stored.
10. Turn off probe heating: Adjustments->Internal->Probe heating->F4
Select NO for Oil trace.
Remember to let the probe cool down
before putting it back in the case.
Soot Test
Average: -.-
Boiler temp.: ---°F
1st Soot meas.: -.-
2nd Soot meas.: -.-
3rd Soot meas.: -.-
Oil trace : ----
Soot Test
Mean value: 5.0
Boiler temp.: 166°F
1st Soot meas.: 5.0
2nd Soot meas.: 4.5
3rd Soot meas.: 5.5
Oil trace : NO

Page 18
9. Data Logging onto Memory Card (2GB max)
Initial Set-up
1. Insert memory card (32MB to 2GB) into
the top-right of the handheld display
2. Go to Automatic Meas. -> Save to MM
Card. This is the time interval that each
data snapshot is recorded to the memory
card (min. 1sec, max 255sec). Input
desired amount in seconds and press OK.
Data Logging
1. Within Automatic Meas., select Datalogger -> “Start dl?
Are you sure?” -> Press F1
2. Analyzer is now in Datalogging mode. The
blinking disk in the top right corner indicates that the analyzer
is currently logging data. Press to return to the main menu
and select Gas Analysis to view real-time measurements.
3. To start & stop data logging, press 5 (disk symbol) while
in Gas Analysis.
4. To complete data logging and save the file to the SD card,
press to return to the main menu, go to Automatic
Meas., select Datalogger -> “Finish dl? Are you sure?” ->
Press F1.
5. Press down on the memory card to release, and insert the card
into a card reader on a computer to view the files (.csv format).
Each data logging term will be saved separately as J2KDL-00,
J2KDL-01, J2KDL-02, etc. Open in Microsoft Excel.

Page 19
10. Averaging Tests
The Averaging function allows you to take a sample of
emissions data and compute an average over time.
1. Go to Averaging -> Select Meas. Time
2. Input total measuring time in minutes or
seconds (for seconds, press decimal 1st)
3. Select Scanning and input interval time
in minutes or seconds
For example: If the Meas. Time is 1 minute and the
Scanning time is 10 seconds, the mean value will take
into account 6 scans and find the average
4. Select Printer and choose from the following options:
No Value. This prints only the final averaged values.
Each Value. This prints a snapshot for every scan.
Each Value of 2, 3, etc. This prints a snapshot for every
other scan, every third scan, etc.
5. Do not select Store. Please leave to default.
6. Select Start Measurement.
Mean value measurement has initiated.
Press up/down to toggle between mean
value and real-time results. You will see
the time counting down in the bottom
left of the display screen.
7. After the Meas. Time has elapsed, press Print key to print
averaged results if it does not print automatically
8. Press , select Averaging, and press F1 to quit
averaging calculation
Start measurement
Meas. time
Scanning
Printer
Store
Averaging
Quit with:
O2 3.2 %
CO2 13.1 %
CO 0 ppm
Eta 92.5 %
Losses 7.5 %
Lambda 1.18
T.Gas 184 °C
T.Air 20 °C
Averaging 25.11.07
15:59 min

Page 20
11. Draft/Pressure
A trend indication for the draft conditions in the exhaust
channel is displayed in the Gas Analysis screen. Note that the
pressure sensor tends to drift because of its sensitivity, and it
is necessary to calibrate the sensor immediately before sam-
pling to get an accurate measurement.
To calibrate, go to Draft/Pressure.
The current value is displayed. Discon-
nect the draft hose from the J2KN for a
short moment and press <F4>.
The pressure sensor is now calibrated.
Reconnect the draft hose. The dis-
play shows the current draft meas-
urement value. This can be stored into
intermediate memory by pressing
5/Save. The stored value is shown on
the display. Press to quit the dif-
ferential pressure menu.
12. Adjustments
Most of the settings of the J2KN-Pro
that are user-selectable can be changed
in Adjustments in the Main Menu.
Auto-Zero (J2KN-Pro IN only)
Press <OK> to set new zero points
for sensors. Before using this function,
the sensors must be flushed with fresh
air, and the J2KN-Pro IN must be in a
fresh air environment during the auto-
zero phase.
Unit
The default setting for gas concentration units is ppm
(parts per million). The options for units include:
Auto-Zero
Unit
Mass Emission
Ref. O2
Fuel type
Set clock
Paper feed
Internal
Air Leak Test
Quit with:
Other manuals for J2KNpro Tech
5
Table of contents
Other Ecom Measuring Instrument manuals
Popular Measuring Instrument manuals by other brands

Endress+Hauser
Endress+Hauser Ceraphant T PTC31 operating instructions

York Survey Supply
York Survey Supply 343680 operating instructions
Minolta
Minolta AUTO METER IIIF - PART 2 manual
Endress+Hauser
Endress+Hauser KRFB operating instructions
Chauvin Arnoux
Chauvin Arnoux CA-MA 100 user manual

pyroscience
pyroscience Piccolo2 user manual
