manuals.online logo
Brands
  1. Home
  2. •
  3. Brands
  4. •
  5. Eldat
  6. •
  7. Transmitter
  8. •
  9. Eldat Easywave RTS43 User manual

Eldat Easywave RTS43 User manual

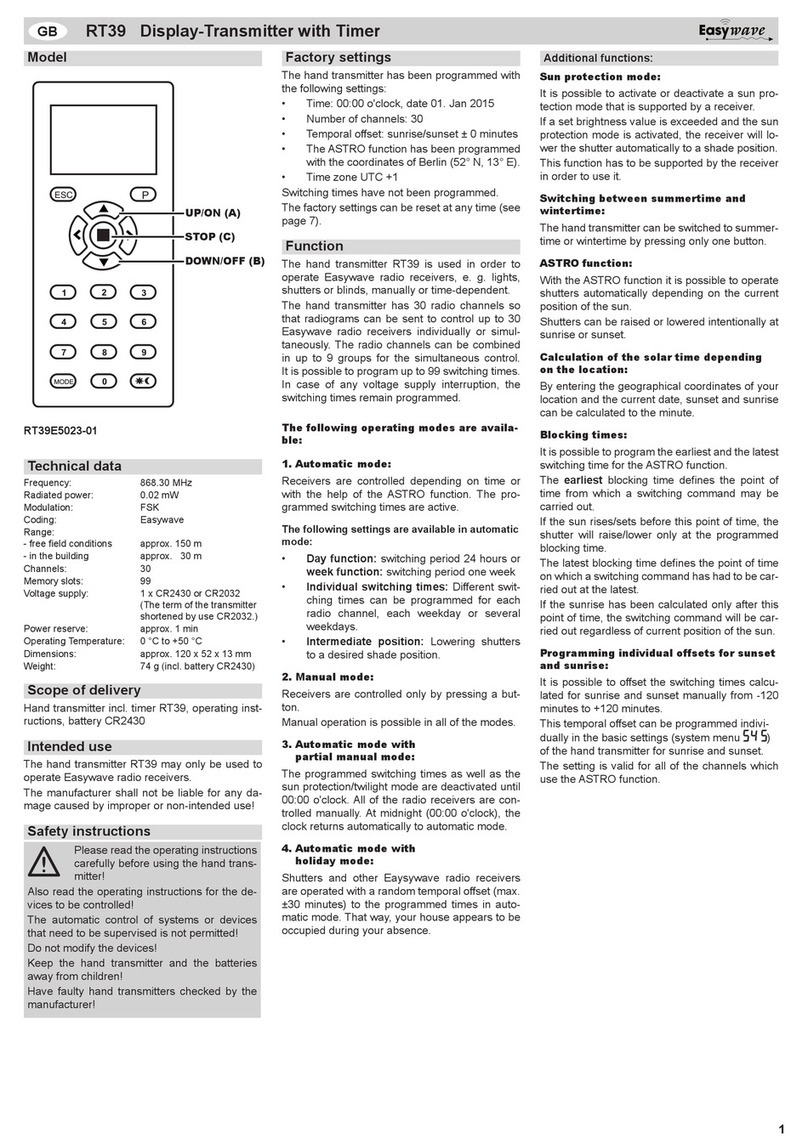
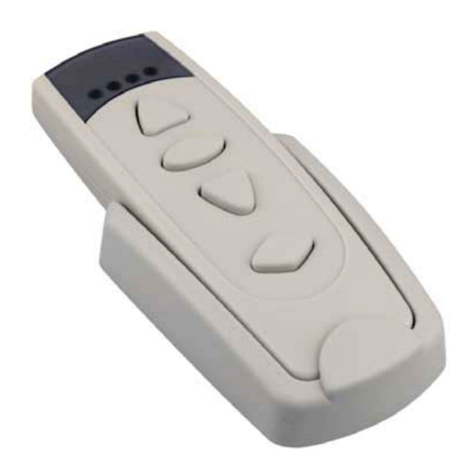
Model
RTS43E5002A01 230 V
132
Mode
132
Mode
RTS43E5002A02 12-24 V
Wall-mounted Transmitter RTS43
GB
Technical Data
Frequency: 868.30 MHz
Radiated power: max. 22.9 mW
Modulation: FSK
Coding: Easywave
Power supply:
RTS43E5002A02 12-24 V AC/DC
RTS43E5002A01 230 V AC
(Connection cable:
NYM-J min. 1.5 mm²)
Power consumption:
Quiescent current
12-24 V DC 6 mA
230 V AC 10 mA
Transmission current
12 V DC 50 mA
24 V DC 27 mA
12 V AC 66 mA
24 V AC 39 mA
230 V AC 12 mA
Protection rating: IP 65
Operating
temperature: -20 °C to +60 °C
Range: typically 300 m with good
freeeldconditions
Dimensions: 162x70x38 mm
Weight: 200 g
Scope of Delivery
Wall-mounted transmitter RTS43, mounting kit,
operating manual
Intended Use
The wall-mounted transmitter RTS43 may only be
used to operate Easywave wireless receivers.
The manufacturer shall not be liable for any da-
mage caused by improper or non-intended use!
Safety Advice
Before using the device, carefully read
through this operating manual!
Caution! Electrical installation must only
be carried out by a qualied electrician and
only when there is no voltage present!
When the remote learning function is activa-
ted, the transmitter is live. Do not touch any
live electrical parts.
When connecting the mains voltage supply
with 230 V AC, an isolating protective device
capable of disconnecting all poles must be
present in the electrical circuit (e.g. automa-
tic circuit breaker 16 A).
The device is only intended to be securely
mounted on a wall.
Note also the operating manual(s) for the recei-
vers!
Note the device-specic standards, VDE and
TÜV regulations!
Donotmakeanymodicationstothedevice!
Have faulty devices checked by the manufac-
turer!
Jumper
MODE
LED
PTx
Funktion
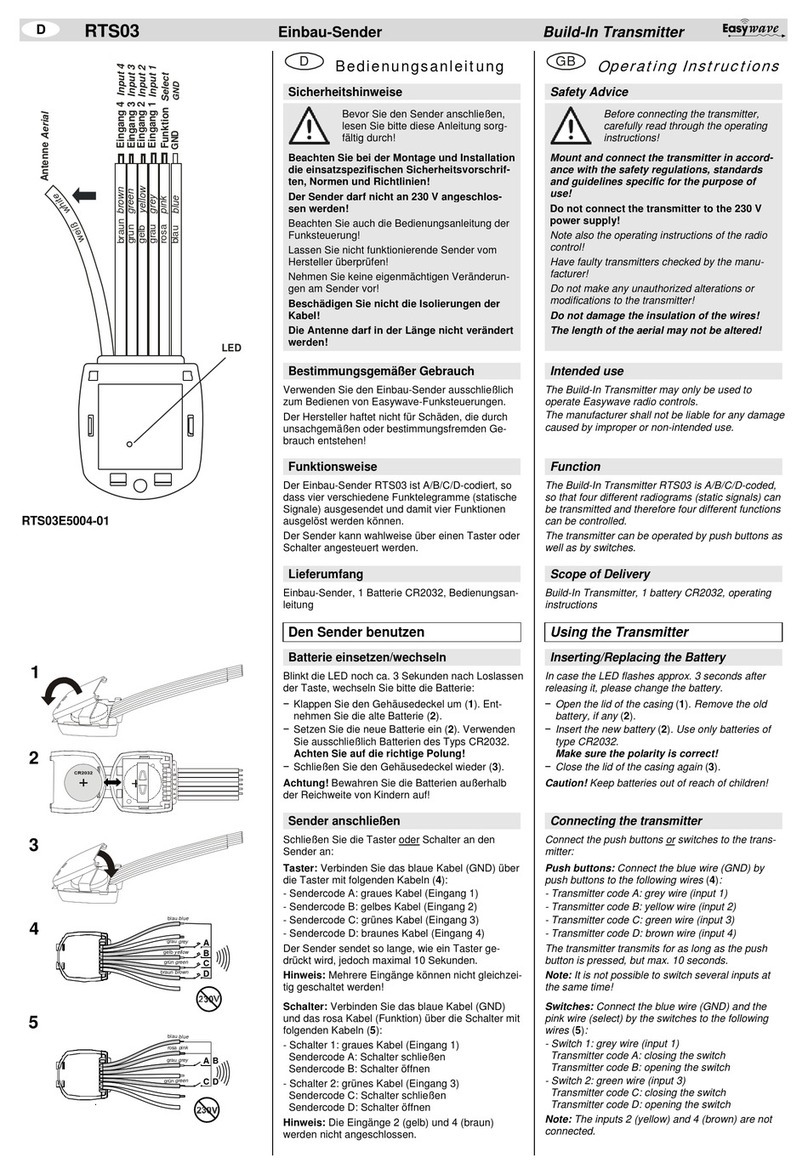
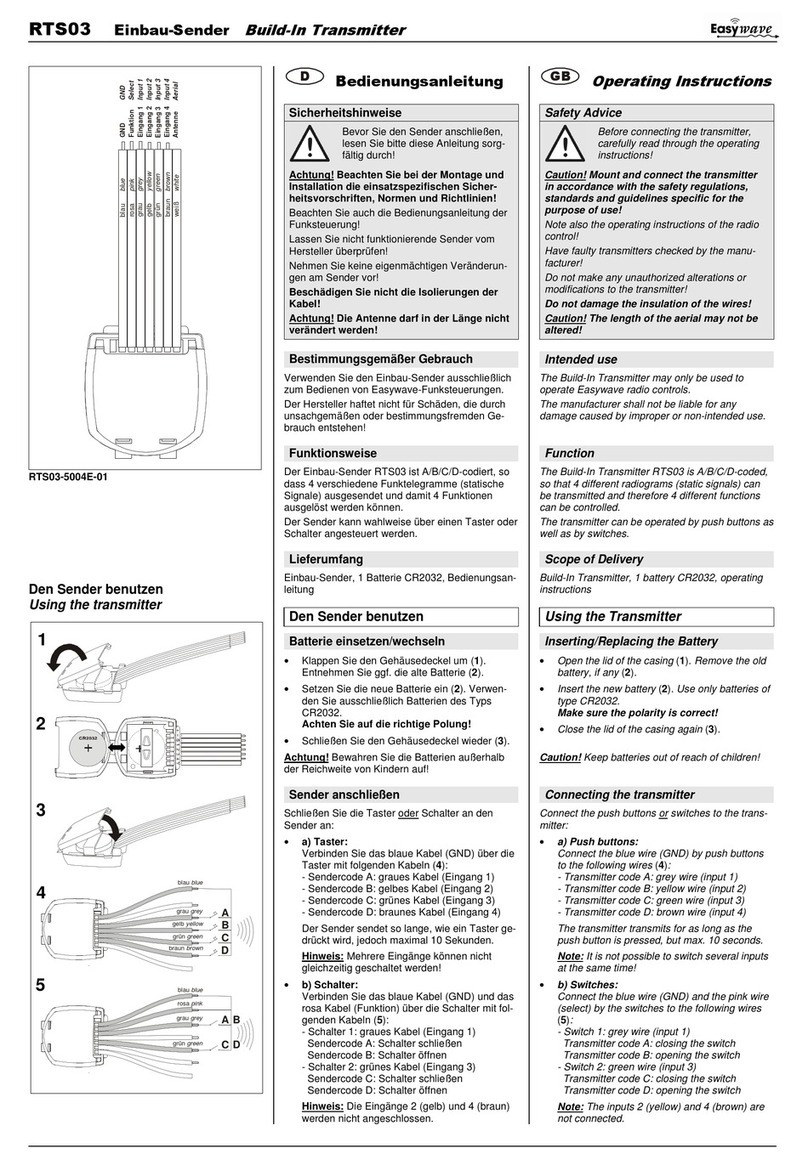
The RTS43 wall-mounted transmitter can extend
the switching functions of existing switches or
buttons using a wireless interface.
The transmitter checks whether the power has
been coupled to a switch or button, and transmits
the corresponding Easywave code A or B to an
Easywave wireless receiver, which then activates
a connected device. The LED indicates an outgo-
ing wireless signal.
Selecting the SWITCH or BUTTON mode is done
using the Jumper MODE (see section “Select
Mode”).
The default factory setting for the RTS43 is to
connect a button (jumper position 1-2).
Start-Up
1. Screw on the housing cover and attach the
transmitter to the wall using the included
screws and wall plugs.
Avoid wireless interference. Avoid
installing in a junction box, metal-
lic housings, in the immediate vi-
cinity of large metallic objects, on
the ground or near these objects.
2. Select mode:
Button: Jumper in position 1-2
Switch: Jumper in position 2-3
3. Turno󰀨thepowersupplytothecircuit.
Connect the power supply cable and the
switch or button in a de-energised state in ac-
cordance with the connection examples (see
section „Connection examples“).
The terminals are designed for
2x 2.5 mm² cable cross-sections.
Use connecting cables such as
NYM-J min. 1.5 mm². Disconnect the
PE cable.
Insert all of the connecting cables into
the device through the water-resis-
tant PG cable glands. After installati-
on, check the tightness of the device.
4. Screw down the housing cover and switch the
power supply back on.
5. Programme the RTS43 transmission codes
into the receivers of the devices to be cont-
rolled. By pressing the switch or button, the
transmission code is assigned to the receiver.
Please also read the operating manuals for
the receiver.
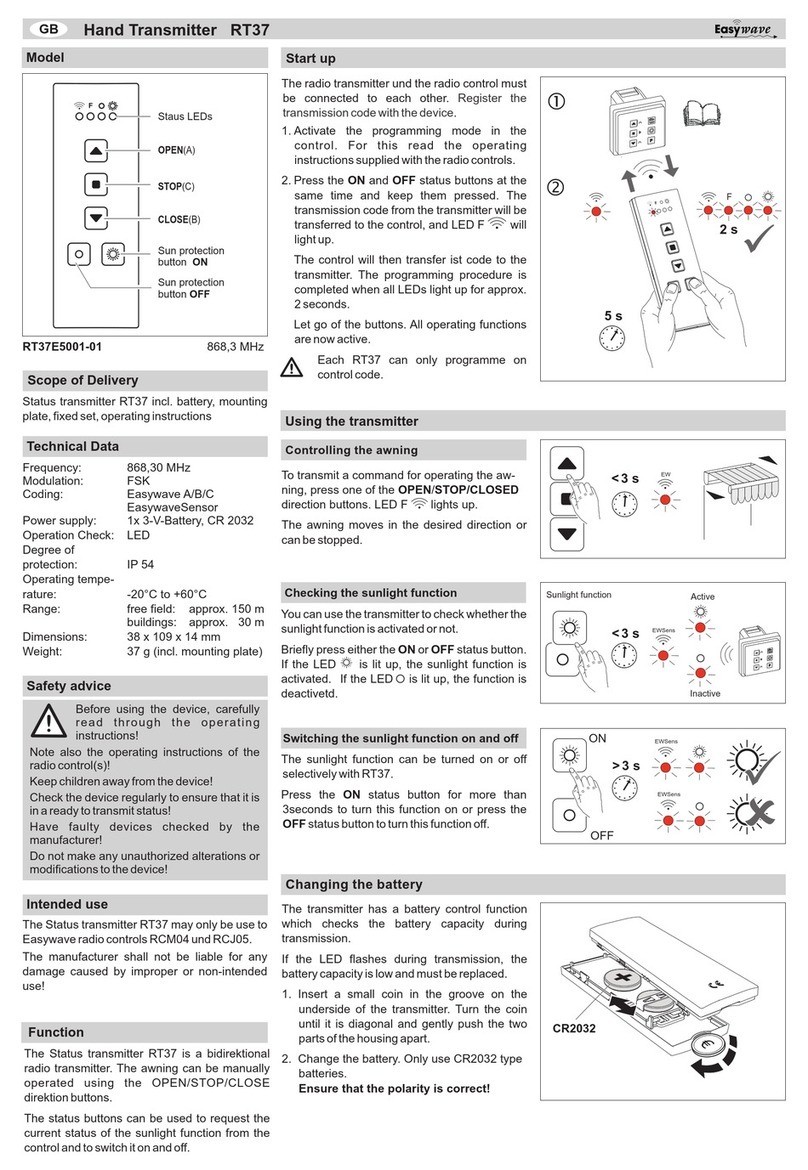
Remote Learning Function
By pressing the teach-in button PTx, compatible
receivers, which are programmed with RTS43,
can also be set to learning mode or delete mode
while installed.
The transmitter is live. Do not touch any
live parts (terminal, transformer) when
pressing the PTx button.
To start the remote learning, the connected switch
elements must be open and a button must be con-
nected.
The jumper serves exclusively to select which
transmission code the remote learning function
should trigger.
Jumper Position 1-2 Jumper Position 2-3
S1-->Transm. code A1
S2-->Transm. code B1
S1-->Transm. code A1
S2-->Transm. cod A2
For more information please refer to the opera-
ting manual for the respective receiver.
Disposal
Waste electrical products may not be dispo-
sed of with household waste!
Dispose of the waste product at a
designated collection point for electronic
waste or via your specialist retailer.
Dispose of the packaging material in the
recycling containers for cardboard, paper
and plastics.
Warrenty
During the warranty period, we undertake to rec-
tify free of charge by repair or replacement any
product defects arising from production or mate-
rial faults.
Anyunauthorisedtamperingwith,ormodications
to, the product shall render this warranty null and
void
Conformity
ELDAT GmbH hereby declares that the radio
equipment type RTS43 is in compliance with the
Directive 2014/53/EU.
The full text of the EU declaration of conformity
can be obtained at the following internet address:
www.eldat.de
Customer Service
If, despite correct handling, faults or malfunctions
occur or in case of damage, please contact your
retailer or the manufacturer.
ELDAT GmbH
Im Gewerbepark 14
15711 Königs Wusterhausen
Germany
Phone: + 49 (0) 33 75 / 90 37-310
Fax: + 49 (0) 33 75 / 90 37-90
Internet: www.eldat.de
E-Mail: [email protected]
RTS43E5002A01 230 V
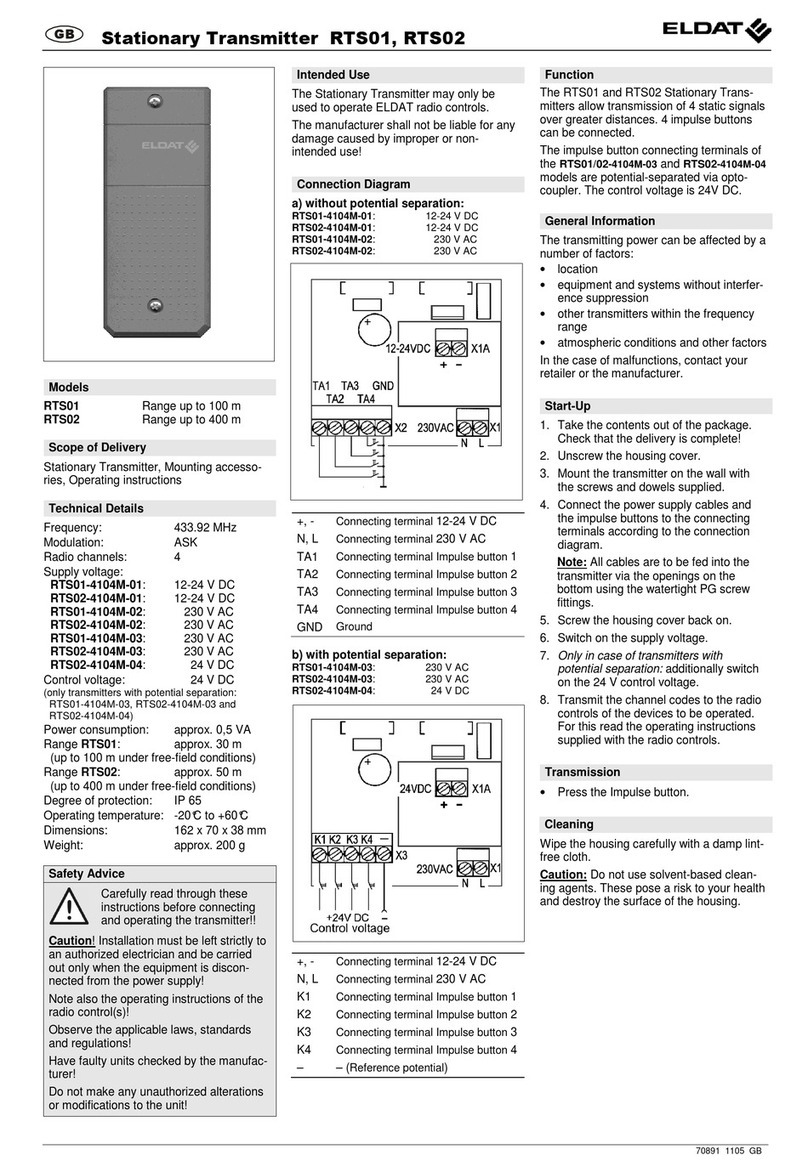
N
230 V
L
N
230 V
L
RTS43E5002A02 12-24 V
12-24 V
A
C/DC
IN1IN2
+
+
-
-
O
12-24 V
O
~
IN1IN2
+
-
O
12-24 V
O
12-24
V
A
C/DC
+
-
~
UM140654 0118 DE
and S2 must always be connected with the poten-
tial applied to IN1!
oth “O” outputs are internally bridged with IN1 and
can therefore be used as the source.
Connecting electrical devices to
the output terminals (O) is not per-
mitted!
The output terminals (O) are ex-
clusively intended for connecting
the S1 and S2 switch inputs!
The three L terminals are internally bridged and
can be used to connect S1 and S2.
Connecting electrical devices to
the L terminals is not permitted!
The bridged L terminals are ex-
clusively intended for connecting
the S1 and S2 switch inputs!
Each L, with the same reference potential (N) as
the power supply, can be used to connect S1 and
S2.
L: Power supply, 230 V AC
N: Power supply, 230 V AC
S1: Switch input 1
S2: Switch input 2
IN1: Power supply
AC: 12-24 V
DC: + 12-24 V
IN2: Power supply
AC: 12-24 V
DC: - 12-24 V
O: Output
S1: Switch input 1
S2: Switch input 2
Connection Examples
Select Mode
BUTTON Mode
Jumper MODE in position 1-2
The transmitter sends for as long as a button
is pressed, but for a maximum of 36 seconds.
Button 1: Input S1 Transmission code A1
Button 2: Input S2 Transmission code B1
SWITCH mode
Jumper MODE in position 2-3
hen the switch changes state, the transmit-
ter sends a switching pulse lasting approx.
0.5 seconds.
Switch 1: Input S1
Close switch: Transmission Code A1
Open switch: Transmission Code B1
Switch 2: Input S2
Close switch: Transmission Code A2
Open switch: Transmission Code B2
13
2
Mode
13
2
Mode

This manual suits for next models

2

Other Eldat Transmitter manuals

Eldat RT22-3125M-01 User manual

Eldat

Eldat RT22-3125M-01 User manual

Eldat RT31 User manual

Eldat

Eldat RT31 User manual

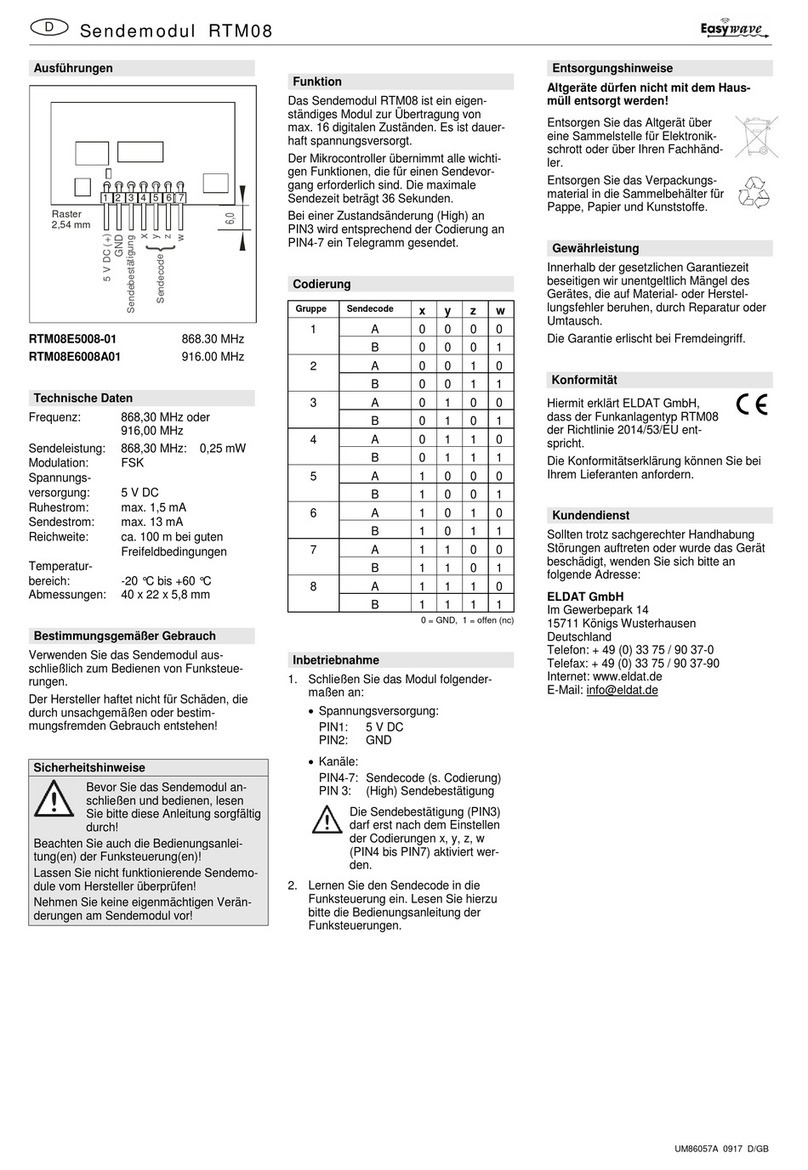
Eldat Easywave RTS03 Series User manual

Eldat

Eldat Easywave RTS03 Series User manual

Eldat RT39 User manual

Eldat

Eldat RT39 User manual

Eldat RTS03 Series User manual

Eldat

Eldat RTS03 Series User manual

Eldat Easywave RTS39 Series User manual

Eldat

Eldat Easywave RTS39 Series User manual

Eldat RTS01 Series User manual

Eldat

Eldat RTS01 Series User manual

Eldat Easywave RTS03 User manual

Eldat

Eldat Easywave RTS03 User manual

Eldat RT35-4104M-01 User manual

Eldat

Eldat RT35-4104M-01 User manual

Eldat RT22-4139M-01 User manual

Eldat

Eldat RT22-4139M-01 User manual

Eldat Easywave RT24 Series User manual

Eldat

Eldat Easywave RT24 Series User manual

Eldat RT22-4139M-02 User manual

Eldat

Eldat RT22-4139M-02 User manual

Eldat Easywave RTM08 Series User manual

Eldat

Eldat Easywave RTM08 Series User manual

Eldat RT22 Series User manual

Eldat

Eldat RT22 Series User manual

Eldat RTS03 Series User manual

Eldat

Eldat RTS03 Series User manual

Eldat RT37 User manual

Eldat

Eldat RT37 User manual

Eldat secwave RT42 User guide

Eldat

Eldat secwave RT42 User guide

Popular Transmitter manuals by other brands

König CSBTTRNSM100 manual

König

König CSBTTRNSM100 manual

Honeywell ST 3000 installation guide

Honeywell

Honeywell ST 3000 installation guide

Sound Associates SA1401 Operation manual

Sound Associates

Sound Associates SA1401 Operation manual

Vega VEGABAR 83 Quick setup guide

Vega

Vega VEGABAR 83 Quick setup guide

Michell Instruments SF72 user manual

Michell Instruments

Michell Instruments SF72 user manual

GRAUPNER mz-32 HoTT manual

GRAUPNER

GRAUPNER mz-32 HoTT manual

FuehlerSysteme FS5021 operating manual

FuehlerSysteme

FuehlerSysteme FS5021 operating manual

Kramer 650T user manual

Kramer

Kramer 650T user manual

Pepperl+Fuchs LHCR-51 operating instructions

Pepperl+Fuchs

Pepperl+Fuchs LHCR-51 operating instructions

Vega VEGABAR 86 Quick setup guide

Vega

Vega VEGABAR 86 Quick setup guide

AirLink Communications Raven X HSDPA user guide

AirLink Communications

AirLink Communications Raven X HSDPA user guide

Online 3015X ALKALINE Series operating manual

Online

Online 3015X ALKALINE Series operating manual

Gelec PIT70000 User's & technical manual

Gelec

Gelec PIT70000 User's & technical manual

Kobold SEN-98 operating instructions

Kobold

Kobold SEN-98 operating instructions

Phonak SmartLink+ Frequently asked questions

Phonak

Phonak SmartLink+ Frequently asked questions

Extron electronics XTP T HWP 101 4K user guide

Extron electronics

Extron electronics XTP T HWP 101 4K user guide

Dakota Alert WHT-3000 owner's manual

Dakota Alert

Dakota Alert WHT-3000 owner's manual

Lightware SW4-OPT-TX240RAK quick start guide

Lightware

Lightware SW4-OPT-TX240RAK quick start guide

manuals.online logo
manuals.online logoBrands
  • About & Mission
  • Contact us
  • Privacy Policy
  • Terms and Conditions

Copyright 2025 Manuals.Online. All Rights Reserved.