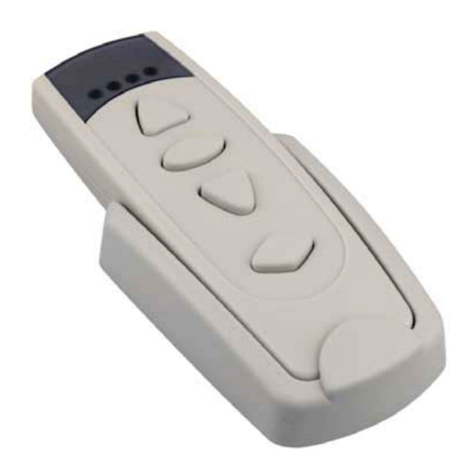
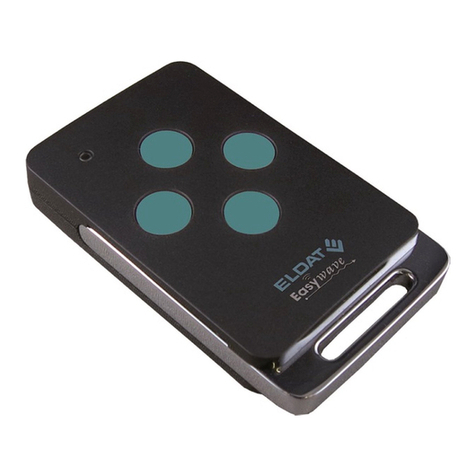
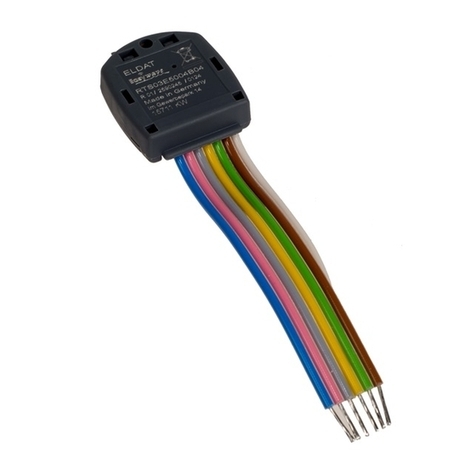
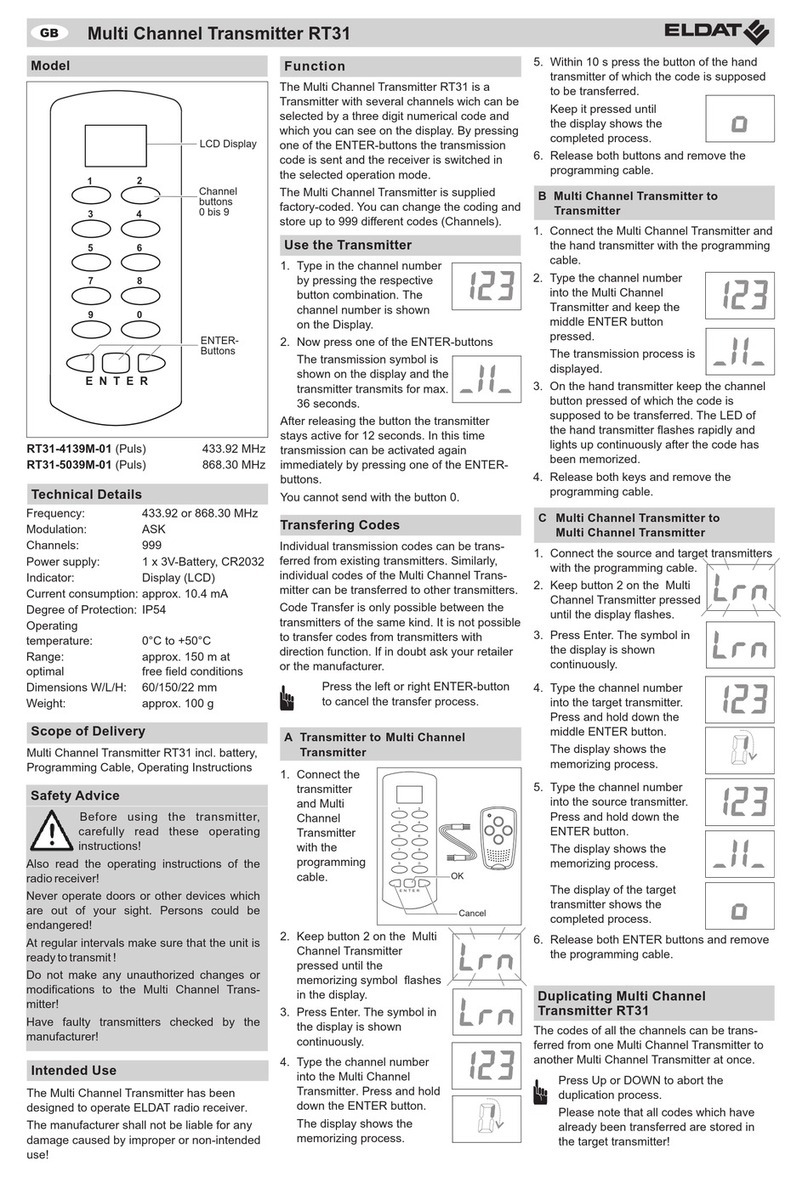
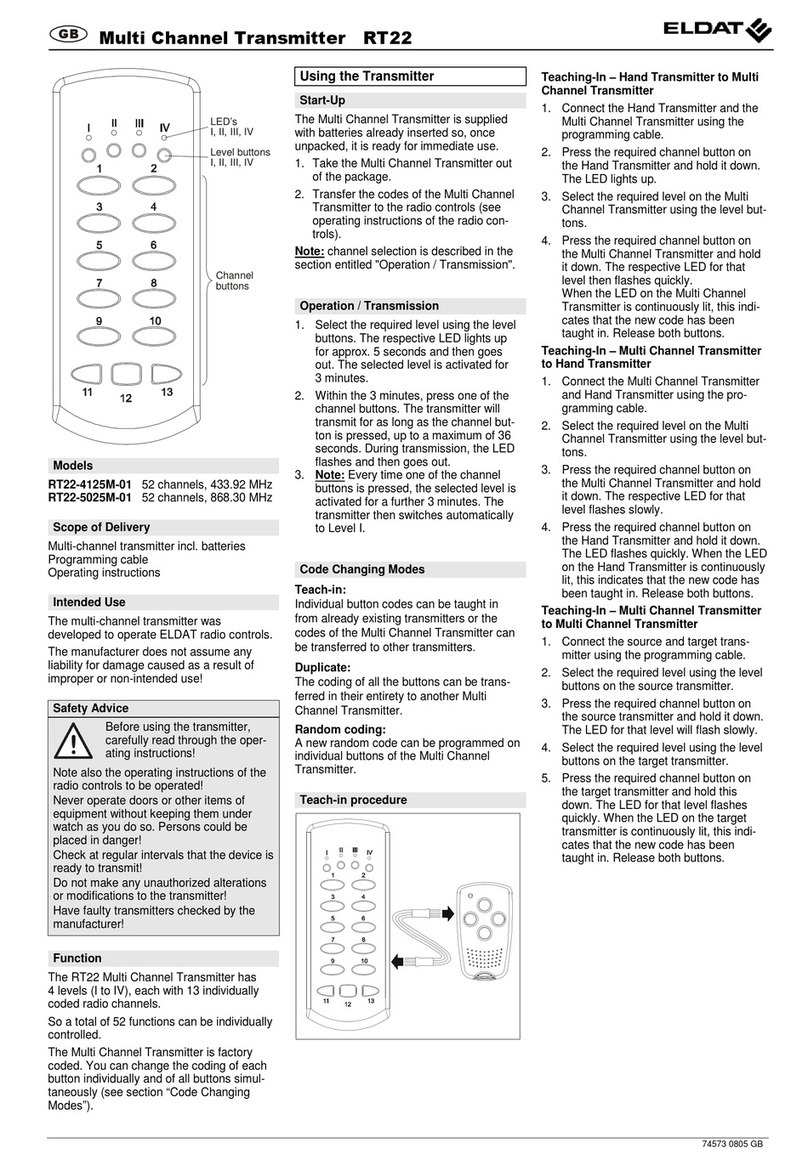
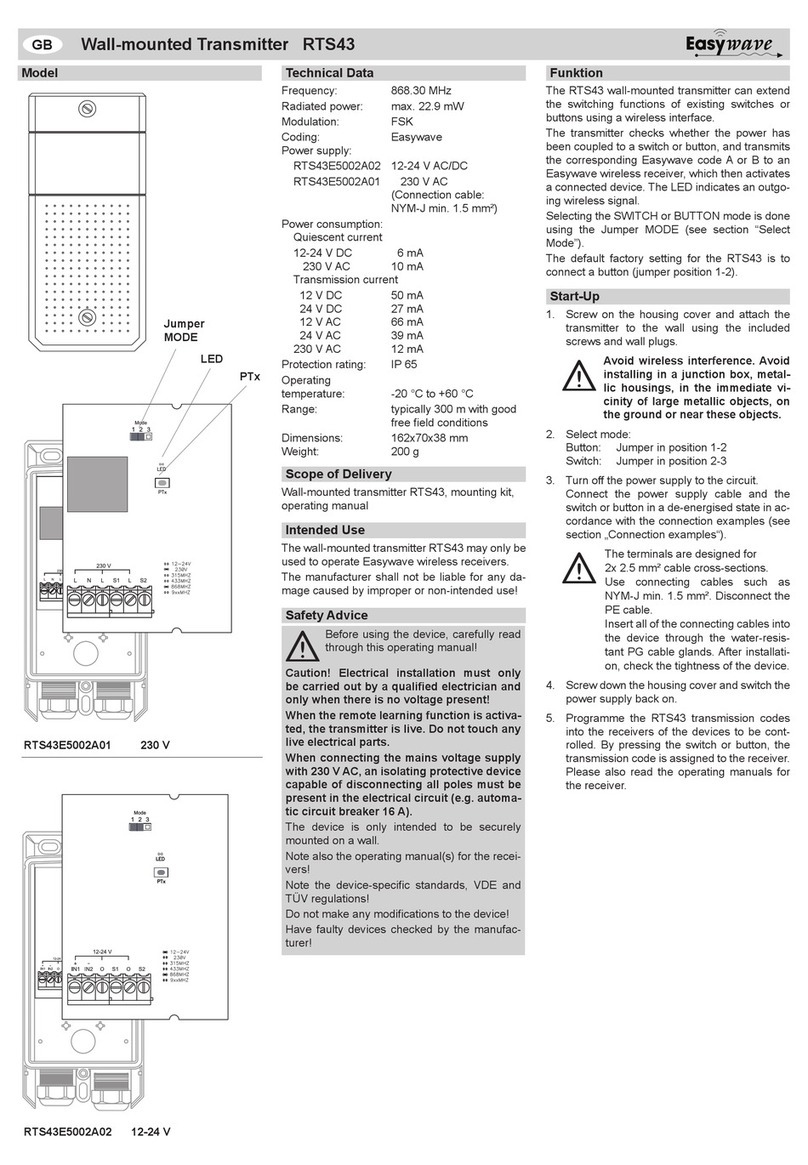
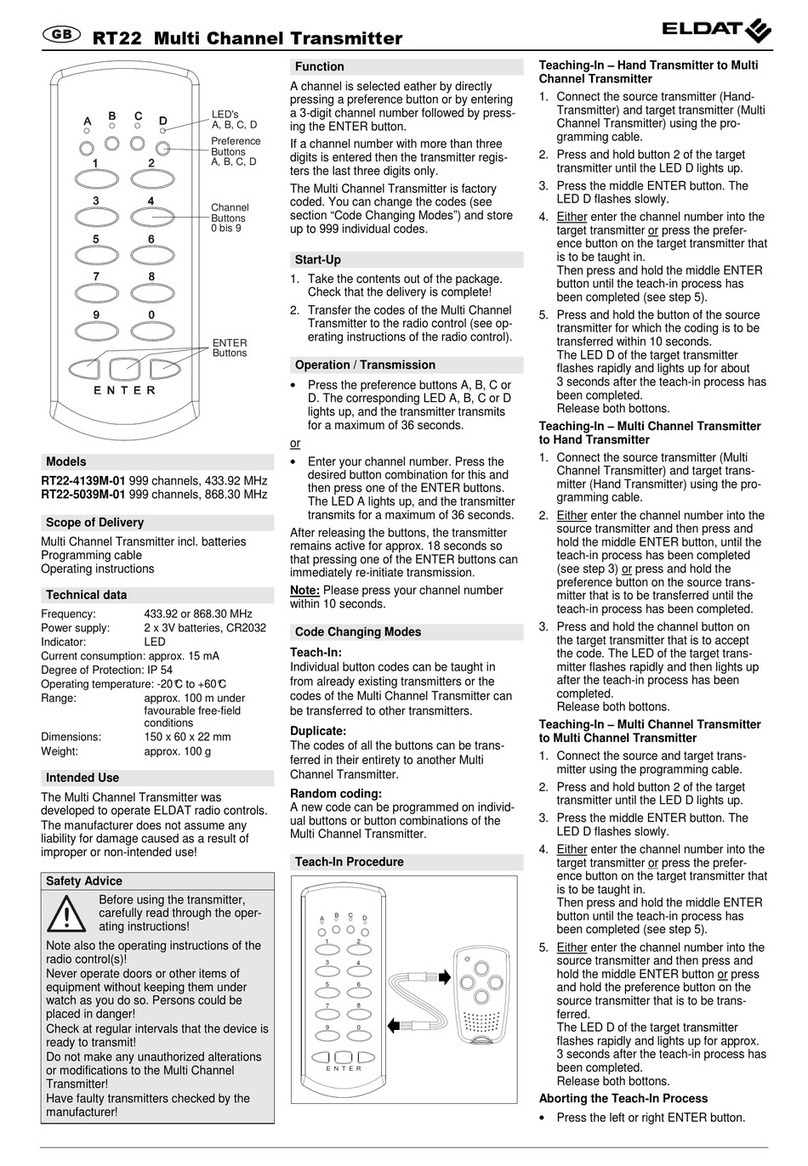
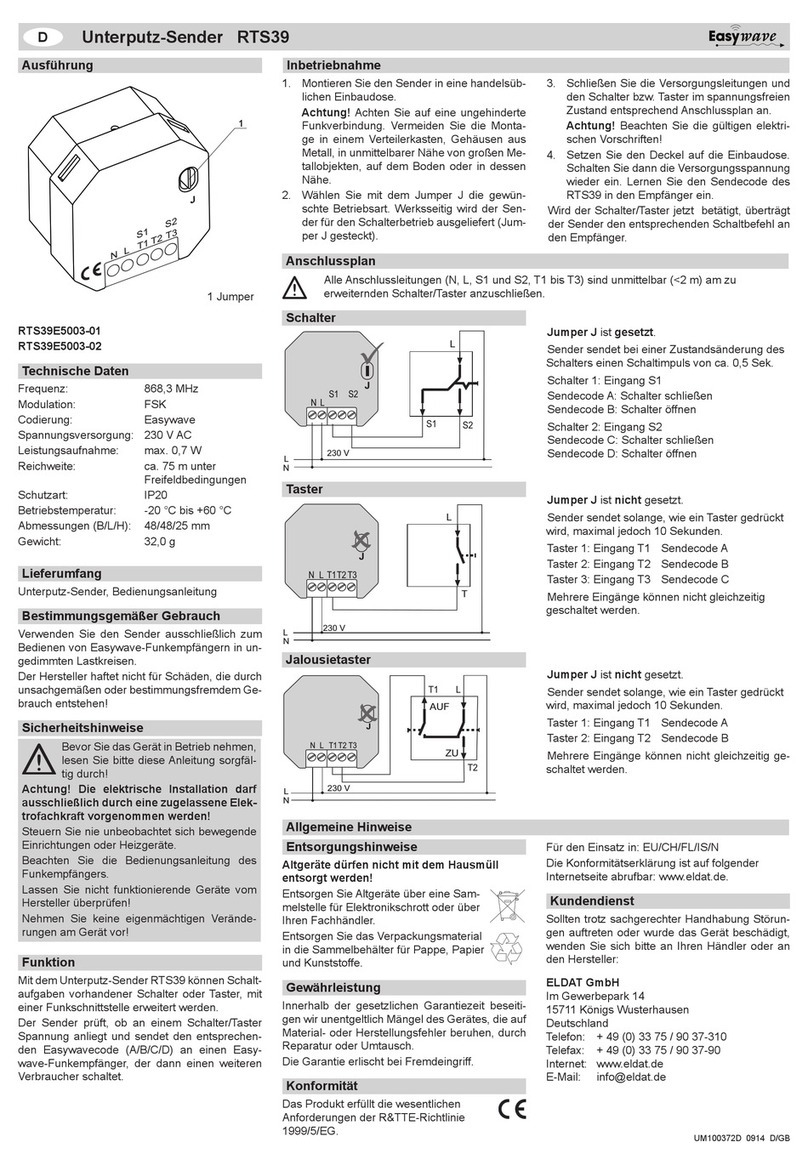
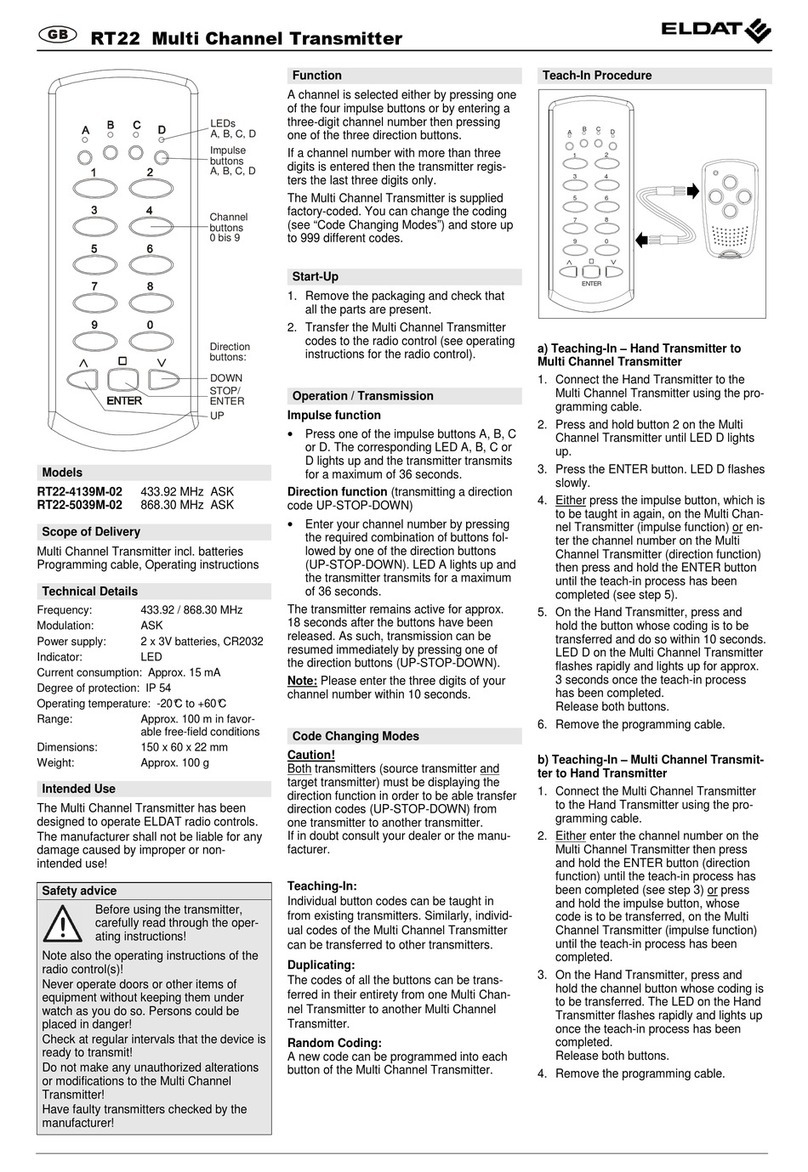
Eldat RT39 User manual

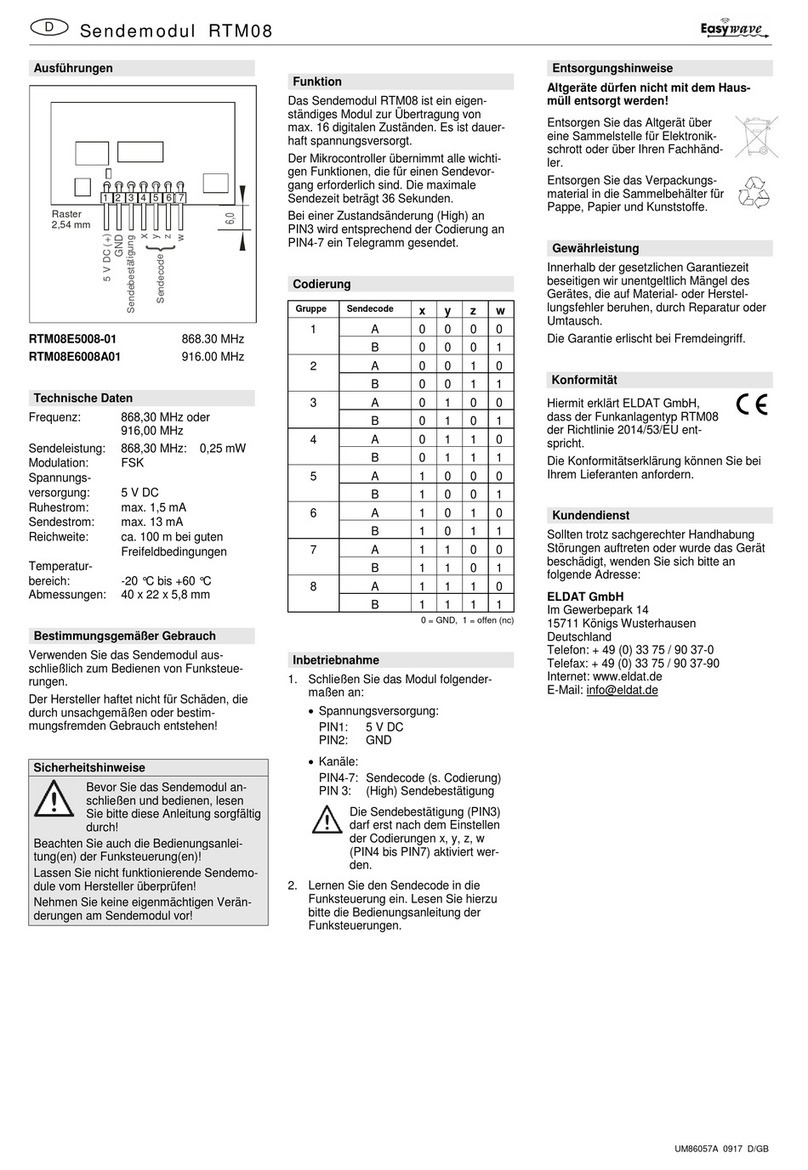
Additional functions:
Sun protection mode:
It is possible to activate or deactivate a sun pro-
tection mode that is supported by a receiver.
If a set brightness value is exceeded and the sun
protection mode is activated, the receiver will lo-
wer the shutter automatically to a shade position.
This function has to be supported by the receiver
in order to use it.
Switching between summertime and
wintertime:
The hand transmitter can be switched to summer-
time or wintertime by pressing only one button.
ASTRO function:
With the ASTRO function it is possible to operate
shutters automatically depending on the current
position of the sun.
Shutters can be raised or lowered intentionally at
sunrise or sunset.
Calculation of the solar time depending
on the location:
By entering the geographical coordinates of your
location and the current date, sunset and sunrise
can be calculated to the minute.
Blocking times:
It is possible to program the earliest and the latest
switching time for the ASTRO function.
The earliest blocking time denes the point of
time from which a switching command may be
carried out.
If the sun rises/sets before this point of time, the
shutter will raise/lower only at the programmed
blocking time.
The latest blocking time denes the point of time
on which a switching command has had to be car-
ried out at the latest.
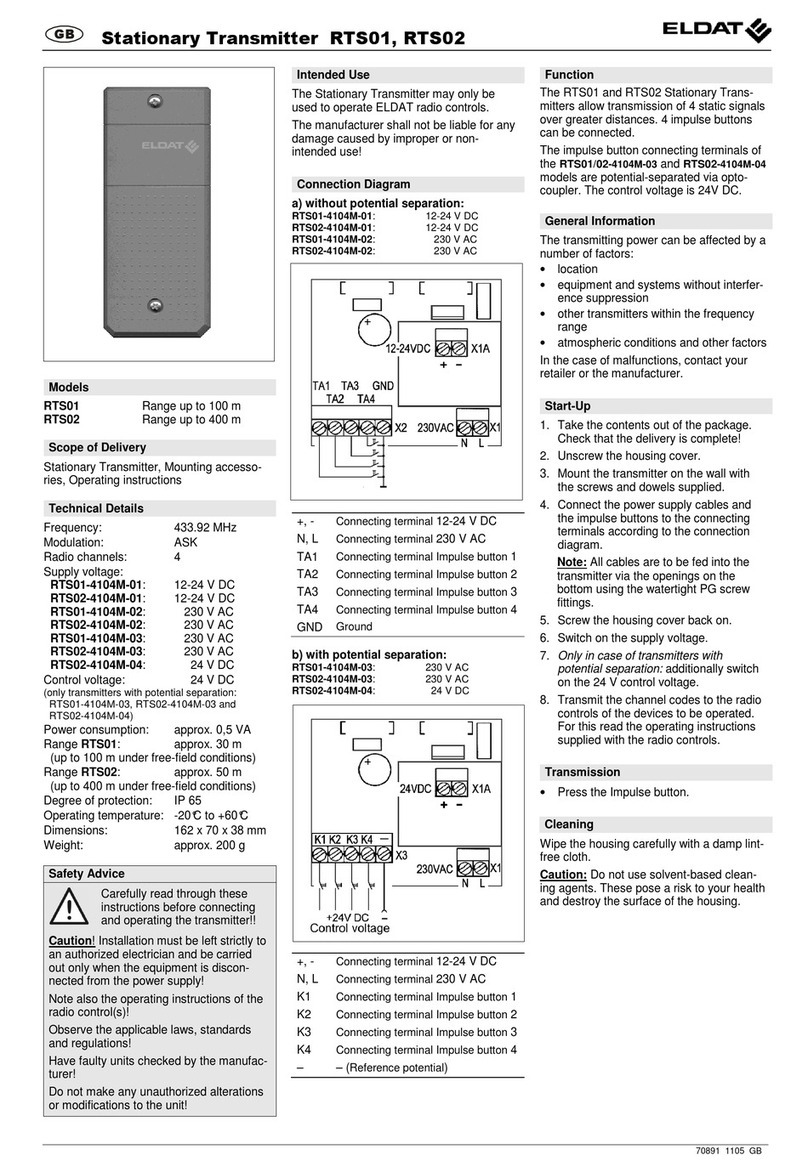
If the sunrise has been calculated only after this
point of time, the switching command will be car-
ried out regardless of current position of the sun.
Programming individual offsets for sunset
and sunrise:
It is possible to oset the switching times calcu-
lated for sunrise and sunset manually from -120
minutes to +120 minutes.
This temporal oset can be programmed indivi-
dually in the basic settings (system menu )
of the hand transmitter for sunrise and sunset.
The setting is valid for all of the channels which
use the ASTRO function.
Model
RT39E5023-01
Technical data
Frequency: 868.30 MHz
Radiated power: 0.02 mW
Modulation: FSK
Coding: Easywave
Range:
- free eld conditions approx. 150 m
- in the building approx. 30 m
Channels: 30
Memory slots: 99
Voltage supply: 1 x CR2430 or CR2032
(The term of the transmitter
shortened by use CR2032.)
Power reserve: approx. 1 min
Operating Temperature: 0 °C to +50 °C
Dimensions: approx. 120 x 52 x 13 mm
Weight: 74 g (incl. battery CR2430)
Scope of delivery
Hand transmitter incl. timer RT39, operating inst-
ructions, battery CR2430
Intended use
The hand transmitter RT39 may only be used to
operate Easywave radio receivers.
The manufacturer shall not be liable for any da-
mage caused by improper or non-intended use!
Safety instructions
Please read the operating instructions
carefully before using the hand trans-
mitter!
Also read the operating instructions for the de-
vices to be controlled!
The automatic control of systems or devices
that need to be supervised is not permitted!
Do not modify the devices!
Keep the hand transmitter and the batteries
away from children!
Have faulty hand transmitters checked by the
manufacturer!
RT39 Display-Transmitter with Timer
GB
Factory settings
The hand transmitter has been programmed with
the following settings:
• Time: 00:00 o'clock, date 01. Jan 2015
• Number of channels: 30
• Temporal oset: sunrise/sunset ± 0 minutes
• The ASTRO function has been programmed
with the coordinates of Berlin (52° N, 13° E).
• Time zone UTC +1
Switching times have not been programmed.
The factory settings can be reset at any time (see
page 7).
Function
The hand transmitter RT39 is used in order to
operate Easywave radio receivers, e. g. lights,
shutters or blinds, manually or time-dependent.
The hand transmitter has 30 radio channels so
that radiograms can be sent to control up to 30
Easywave radio receivers individually or simul-
taneously. The radio channels can be combined
in up to 9 groups for the simultaneous control.
It is possible to program up to 99 switching times.
In case of any voltage supply interruption, the
switching times remain programmed.
The following operating modes are availa-
ble:
1. Automatic mode:
Receivers are controlled depending on time or
with the help of the ASTRO function. The pro-
grammed switching times are active.
The following settings are available in automatic
mode:
• Day function: switching period 24 hours or
week function: switching period one week
• Individual switching times: Dierent swit-
ching times can be programmed for each
radio channel, each weekday or several
weekdays.
• Intermediate position: Lowering shutters
to a desired shade position.
2. Manual mode:
Receivers are controlled only by pressing a but-
ton.
Manual operation is possible in all of the modes.
3. Automatic mode with
partial manual mode:
The programmed switching times as well as the
sun protection/twilight mode are deactivated until
00:00 o'clock. All of the radio receivers are con-
trolled manually. At midnight (00:00 o'clock), the
clock returns automatically to automatic mode.
4. Automatic mode with
holiday mode:
Shutters and other Eaysywave radio receivers
are operated with a random temporal oset (max.
±30 minutes) to the programmed times in auto-
matic mode. That way, your house appears to be
occupied during your absence.
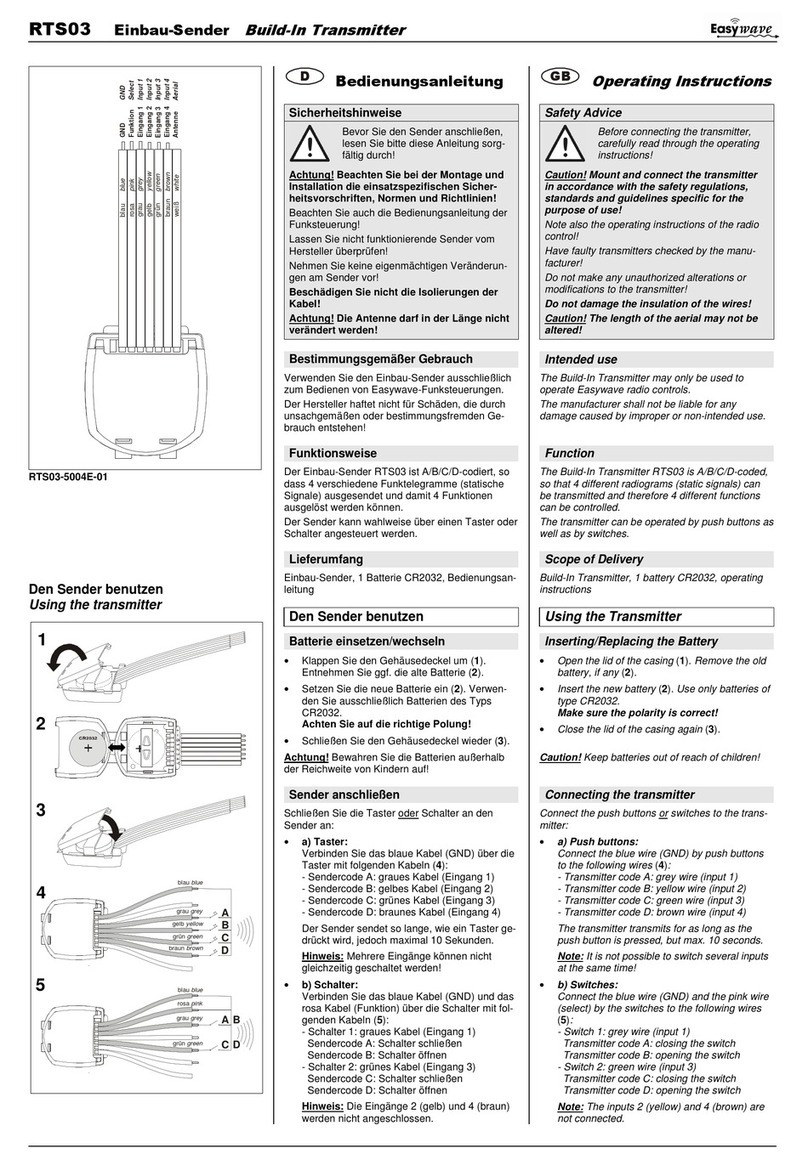
1
ESC P
MODE
123
456
7 8 9
0
UP/ON (A)
STOP (C)
DOWN/OFF (B)

Menu level: Level 1 Level 2 Level 3 Level 4
ASTRO function
Weekdays Battery view
Time/menu items/etc. Signal transmission
Wintertime/summertime Intermediate position
Operating mode Current time setting
Direction Holiday mode
Weekday setting Sun protection mode on/o
MANU
AUTO
Display
In standby, the weekday, time, summertime or
wintertime and the set operating mode are dis-
played.
In programming mode however, the user can see
which settings can be changed by dierent dis-
played symbols. The meaning of the symbols is
explained in the adjacent gure.
Weekdays:
MO Monday
TU Tuesday
WE Wednesday
TH Thursday
FR Friday
SA Saturday
SU Sunday
Product overview
The learning button PTx is located on the back of
the transmitter under the battery cover.
With the help of the learning button you can pro-
gram new radio transmitters into receivers which
are already installed so that the learning button
is inaccessible (see page 3, "Programming recei-
vers via radio").
PTx
Press briey:
Press the button for less than 1.6
seconds.
Press and hold:
Press the button for more than 1.6
seconds.
Programming mode:
Buttons used to navigate and to operate in the
programming menu:
ESC button:
Moving one step back in the menu or quitting
programming without saving.
By holding the button pressed, the hand trans-
mitter returns to standby.
Direction buttons:
left/right Navigation in the menu.
up/down Change of
settings.
Holding the button pressed accelerates the run.
OK button:
Opens menu items.
Veries and saves entries.
Number buttons:
Used to enter
numerical values (e. g. time,
date, channel quick search)
In order to enter 2-digit num-
bers (values), press the cor-
responding number buttons
successively fast (< 2 s).
If you do not press a button within 5 minu-
tes during programming, the hand transmitter
will automatically return to standby.
Standby
Buttons used to control Easywave radio recei-
vers manually:
ESC button:
Return to the start screen.
P button:
Hold the button pressed to open the program-
ming menu.
Direction buttons:
left/right Switching between
channels and groups.
up/down Raising and lowering
shutters, for example.
Stop button:
Stops the raising/lowering.
Number buttons:
Press briey:
Direct selection of a channel.
Press and hold:
Direct selection of a group.
In order to enter 2-digit numbers (channels),
press the corresponding number buttons succes-
sively fast (< 2 s).
If an invalid channel value is entered during
standby, the hand transmitter will detect the inva-
lidity. In this case, the hand transmitter shows the
latest selected channel.
MODE button:
Switching between the 4 operating modes.
Sun/moon button:
Press briey:
Activating or deactivating the sun protection
mode in compatible receivers.
Press and hold:
Switching between summertime and wintertime.
If you do not press a button within 30 seconds
during programming, the hand transmitter will
automatically return to standby.
Buttons
ESC P
MODE
123
456
7 8 9
0
MODE
P
ESC
ESC
Display
Learning button PTx
2

Inserting the battery
1. Open the battery compartment.
2. (Remove the battery.)
3. Insert a new battery.
4. Slide the cover until it locks.
After removing the battery, the programming
will be maintained indenitely. Time and date
settings are retained for at least one minute.
Programming the transmission codes
In order to control Easywave receivers with the
RT39 transmitter, the individual channels have to
be programmed into the appropriate receivers at
rst.
Please read the operating instructions
supplied with the particular receivers.
Programming a channel into the receiver:
1. Activate the learning mode on the receiver.
2. Select a channel on the hand transmitter.
3. Press the or button.
4. Quit the learning mode on the receiver.
Programming a low voltage telegram
This function has to be supported by the
receiver.
In case of a low battery, the RT39 transmitter
sends a low voltage telegram. This telegram can
be evaluated by receivers with the corresponding
functionality.
For this, the telegram has to be programmed into
the receiver.
1. Activate the learning mode on the receiver
with low voltage detection.
2. Set the RT39 transmitter to standby (time is
shown).
3. Hold the MODE button on the transmitter
pressed (> 1.6 s).
4. Quit the learning mode on the receiver.
→ the telegram has been programmed
In case of a low battery, the RT39 transmitter
sends a low voltage telegram every six hours
(00:00, 06:00, 12:00, 18:00). Change the battery
as soon as possible.
Programming receivers via radio
This function has to be supported by the
receiver. For further information, please
read the relevant operating instructions.
In order to use this function, the transmitter
had to be programmed into the particular re-
ceiver already.
All receivers, which are located in the recepti-
on area und are programmed with the selected
channel, will be activated.
Sending a learn and delete telegram:
1. Open the battery compartment.
2. Press the learning button PTx briey
(< 1.6 s).
→ is shown
3. Select the channel of the desired radio recei-
ver (e. g. ).
4. Press the or button briey
(< 1.6 s) in order to send the learn telegram
OR
Hold the or button pressed
(> 5 s) in order to send the delete telegram.
→ The learning or deleting mode was acti-
vated in the corresponding receiver and may
be used according to the operating instruc-
tions supplied with the receiver.
Sending a reset telegram:
1. Open the battery compartment.
2. Hold the learning button PTx pressed
(> 5 s).
→ is shown
3. Select the channel of the desired radio recei-
ver (e. g. ).
4. Hold the or button pressed (> 5 s).
→ The reset telegram will be sent. Please
read the operating instructions supplied with
the receiver.
Press the ESC button in order to abort pro-
gramming at any time and to return to stand-
by.
If you do not press a button within 30 seconds
during programming, the hand transmitter will
automatically return to standby.
Setting summertime/wintertime
In standby, the current time is shown. Hold the
button pressed (> 1.6 s) in order to switch
between summertime and wintertime.
The rst adjustment should be done in the pro-
gramming menu.
CR2430
Attention! The posi-
tive pole has to be
visible.
Setting the operating mode
In all operating modes, shutters can be
raised, lowered and stopped also manually.
Press the MODE button briey (repeatedly) in or-
der to switch between the operating modes.
"AUTO"
In automatic mode, shutters are controlled at the
programmed switching times.
It is possible to move shutters to intermediate
positions automatically as well as to operate ma-
nually.
"MANU"
Manual operation by pressing the and button.
In this operating mode, programmed switching
times won't be considered.
"AUTO/MANU"
The automatic mode is deactivated until midnight
(00:00 o'clock). After midnight, the radio timer re-
turns automatically to the operating mode "AUTO"
so that the hand transmitter controls the shutters
again at the programmed switching times.
This mode prevents shutters temporarily from lo-
wering automatically at undesired times, e. g. on
a terrace door during a party.
"AUTO [holiday]"
Automatic mode where the programmed swit-
ching times vary randomly for at most ± 30 mi-
nutes.
Activating/deactivating the sun protection
In order to use the sun protection func-
tion, a suitable receiver has to be availa-
ble.
By pressing the button, a sun protection func-
tion in the receiver can be switched on or o al-
ternately for selected channels and/or groups. In
sun protection mode, the shutter lowers automati-
cally to the shade position.
For further information, please read the opera-
ting instructions supplied with the receivers.
Deactivating/activating the sun protection
mode:
1. Select a channel or group.
2. Press the button briey in order to
activate the sun protection function.
→ the sun icon ashes
3. Press the button briey again
in order to deactivate the
sun protection function.
→ the moon icon ashes
By pressing the button again, the sun protec-
tion mode is activated or deactivated alternately.
General
You can set and change the basic settings for the
handtransmitterincl. timerinthe system menu.Fur-
thermore, you can congure channels and program
switching times.
Open the programming menu by holding the P
button pressed (> 1.6 s). The current program-
ming level is shown by horizontal bars on the dis-
play (see page 2).
If you do not press a button for 5 minutes during
programming, the hand transmitter will automati-
cally return to standby.
Start-up
Programming
Navigating in the programming menu
Navigate in the menu via . Adjustable values
are blinking and may be changed via . By pres-
sing the button you can select individual menu
items and save settings.
Press the ESC button in order to navigate to the
superior menu level or to quit the menu item wit-
hout saving.
Hold the ESC button pressed (> 1.6 s) in order
to quit the programming menu and to return to
standby.
Programming individual switching times
Switching times control the operation of the recei-
vers in the programming modes "AUTO" or
"AUTO/MANU". For this purpose, you can change
the following settings in the menu item :
time, weekdays, direction of motion, intermediate
position and ASTRO function.
The switching time will only be saved if all of the
settings mentioned above have been processed.
If you press the button before having processed
all of the settings, you will proceed to the next set-
ting.
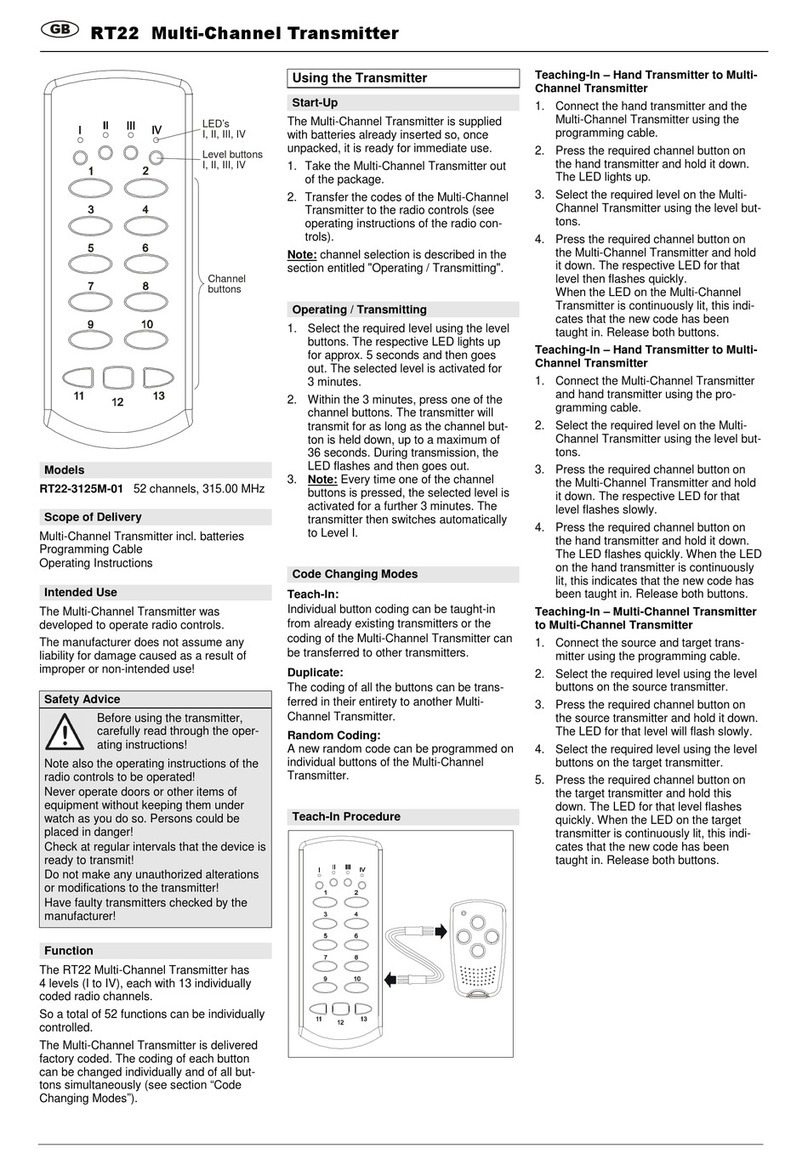
3
programming menu
system runtime groups switch. times
SYS (system menu)
Includes all of the basic settings such as time,
location, temporal oset for sunrise/sunset,
time zone and number of the usable channels
on the device.
Entering system data
Setting the time:
1. Press to open the menu
item .
→ clock icon appears at the bottom
→ values to be set are blinking
2. Use to switch between hour, minute
and summertime/wintertime.
3. Use or number buttons to enter hour, mi-
nute and summertime/wintertime.
4. Press to save settings and quit.
Setting the date:
1. Press to open the menu
item .
→ date icon appears at the bottom
→ values to be set are blinking
2. Use to switch between day, month
and year.
3. Use or number buttons to enter day,
month and year.
4. Press to save settings and quit.
Entering the coordinates:
1. Press to open the menu
item .
→ "ASTRO" appears above the indication
2. Use to switch between (latitu-
de), (longitude) or (time zone).
3. Press .
4. Use or number buttons to enter an inte-
ger value (-90 to 90, -180 to 180, -11 to 12
change sign with , see page 6).
5. Press to save settings.
6. Repeat the process for the other value or
quit with ESC.
Setting the offset:
Dene a temporal oset to the calculated time of
sunrise ( ) and sunset ( ) in .
1. Press to open the menu item .
2. Use to switch between and
3. Press .
4. Use or number buttons to enter an
integer value (-120 to 120, change sign
with ).
5. Press to save settings and quit.
6. Repeat the process for the other value or
quit with ESC.
Dening the number of channels:
1. Press to open the menu
item .
2. Use or number buttons to select the desi-
red channel number (max. 30).
3. Press to save settings and quit.
Measuring the runtimes
The shutter has to be raised completely
in order to start measuring the runtimes.
The runtime can be measured and overwritten
as often as desired for each channel.
For channels, where the runtime has already
been measured, the icon for the intermediate
position is shown in the menu .
Measuring the runtime for
a channel:
1. Use or the number buttons to select
the channel for the runtime measu-
rement.
2. Press .
→ is shown
3. Press .
→ the shutter raises automatically and
→ is shown
Measuring the runtime to lower the
shutter
4. Hold pressed until the shut-
ter is lowered completely.
( is shown)
Then, release the button.
→ is shown
Measuring the runtime to raise the
shutter
5. Hold pressed until the shut-
ter is raised completely.
( is shown)
Then, release the button.
→ is shown (2 s)
→ you return to the channel selection
→ the settings have been saved
6. Repeat the process, if necessary.
Deleting the runtime for
a channel:
The runtime can be deleted in order to use the
channel for other Easywave radio receivers.
1. Use to select a channel.
2. Press .
3. Use to select a menu item .
(only available when a runtime has been
measured)
4. Press .
5. Use to switch to .
(at the runtime is not deleted)
6. Press to delete the runtime and quit.
→ is shown (2 s)
→ you return to the channel selection (1.)
Dening groups
Adding channels to a group:
A channel can be added to several groups.
1. Use to select a group.
2. Press .
3. Use to select the menu item .
4. Press .
5. Use or the number buttons to select the
channel you want to add.
→ channels that have already been
added cannot be selected
6. Press to save.
→ you return to the menu item .
7. If necessary, repeat the process in order to
add further channels to the group.
Deleting channels from a group:
Deleted channels are no longer in
the group.
1. Use to select a group.
2. Press .
3. Use to select the menu item .
4. Press .
5. Use to select the channel you want to
delete from the group.
6. Press to conrm and quit.
→ you return to the menu item
7. If necessary, repeat the process in order
to delete further channels from the group.
Displaying channels of a group:
The menu item only serves for checking
purposes. You cannot change settings.
1. Use to select a group .
2. Press .
3. Use to select the menu item .
4. Press .
5. Use to display channels.
6. Press or ESC to quit the menu.
Deleting all channels from
a group:
1. Use to select a group.
2. Press .
3. Use to select the menu item .
4. Press .
5. Use to switch to .
(at the channels are not deleted from
the group)
6. Press to delete and quit.
→ is shown (2 s)
→ you return to the group selection (1.)
SPAN (measurement of runtimes)
The hand transmitter can move shutters to
intermediate positions. In order to use this
function, you have to measure the runti-
mes of the respective channels in this menu.
GRPS (groups)
Permits to combine several channels in groups
and to control them simultaneously. It is possib-
le to dene up to 9 dierent groups ( to
).
4

programming menu
system runtime groups switch. times
Programming new switching times
You can dene new switching times in .
The numerical value behind " " indicates how
many free memory slots are still available ( -- =
all memory slots are occupied). You can program
only one switching time per direction of motion.
Changing existing switching times
Existing switching times are displayed under the
set time (e. g. ) in the menu item . If
the switching time was selected by it can be
changed in the menu item .
ADD, DEL, DISP, DELP
This is were channels/groups are dened which
shall be added to a new or existing switching
time. Only added channels/groups are cont-
rolled by a switching time.
1. Switching time
Press to open or add a switching time.
→ values to be set are blinking
→ appears at the bottom
1. Use to switch between hour and minu-
te.
2. Use or number buttons to enter hour and
minutes.
3. Press the direction button to move on to
the next item.
This is were you dene the switching time at
which a switching command will be carried out.
When editing existing switching times
you can save changes in the whole
menu immediately and return to
by pressing .
Abort programming by pressing ESC.
2. Weekdays
→ the weekdays are blinking
→ appears at the bottom
4. Use
to select the desired weekdays.
5. Press to move on to the next item.
(press to move back to the previous
item)
This is where the weekdays are dened at
which a switching command will be carried out.
The following settings are possible:
• whole week (MO - SU)
• work week (MO - FR)
• weekend (SA, SU)
• individual days (e. g. TH)
3. Direction of motion
→ the direction of motion
is blinking
→ appears at the bottom
6. Select the direction of motion or by
using .
7. Move on to the next item by pressing .
(move back to the previous item by
pressing )
The direction of motion of the shutters is de-
ned.
The following settings are possible:
• raise the shutters ( )
• lower the shutters ( )
4. Intermediate position
→ the intermediate position
is blinking
→ appears
8. Use
to set the intermediate position in
steps of ve. The percentages refer to the
runtimes, they are not the absolute position
of the shutter!
9. Press
to move on to the next item.
(press to move back to the previous
item)
The intermediate positions dene how far the
shutters raise or lower.
In case of the setting "100 %" at:
: the shutter is lowered and at
: the shutter is raised.
The percentage for the intermediate positions
is set in steps of ve.
In order to be able to drive the shutters into an intermediate position, you have to measure the
runtimes of the respective channels in the menu.
5. ASTRO function
→ the ASTRO function
is blinking
→ appears
10. Use the direction buttons to select the
ASTRO mode .
11. Press to save the set switching times
and quit.
When programming a new switching time
takes place a change in the menu ,
to add the switching time to the channels
(see „Conguring switching times“).
Please nd detailed information about the
ASTRO function on the next page.
In order to use the Astro-function, the
following values you have to be set in the
menu correctly: time, date, coordi-
nates, time zone.
Conguring switching times
Adding channels/groups to
switching times:
A channel/group can be added to several
switching times.
1. Use to select a switching time.
2. Press .
3. Use to select the menu item .
4. Press .
5. Use to select the channel/group you want
to add to the switching time.
→ channels/groups that have already been
added cannot be selected
6. Press to save and quit.
→ move back to the menu item
7. If necessary, repeat the process in order to
add further channels/groups.
Deleting channels/groups from
switching times:
Deleted channels are no longer part
of the switching time.
1. Use to select a switching time.
2. Press .
3. Use to select a menu item .
4. Press .
5. Use to select the channel/group you want
to delete from the switching time.
6. Press to delete and quit.
→ move back to the menu item
7. If necessary, repeat the process in order to
delete further channels.
Displaying channels/groups of
switching times:
The menu item only serves for checking
purposes. You cannot change settings.
1. Use to select a switching time.
2. Press .
3. Use to select the menu item .
4. Press .
5. Use to display channels/groups.
6. Press or ESC to quit the menu.
→ move back to the menu item
Deleting a switching time
including all settings:
1. Use to select a switching time.
2. Press .
3. Use to select the menu item .
4. Press .
5. Use to switch to .
(at the switching time is not deleted)
6. Press to delete and quit.
→ is shown (2 s)
→ move back to the menu item xx
5

ASTRO modes
The sunset/sunrise switching times are
calculated as follows:
Sunrise/sunset at set coordinates ± tem-
poral oset in the settings in the
system menu.
The following settings are possible:
1.
2.
3. (early)
4. (late)
For the ASTRO function, the following is essential:
If the set switching time is before noon, the ASTRO function will
operate based on the sunrise time. After noon, the ASTRO func-
tion operates based on the sunset time.
In case of the and function, the switching times are
called blocking times.
Switching commands before the blocking time in case of or
after the blocking time in case of are adapted by the sys-
tem accordingly.
Sunrise
Switching time
before noon
Sunset
Switching time
after noon
ASTRO
The ASTRO function is deactivated. The shutters raise/lower at the program-
med switching time.
Sunrise/sunset are not considered.
ASTRO
The shutters are raised/lowered at the calculated sunrise or sunset time (+/- a
possibly dened oset). The programmed switching time will be ignored.
ASTRO (latest possible blocking time)
The programmed switching time will be used as the latest possible blocking
time.
The switching command to raise/lower the shutter will be carried out at the
latest with the programmed switching time.
Example:
Latest blocking
time
Sunrise time Carried out at
7:30 o‘clock
(< noon =
sunrise)
06:30 o‘clock 06:30 o‘clock
08:00 o‘clock 7:30 o‘clock
Latest blocking
time
Sunset time Carried out at
09:00 o‘clock
(> noon =
sunset)
20:30 o‘clock 20:30 o‘clock
22:00 o‘clock 21:00 o‘clock
ASTRO (earliest possible blocking time)
The programmed switching time will be used as the earliest possible blocking
time.
The switching command to raise/lower the shutter will be carried out at the
earliest with the programmed switching time.
Example:
Earliest blocking
time
Sunrise time Carried out at
7:30 o‘clock
(< noon =
sunrise)
06:30 o‘clock 7:30 o‘clock
08:00 o‘clock 08:00 o‘clock
Earliest blocking
time
Sunset time Carried out at
09:00 o‘clock
(> noon =
sunset)
20:30 o‘clock 21:00 o‘clock
22:00 o‘clock 22:00 o‘clock
Coordinates of German cities
City Latitu-
de *)
Longi-
tude **)
Time
zone
(UTC) ***)
Berlin
Bremen
Dusseldorf
Dresden
Erfurt
Hanover
Hamburg
Kiel
Magdeburg
Mainz
Munich
Potsdam
Saarbrücken
Schwerin
Stuttgart
Wiesbaden
52°
53°
51°
51°
51°
52°
54°
54°
52°
50°
48°
52°
49°
54°
49°
50°
13°
9°
7°
14°
11°
10°
10°
10°
12°
8°
12°
13°
7°
11°
9°
8°
+1
+1
+1
+1
+1
+1
+1
+1
+1
+1
+1
+1
+1
+1
+1
+1
Coordinates of European cities
City Latitu-
de *)
Longi-
tude **)
Time
zone
(UTC) ***)
Amsterdam
Andorra la Vella
Athens
Belgrade
Bern
Bratislava
Brussels
Budapest
Bucharest
Chisinau
Dublin
Helsinki
Copenhagen
Lisbon
Ljubljana
London
Luxembourg
Madrid
Minsk
Monaco
Moscow
Nicosia
Oslo
Paris
Podgorica
Prague
Reykjavík
Riga
Rome
San Marino
Sarajevo
Skopje
Soa
Stockholm
Tallinn
Tirana
Vaduz
Valletta
Vatican City
Vilnius
Warsaw
Vienna
Zagreb
52°
43°
38°
45°
47°
48°
51°
47°
44°
47°
53°
60°
56°
39°
46°
52°
50°
40°
54°
44°
56°
35°
60°
49°
42°
50°
64°
57°
42°
44°
44°
42°
43°
59°
59°
41°
47°
36°
42°
55°
52°
48°
46°
5°
2°
24°
20°
7°
17°
4°
19°
26°
29°
-6°
25°
13°
-9°
15°
0°
6°
-4°
28°
7°
38°
33°
11°
2°
19°
14°
-22°
24°
12°
12°
18°
21°
23°
18°
25°
20°
10°
15°
12°
25°
21°
16°
16°
+1
+1
+2
+1
+1
+1
+1
+1
+2
+2
0
+2
+1
0
+1
0
+1
+1
+2
+1
+3
+2
+1
+1
+1
+1
0
+2
+1
+1
+1
+1
+2
+1
+2
+1
+1
+1
+1
+2
+1
+1
+1
The coordinates can be entered as integer values only. Due to this, slight
inaccuracies in the calculation of sun set and sun rises may occur.
6
**) Longitude, adjustable from -180° to 180°
east: + (positive values)
west: - (negative values)
*) Latitude, adjustable from -90° to 90 °
north: + (positive values)
south: - (negative values)
***) Time zone (UTC), adjustable from -11 h to 12 h
Is used for ASTRO function only,
does not aect the set time.

Disposal
Waste electronic equipment must not be
disposed of with household waste!
Dispose of the waste product via collec-
tion facilities for electronic scrap or via
your specialist dealer.
Dispose of used batteries in a recycling
bin for batteries or via the specialist trade.
Dispose of packaging material in the recy-
cling bins for cardboard, paper and plastic.
Troubleshooting
Description of faults Fault Remedy
The battery symbol appears on the display,
if the transmitter is in operating mode.
The battery is weak. Replace the battery (see page 3).
There is no visible display. The battery is inserted incorrectly or empty. Check the batteries polarity or replace the battery
(see page 3).
The radio control does not react to the press of a
button in manual mode.
Channels are not programmed into the receiver
correctly.
Reprogram the channels (see page 3).
The hand transmitter does not react to the pro-
grammed switching commands.
A wrong operating mode has been set.
Switching times have been programmed incor-
rectly.
Channels are not programmed into the receiver
correctly.
Switch to the operating mode "automatic mode"
(see page 3).
Check the switching times (see page 5 - 7).
Reprogram the channels, if necessary (page 3).
The shutter is not driving into the desired position. The runtimes are incorrect. Measure the runtimes again (see page 4).
It is not possible to select a channel in the menu
item .
The number of the usable channels is too low. Add more channels under .
(see page 4).
The ASTRO function calculates inexact times. The ASTRO settings have been congured in-
exactly.
Set the correct coordinates and the exact date in
the system menu.
When creating a new switching time „doub“
appears on the display.
There is already an identically switching time pro-
grammed.
Choose another combination of time, direction
and days.
Entered numbers are not accepted. Invalid value entered. Enter valid values.
Warranty
Within the statutory warranty period we undertake
to rectify free of charge by repair or replacement
any product defects arising from material or pro-
duction faults. Any unauthorized tampering with,
or modications to, the product shall render this
warranty null and void.
Conformity
Hereby, ELDAT GmbH declares that the
radio equipment type RT39 is in compliance with
Directive 2014/53/EU. The full text of the EU de-
claration of conformity is available at the following
internet address: www.eldat.de
Customer service
If the device does not work properly despite
proper handling or in case of damage, please
contact the manufacturer or your retailer.
ELDAT GmbH
Im Gewerbepark 14
15711 Königs Wusterhausen
Germany
Phone: + 49 (0) 33 75 / 90 37-310
Fax: + 49 (0) 33 75 / 90 37-90
Internet: www.eldat.de
E-mail: [email protected]
General information
The reset function is used to apply the factory
settings of the hand transmitter. All saved settings
will be deleted.
Switching time - examples
Example
At the weekend, all
shutters shall raise with
sunset but at 07:30
o‘clock at the earliest.
During the work week,
the shutters on the
ground oor shall be lo-
wered at 21:00 o‘clock.
In the evening, the
shutters shall be lowe-
red halfway 30 minutes
after the sunset but
at the latest at 20:30
o‘clock.
The shutters in the
bedroom shall raise
slightly every day as
soon as it is bright
outside (approx. 20 mi-
nutes before sunrise).
On Wednesdays, the
shutters in the living
room shall lower at
sunset but be raised
until at least 21:30
o‘clock.
OFFS settings RISE ± 0 minutes - SET + 30 minutes RISE - 20 minutes SET ± 0 minutes
Switching time 7:30 o‘clock 20:00 o‘clock 20:30 o‘clock before noon 21:30 o‘clock
Weekday SA, SU MO - FR MO - SU MO - SU WE
Direction of motion UP DN DN UP DN
Intermediate posi-
tion
100 % 100 % 50 % 25 % 100 %
ASTRO EARL OFF LATE ON EARL
Channels/group(s) all shutters ground oor shutters all shutters bedroom shutters living room shutters
2x
Resetting the transmitter
1. Hold both buttons pressed
simultaneously (> 1.6 s).
→ all numbers are blinking
2. Hold both buttons pressed
again (> 1.6 s).
→ all numbers are ashing for
3 seconds (reset was success-
ful)
P
> 1,6
s
ESC
The transmitter has returned to standby. The
factory settings have been reset.
7

Channel Description Group
e. g. Ch01 left kitchen window }GR**
Ch01
Ch02
Ch03
Ch04
Ch05
Ch06
Ch07
Ch08
Ch09
Ch10
Ch11
Ch12
Ch13
Ch14
Ch15
Ch16
Ch17
Ch18
Ch19
Ch20
Ch21
Ch22
Ch23
Ch24
Ch25
Ch26
Ch27
Ch28
Ch29
Ch30
Swit. time Description Channels
08:30 pm SET + 30 minutes, MO - SU, DN, 50 %, LATE Ch01,Ch02,Ch03...
UM120198B 0917 GB
Table of contents
Other Eldat Transmitter manuals

Eldat
Eldat RT37 User manual

Eldat
Eldat Easywave RTS03 User manual

Eldat
Eldat RT35-4104M-01 User manual

Eldat
Eldat secwave RT42 User guide

Eldat
Eldat Easywave RTM08 Series User manual

Eldat
Eldat Easywave RTS43 User manual

Eldat
Eldat RTS01 Series User manual

Eldat
Eldat RT22-4139M-02 User manual

Eldat
Eldat RT22-4139M-01 User manual

Eldat
Eldat RT22-3125M-01 User manual
Popular Transmitter manuals by other brands

M-E
M-E ODYON pro HS1 instruction manual

EnOcean
EnOcean easyfit PTM 250 Installation and operating instructions

Becker
Becker Centronic MemoControl MC441-II Assembly and operating instructions

Emerson
Emerson Rosemount 2051HT quick start guide

Transmitter Solutions
Transmitter Solutions Stinger 2 390GED21V2 manual

Seasafe
Seasafe SSTX/01 user manual