manuals.online logo
Brands
  1. Home
  2. •
  3. Brands
  4. •
  5. Eldat
  6. •
  7. Transmitter
  8. •
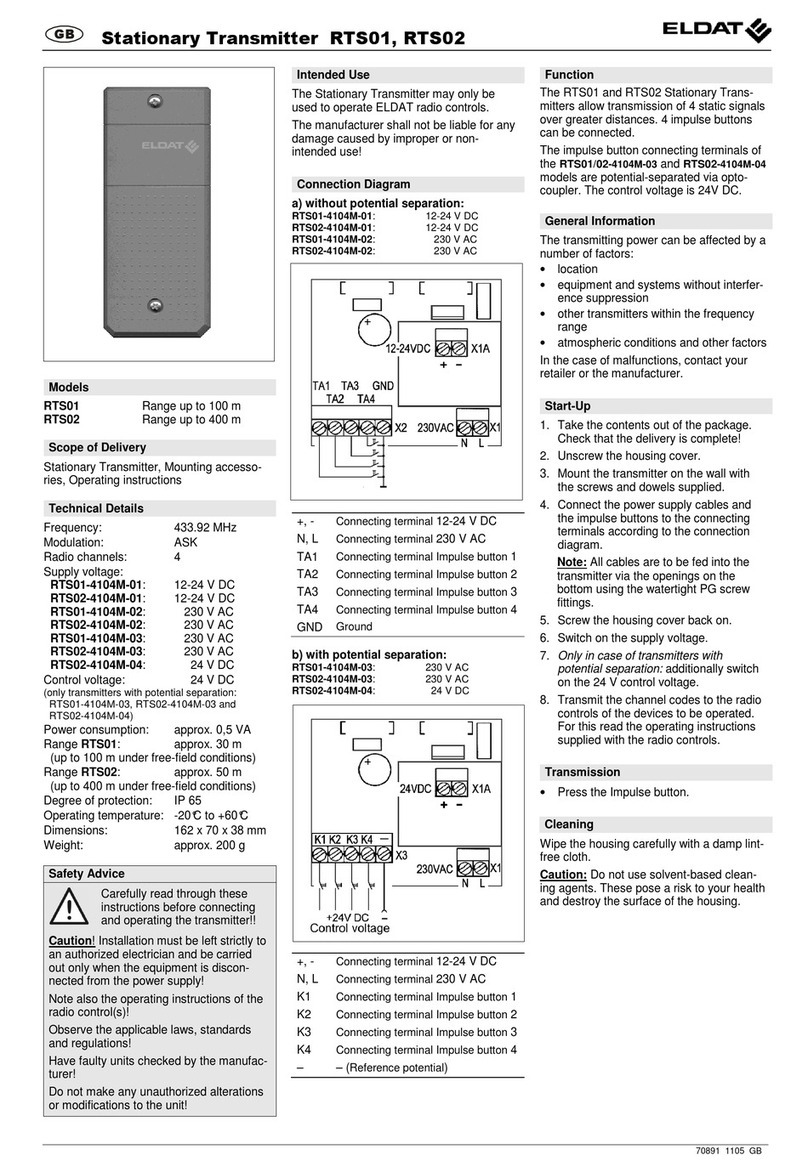
  9. Eldat RT22 Series User manual

Eldat RT22 Series User manual

GB
Multi Channel Transmitter RT22
74573 0805 GB
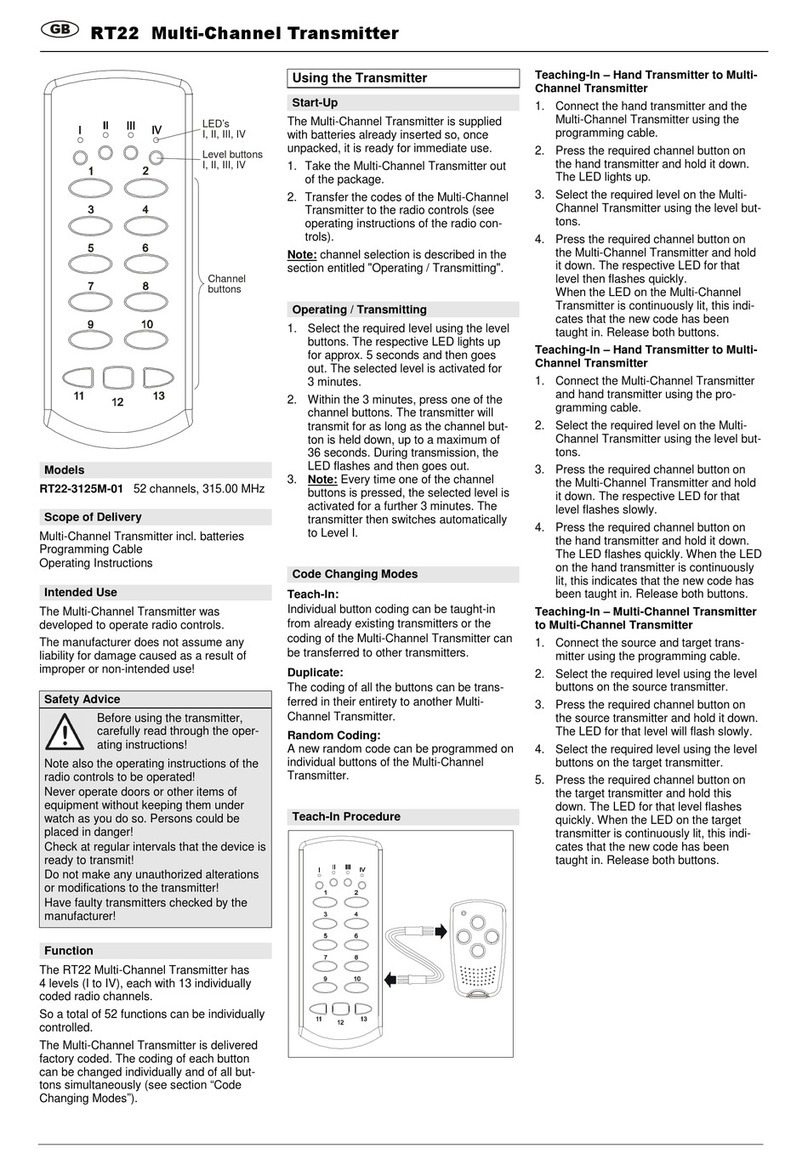
LED’s
I, II, III, IV
Level buttons
I, II, III, IV
Channel
buttons
Models
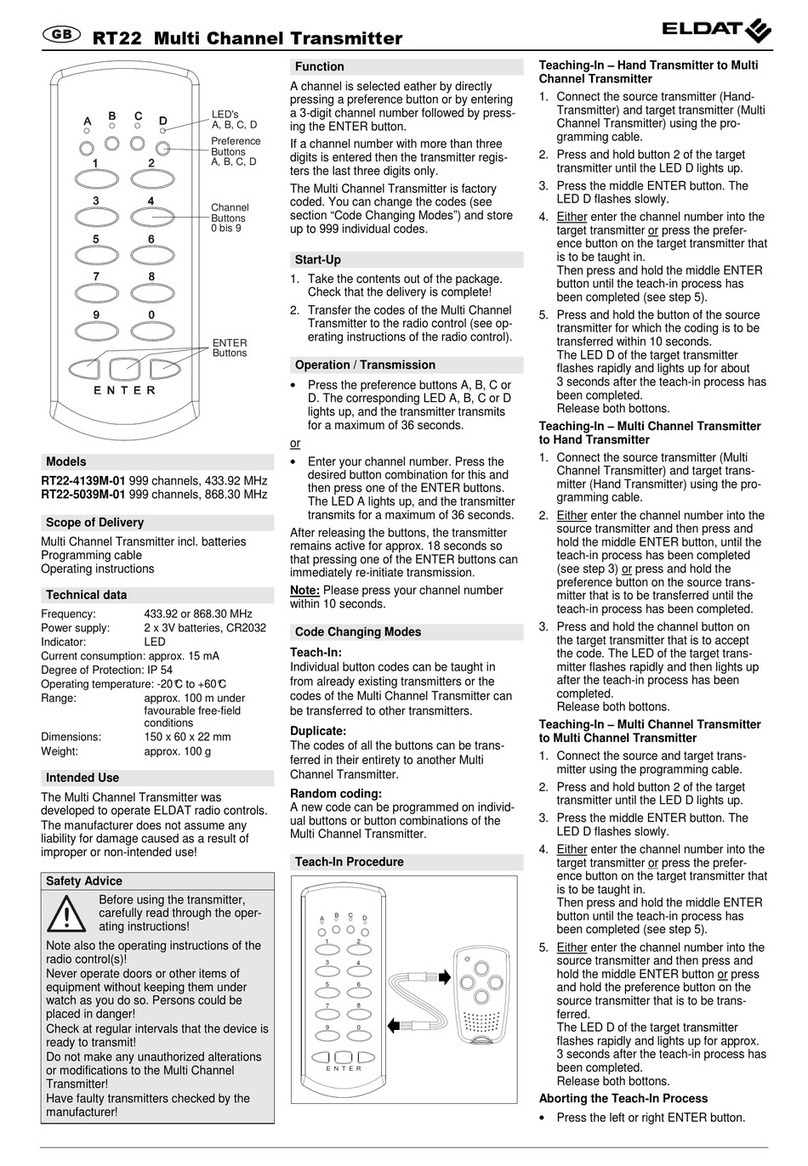
RT22-4125M-01 52 channels, 433.92 MHz
RT22-5025M-01 52 channels, 868.30 MHz
Scope of Delivery
Multi-channel transmitter incl. batteries
Programming cable
Operating instructions
Intended Use
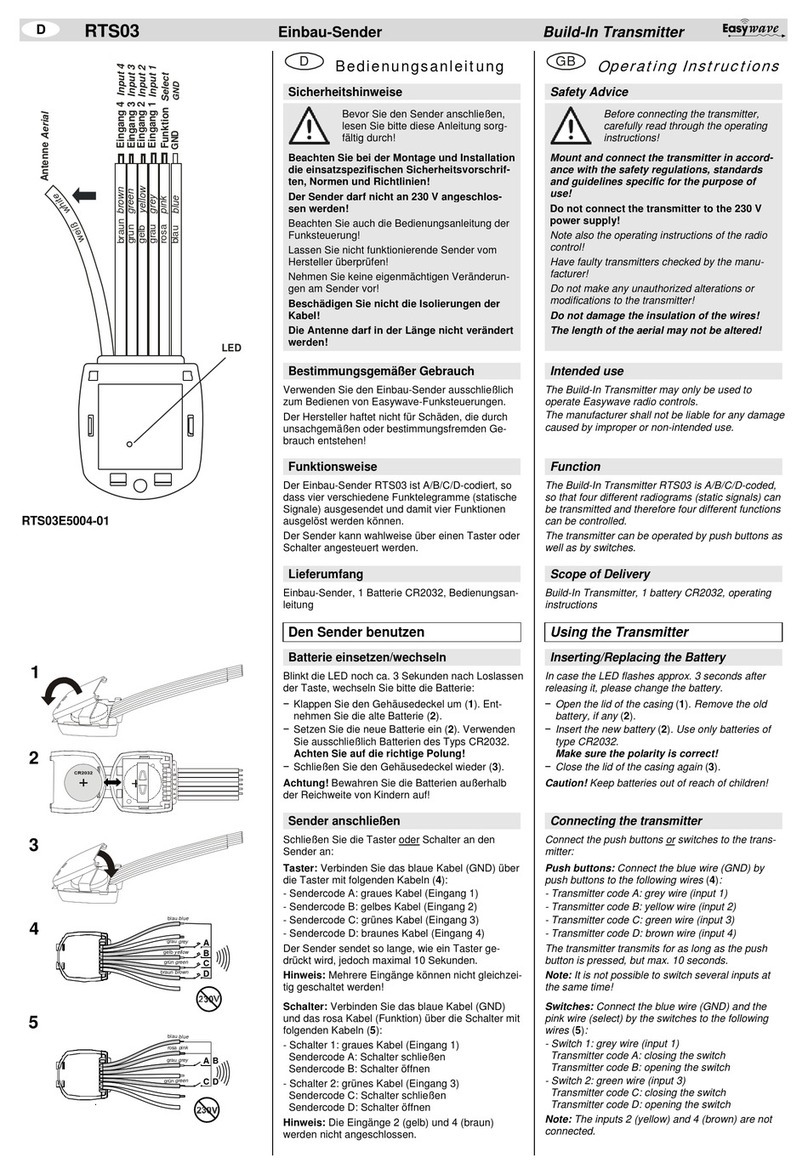
The multi-channel transmitter was
developed to operate ELDAT radio controls.
The manufacturer does not assume any
liability for damage caused as a result of
improper or non-intended use!
Safety Advice
Before using the transmitter,
carefully read through the oper-
ating instructions!
Note also the operating instructions of the
radio controls to be operated!
Never operate doors or other items of
equipment without keeping them under
watch as you do so. Persons could be
placed in danger!
Check at regular intervals that the device is
ready to transmit!
Do not make any unauthorized alterations
or modifications to the transmitter!
Have faulty transmitters checked by the
manufacturer!
Function
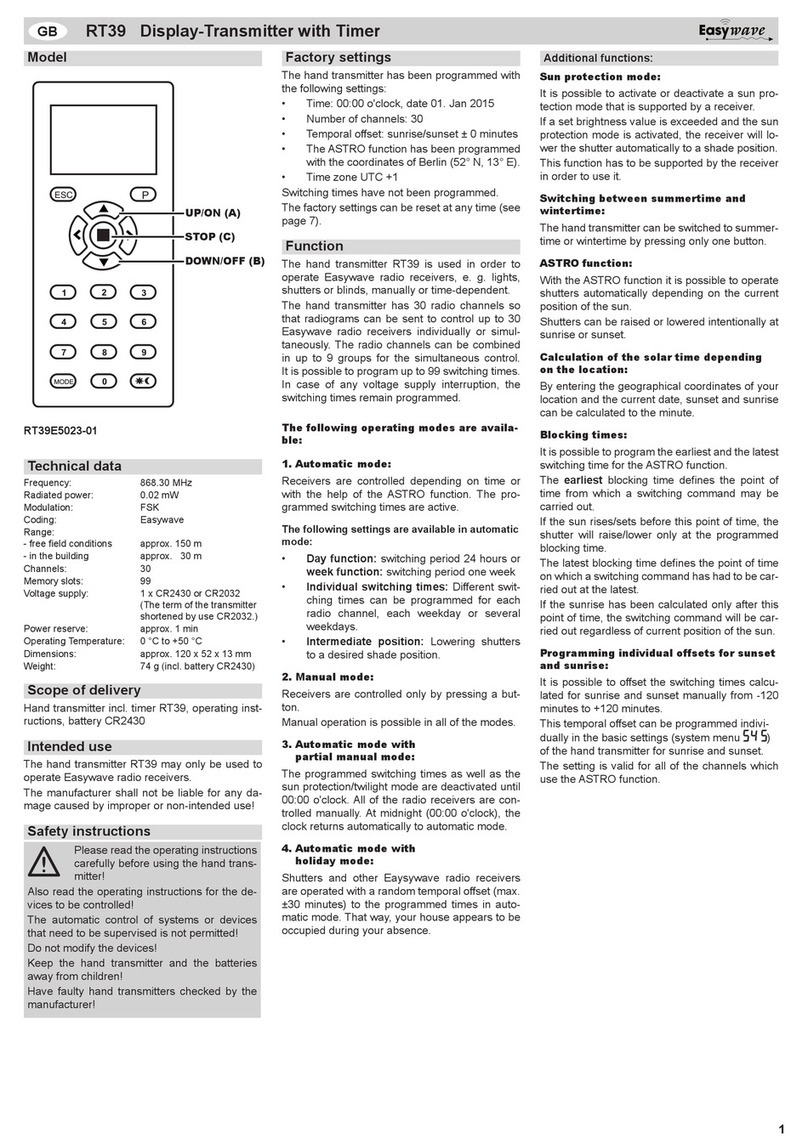
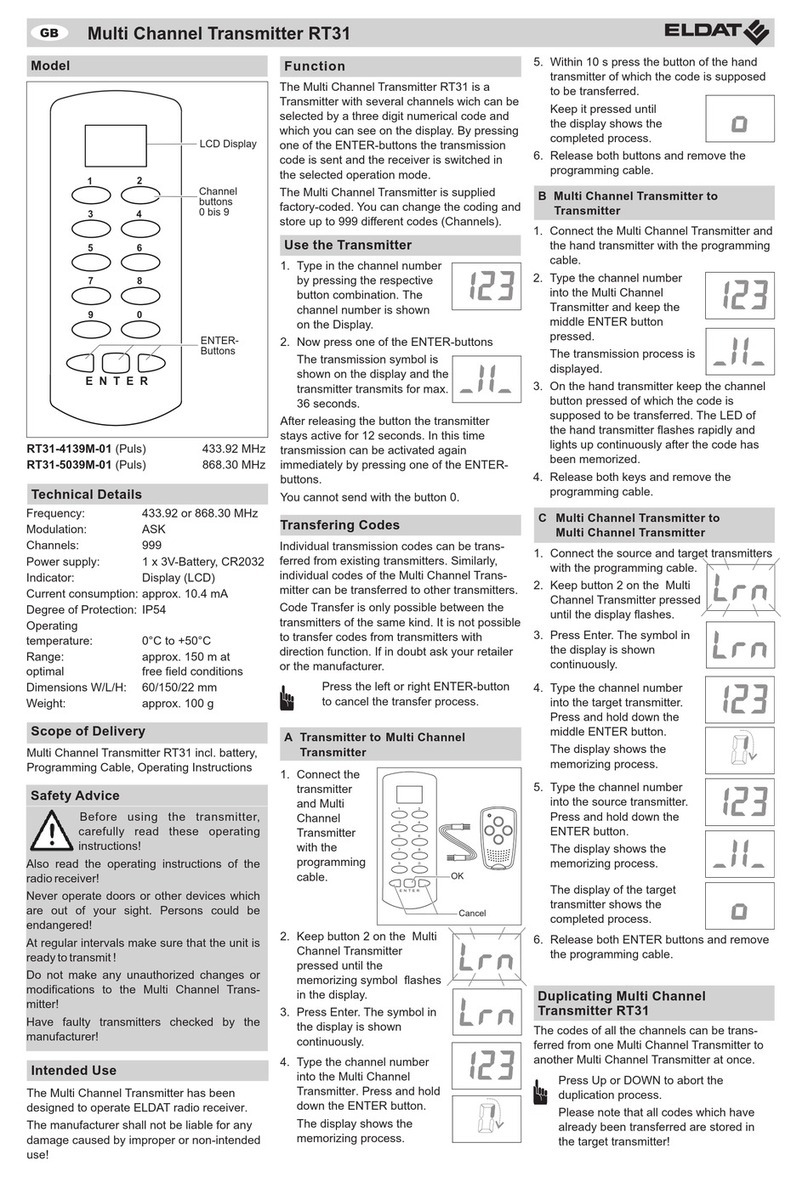
The RT22 Multi Channel Transmitter has
4 levels (I to IV), each with 13 individually
coded radio channels.
So a total of 52 functions can be individually
controlled.
The Multi Channel Transmitter is factory
coded. You can change the coding of each
button individually and of all buttons simul-
taneously (see section “Code Changing
Modes”).
Using the Transmitter
Start-Up
The Multi Channel Transmitter is supplied
with batteries already inserted so, once
unpacked, it is ready for immediate use.
1. Take the Multi Channel Transmitter out
of the package.
2. Transfer the codes of the Multi Channel
Transmitter to the radio controls (see
operating instructions of the radio con-
trols).
Note: channel selection is described in the
section entitled "Operation / Transmission".
Operation / Transmission
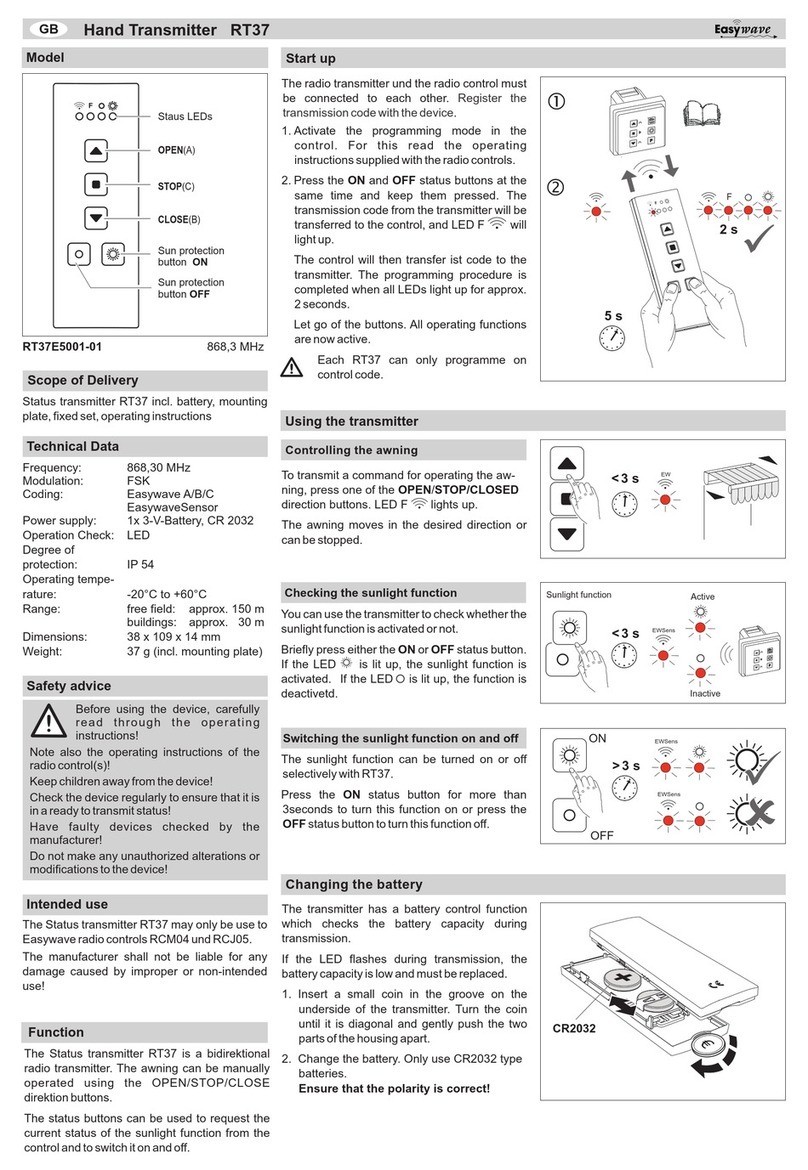
1. Select the required level using the level
buttons. The respective LED lights up
for approx. 5 seconds and then goes
out. The selected level is activated for
3 minutes.
2. Within the 3 minutes, press one of the
channel buttons. The transmitter will
transmit for as long as the channel but-
ton is pressed, up to a maximum of 36
seconds. During transmission, the LED
flashes and then goes out.
3. Note: Every time one of the channel
buttons is pressed, the selected level is
activated for a further 3 minutes. The
transmitter then switches automatically
to Level I.
Code Changing Modes
Teach-in:
Individual button codes can be taught in
from already existing transmitters or the
codes of the Multi Channel Transmitter can
be transferred to other transmitters.
Duplicate:
The coding of all the buttons can be trans-
ferred in their entirety to another Multi
Channel Transmitter.
Random coding:
A new random code can be programmed on
individual buttons of the Multi Channel
Transmitter.
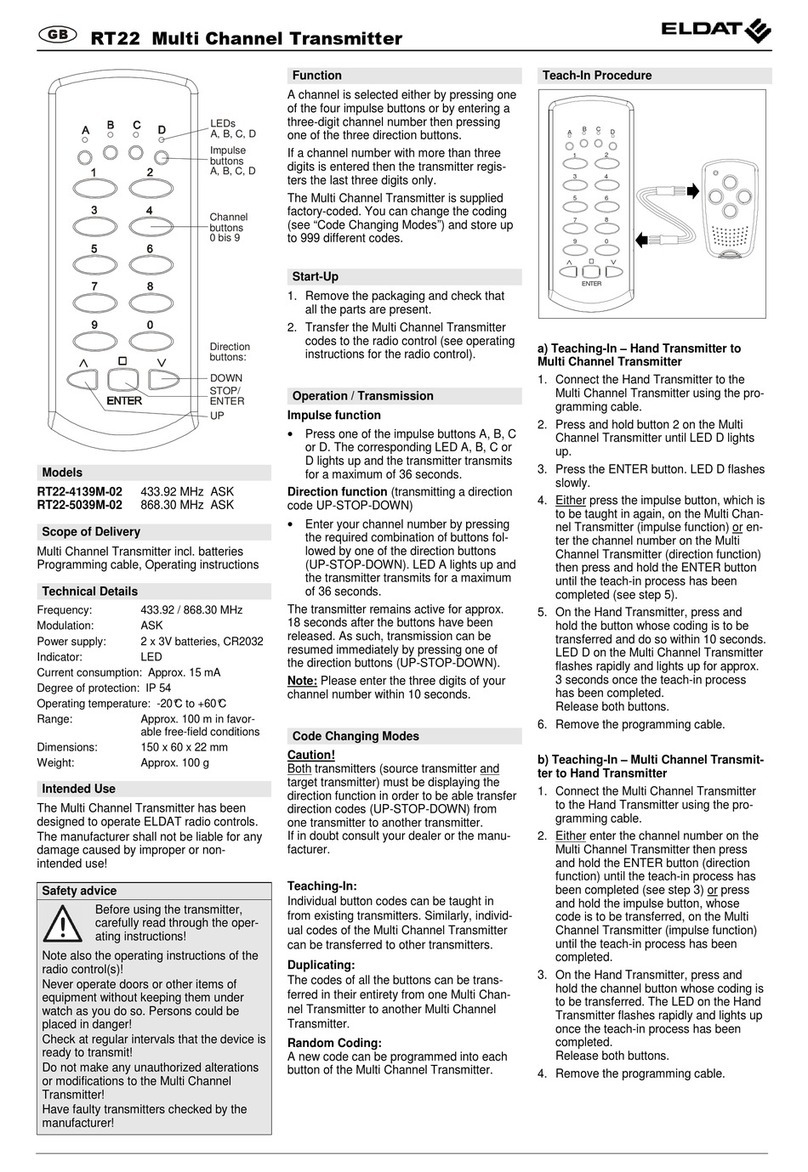
Teach-in procedure
Teaching-In – Hand Transmitter to Multi
Channel Transmitter
1. Connect the Hand Transmitter and the
Multi Channel Transmitter using the
programming cable.
2. Press the required channel button on
the Hand Transmitter and hold it down.
The LED lights up.
3. Select the required level on the Multi
Channel Transmitter using the level but-
tons.
4. Press the required channel button on
the Multi Channel Transmitter and hold
it down. The respective LED for that
level then flashes quickly.
When the LED on the Multi Channel
Transmitter is continuously lit, this indi-
cates that the new code has been
taught in. Release both buttons.
Teaching-In – Multi Channel Transmitter
to Hand Transmitter
1. Connect the Multi Channel Transmitter
and Hand Transmitter using the pro-
gramming cable.
2. Select the required level on the Multi
Channel Transmitter using the level but-
tons.
3. Press the required channel button on
the Multi Channel Transmitter and hold
it down. The respective LED for that
level flashes slowly.
4. Press the required channel button on
the Hand Transmitter and hold it down.
The LED flashes quickly. When the LED
on the Hand Transmitter is continuously
lit, this indicates that the new code has
been taught in. Release both buttons.
Teaching-In – Multi Channel Transmitter
to Multi Channel Transmitter
1. Connect the source and target trans-
mitter using the programming cable.
2. Select the required level using the level
buttons on the source transmitter.
3. Press the required channel button on
the source transmitter and hold it down.
The LED for that level will flash slowly.
4. Select the required level using the level
buttons on the target transmitter.
5. Press the required channel button on
the target transmitter and hold this
down. The LED for that level flashes
quickly. When the LED on the target
transmitter is continuously lit, this indi-
cates that the new code has been
taught in. Release both buttons.
GB
Multi Channel Transmitter RT22
74573 0805 GB
Duplicate
1. Connect both Multi Channel Transmit-
ters using the programming cable.
2. Hold down the level III button on the
target transmitter until LED III flashes.
3. Hold down the level IV button on the
source transmitter until LED IV flashes.
4. On both the target transmitter and the
source transmitter, press channel button
12 and hold down. The LED III on the
target transmitter flashes quickly, while
the LED IV on the source transmitter
flashes slowly. When both LEDs go off,
the duplication function is complete. Re-
lease both buttons.
Aborting the random coding process
•Press the button 11 or the button 13.
Random Coding
1. Insert the programming cable into the
socket on the Multi Channel Transmit-
ter, and at the other end of the cable
short-circuit one of the outer pins with
the middle pin.
2. Select the required level using the level
buttons.
3. Press one of the channel buttons and
hold it down. The LED for that level will
flash quickly.
When the LED is continuously lit, this
indicates that a new code has been as-
signed at random. Release the button.
Note: After the channel button has been
released, the selected level remains acti-
vated for a further 10 seconds for the re-
coding of further channel buttons. The
transmitter then automatically switches to
Level I.
Caution!
The new coding must be transferred to the
radio control.
Replacing Batteries
1. Unscrew the battery housing cover.
2. Remove the old batteries.
3. Insert two new 3 V batteries. Use only
batteries of type CR2032.
Make sure the polarity is correct!
4. Screw the battery housing cover back
on.
Caution!
Keep batteries out of reach of children!
Troubleshooting
•The LEDs are only faint when lit up:
Change the batteries.
•The LEDs do not light up at all:
Check the polarity of the batteries.
•Move closer to the radio control or
teach-in the Multi Channel Transmitter
channels to the radio control(s) again.
Cleaning
Wipe the housing carefully with a damp lint-
free cloth.
Caution!
Do not use solvent-based cleaning agents.
These can damage your health and destroy
the surface of the housing.
General Information
Disposal
Waste electrical products and batteries
should not be disposed of with house-
hold waste!
Dispose of the waste product via a
collection point for electronic scrap
or via your specialist dealer.
Dispose of used batteries in a
recycling bin for batteries or via the
specialist trade.
Put the packaging material into the
recycling bins for cardboard, paper
and plastics.
Warranty
Within the statutory warranty period we
undertake to rectify free of charge by repair
or replacement any product defects arising
from material or production faults.
Any unauthorized tampering with, or modifi-
cations to, the product shall render this
warranty null and void.
Conformity
This product conforms to the basic
requirements of the R&TTE Direc-
tive 1999/5/EC.
For use in: EU/CH/FL/N/IS
The Declaration of Conformity can be found
on the Internet at: www.eldat.de.
Technical Details
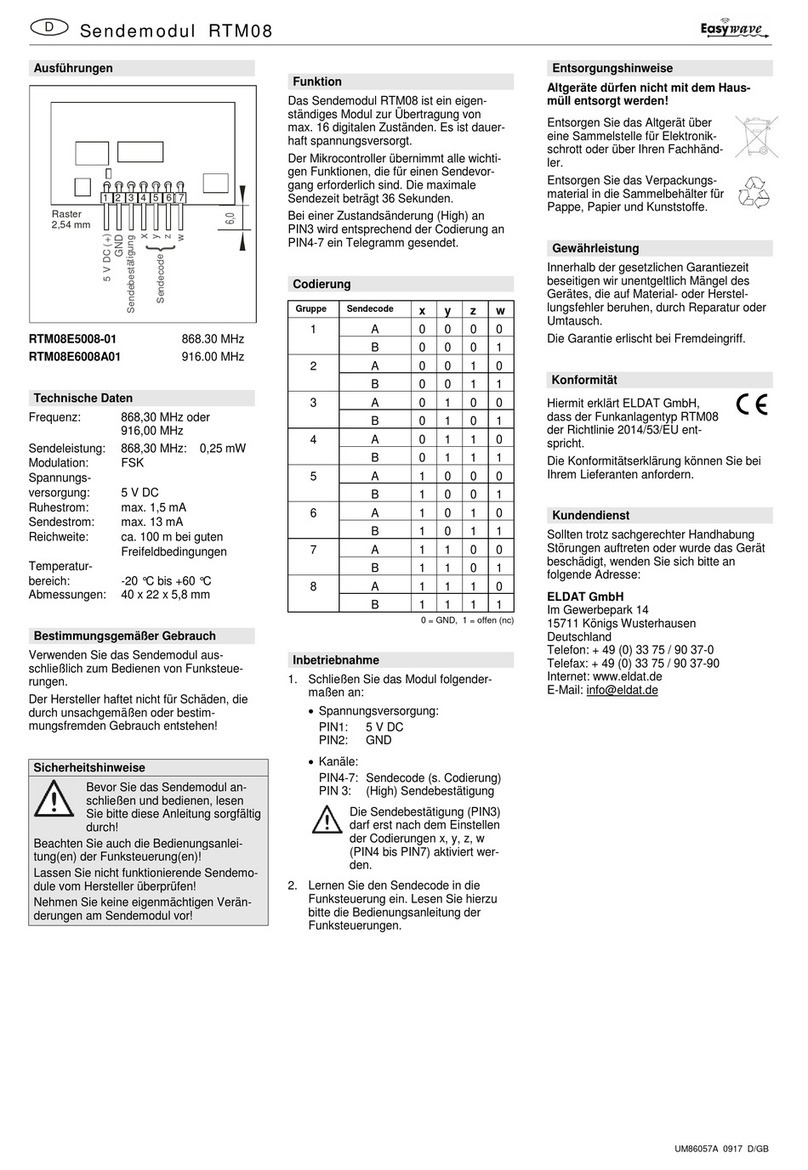
Frequency: 433.92 or 868.30 MHz
(depending on model)
Power supply: 2 x 3V batteries, CR2032
Indicator: LED
Current consumption: approx. 15 mA
Degree of Protection: IP 54
Operating temperature: -20°C to +60°C
Range: under favourable open
field conditions:
approx. 100 m
in buildings: approx. 30 m
Dimensions: 150 x 60 x 22 mm
Weight: approx. 100 g
Customer Service
If, despite correct handling, faults or mal-
functions occur or if the product was dam-
aged, please contact the company at the
address below:
ELDAT GmbH
Im Gewerbepark 14
D-15711 Zeesen
Germany
Phone: + 49 (0) 33 75 / 90 37-0
Fax: + 49 (0) 33 75 / 90 37-90
Internet: www.eldat.de
e-Mail: [email protected]

This manual suits for next models

2

Other Eldat Transmitter manuals

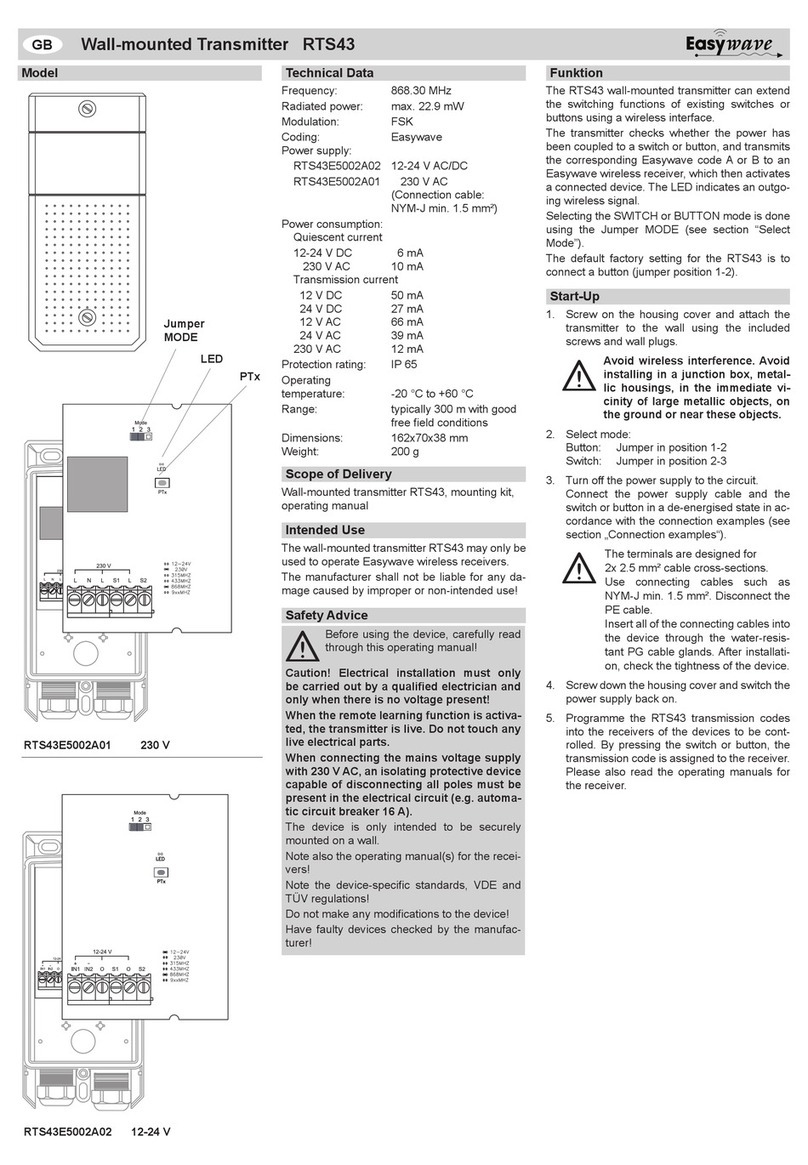
Eldat Easywave RTS43 User manual

Eldat

Eldat Easywave RTS43 User manual

Eldat RT37 User manual

Eldat

Eldat RT37 User manual

Eldat RTS01 Series User manual

Eldat

Eldat RTS01 Series User manual

Eldat RT22-4139M-02 User manual

Eldat

Eldat RT22-4139M-02 User manual

Eldat Easywave RT24 Series User manual

Eldat

Eldat Easywave RT24 Series User manual

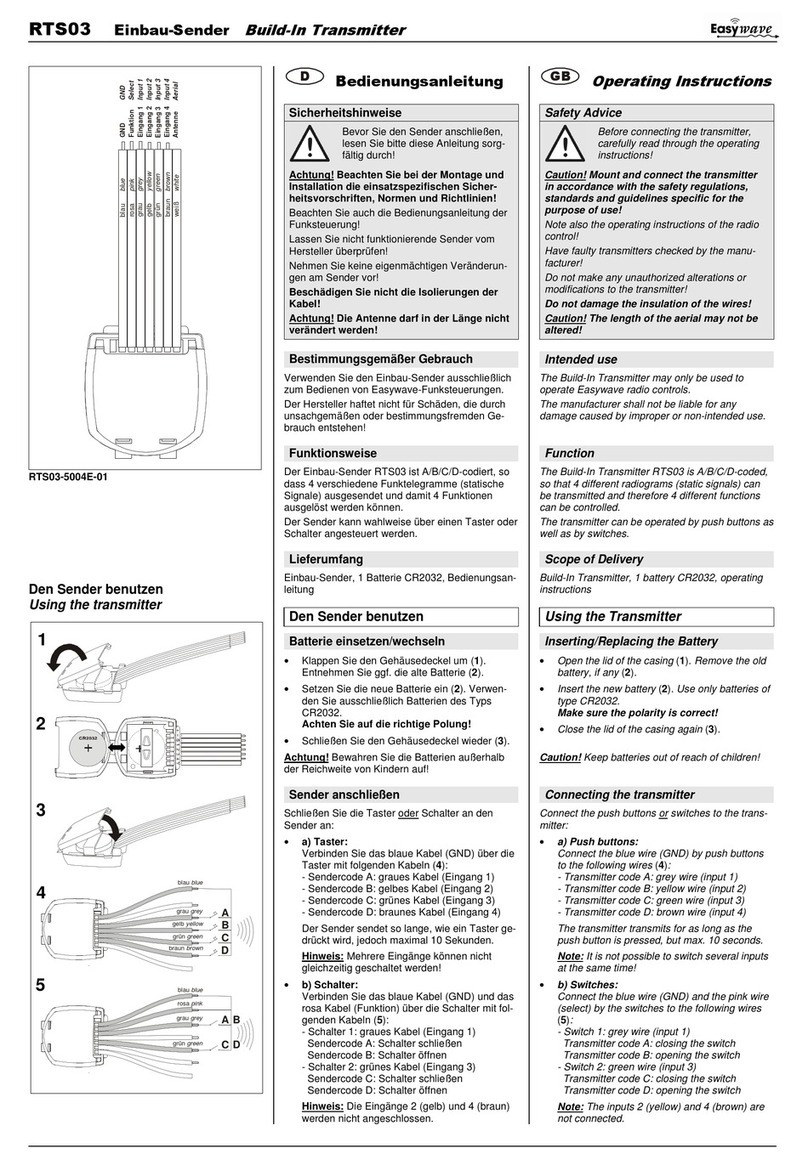
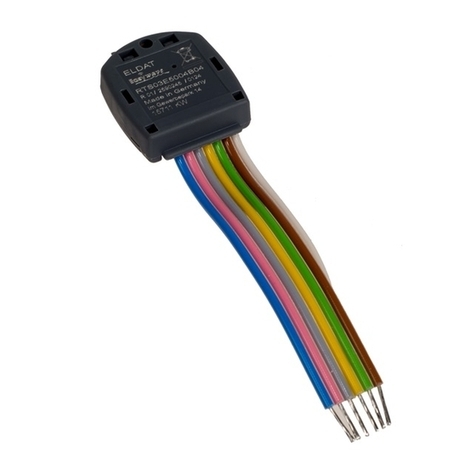
Eldat RTS03 Series User manual

Eldat

Eldat RTS03 Series User manual

Eldat secwave RT42 User guide

Eldat

Eldat secwave RT42 User guide

Eldat RT22-3125M-01 User manual

Eldat

Eldat RT22-3125M-01 User manual

Eldat Easywave RTS03 User manual

Eldat

Eldat Easywave RTS03 User manual

Eldat RT39 User manual

Eldat

Eldat RT39 User manual

Eldat Easywave RTS03 Series User manual

Eldat

Eldat Easywave RTS03 Series User manual

Eldat RT35-4104M-01 User manual

Eldat

Eldat RT35-4104M-01 User manual

Eldat RT31 User manual

Eldat

Eldat RT31 User manual

Eldat Easywave RTM08 Series User manual

Eldat

Eldat Easywave RTM08 Series User manual

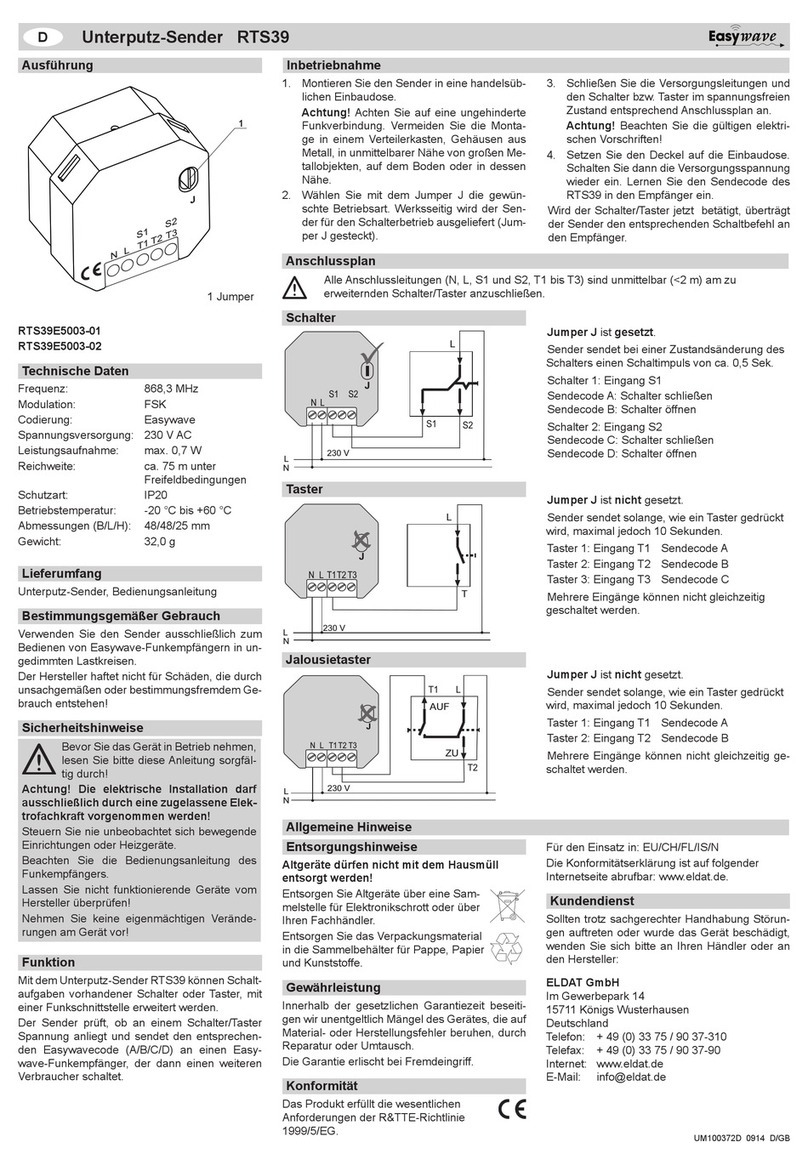
Eldat Easywave RTS39 Series User manual

Eldat

Eldat Easywave RTS39 Series User manual

Eldat RT22-4139M-01 User manual

Eldat

Eldat RT22-4139M-01 User manual

Eldat RTS03 Series User manual

Eldat

Eldat RTS03 Series User manual

Popular Transmitter manuals by other brands

Siemens SITRANS P500 Compact operating instructions

Siemens

Siemens SITRANS P500 Compact operating instructions

Sony TMR-BT10 - Bluetooth Wireless Audio... operating instructions

Sony

Sony TMR-BT10 - Bluetooth Wireless Audio... operating instructions

mcmurdo Smartfind G8 AIS user manual

mcmurdo

mcmurdo Smartfind G8 AIS user manual

enika P8 T 4a Cobra quick start guide

enika

enika P8 T 4a Cobra quick start guide

Envoy En2 user guide

Envoy

Envoy En2 user guide

Pepperl+Fuchs Barcon PPC operating instructions

Pepperl+Fuchs

Pepperl+Fuchs Barcon PPC operating instructions

Picomed Pico4 user manual

Picomed

Picomed Pico4 user manual

Omron Automotive Electronics OKA-110T user manual

Omron Automotive Electronics

Omron Automotive Electronics OKA-110T user manual

DSE FM2WLCDSS user guide

DSE

DSE FM2WLCDSS user guide

Televes 238201 user guide

Televes

Televes 238201 user guide

R.V.R. Elettronica TEX702TFT Operator's manual

R.V.R. Elettronica

R.V.R. Elettronica TEX702TFT Operator's manual

Phonak Roger inspiro Quick setup guide

Phonak

Phonak Roger inspiro Quick setup guide

M-E ODYON pro HS1 instruction manual

M-E

M-E ODYON pro HS1 instruction manual

EnOcean easyfit PTM 250 Installation and operating instructions

EnOcean

EnOcean easyfit PTM 250 Installation and operating instructions

Becker Centronic MemoControl  MC441-II Assembly and operating instructions

Becker

Becker Centronic MemoControl MC441-II Assembly and operating instructions

Emerson Rosemount 2051HT quick start guide

Emerson

Emerson Rosemount 2051HT quick start guide

Transmitter Solutions Stinger 2 390GED21V2 manual

Transmitter Solutions

Transmitter Solutions Stinger 2 390GED21V2 manual

Seasafe SSTX/01 user manual

Seasafe

Seasafe SSTX/01 user manual

manuals.online logo
manuals.online logoBrands
  • About & Mission
  • Contact us
  • Privacy Policy
  • Terms and Conditions

Copyright 2025 Manuals.Online. All Rights Reserved.