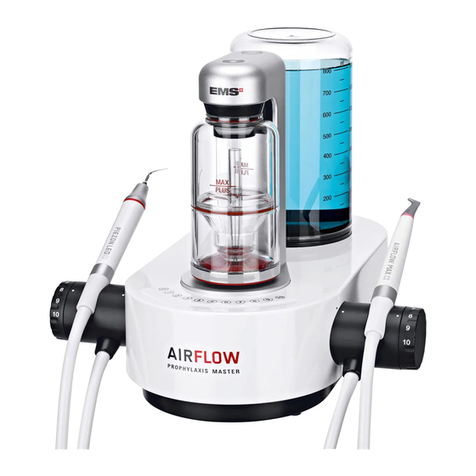
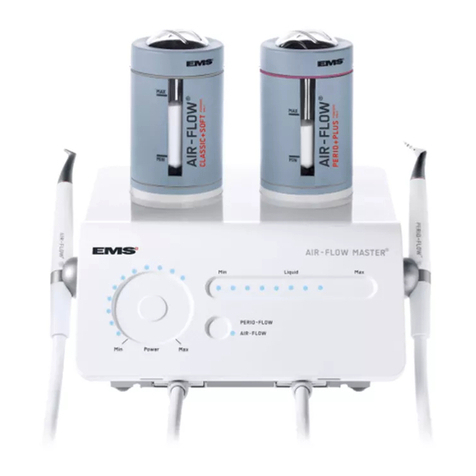
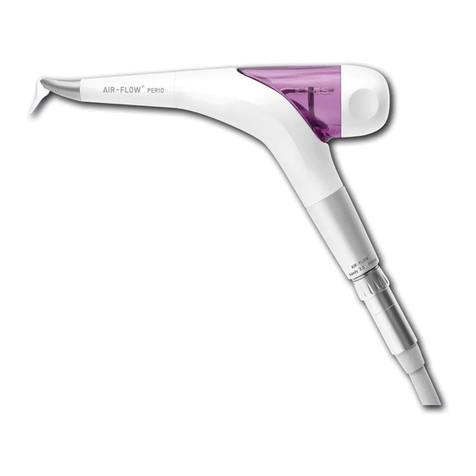
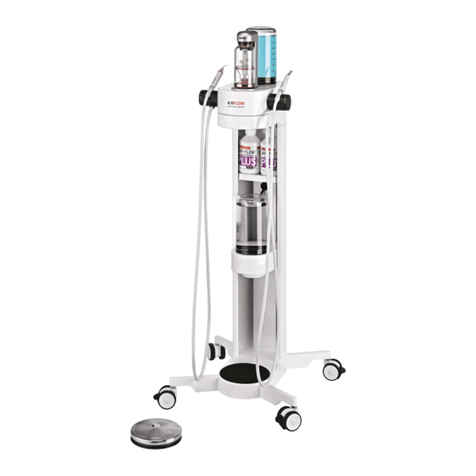
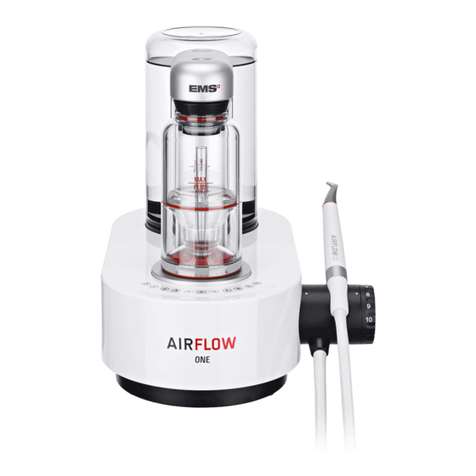
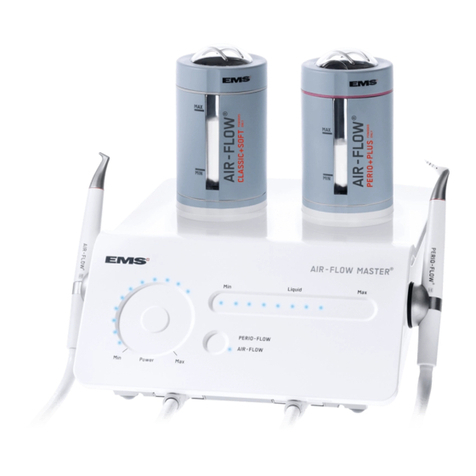
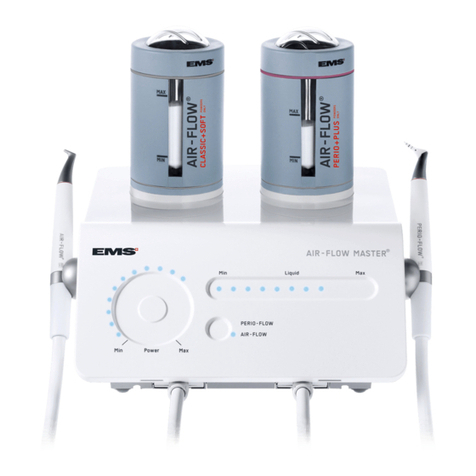
EMS AirFlow Master User manual

AIRFLOW®ONE
INSTRUCTIONS FOR USE
This IFU is only valid for the United States.

2 3
SUMMARY
BEFORE USE...........................................................................................................................4
INTENDED USE.......................................................................................................................4
INTENDED USERS ..................................................................................................................4
PATIENT POPULATION ..........................................................................................................5
INTENDED ENVIRONMENT....................................................................................................5
CONTRAINDICATIONS...........................................................................................................5
COMPATIBILITY.....................................................................................................................5
GENERAL PRECAUTIONS ......................................................................................................5
INSTALLATION ......................................................................................................................6
I- EQUIPMENT INCLUDED IN THE BOX.................................................................................................. 6
II- STEP-BY-STEP INSTALLATION ........................................................................................................ 7
2.1- Find an appropriate area to place the device ..........................................................................7
2.2- Check for proper water and air supply lines ...........................................................................7
2.3- Check for a proper and safe power grid .................................................................................7
2.4- Be aware ...............................................................................................................................7
2.5- Connect air and water hoses..................................................................................................7
2.6- Install accessories.................................................................................................................8
2.7- Check the cord connections...................................................................................................8
2.8- Fix the device ........................................................................................................................8
2.9- Power your device .................................................................................................................9
2.10- Installation of the wireless pedal .........................................................................................9
III- POWDER CHAMBERS....................................................................................................................... 9
IV- WATER SUPPLY AND WATER BOTTLE ........................................................................................... 10
V- AIRFLOW®AND PERIOFLOW®HANDPIECES................................................................................... 10
5.1- Before rst use....................................................................................................................10
5.2- Attaching and removing AIRFLOW®or PERIOFLOW®Handpiece ...........................................11
5.3- Attaching and removing PERIOFLOW Nozzles......................................................................11
DEVICE USE..........................................................................................................................11
I- INTERFACES ..................................................................................................................................... 11
1.1- AIRFLOW®pressure setting .................................................................................................12
1.2- AIRFLOW®BOOST................................................................................................................12
1.3- Wireless pedal battery saving ..............................................................................................12
1.4- Water temperature and acoustic feedback settings..............................................................12
II- TREATMENT SEQUENCE ................................................................................................................. 13
2.1- Patient and dental professional precautions ........................................................................13
2.1.1- Patient preparation .................................................................................................13
2.1.2- Dental professional preparation ..............................................................................13
2.2- AIRFLOW®and PERIOFLOW®...............................................................................................13
2.2.1- AIRFLOW®treatment...............................................................................................13
2.2.1.1- Recommended position and movement......................................................13
2.2.1.2- Settings .....................................................................................................14
2.2.2- PERIOFLOW®treatment...........................................................................................14
2.2.2.1- Recommended use ....................................................................................14
2.2.2.2- Risk of emphysema....................................................................................14
2.2.2.3- Settings .....................................................................................................14
2.2.3- On the device..........................................................................................................15
2.2.4- End of treatment .....................................................................................................15
2.2.4.1- Fluoride protection.....................................................................................15
2.2.4.2- Post-treatment recommendations..............................................................15
III CLEANING AND REPROCESSING .................................................................................................... 16
3.1- Water lines cleaning & disinfection ......................................................................................16
IV- MAINTENANCE & TROUBLESHOOTING......................................................................................... 18
4.1- AIRFLOW®and PERIOFLOW®Handpiece unclogging ............................................................18
4.2- AIRFLOW®Handpiece leakage .............................................................................................18
4.3- Handpiece cord replacement ...............................................................................................18
4.4- Monthly check.....................................................................................................................18
4.5- Yearly maintenance and repair.............................................................................................19
4.6- Pairing a new pedal .............................................................................................................19
4.7- Troubleshooting ..................................................................................................................19
4.7.1- For AIRFLOW®and PERIOFLOW®products...............................................................19
4.7.2- For the device .........................................................................................................20
4.8- To contact EMS service center.............................................................................................22
SUSTAINABILITY .................................................................................................................22
I- DISPOSAL OF WASTE....................................................................................................................... 22
II- SUSTAINABLE DESIGN.................................................................................................................... 22
WARRANTY..........................................................................................................................22
TECHNICAL DATA COLLECTION AND PRIVACY POLICY....................................................23
TECHNICAL DESCRIPTION..................................................................................................23
SYMBOLS.............................................................................................................................24
ELECTROMAGNETIC COMPATIBILITY ................................................................................26

4 5
PATIENT POPULATION
AIRFLOW®devices are intended for use on patients requiring dental treatment, including cleaning and polishing of teeth (natural
or implant) by the projection of water, air and dental powders onto the tooth surface, regardless of age or gender.
This medical device is not intended for use on newborn (neonate) and infant (< 2 years old) patient populations.
INTENDED ENVIRONMENT
The device is intended to be used in a dental cabinet/hospital complying with each country’s regulations.
CONTRAINDICATIONS
AIRFLOW®
Patients suffering from chronic bronchitis or asthma must not, under any circumstances, be treated with an air polishing
device. The jet of air and powder could cause respiratory difficulties.
Patients on a low salt diet must not be treated with the powder containing sodium bicarbonate. For patients on a law salt
diet use the powder without sodium bicarbonate provided by EMS.
PERIOFLOW®
The treatment of deep periodontal pockets can cause bacteraemia. Please apply appropriate restrictions for the treatment of
risk patients:
Endocarditis
Pregnancy, breast feeding
Contagious disease
Immune deficiency (neutropenia, angranulocytosis, diabetes, hemophilia)
Patients under treatment (radiotherapy, chemotherapy, antibiotics)
The air jet and powder may cause breathing difficulties. Please apply appropriate restrictions for the treatment of risk
patients: Patients suffering from chronic bronchitis or asthma must not be treated under any circumstances with this product.
Predisposed persons may be sensitive to the powder. If allergic reactions are observed, stop using the product and
completely remove it.
The single use nozzle must be used for one single patient only. Never reuse a nozzle because treatment will be ineffective
and the risk of emphysema would increase.
The use of any other powder than the EMS powders for subgingival application would reduce the nozzle's service life. As a
result the treatment would become ineffective and would increase the risk of emphysema.
Powders
Refer to the instructions for use of the specific powder.
COMPATIBILITY
This device is compatible with the following accessories:
AIRFLOW®Powders DV-164, DV-165 series
AIRFLOW®MAX Handpiece E L- 3 0 8
PERIOFLOW®Handpiece E L- 3 5 4
AIRFLOW STATION / STATION+ DW-048A, DW-048B
Applied Parts
The following items are Medical Device Applied Parts:
AIRFLOW®MAX (EL-308) Handpiece
PERIOFLOW®(EL-354) Handpiece
Applied Parts, under certain operating conditions, may exceed 41°C of temperature and reach a maximum temperature of
51°C.
GENERAL PRECAUTIONS
ONLY USE EMS ACCESSORIES AND CONSUMABLES!
The use of any other accessories could lead to patient injury, malfunction or damage to the device.
DO NOT use this device in the presence of flammable anesthetics or oxidizing gases (such as nitrous oxide (N2O) and
oxygen) or in close proximity to volatile solvents (such as ether or alcohol), as explosion may occur.
DO NOT store the powder near acids or heat sources.
TAKE the following precautions to prevent any adverse events to the patient and/or to the user in case of electromagnetic
disturbances:
Always refer to the information listed in the chapter “Electromagnetic Compatibility”.
BEFORE USE
CONGRATUL ATIONS!
You are now the owner of this new EMS device!
Please read the instructions carefully before use.
TO AVOID the risk of electric shock, this equipment must
only be connected to a mains supply with protective earth/
grounding. This device uses a Class-I insulating system that
requires protective earth.
FOR USA AND CANADA: GROUNDING RELIABILITY CAN ONLY
BE ACHIEVED WHEN EQUIPMENT IS CONNECTED TO AN
EQUIVALENT RECEPTACLE MARKED “HOSPITAL ONLY” OR
“HOSPITAL GRADE”.
DO NOT modify this equipment and/or any of its
accessories.
No modification of any part of this medical device is allowed.
DO NOT open the device. There are no serviceable parts
inside.
If any serious incident occurs that is directly or indirectly
related to the device, report it immediately to the manufacturer
and to the competent authority of your country and of where
the patient is established (if different).
Disconnect the mains plug from electrical outlet for the
purposes of maintenance, in the case of malfunction or when
the device is left unattended.
Turn off the water inlet when not in use. The device is
not equipped with Aquastop and the EG-110 water hose may
disconnect or leak: risk of flooding.
The Instructions for Use of the device, as well as
the Treatment Recommendations (FB-648), are provided in
electronic format and are part of the product documentation.
However, if you would like to receive these in hard copy, you can
request one set free of charge on our website, by telephone or
in writing, and receive it within 7 days.
The Instructions for Use of the device (FB-621), as well as
the Treatment Recommendations (FB-648), are available for
download in PDF format at www.ems-instruction.com using
the Product/Key Code FT-230. A PDF reader is required and,
in case of need, it can be downloaded from the same web site.
It is essential to first read and understand all the Instructions
for Use of the device before operating it and using the related
accessories. The Treatment Recommendations are an
integral part of the device’s Instruction for Use and each one
document is complementary to the other. Always keep this
documentation close at hand.
We recommend that you visit our website regularly to consult
and/or download the latest version of the documentation for
your device at www.ems-instruction.com
Please contact EMS technical support or your local EMS
representative for further information and support.
INTENDED USE
The AIRFLOW One is intended for use in the cleaning and polishing of teeth by the projection of water, air, and dental powders
onto the tooth surface. The device removes dental plaque, soft deposits, and surface stains from pits, grooves, interproximal
spaces, or smooth surfaces of teeth.
The AIRFLOW One can be used for the following cleaning procedures:
plaque removal for placement of sealants
surface preparation prior to bonding/cementation of inlays, onlays, crowns and veneers
surface preparation prior to placing composite restorations
effective plaque and stain removal for orthodontic patients
cleaning prior to bonding ortho brackets
cleaning implant fixture prior to loading
stain removal for shade determination
plaque removal prior to fluoride treatment
plaque and stain removal prior to whitening procedure
The AIRFLOW One is also intended for use as an air-polisher in patients suffering from periodontal disease. The AIRFLOW
Prophylaxis Master is indicated for the non-surgical removal of subgingival plaque in pockets up to 5 mm after initial periodontal
treatment.
INTENDED USERS
Only qualified dental professionals must use this device by fully complying with their respective country’s regulations, accident
prevention measures, and strictly follow these instructions for use.
The device must be prepared and maintained only by persons who have been instructed in infection control, personal
protection and patient safety.
Improper use (e.g. due to lack of hygiene or routine maintenance), non-compliance with our instructions, or the use of
accessories and spare parts that are not approved by EMS invalidates all claims under warranty and any other claims.
No specific training other than initial professional training is required to use this medical device.
The practitioner is responsible for performing the clinical treatments and for any dangers that may arise due to a lack of skill
and/or training.
For optimal patient comfort, safety and efficiency, we suggest that you regularly follow our: SWISS DENTAL ACADEMY Training
Program. Please contact your local EMS representative for further information.
Professional product installation and product introduction by EMS certified person is highly recommended for optimal setup
and reliability.

6 7
In case of a wireless pedal malfunction, presumably caused by electromagnetic disturbances, use the wired pedal instead.
In case of a device malfunction, presumably caused by electromagnetic disturbances, first verify the cabling, and then move
any portable RF communications equipment and mobile devices placed nearby as far away as possible to rule out interference.
Stop using the device if the electromagnetic disturbances persist and contact EMS technical support for assistance.
INSTALLATION
I- EQUIPMENT INCLUDED IN THE BOX
Check contents for any damage that may have occurred during transportation.
AIRFLOW®ONE Unit
with Master Screw,
water & air filters
installed
1x FT-230/A
AIRFLOW®PLUS
Prophylaxis Powder
3x DV-165/Z
WATER bottle
1x EG-121
QUICK GUIDE
AIRFLOW
®
PROPHYLAXIS MASTER
MAK
E
M
E
SMIL
E
.
Quick Guide
1x FB-620/US
AIFLOW CLASSIC
Prophylaxis Powder
1x DV-164/MIN
CLEANER bottle
1x EG-1000
REPROCESSING
INSTRUCTIONS
MAK
E
M
E
SMIL
E
.
R
Reprocessing
instructions
1x FB-358/NA
CLIP+CLEAN
2x AB-613
(package EL-655)
Powder chambers
1x EL-607 (Plus)
1x EL-606 (Classic)
US power cord
1x CD-137
Air hose
1x EH-142-US
Water hose
1x EG-110-US
Boost wireless pedal
1x EK-404A
with 2x AA 1.5V type
lithium batteries
AIRFLOW®Handpiece
cord
1x EM-145
GBT training tool kit
1x F V-122
GBT ready2
2 x EL-308
1
2 3
5 4
AIRFLOW®application
1 - EL-308/XC: AIRFLOW®
Handpiece
2 - AB-470A/A (FV-0833):
Easy Clean
3 - EL-1076: Cord gaskets
4 - El-600 (FV-0943):
Water filter
5 - EL-599: Air filter
1x FS-473
1
2
PERIOFLOW®
application
1 - EL-354: PERIOFLOW®
Handpiece
AB-358/B (DT-0953):
Nozzle extractor (under)
2 - 20x AB-1010 (DT-476/
US3): PERIOFLOW Nozzle
1x FS-474
2 If GBT ready kit ordered
3 Reference to be used for individual accessory order
II- STEP-BY-STEP INSTALLATION
2.1- Find an appropriate area to place the device
Place the medical device (control unit) with the recommended STATION8within the dental cabinet in a suitable position for
your activity and leave enough free space to allow easy handling and proper ventilation.
Use of this equipment adjacent to (minimum 10 cm of clearance) or stacked with other equipment should be avoided
because it could result in improper operation. If such use is necessary, this equipment and the other equipment should be
observed to verify that they are operating normally.
Keep a minimum of 10 cm clearance around the unit.
The medical device must be placed on a secure and flat surface (with a maximum slope of 5 degrees).
2.2- Check for proper water and air supply lines
Verify that your dental cabinet has a filtered tap water source (please note that only an air supply line is needed for the
recommended STATION+) and a compressed air source using air and water hoses EG-110-US and EH-142-US, respectively.
In case your cabinet water and air lines are not provided with the required hoses EG-110-US and EH-142-US, a proper
installation by qualified personnel is required. Call EMS Service for support.
2.3- Check for a proper and safe power grid
This device uses a Class-I insulating system that requires protective earth.
Plug the unit only into an FI protected mains supply (FI = Residual current protection).
For USA and Canada: connect only to a hospital-grade outlet.
Check that the rated voltage of the device is suited for the local line voltage to prevent damaging the unit, risk of fire and
electric shock.
The mains plug of the unit must be accessible at all times.
DO NOT INSTALL the device in case your dental cabinet does NOT have protective earth. If you have any concerns about
this, call EMS Service for on-site support by qualified personnel.
2.4- Be aware
The use of cables and accessories other than those supplied by EMS may negatively affect EMC performance. Use only
parts supplied by EMS.
The device uses a low power radio, 8 dBm EIRP max, Bluetooth®2.4 GHz, to communicate with the wireless pedal.
Interference may occur in the vicinity of this equipment.
The Bluetooth®radio is automatically disabled (powered off) when a wired pedal is connected.
Portable RF communications equipment (including peripherals such as antenna cables and external antennas) should be used
no closer than 30 cm (12 inches) to any part of the device, including cables. Otherwise, degradation of the performance of this
equipment could result.
2.5- Connect air and water hoses
Turn the device over and place it upside down.
1
In the absence of the STATION8, connect the air hose EH-142-US to the
cabinet/dental unit.
Push the hose connector into the air jack firmly (it may be hard).
Pressure: 4.5 to 7 bar. 6 bar ideally
Dry air. Max. humidity: 1.032 g/m3
Filtration: max. 1 μm
2
Connect the water hose EG-110-US to the cabinet/dental unit.
DO NOT install the WATER or CLEANER bottles before connecting the
air and water lines.
Drinking water
Pressure: 2 to 5 bar
Salinity: max. 0.2%
Temperature: 10°C to 30°C
8 AIRFLOW®STATION or STATION+
Scan
for
support

8 9
2.9- Power your device
You can now connect the power cord to the mains grid.
Protective earth is required! Be sure your power grid has an efficient protective earth.
Settings: Voltage: 100-240 Vac - Frequency: 50 to 60 Hz - Operating current: 4 A max.
2.10- Installation of the wireless pedal
Insert two (2) AA 1.5V lithium batteries into the wireless pedal. Close the cover and operate your
device. USE ONLY LITHIUM BATTERIES. Close the cover and operate your device.
Risk of fire: only use batteries that have current limiter/short-circuit and over-temperature
protection (compliant to IEC 60086-4:2014 Safety of lithium batteries).
The wireless pedal supplied with your device is already paired and ready to use (Note: A pedal can only command one single
device at a time. Pairing is maintained even if the batteries are removed).
When you receive your new machine, all you need to do is insert the two (2) AA lithium batteries into the wireless pedal and your
device is ready to work.
In case you replace your pedal, you will need to pair it with your device. For instructions, please read the specific Maintenance
& Troubleshooting chapter.
The Bluetooth®radio is automatically disabled (powered off) when a wired pedal is connected.
The wireless pedal uses a low power, 8 dBm EIRP max, Bluetooth®2.4 GHz radio, to communicate with the control unit.
Interference may occur in the vicinity of this equipment.
Portable RF communications equipment (including peripherals such as antenna cables and external antennas) should be used
no closer than 30 cm (12 inches) to any part of the device, including cables. Otherwise, degradation of the performance of this
equipment could result.
III- POWDER CHAMBERS
Clinical risk: Only use PLUS Powder with the PLUS Powder chamber.
Clinical risk: Only use PLUS Powder chamber (red) for subgingival treatments.
PLUS The PLUS Powder chamber is designed for the PLUS Powder. It can be used for supragingival and
subgingival treatments.
Pressure is automatically reduced for compatibility with subgingival treatments, including PERIOFLOW®
treatments (Supra applications also possible).
Compatible EMS Powders: PLUS (refer to paragraph “Compatibility” for details).
CLASSIC The CLASSIC Powder chamber is designed for the CLASSIC Powder and can only be used for
supragingival treatments.
Sodium Bicarbonate: Only use this powder and chamber for supragingival applications.
Compatible EMS Powders: CLASSIC (refer to paragraph “Compatibility” for details).
Check bottle and powder chamber integrity: There should be no crack on the body.
The powder chamber is pressurized during use. Replace faulty parts immediately.
Make sure that the powder chambers are dry.
Use only PLUS Powder for restorations, crowns, bridgework, implants and orthodontics.
Regularly clean the powder chambers. Take care that all parts are fully dry before reuse.
DO NOT sterilize the powder chambers and their caps/parts by steaming or dry thermal reprocessing.
By hand only: remove the powder chamber cap to refill powder up to the indicated MAX level, then
insert the cap back fully onto the bottle.
Pour the powder in freely. The central tube can be fully filled without problem.
DO NOT fill the chamber higher than the indicated MAX level. The powder level will go down slightly
a few minutes after the filling (powder compaction).
Before pressurizing, position the powder chamber into the device. Magnetic attraction will position it
correctly.
DO NOT insert upside-down.
Scan
for
support
2.6- Install accessories
Continue to keep the device upside down and disconnected from the power grid!
1
EH-142-US
Air hose – filter pre-installed
USE HARD FORCE
2EG -110-US
Water hose – filter pre-installed
3Power cord into socket
(Fuse holder in the socket)
4
EK-410
Wired pedal
ONLY IF APLICABLE
5
EM-145
AIRFLOW®handpiece cord + lock actuator
USE FORCE
2.7- Check the cord connections
The handpiece cord is not fully connected. USE FORCE to lock in.
The system is well connected & locked.
To disconnect the handpiece cord system, unlock the connection and pull at the same time.
2.8- Fix the device
Fix the device to the recommended STATION9
Follow the quick guide delivered with your STATION9
Fix the device to the recommended STATION9
You will find a “Master Screw” provided on the bottom center of the device.
Unscrew the Master Screw first and use it to secure the device firmly to a table or onto the AL-125 device support in your cabinet
(the AL-125 part is available through our after-sales support and dealers).
Master Screw placement
Fix your device with the provided “Master Screw” in order to ensure that the unit cannot be removed without the use of a
tool.
Check the position of the medical device so that it corresponds to your line of sight and the characteristics of your personal
workstation (the lighting and the distance between the user and the device). The device must remain quickly and easily
accessible at all times.
Check that the water and air lines and the power cord do not hinder physical movement.
9 AIRFLOW®STATION or STATION+

10 11
5.2- Attaching and removing AIRFLOW®or PERIOFLOW®Handpiece
In order to ensure perfect electronic connection, the individual components must be dry.
Attaching the
AIRFLOW®or
PERIOFLOW®
Handpiece
Connect the Handpiece to the hose.
Removing the
AIRFLOW®or
PERIOFLOW®
Handpiece
Disconnect the Handpiece from the hose.
5.3- Attaching and removing PERIOFLOW Nozzles
Single-use PERIOFLOW Nozzle. Cannot be reprocessed.
DO NOT use the PERIOFLOW Nozzle if the
package is damaged or opened.
Fully connect the PERIOFLOW Nozzle by
pushing on a hard surface.
Make sure the PERIOFLOW Nozzle is correctly
attached = fully inserted and right way
Remove the nozzle by using the PIEZON®
Instrument check tool
Risk of injury: Always USE the PIEZON®
Instrument check tool.
DO NOT remove by hand.
DEVICE USE
I- INTERFACES
4
3
1
2
5
6
BOOST
USE FORCE
NORMAL
PRESS GENTLY
1ON/OFF-mode Standby
ON: the device goes into operating mode.
OFF: the device reverts back to standby.
(After 1 hour of inactivity, the unit switches to standby)
2
Powder chamber
pressurization /
depressurization
Powder chamber is pressurized or depressurized.
A white light illuminating the powder chamber will turn on when pressurized.
During chamber depressurization, the AIRFLOW®cord will automatically purge and the white light will
turn off at the end of the process.
Entering Standby mode: The powder chamber depressurizes automatically.
Powder chamber depressurization may take up to 10 seconds to complete.
During this time, it is recommended that you leave the AIRFLOW®Handpiece in its holder with the nozzle
facing down to avoid spraying the purged air and residual powder upwards.
3 Power setting
Place your finger in the groove below the numbers to adjust AIRFLOW®
air pressure:
• 0 (water only, blue indicator)
• 10 (Maximum)
Memorization of the preselected settings.
4AIRFLOW®water Sets the AIRFLOW®water flow rate.
5Pedal (normal) Press the edge of the pedal for normal operation.
The pedal is deactivated when handpiece cord is placed in its holder.
6
Pedal BOOST
(Only on the wireless
pedal)
Pressing hard on the center of the wireless pedal activates power boost.
For easy boost activation: leave the foot on the pedal and put the heel up.
Scan
for
support
IV- WATER SUPPLY AND WATER BOTTLE
What water should I include in my WATER bottle?
EMS recommends the use of:
Filtered drinking water
Good quality tap water
Distilled water
The temperature must be between 10°C and 30°C. All other liquids can damage your device and void your warranty.
How to fill your water bottles?
Fill both bottles each morning with filtered water or good quality tap water (keep one as a back up to ensure uninterrupted
treatment flow).
To remove and place the bottle, use a straight up and down movement (do not shake the bottle to avoid damages).
At the end of every day: empty your bottles and allow to dry.
Once a week: wash your bottles with warm soapy water, rinse thoroughly and allow to dry.
It is also recommended to use a bottle cleaning agent weekly.
Without Bottle:
AIRFLOW®uses external water supply.
With WATER Bottle connected:
AIRFLOW®uses bottle liquid supply.
The CLIP+CLEAN shall be previously cleaned and
sterilized before use.
Non-cleaned and sterilized CLIP+CLEAN may contaminate
the device.
Place the CLIP+CLEAN into the device’s bottle receptacle
for dust protection.
Connect the WATER bottle
Only use the WATER bottle EG-121 (transparent) for water.
Water supply when on a STATION+
It's important to note the following configurations with the WATER Bottle when your AIRFLOW®ONE is on a STATION+.
AIRFLOW®TREATMENT – NO WATER AIRFLOW®TREATMENT – WATER bottle B
AIRFLOW®TREATMENT – WATER bottle A AIRFLOW®TREATMENT – WATER bottle A
DO NOT sterilize the WATER bottle and its nozzle cap by steaming or dry thermal reprocessing.
V- AIRFLOW®AND PERIOFLOW®HANDPIECES
5.1- Before rst use
EMS AIRFLOW®and PERIOFLOW®Handpieces are sterilizable and need to be cleaned and sterilized before use. Non
reprocessed Handpieces may cause bacterial or viral infections.
Follow the recommendations of the "Reprocessing Instructions" (FB-358/NA) manual delivered with your product regarding
procedure for cleaning, disinfecting and sterilizing the components, and the present-day regulations on reprocessing in effect
in your country.
In case the AIRFLOW®or PERIOFLOW®Handpieces get clogged, refer to the “Maintenance & Troubleshooting” section for
instruction.

12 13
II- TREATMENT SEQUENCE
Consult the Treatment Recommendations (FB-648/US) before starting any treatment to the patient.
2.1- Patient and dental professional precautions
For your protection and the protection of your patient, start by rinsing with an antimicrobial mouth rinse.
2.1.1- Patient preparation
Eye protection is mandatory.
It is also recommended to remove the patient‘s glasses and optical lenses.
OptraGate for lip and cheek retractor protection is recommended for maximum
patient comfort and improved access to the treatment field. If a retractor is not used,
place cocoa butter or equivalent on the patient‘s lips.
If PERIOFLOW®treatment has to be performed, radiographs is mandatory to correlate
clinical probing depth.
EMS Nyon
2.1.2- Dental professional preparation
Protect yourself with the following measures:
Wear protective mask Wear protective glasses Wash your hands Wear protective gloves
Additional personal protective equipment can be used.
High vacuum suction (HVS) and saliva ejector are mandatory. They evacuate the air/powder mixture deviated by the treated
tooth. Study12 on aerosol management shows that if AIRFLOW®is used as recommended, the risk is negligeable for the clinician.
2.2- AIRFLOW®and PERIOFLOW®
2.2.1- AIRFLOW®treatment
2.2.1.1- Recommended position and movement
Angle
Aerosol management:
Use high-speed suction cannula. Positioning the HVS in opposite nozzle direction.
Direct the jet projections towards the cannula.
15° to 80°
2-5mm
Optimal efciency
Avoid using the AIRFLOW®Handpiece at 90°
Continuously adapt the angle while working
Maximal range of usage is between 15°-80°
Distance
General rule: With AIRFLOW®MAX, work closer!
Keep the handpiece at 2 to 5 mm during work
In case of heavy stains, keep the handpiece at max 2mm
More than 5mm, it will lose efficiency
Movement
Make continuous semi-circular movement
Small smileys mesial to distal
Never hold the handpiece stationary
12 Aerosols in Dentistry: The Bacterial Contamination of the Room Air During an AIRFLOW®Treatment. Marcel Donnet, Klaus-Dieter Bastendorf, Magda Mensi,
Adrian Lussi. www.ZM.ONLINE.de 12/2020
1.1- AIRFLOW®pressure setting
Both the PLUS and CLASSIC powder chambers have an integrated dynamic pressure
regulator that automatically set the optimal pressure range for the selected powder chamber
and related powder type as detailed in chapter “Powder Chambers”.
The following table shows the static and approximate dynamic pressures10 as per selected powder chamber and user power
setting:
Pressure settings 012345678910
Static (Bar) /2.5 2.7 3.0 3.2 3.5 3.7 4.0 4.2 4.5 4.7
CLASSIC dynamic (Bar) /1.9 2.1 2.3 2.6 2.8 3.0 3.2 3.5 3.7 3.9
PLUS dynamic (Bar) / 1.5 1.7 1.9 2.0 2.2 2.4 2.6 2.7 2.9 3.1
1.2- AIRFLOW®BOOST
Pressing hard on the center of the wireless pedal activates the BOOST mode and results in an increase of power, as the
following table shows:
Power settings 012345678910
AIRFLOW®
corresponding Boost level 067888910 10 10 10
1.3- Wireless pedal battery saving
Each time the wireless pedal is released, it enters into a low power mode. Even if unused for long, it is not required to remove
the batteries.
To avoid an involuntary depletion of the wireless pedal batteries, in case the pedal remains pressed without interruption for 10
minutes, it will automatically enter into switch-off mode.
To resume from the switch-off mode, it is required to first release the wireless pedal and then power cycle the device (switch
off for 30s and then power on again).
1.4- Water temperature and acoustic feedback settings
AIRFLOW®water temperature is 40°C by default.
To adjust the water temperature or the acoustic feedback, follow the procedure below:
1. Turn the device ON.
2. Securely place the AIRFLOW®handpiece back into its holder.
3. Press 0 + 10 simultaneously to access the menu. (See image below – place fingers in the groove below the numbers)
4. Colors will appear on the numbers:
• 0 to 4 for setting water temperature (5 is not used)
• 6 to 10 for setting acoustic feedback (5 is not used)
Water temperature11 Acoustic feedback
01234 678910
No
Heating 25° 30° 35° 40° No
sound
Low
volume
Medium
volume
High
volume
Maximum
volume
5. Change the settings according to your wish.
6. Press the ON/OFF button to save the setting and exit.
Note:
• After a few seconds of keyboard inactivity, the device automatically exits the mode.
10 Dynamic pressures depend on handpiece and powder type too. The listed pressures are for information purpose and referring to the commonly used EL-308
AIRFLOW®Handpiece with DV-082 and DV-048 powders.
11 The target temperature is determined into the device’s body.
On AIRFLOW®side, water temperature decreases along the cord. Air spray also decreases the temperature. Final temperature of AIRFLOW®spray is lukewarm, lower
than 40°C.
Scan
for
support

14 15
2.2.3- On the device
1 Position the powder chamber.
2 Pressurize the chamber.
3 Set the AIRFLOW®power.
4 Set the water flow.
5 Take the AIRFLOW®or PERIOFLOW®Handpiece.
6 Press the pedal to start treatment.
7 [Step hard on the center of the BT pedal for BOOST.]
8 Release the pedal to stop treatment.
9 Put the handpiece back into its holder.
10 Depressurize the powder chamber before removing the AIRFLOW®
handpiece for sterilization.
4
3
1
2
5
6
7
8
Treatment does not stop immediately. Beware there is a small delay between the release of the pedal and the effective stop
of the treatment (approximately 0.2 second). Make sure to never point the PERIOFLOW Nozzle toward the patient, during and
after operation.
Risk of patient injury. If you are not trained on a specific treatment, do not execute it. Always get trained before executing
new treatments.
2.2.4- End of treatment
2.2.4.1- Fluoride protection
After completion of treatment, the patient can do a final rinse.
After the treatment, the teeth are practically free from mucin. It is thus advised to carry out a topics application of fluoride. It is
then important to use a colorless fluoride.
2.2.4.2- Post-treatment recommendations
Treatment cleans the teeth but also eliminates the pellicle acquired by the patient. Since the restoration by salivary proteins
takes time, the teeth are left without natural protection against coloration for 1 hour.
DURING 1 HOUR
NO
COFFEE
NO
SMOKING
NO
ALCOHOL
2.2.1.2- Settings
20 to 60%
A
B
O
V
E
C
E
M
E
N
T
O
-
E
N
A
M
E
L
J
U
N
C
T
I
O
N
GBT
I
N
P
I
T
S
A
N
D
F
I
S
S
U
R
E
S
A
R
O
U
N
D
B
R
A
C
K
E
T
S
GBT
GBT
E
X
P
O
S
E
D
D
E
N
T
I
N
E
GBT
4MM
A
R
O
U
N
D
I
M
P
L
A
N
T
S
GBT
I
N
T
E
R
D
E
N
T
A
L
GBT
O
N
P
R
I
M
A
R
Y
T
E
E
T
H
O
N
R
E
S
T
O
R
A
T
I
O
N
S
GBT
S
U
B
G
I
N
G
I
V
A
L
GBT
T
O
N
G
U
E
A
N
D
P
A
L
A
T
E
100%13
2.2.2- PERIOFLOW®treatment
2.2.2.1- Recommended use
Only use by trained and qualified personnel.
Correlate clinical probing depth with radiographs before using the PERIOFLOW
Nozzle.
Always check the patency of the PERIOFLOW Nozzle before and during use.
Single use per patient. DO NOT use the same PERIOFLOW Nozzle in more than
1 patient, PERIOFLOW Nozzle cannot be sterilized or re-used.
Use the PERIOFLOW Nozzle between 5-10 secs per site depending on the
probing depth.
If treating multiple sites in 1 patient, check if the tip of the PERIOFLOW Nozzle is
not bent and the quality of the PERIOFLOW Nozzle has not changed.
After approx. 20 sites, change the PERIOFLOW Nozzle.
In natural teeth, after a 6-point pocket charting, the PERIOFLOW Nozzle is to be
used only in sites where probing depths exceed 4mm.
Use your finger and thumb to compress the site.
Never push or force the PERIOFLOW Nozzle into the pocket even if the depth is
> 4 mm.
Use it in a vertical overlapping, repetitive movement. The PERIOFLOW Nozzle
must be inside the pocket during the entire cleaning process.
Around dental implants, use the PERIOFLOW Nozzle in buccal, lingual, mesial
and distal sites - all sites in general..
Vertical
oscillations
Vertical movements
2.2.2.2- Risk of emphysema
To limit the risk, always follow contraindications, recommendations and detailed instructions.
Subcutaneous emphysema occurs as a result of an abnormal introduction or presence of air or gas into tissue or tissue spaces.
It has been recognized and documented as a complicating factor of any dental procedure where pressurized air has been used.
Expeditious diagnosis and management of subcutaneous emphysema are important to facilitate recovery.
Clinical signs of emphysema:
Crackling of mucosa upon pressure (subcutaneous crepitation), pain, swelling, tenderness and discomfort.
Often accompanied by facial or neck swelling.
2.2.2.3- Settings
50 to 100%
9MM
I
N
P
E
R
I
O
D
O
N
T
A
L
P
O
C
K
E
T
S
9MM
I
N
P
E
R
I
-
I
M
P
L
A
N
T
P
O
C
K
E
T
S
I
N
R
O
O
T
F
U
R
C
A
T
I
O
N
S
100%14
13 Adjust setting up to 100% for warmer water.
14 Set water spray at 100% to prevent lesions.

16 17
2- Flushing
1 2 3 4
H2O
Place the water bottle fully
filled.
Set water to 10.
Turn the device ON. Hold cord over a sink. Press the pedal until the water
runs clear.
To reduce the risk of
ingestion of the cleaning
agent by the patient, always
use a fully filled 800ml
water bottle.
Set water regulator to 10 to
ensure optimal rinsing.
Contamination prevention:
DO NOT make any contact
between the sink and the
cords.
Cleaning can be paused and
reset by pressing the pedal
again.
Remove the water bottle and
rinse well prior to filling with
water for the first patient of the
day.
DO NOT leave water in your water bottles overnight. Allow the bottles to air with the lids off overnight.
Always empty out and wash the water bottle used for rinsing before any new use. EMS recommends a weekly use of a bottle
cleaning agent.
After every patient
Overall cleaning and disinfection
1 2
Use a cleaning and disinfecting wipe (less than 35% alcohol) compatible EPA-
registered intermediate level surface disinfectant or that complies with the standards
applicable in the country (e.g. MICROKLEEN or Opti-Cide³ wipes).
Follow carefully the instructions provided by the wipes manufacturer.
DO NOT use CaviWipes™ or Advantaclear wipes. They damage EMS products
Reprocess handpieces and
instruments. Please refer to FB-
358/NA “reprocessing instructions”
delivered with your kit.
Risk of contamination. Always
disinfect the bottom and top areas of
device air connections.
Please remember to dry your
AIRFLOW®cord connection and ensure
it is cooled and dried prior to each use.
Excess moisture can cause blockages.
III CLEANING AND REPROCESSING
Follow the recommendations of the "Reprocessing Instructions" (FB-358/NA) manual delivered with your product
regarding procedure for cleaning and sterilizing the components, and the present-day regulations on reprocessing in effect in
your country.
Reusable Products:
Description
AIRFLOW®MAX handpiece CLIP+CLEAN
PERIOFLOW®handpiece Easy Clean
3.1- Water lines cleaning & disinfection
If you have the AIRFLOW®STATION+, bottle has to be placed onto the cart to run the lines. To disinfect the
unit place the CLEANER bottle on the bottom only.
NIGHT
CLEANER
WATER SUPPLY
BY HOSE EG-110 Keeping the device’s water lines clean and disinfected is mandatory to prevent patient infection.
A regular cleaning and maintenance protocol should be adopted to clean and protect dental unit
waterlines. EMS recommends using EPA-registered dental unit waterline cleaners, VistaCleanTM
Irrigant Solution Concentrate and VistaTab™ Dental Unit Waterline Cleaner by Hu-Friedy or
Monarch Lines Cleaner by Air Techniques.
Follow the instructions for use of the product.
The instructions for use should be followed to ensure the appropriate water quality to help protect
patients, staff and equipment.
Handpiece should be removed prior to using VistaCleanTM /VistaTab™ or Monarch Lines
Cleaner.
The water supply hose and related device connection will not be cleaned by this procedure.
Initial start-up treatment and routine treatment
Follow the instructions for use of the product.
For daily water line disinfection: Add drops16 of VistaCleanTM Irrigant Solution Concentrate in the water bottle fully filled (800ml)
and use it with patients.
Dental unit waterline cleaner and AIRFLOW®ONE
1- Waterlines cleaning with VistaTab™ Dental Unit Waterline Cleaner or Monarch Lines Cleaner.
Follow the instructions for use of the product.
1234
CLEANER
Place the CLEANER bottle onto
the device with VistaTab™ or
Monarch Lines Cleaner
Set water to 10.
Turn the device ON. Hold cord over a sink.
Press the pedal once,
release, and wait 1 minute.
Repeat if necessary until the
solution is visible.
Set water regulator to 10 to
ensure the flow of the cleaning
agent.
Contamination prevention:
DO NOT make any contact
between the sink and the
cords.
16 Follow disinfection products manufacturer instructions. Please refer to your public health guidelines.
Scan
for
support

18 19
Good
Worn-out
1. Disconnect the power cord from the grid first.
2. Disconnect the water hose by pulling it off the
connector.
3. Pull the filter off by hand or by using a small flat
screwdriver.
4. Replace with a new filter and reconnect the hose.
4.5- Yearly maintenance and repair
EMS devices and products must only be maintained and/or repaired by EMS service center in Dallas.
A yearly preventive maintenance or 2000 hours usage maintenance (this is when the LED 1
on your device is lit solid orange prompting you to contact your EMS service provider), whichever
comes first, is required as means of safety and performance guarantee for both the patient and the
user.
Qualified service repair may also be required anytime persistent malfunctioning is detected by the
user and/or reported by the device diagnostic.
When returning the device for service, it is recommended that you ship the device with its pedal, powder chamber,
bottle and cord in its original packaging for optimal protection against damage during transportation.
Provide the contact details of EMS for a quicker service process (see § 4.8).
4.6- Pairing a new pedal
1. Remove one battery from the pedal (no need to remove both).
2. Place the handpiece in its holder.
3. Turn the machine OFF, wait 10 seconds, then turn it ON again.
4. Press 0 + 5 first, then also press 10 simultaneously.
A sonar sound will start playing (if not, repeat step 4).
Respect the order and the three-finger sequence (see figure – place fingers in the groove below the numbers).
5. While the sonar sound plays, replace the lithium batteries into the wireless pedal.
6. Within a short time (less than 15 seconds), the pairing will be complete, the white LEDs will blink for a while and the
device is then ready for use.
If the process takes longer than 1 minute, it means the pairing has failed and the device will automatically exit the mode. (No
more sonar sound and no blinking at exit).
In case of this process failure, redo it from the beginning.
4.7- Troubleshooting
4.7.1- For AIRFLOW®and PERIOFLOW®products
No powder/air jet coming from the unit
1° Cut immediately the air input by releasing the foot pedal
2° Wait for 1-2 minutes for the system to decompress
3° Disconnect the unit from the dental unit
4° Press the foot control pedal of the dental unit
5° If no air comes out of the turbine connector, it is your dental unit that causes the problem. Send the unit to
the EMS service center in Dallas
6° If air comes out, it is the device that causes the problem
7° Unscrew the cap above the wash-hand basin, because the powder can be ejected. A sealed apparatus,
even disconnected, can indeed remain under pressure
8° Empty the powder chamber and screw the cap back on
9° Connect the unit to the dental unit (be careful, the powder chamber must be empty)
10° Connect the handpiece to the unit
11° Press the foot control pedal of the dental unit
12° If air comes through the handpiece connector, the handpiece is blocked. Clean the handpiece
13° If no air comes out of the handpiece connector, the unit is blocked
Send the unit to the EMS service center in Dallas
No water spray is coming from the PERIOFLOW Nozzle
1° Change the PERIOFLOW Nozzle
2° Remove the PERIOFLOW Nozzle and verify that a water jet comes out of the handpiece
3° Send the device to the EMS service center in Dallas
Scan
for
support
IV- MAINTENANCE & TROUBLESHOOTING
4.1- AIRFLOW®and PERIOFLOW®Handpiece unclogging
Before the reprocessing or in case of a clogged AIRFLOW®and PERIOFLOW®Handpieces: use Easy Clean provided in your
AIRFLOW®Application box.
1- Clean the water channel:
AIR
Clear the water channel with air
2- Clean the air-powder channel with Easy Clean:
Fill the syringe with water
Connect the Easy Clean
Connect the Handpiece
Rinse the air-powder channel
The Easy Clean must be cleaned and sterilized in a fractional pre vacuum cycle at 132°C for 4 minutes.
4.2- AIRFLOW®Handpiece leakage
In case of leakage at the AIRFLOW®Handpiece connection with the AIRFLOW®cord, replace
the o-rings of the cord with the spare provided in the EL-1076 kit located in the AIRFLOW®
application box. Contact EMS aftersales service if needed.
4.3- Handpiece cord replacement
Disconnect the mains plug for purposes of maintenance and in case of malfunction.
Depressurize the powder chamber before disconnecting the AIRFLOW®cord.
In case of persistent malfunction or damage to the AIRFLOW®Handpiece cord system, the part can be easily replaced by the
user. Follow the directions for replacement provided with the spare part supply.
1
2
Handpiece cord disconnecting procedure:
1. Unlock the cord system by pushing the lock switch to the front (Switch located under the device).
2. The cord system is now unlocked and can be removed by pulling it.
4.4- Monthly check
Each month check both air and water filters for cleanliness.
Disconnect the mains plug for purposes of maintenance and in case of malfunction.
No maintenance is allowed while in use with a patient.
Check water and air
filter cleanliness.
Filter color has to be white without significant visible
impurities. If not, replace the filter.
If the water filter needs to be changed more than 3
times a year, please check the quality of your water line.
Air filters usually remain clean for longer periods of
time. Replace once a year. (The yearly maintenance
service includes the replacement of both filters.)
To change the water and air filters from your device on a
Station+, remove the device from your Station+ via the
centre screw.
Scan
for
support

20 21
LED 3 SOLID orange
The problem may have multiple causes. A step-by-step multiple checks are required
1° No pedal detected (at least one pedal must be connected to operate the device):
- Wired pedal may be disconnected. Check if the jack is fully inserted. Restart the device
- Wireless pedal is not paired. Execute the procedure “Pairing of new pedal”
2° If the error is still present, contact the EMS service center in Dallas for repair
LED 3 BLINKING orange
The AIRFLOW®cord system is not detected or missing. At least one cord system is required to operate the
device
1° First, switch OFF the device, then disconnect the AIRFLOW®handpiece cord and clean the electric contacts
(jacks) present on the cord system connections. Also blow air to clean the device connection receptacle.
2° Reinstall the handpiece cord and start the device again
3° If error is still present, contact the EMS service center in Dallas
LED 4 BLINKING orange
Risk of fire and electric shock
First disconnect the mains plug
1° Your device is too hot. Unplug it, wait for 1 hour and start the device again
2° If error is still present, contact the EMS service center in Dallas
Note: This error also shows up when the device is operating below the minimum temperature
In this case, just wait for the device to warm up to ambient temperature
Water filter leakage
First disconnect the mains plug
1° Replace the water filter (blue cartridge)
2° If still not solved, contact the EMS service center in Dallas
Bottle or bottle connection leakage
1° Ensure the bottle cap has been correctly closed
2° Clean the connection: cap and device sides
3° Replace the bottle
4° If still not solved, contact the EMS service center in Dallas
The unit does not start
1° Check the electrical connection and power socket
2° Check the fuses at the back of the unit:
First disconnect the mains plug
Fuses are housed within the power cord socket
1° Remove the power cord from the device
2° With the help of a small flat screwdriver, open the fuse-holder cover
3° Replace fuses only with the exact type required (refer to the “Technical Description” section)
4° If still not solved, contact the EMS service center in Dallas
Wireless pedal does not work
In the case is evident that the pedal remained pressed for longer than 10min, simply release the pedal and
power cycle the device. If not this case, the problem may have multiple causes. A step-by-step multiple
checks are required:
1° Switch-off the device and disconnect and reconnect the AIRFLOW®cord system. Try again
2° Perform a new pairing. This procedure is explained in the paragraph “Pairing a new pedal”. Try again
3° Change the 2x AA lithium batteries and try again
4° If still not solved, contact the EMS service center in Dallas
Wired pedal does not work
1° Disconnect and reconnect the pedal. Check the cable for damage. Restart the device
2° If still not solved, contact the EMS service center in Dallas
No pressurization of the powder chamber
1° Check that your device is ON: at least 1 LED light should be ON
2° Check that the AIRFLOW®cord system is well connected (full green mark on the lock actuator)
3° If still not solved, contact the EMS service center in Dallas
Powder chamber white light is BLINKING at pressurization attempt
Either the air line is not connected or there is not enough air pressure
1° Check the air line for no kinking and check the air compressor unit
2° Check air filter for cleanliness and replace if dirty
3° If still not solved, contact the EMS service center in Dallas
Powder chamber white light is BLINKING at depressurization
1° The handpiece could be clogged. Unclog with Easy Clean (see paragraph below)
2° AIRFLOW®cord could be clogged. Dismount and clean the AIRFLOW®cord extremity
3° If still not solved, contact the EMS service center in Dallas
Water leakage between the handpiece and the PERIOFLOW Nozzle (unusual leak of droplets)
1° Check the position of the PERIOFLOW Nozzle and its position on the handpiece
2° Change the PERIOFLOW Nozzle
3° Check for residues between the PERIOFLOW Nozzle and the handpiece
4° Check that nothing affects the alignment of the PERIOFLOW Nozzle
5° Send the device to the EMS service center in Dallas
Water leakage between the handpiece and the cord.
1° Ensure the handpiece has been correctly connected to the cord
2° Clean the interior of the handpiece and the cord terminating end
3° Replace the AIRFLOW®cord gasket as described in section “AIRFLOW®Handpiece leakage”
4° If still not solved, contact the EMS service center in Dallas
Insufficient or no water from handpiece
1° Make sure you have set your water regulators to 10 (maximum flow on the cord) and verify that the
handpiece is not clogged by removing it and checking the water flow without handpiece
2° Check your water filter cleanliness and replace it if necessary
Disconnect the mains plug before servicing any filter
2° Make sure you have well-connected and sufficient pressure from your water supply
3° If still not solved, contact the EMS service center in Dallas
The unit efficiency diminishes
1° Check the amount of powder in your device
2° Check the air pressure of the dental unit
3° Change the nozzle
4° Remove the residual powder in the channels of the handpiece with EasyClean
5° Send the device to the EMS service center in Dallas
If the handpiece falls
AIRFLOW®Handpiece:
1° Check the state of the nozzle
2° Replace the handpiece
PERIOFLOW®Handpiece:
1° Replace the PERIOFLOW Nozzle and check the fit of the
PERIOFLOW Nozzle
2° If the PERIOFLOW Nozzle doesn’t hold or it is not watertight, send
the handpiece to the EMS service center in Dallas
4.7.2- For the device
The device is whistling or making strange noises
Risk of bottle explosion
First disconnect the mains plug
This symptom is generally caused by a problem to the pressure regulator (fault or low temperature) or by a
crack in the water bottle
1° Stop using your device immediately and disconnect it from the grid
2° Check the bottle in use for crack or any damage and, if the case, replace it with a new one
3° Check the supplied air pressure: it shall be 4.5 bar minimum
4° If the device temperature is below 10°C (device too cold), wait for it to warm-up at ambient temperature
and then reconnect to the power grid and switch it on again
5° If the device temperature is over 10°C, or the problem recurs, definitively stop using it and contact the EMS
service center in Dallas
The device is making smoke (and fire)
Risk of fire and electric shock
First disconnect the mains plug
Stop using your device immediately, disconnect it and contact the EMS service center in Dallas
Cord or device leakage
Risk of fire and electric shock
First disconnect the mains plug
1° If the leak is from the AIRFLOW®handpiece, replace the o-rings
2° If the leak is from the device (handpiece support and water regulator), replace the complete handpiece cord
3° If still not solved, contact the EMS service center in Dallas
LED 1 is SOLID orange
Automatic maintenance reminder. It is time to send your device to yearly maintenance service
Promptly contact the EMS service center in Dallas
LED 1 is BLINKING orange
Permanent or transitory hardware fault condition detected
1° Unplug the device power cord, wait for 30 seconds, then plug it back again and restart the device (to check
for effective permanent fault condition)
2° If the error is still present, contact the EMS service center in Dallas for repair
LED 2 is SOLID orange
The wireless pedal’s 2x AA lithium batteries are depleted. Replace both with new AA high-quality lithium
batteries having current limiter protection

22 23
TECHNICAL DATA COLLECTION AND PRIVACY POLICY
During maintenance and/or repair of the device, EMS or any authorized EMS repair center will have access to certain technical
information such as usage statistics (hereinafter “Technical Data”), collected during the device service.
Such technical data shall be analyzed and used by EMS in its legitimate interest, e.g. to carry out statistical analysis and to
improve its customer service and/or its Research and Development processes.
EMS may also use such technical data along with your personal details in order to be able to understand your personal usage
of the device and offer you a better customer experience and tailored service. However, you can unsubscribe from this process
at any time, by simply sending us an email at privacy@ems-ch.com.
Rest assured that these activities will be carried out in compliance with applicable data protection laws. For any questions
regarding your personal data, please consult our privacy policy at www.ems-company.com or send an email to privacy@ems-
ch.com.
TECHNICAL DESCRIPTION
Manufacturer EMS ELECTRO MEDICAL SYSTEMS SA, CH-1260 Nyon, Switzerland
Model AIRFLOW ONE, product code FT-230
Classification IEC 60601-1 Electrical Insulation Class-I
Applied part Type B
IP20 Control unit
IP21 Foot pedal
Operating mode Continuous operation
Power supply 100-240Vac, 50-60Hz, 4A max.
Power consumption OFF-mode / Stand-by: 0.5W max.
Max: 700VA
Fuse 5A, T (slow), 250Vac, H type (=T5H250V)
Wireless communication
module
Max 8 dBm EIRP, 2.4GHz band, Bluetooth®radio module
Weight Control Unit 5kg max. (full operating condition)
Foot pedal: 0.35kg max. (wireless pedal)
Dimensions Control Unit: Height: 245 mm, Width: 205 mm, Length: 290 mm
Wireless pedal: Diameter 135 mm, Height 35 mm
Operating conditions Temperature: 10°C to 35°C
Humidity: 30% to 75%
Altitude: Max 2000m
Storage conditions Device:
Temperature: -10°C to 30°C, no water inside
Humidity: 10% to 95% not condensed
Pressure: 500hPa to 1060hPa
Application box:
Temperature: up to 40°C
Transport conditions Temperature: -29°C to 38°C, no water inside
Humidity: 10% to 95% not condensed
Pressure: 500hPa to 1060hPa
Input fluids Water: pressure 2-5bar, temperature 10-30°C, salinity 0.2% max., hardness from 8 to 12°dH, minimum
flow-rate 100ml/min, RECTUS 20KA connector type. EN-1717 compliant water network/inlet is required.
Note: The pH and particle size information are not relevant.
Air: pressure 4.5-7bar, dry-only (humidity 1.032g/m3 max.), oil filtered 0.1mg/m3 max., minimum flow-
rate 20 Nl/min at 4.5bar, RECTUS 21KA connector type
Output fluids Water: min. 40ml/min. for AIRFLOW®
Air: max pressure 5bar for AIRFLOW®
A few drops may escape when the water setting is at "0"
Shelf life WATER and CLEANER®bottles: 5 years
Validated lifetime Handpieces (main bodies): 1000 sterilization cycles
Expected service life Device: 7 years, having regular yearly preventive maintenance
Powder sprays out of chamber at depressurization
1° Powder chamber is filled beyond the maximum level marked
2° Remove the powder exceeding the MAX sign on the bottle
Powder leaks under the AIRFLOW®Handpiece cord system
The AIRFLOW®pinching element might be worn out or the air interface is dirty and is leaking powder
1° Disconnect the cord, clean the air jack and connect again. If problem persists, go to Step 2
2° Replace your AIRFLOW®Handpiece cord with a new one
3° If still not solved, contact the EMS service center in Dallas
Powder chamber is leaking
1° Clean the chamber with a wet cloth, in particular the cap and the bottom o-rings. Also clean the connecting
elements on the device
2° If still not solved, replace the powder chamber with a new one
4.8- To contact EMS service center
Electro Medical Systems Dallas Corporation
11886 Greenville Avenue, #120
US-Dallas, TX 75243
Phone: +1 972 690 83 82
Fax: +1 972 690 89 81
Email: info@ems-na.com
SUSTAINABILITY
I- DISPOSAL OF WASTE
The device must not be discarded in domestic household waste. Should you wish to definitively
dispose of the device, please comply with the regulations that apply in your country.
Other parts of this device, including tips/inserts, and chemicals must be disposed of according to
your country’s regulations.
Keep the original packaging until the device is to be disposed of permanently. It can be used for
shipping or storing.
II- SUSTAINABLE DESIGN
The device, on a voluntary basis, respects the latest Eco design low energy standby and off mode
consumption regulation19. Packaging cardboards are recycled and recyclable.
Printed instructions are aligned with a sustainable development policy and are certified « Myclimate
neutral imprimerie » and « FSC ».
WARRANTY
Certify your practice and receive a second year of warranty. This warranty is only valid if you have completed your first yearly
maintenance within 12 months following purchase.
For more details, scan the QR code.
Warranty is void if the device has been used with non-original EMS powder and handpieces. Warranty is void if the device has
been opened.
EMS and the distributor of this device accept no liability for direct or consequential injury or damage resulting from improper
use, arising in particular through non-observance of the instructions for use, or improper preparation and maintenance.
EMS declines the responsibility for the safety of the device and declares the warranty null and void if service or repair is carried
out by an unauthorized third party or if non-genuine spare parts are used.
19 European Commission Regulation N°1275/2008 of 17 December 2008 regarding the Eco design requirements for standby and off mode electric power
consumption of electronic household and ofce equipment.
Scan
for
support

24 25
TRA
REGISTERED NO:
ER64514/18
DEALER NO:
DA76058/18
United Arab Emirates TRA compliance marking for wireless equipment
ER64514/18: BLE113 Bluetooth module approval number
ER67538/18: BLE121LR Bluetooth module approval number
Australian RCM compliance marking for wireless equipment
R-NZ New Zealand R-NZ compliance marking for wireless equipment
Complies with IMDA
Standards (DB106919)
Singaporean IMDA compliance marking for wireless equipment
DB106919: Dealer’s Licence No.
CMIIT ID: 2018DJ3393 Chinese SRRC compliance marking for wireless equipment
2018DJ3393: System approval number
R-RMM-E23-FT-229
KCC-CRM-BGT-BLE113
Korean KC compliance marking for wireless equipment
R-RMM-E23-FT-229: System approval number
KCC-CRM-BGT-BLE113: Bluetooth module approval number
South African ICASA compliance marking for wireless equipment
TA-2017/2826: BLE113 Bluetooth module approval number
TA-2018/3027: BLE121LR Bluetooth module approval number
И005 20
Serbian RaTT certification label “Triple A” for the the R&TT equipment
И005: Identification number of the designated Conformity Assessment Body Kvalitet
20: Two digits of the year when the certificate was issued
DEKRA INMETRO identification for products in conformance with Brazilian electrical standards
Oman TRA compliance marking for wireless equipment
D192564 – dealer number
R/11875/21-certificate number BT system FT-230
ANATEL certification number 01237-16-03402
ANVISA: 80102512352 ANVISA certification number 80102512352
C US
CSA marking with “C” identification for products in conformance with Canadian standards and “US”
for products in conformance with US standards
SYMBOLS
General Warning
Warning Electricity
Non-ionizing radiation (radio communication)
Read the operation instructions
Device requiring protective earth
Disconnect the mains plug for purposes of maintenance and in case of malfunction
Electronic instructions for use
Mandatory action
Wear personal protective equipment
Expiration date
Single use. Do not re-use.
Do not do.
Disposal of old electronic equipment (European Union & other countries with separate collection
systems)
135°C
Sterilizable at up to 135°C in the autoclave
Thermal disinfection
Input
Output
Fuse
Wired foot pedal connection
IP ... Protection against water permeability
Applied part, type B
Manufacturer
EC REP
EC Importer
EC
Authorized representative
EMS France SARL
32 Rte de Pontarlier
39460 Foncine-Le-Haut
FRANCE
EC Authorized Representative
Manufacturing date
Serial number
Catalog number / Product reference
0124
Medical Device compliant with EU Directive 93/42/EEC
Number of the Notified Body
Prescription device
GOST R for products in conformance with Russian standards
UA.TR.028
Ukrainian Technical Regulation compliance marking for wireless equipment
UA – Symbol of Ukraine;
TR – Provisional symbol of the Conformity Assessment Body that is assigned to perform conformity
assessment to the requirements of technical regulations;
028 – Identification number of the designated Conformity Assessment Body.
AGREE PAR L'ANRT MAROC
Numéro d'agrément: MR
17713 ANRT 2018 / MR
14883 ANRT 2017
Date d'agrément: 16-10-2018
/ 09-10-2017
Moroccan ANRT compliance marking for wireless equipment
MR 17713 ANRT 2018: Wireless pedal approval number
MR 14883 ANRT 2017: Device approval number

26 27
Proximity elds from RF wireless communications equipment
IEC 61000-4-3
Test
Frequency
(MHz)
Band
(MHz) Service Modulation Maximum power
(W)
Distance
(m)
Immunity test
level
(V/m)
385 380-390 TETRA 400 Pulse Modulation
18Hz 1,8 0,3 27
450 430-470 GMRS 460,
FRS 460
FM
±5 kHz deviation
1 kHz sine
20,3 28
710
745
780
704-787 LTE Band 13, 17
Pulse
Modulation
217 Hz
0,2 0,3 9
810
870
930
800-960
GSM 800/900,
TETRA 800,
iDEN 820, CDMA
850, LTE Band 5
Pulse
Modulation
18 Hz
20,3 28
1720
1845
1970
1700-1990
GSM 1800, CDMA
1900,
GSM 1900, DECT,
LTE Band 1, 3, 4,
25, UMTS
Pulse
Modulation
217 Hz 20,3 28
2450 2400-2570
Bluetooth, WLAN,
802.11b/g/n, RFID
2450,
LTE Band 7
Pulse
Modulation
217 Hz
20,3 28
5240
5500
5785
5100-5800 WLAN 802.11a/n
Pulse
Modulation
217 Hz
0,2 0,3 9
NOTE: This equipment has been tested and found to comply with the limits for a Class B digital device, pursuant to part 15 of the FCC
Rules. These limits are designed to provide reasonable protection against harmful interference in a residential installation. This equipment
generates, uses and can radiate radio frequency energy and, if not installed and used in accordance with the instruction, may cause harmful
interference to radio communications. However, there is no guarantee that interference will not occur in a particular installation. If this
equipment does cause harmful interference to radio or television reception which can be determined by turning the equipment off and on,
the user is encouraged to try to correct interference by one or more of the following measures:
- Reorient or relocate the receiving antenna.
- Increase the separation between the equipment and receiver.
- Connect the equipment into an outlet on a circuit different from that to which the receiver is connected.
- Consult the dealer or an experienced radio/TV technician for help.
Electromagnetic emissions compliance
Emissions test Compliance Electromagnetic environment - guidance
RF emissions CISPR 11 Group 1 The product uses RF energy only for its internal function. Therefore, its
RF emissions are very low and are not likely to cause any interference in
nearby electronic equipment.
RF emissions CISPR 11 Class B
The product is suitable for use in all establishments, including domestic
establishments and those directly connected to the public low-voltage
power supply network that supplies buildings used for domestic purposes.
Harmonic emissions IEC 61000-3-2 Class A
Voltage fluctuations / flicker emissions
IEC 61000-3-3
Complies
ELECTROMAGNETIC COMPATIBILITY
The use of parts other than those supplied or listed as accessory may negatively affect EMC performance.
The device has embedded a low power, 8 dBm EIRP max, Bluetooth®2.4 GHz module, for communication with the wireless
pedal. This radio module is disabled when a wired pedal is connected (device reboot required).
The Bluetooth module complies with all the restrictions foreseen by the ERC recommendations 70-03 for the CEPT countries
concerning the Annex 3 (Wideband Data Transmission System band A 2400-2483.5 MHz) without requiring any modifications
of the products by the user.
The product is intended for use and Basic Safety is maintained in the electromagnetic environment specified below.
The customer or the user of this product should assure that it is used in such an environment.
Electromagnetic immunity compliance
Immunity test IEC 60601 test level Compliance level Electromagnetic environment - guidance
Electrostatic discharge (ESD)
IEC 61000-4-2
± 8 kV contact
± 15 kV air
Floors should be wood, concrete or
ceramic tile. If floors are covered with
synthetic material, relative humidity should
be > 30%.
Electrical fast transient/burst
IEC 61000-4-4
± 2 kV for power supply lines 100 kHz repetition
frequency
± 1 kV for input/output lines 100 kHz repetition frequency
Mains power quality should be that
of a typical commercial or hospital
environment.
Surge
IEC 61000-4-5
± 1 kV line(s) to line(s)
± 2 kV line(s) to earth
Mains power quality should be that
of a typical commercial or hospital
environment.
Voltage dips
IEC 61000-4-11
Voltage interruptions
IEC 61000-4-11
<5 % UT (>95 % dip in UT) for 0,5 cycle
40 % UT (60 % dip in UT) for 5 cycles
70 % UT (30 % dip in UT) for 25 cycles
0 % UT for 0,5 cycle at 0°, 45°, 90°, 135°, 180°, 225°, 270°
and 315°
0 % UT for 1 cycle single phase
<5 % UT (>95 % dip in UT) for 5 s
0% UT for 250 cycles
Mains power quality should be that
of a typical commercial or hospital
environment. If the user of the product
requires continued operation during power
mains interruptions, it is recommended
that the product be powered from an
uninterruptible power supply or a battery.
Power frequency (50/60 Hz)
magnetic field
IEC 61000-4-8
30 A/m 30 A/m (50 Hz or 60 Hz) Power frequency magnetic fields should
be at levels characteristic of a typical
location in a typical commercial or hospital
environment.
Conducted RF
IEC 61000-4-6
Radiated RF
IEC 61000-4-3
Proximity fields from RF
wireless communications
equipment
IEC 61000-4-3
3 V
150 kHz to 80 MHz
6V in ISM bands 150kHz
and 80 MHz
80 % AM at 1 kHz
3 V/m
80 MHz to 2.7 GHz
80% AM at 1 kHz
See Table below
3 V
150 kHz to 80 MHz
6V in ISM bands 150kHz
and 80 MHz
80 % AM at 1 kHz
3 V/m
80 MHz to 2.7 GHz
80% AM at 1 kHz
Portable RF communications equipment
(including peripherals such as antenna
cables and external antennas) should be
used no closer than 30 cm (12 inches) to
any part of the AIRFLOW®ONE, including
its cables. Otherwise, degradation of
the performance of this equipment
could result.Field strengths from fixed
RF transmitters, as determined by an
electromagnetic site survey20, should be
less than the compliance level in each
frequency range21.
Interference may occur in the vicinity of
equipment marked with the following
symbol: or
IEC 61000-4-39 134.2 kHz / Modulation
pulsée 2.1 kHz / 65A/m
13.56 kHz / Modulation
pulsée 50 kHz / 7.5A/m
134.2 kHz / Modulation
pulsée 2.1 kHz / 65A/m
13.56 kHz / Modulation
pulsée 50 kHz / 7.5A/m
Notes:
- UT is the a. c. mains voltage prior to application of the test level.
- At 80 MHz and 800 MHz, the higher frequency range applies.
- These guidelines may not apply in all situations. Electromagnetic propagation is affected by absorption and reflection from
structures, objects and people.
20 Field strengths from xed transmitters, such as base stations for radio (cellular/cordless) telephones and land mobile radios, amateur radio, AM and FM
radio broadcast and TV broadcast cannot be predicted theoretically with accuracy. To assess the electromagnetic environment due to xed RF transmitters, an
electromagnetic site survey should be considered. If the measured eld strength in the location in which the product is used exceeds the applicable RF compliance
level above, the product should be observed to verify normal operation. If abnormal performance is observed, additional measures may be necessary, such as re-
orienting or relocating the product.
21 Over the frequency range 150 kHz to 80 MHz, eld strengths should be less than 3 V/m.

28 29
ONLY USE ORIGINAL EMS PRODUCTS
So-called "EMS compatible" powders in the marketplace
may cause damage to oral tissues and the device.
See below a damaged AIRFLOW®nozzle after use with a
"compatible" powder. If EMS products are damaged by using
"compatible" powders the product Warranty will be lost.
Damaged
handpiece
ONLY USE THE SWISS ORIGINAL
EMS INSTRUMENTS!
The EMS Instrument, the Handpiece and the NO PAIN electronic module have to
vibrate in harmony like in a trilogy.
Using so-called “compatible” and copy tips from third parties can damage your
patients’ teeth as well as EMS handpieces.
They were developed and made for each other by EMS.
One PS Instrument is designed for up to 1000 treatments, thus reducing the cost
of one treatment to only a few cents.
Therefore, there is absolutely no reason to "save" money by using so-called
"compatible" tips. Moreover, if the Piezon Handpiece gets damaged (the thread)
it will lose its warranty so at the end of the day, “compatible” tips will always cost
you more.
EMS powders are much less abrasive than traditional mechanical debridement techniques
such as rubber cups and handscaling.
We recommend to use AIRFLOW®and PERIOFLOW®first, followed by PIEZON®. GBT: the mini-
mally invasive way for Professional Mechanical Plaque Removal (PMPR).
As part of the GBT disclosing phase, coloration also minimizes AIRFLOW®abrasion. No more
color signifies that all biofilm has been removed: the objective of AIRFLOW®is achieved, to
preserve the integrity of dental tissues.
EMS devices have been designed and tested for exclusive use with EMS prophylaxis powders.
ONLY USE EMS POWDERS
NYON, SWITZERLAND
E.M.S. ELECTRO MEDICAL SYSTEMS S.A.
Chemin de la Vuarpillière 31
CH - 1260 Nyon
www.ems-dental.com/en/contact
www.ems-dental.com
T. +41 22 994 47 00
F. +41 22 994 47 01
HEADQUARTERS
WORLDWIDE EMS AFFILIATES
MADRID, SPAIN
EMS ELECTRO MEDICAL SYSTEMS
ESPAÑA SLU
C/ Tomás Bretón, 50-52 2ª planta
ES - 28045 Madrid
T. +34 91 528 99 89
E-mail: info@ems-espana.com
ES
LISBON, PORTUGAL
EMSPOR - ELECTRO MEDICAL SYSTEMS
PORTUGAL, UNIPESSOAL LDA
Avenida Miguel Bombarda, 36, 6A
PT - 1050-165 Lisboa
T. +351 912 338 777
E-mail: info@ems-portugal.com
PT
FONCINE, FRANCE
EMS ELECTRO MEDICAL SYSTEMS
FRANCE SARL
32, route de Pontarlier
FR - 39460 Foncine-le-Haut
T. +33 3 84 51 90 01
F. +33 3 84 51 94 00
E-mail: info@ems-france.fr
FR
DALLAS, USA
EMS CORPORATION
11886 Greenville Avenue, Ste 120
US - Dallas, Texas 75243
T. +001 972 690 8382
F. +001 972 690 8981
E-mail: info@ems-na.com
US
TOKYO, JAPAN
E.M.S. JAPAN KK
Eminent Ningyoucho Bld 6F.,
9-18, Kobuna-cho, Nihombashi
JP - Chuo-ku, Tokyo, 103-0024
T. +81 (0) 3-6810-9351
F. +81 (0) 3-6810-9352
E-mail: emsjapa[email protected]
JP
SHANGHAÏ, CHINA
医迈斯电子医疗系统贸易(上海)有限公司
E.M.S. ELECTRO MEDICAL SYSTEMS TRADING
(SHANGHAI) CO., LTD.
24A, Jin Sui Mansion,
N°379 Pudong Nan Rd.
CN - Shanghai 200120
T. +86 21 3363 2323
E-mail: emschina@ems-ch.com
CN
SEOUL, SOUTH KOREA
EMS ELECTRO MEDICAL SYSTEMS KOREA LTD.
13, Beobwon-ro 8-gil, Songpa-gu
T. +82 70 7807 2875
E-mail: emskorea@ems-ch.com
KR
MUNICH, GERMANY
EMS ELECTRO MEDICAL SYSTEMS GMBH
Stahlgruberring 12
DE - 81829 München
T. +49 89 42 71 61 0
F. +49 89 42 71 61 60
E-mail: info@ems-ch.de
DE
MILANO, ITALY
EMS ITALIA S.R.L
Via Carlo Pisacane 7B
IT - 20016 Pero (MI)
T. +39 02 3453 8111
E-mail: dental@ems-italia.it
IT
STOCKHOLM, SWEDEN
EMS NORDIC AB
Hammarby Fabriksväg 61
SE - 120 30 Stockholm
T. +46 8 899 102
E-mail: info@ems-nordic.se
SE
AMMAN, JORDAN
EMS ELECTRO MEDICAL SYSTEMS JORDAN
No.2 - second floor, 195 Arar (Wadi Saqra) str.
JO - Amman
JO
SYDNEY, AUSTRALIA
EMS OCEANIA PTY LTD
The Woolstores - Suite 3, Shed 73
4E Huntley Street
AU - Alexandria, NSW 2015
T. +61 405 095 867
E-mail: info@ems-oceania.com
AU
CAMBRIDGESHIRE, UNITED KINGDOM
EMS UK LTD SUITE 2
Xenus House - Sandpiper Court
Phoenix Park - Eaton Socon
UK - St Neots, Cambridgeshire
PE19 8EP
T. +44 01480 587260
Email: info@ems-unitedkingdom.com
UK
KATOWICE, POLAND
EMS POLAND SP. Z O.O.
Al. Roździeńskiego 188H
PL - 40-203 Katowice
T. +48 32 4937060
E-mail: info@ems-poland.com
PL
CH

© FB-621/US rev.F Edition 2023/05
WWW.EMS-DENTAL.COM
Other manuals for AirFlow Master
10
Table of contents
Other EMS Dental Equipment manuals

EMS
EMS PERIOFLOW EL-354 User manual

EMS
EMS AIR-FLOW handy 3.0 PERIO User manual

EMS
EMS Piezon User manual

EMS
EMS AIRFLOW EL-308 User manual

EMS
EMS AIRFLOW Prophylaxis Master User manual

EMS
EMS AirFlow Master User manual

EMS
EMS Piezon User manual

EMS
EMS AIRFLOW EL-185 User manual

EMS
EMS AIR-FLOW S2 User manual

EMS
EMS PIEZON MASTER 700 User manual

EMS
EMS AirFlow S1 User manual

EMS
EMS AIR-FLOW S2 User manual

EMS
EMS AIRFLOW EL-185 User manual

EMS
EMS PIEZON 150 User manual

EMS
EMS FT-188 User manual

EMS
EMS FT-200 User manual

EMS
EMS AirFlow Master User manual

EMS
EMS AirFlow Master User manual

EMS
EMS AirFlow Master Piezon User manual

EMS
EMS EMS520 User manual