manuals.online logo
Brands
  1. Home
  2. •
  3. Brands
  4. •
  5. FAAC
  6. •
  7. Control Unit
  8. •
  9. FAAC 531R User manual

FAAC 531R User manual

3
J5
F1
J4
LD1
P2
LD3
J8
F2
DS1
P1
LD2
J1
J7
J3
J10
These instructions apply to control unit:
531R
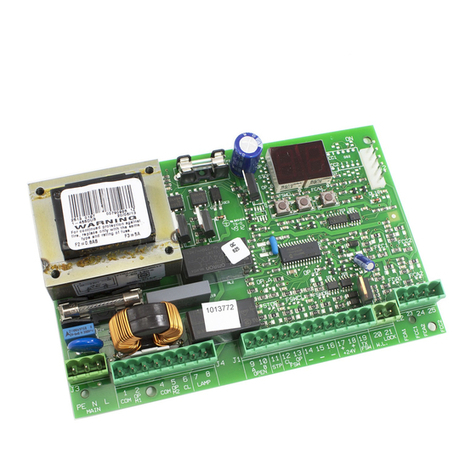
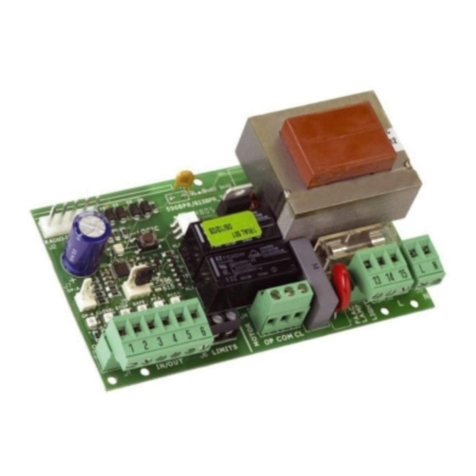
The 531R control unit (Fig. 1), installed on 531R and 531K operators,
has an integrated receiver (433 MHz) to command, by remote
control, the opening and closing of the automated system, and
does not require any outside radio receivers.
Fig. 1
1. 531R CONTROL BOARD
egatlovylppusrewoP zH05-)%01-%6+(.caV032
seirosseccarofylppusrewoP .cdV42
seirosseccarofdaolxaM .Am002
erutarepmetgnitarepO C°55+C°02-
sesuF )1elbaT(,2F,1F
scigolnoitcnuF citamotuaimeS/citamotuA
stupnidraoblanimreT EFAS-LIAF/SECIVEDYTEFAS/POTS/NEPO
remitthgilysetruoC .nim2
smetsysycneuqerfoidaR edocgnippohhtiwzMH334
1F )noitcetorprotom(.V052/.A01dipar02x5esuF
2F )seirossecca(esufelbarotseR
1J seirossecca/stupnirofdraoblanimretegatlovwoL
3J tupnirewopcaV032rofdraoblanimreT
4J gnidniwyramirpremrofsnartrofrotcennoC
5J rotcennocthgilysetruoC
7J gnidniwyradnocesremrofsnartrofrotcennoC
8J rotcennoctuptuorotoM
01J annetnalanretxerofrotcennoC
1P nottub-hsupNEPO
2P nottub-hsupPU-TES
1SD sehctiws-pidgnimmargorP
1DL DELsutatstupniNEPO
2DL DELsutatstupniPOTS
3DL DELsutatstupniWSF
1.1.TECHNICALSPECIFICATIONS
1.2. PARTS OF 531R BOARD (Table 1)
1.3. DESCRIPTION
1.3.1.Terminal boardsand connectors
TERMINALBOARDJ1(lowvoltage)
OPEN= Open command (N.O.)
Anydevice(push-button,etc.)which,byclosingacontact,
suppliesanopening(orclosing)pulsetothedoor.
ToinstallseveralOpendevices,connectN.O.contactsinparallel.
STOP= Stop command (N.C.)
Anydevice(e.g.apush-button)which,byopeningacontact,
stopsmovementofthedoor.
Toinstallseveralstopdevices,connecttheN.C.contactsinseries.
N.B.: if stop devices are not used, jumper connect STOP
to the inputs common contact.
= Inputs common contact/accessories supply negative
pole.
= Accessories supply positive pole (24Vdc 200mA max)
FSW = Closing safety-devices contact (N.C.)
Safetydevicesarealldevices(photocells,sensitiveedges,…)with
N.C.contact,which,ifthereisanobstacleintheareatheyprotect,
operatetoreversedoorclosingmovement.
Ifthesafetydevicesareactivatedwhenthedoorislockedor
open,theypreventitfromclosing.
Toinstallseveralsafetydevices,connecttheN.C.contactsin
series.
N.B.: if no safety devices are connected, jumper
connect FSW to the -TX FSW terminal
-TXFSW=Terminalforconnectionofthenegativepole(-)ofthe
photocellstransmitter(TX).
J3 TERMINAL BOARD (high voltage)
Terminalboardforconnecting230Vac50Hzpowersupply.
J10 TERMINAL BOARD (external antenna)
Aterminalboardforconnectinganexternalantenna(Optional
item)insteadofthesuppliedstandardconductor.
terminalforconnectingtheshieldingofanyexternalantenna.
1.3.2.Programmingdip-switches(DS1)
Failsafe
If activated, it enables the photocell operating test before every
movement.
Anti-crushing sensitivity
For doors with an irregular movement, it reduces the sensitivity of
the anti-crushing device to prevent unwanted action by it.
Radio codes programming
If activated, it enables the 531R board to save the radio codes
of the remote controls. (see chapter 4.1).
Speed adjustment
If door movement is too quick or irregular, you can select low
carriage speed.
531R CONTROL UNIT
.oNnoitcnuFFFONO
1efasliaF evitcAevitcanI
2ytivitisnesgnihsurc-itnA woLhgiH
3gnimmargorpsedocoidaR evitcanIevitcA
4deepsegairraC hgiHwoL
4
P1
P2
P4
P3
2. FLASHING LIGHT AND PRE-FLASHING
A flashing light cannot be connected to this operator.
3. CONNECTIONS OF SAFETY DEVICES
No changes to the connection of the safety devices. Refer to
the main instructions of the 531 EM operator.
4. RADIO CODES PROGRAMMING
4.1. PROGRAMMING RADIO CODES FROM THE BOARD
The 531R control board can save up to 10 radio codes. If other
remote-controls (T4 LC) are installed over this limit, the radio codes
input first are over-written.
Programmingprocedure:
1) To learn the remote-controls, turn switch No.3 of the DS1
programming dip-switches to ON position (Fig.1).
2) The courtesy light begins to flash rapidly and the board
remains in learning status.
3) Press, for at least 1 second, the key of the selected remote-
control.
4) When the courtesy light lights up for 2 sec on a steady beam,
this signals that the transmitted radio code was correctly learnt.
5) To save the code of other remote-controls, repeat the
operations from point 3.
6) When learning has finished, turn switch No.3 of the DS1
programming dip-switches to OFF position, and check if the
courtesy light has gone off.
4.2. PROGRAMMING RADIO CODES FROM THE REMOTE-
CONTROL
Attention:
This programming procedure can be activated only
with remote-controls already known to the 531R board. (see
paragraph 4.1)
Programmingprocedure:
1) Press push-buttons P1 and P2 of the remote-control (Fig.2)
and always hold them down.
2) The courtesy light lights up on a steady beam
3) The courtesy light goes off after 5 secs.
4) Release the P1 and P2 push-buttons of the remote-control.
5) Within ten seconds after the courtesy light went off, press for
at least 1 second the push-button of the remote-control you
had programmed, and which was therefore recognised by
the 531R board.
6) The courtesy light will start to flash rapidly and the 531R board
will go into learning status for 10 sec. Another radio code must
be taught within this time:press, for at least 1 second, the key
of the selected remote-control.
7) The transmission of a radio code will restart the 10 sec count,
during which the board is in programming status.
8) When the 10 seconds have elapsed, the courtesy light goes
off.
Restart from point 1.
4.3.DELETINGRADIOCODES
Attention:withthisprocedure,alltheradiocodesinthememory
aredeleted.
1) Turn switch No.3 of the DS1 programming dip-switches to ON
position.
2) Press and hold down the SET-UP push-button , and then press
the OPEN push-button for at least 1 sec.
3) Release both push-buttons.
4) The board deletes all the radio codes in its memory and
automatically returns to programming status.
5) Proceed as from point 1 of chapter 4.1, or turn switch No. 3 of
the DS1 programming push-buttons to OFF position, to end
the procedure.
5. REMOTE CONTROLS T4 LC 433 MHZ.
For remote control of the 531R operator, use the T4 LC remote
controls only.
Fig. 2
Remote control T4 LC 433 MHz.
6. GENERAL INSTRUCTIONS
For anything not expressly specified in these instructions, consult
the instructions of the 531 EM operator.
732869 Rev. A
DELsutatsfogninaeMFFOthgiLdethgiL
sutatstupnINEPO1DLevitcanI evitcA
sutatstupniPOTS2DL evitcA evitcanI
sutatstupniWSF3DL secivedytefaS deppirt delbasidsecivedytefaS
1.3.3.InputstatusLEDs
The status with the automated system stopped and at rest is
indicated in bold for every input.
ECDECLARATIONOFCONFORMITY
Manufacturer : FAACS.p.A.
Address: ViaBenini,1 -40069 ZolaPredosaBOLOGNA-ITALY
Declares that: 531R controlboard,
• conforms to the essential safety requirements of the
followingdirectives:
73/23/EECandsubsequentamendment93/68/EEC.
89/336/EEC and subsequent amendment 92/31/EEC
and93/68/EEC
Additionalnote:
This product underwent tests in a typical uniform
configuration
(allproductsmanufacturedbyFAACS.p.A.).
Bologna,01January2005.
TheManagingDirector
A.Bassi

Other FAAC Control Unit manuals

FAAC 452 MPS User manual

FAAC

FAAC 452 MPS User manual

FAAC 275 H600 Technical document

FAAC

FAAC 275 H600 Technical document

FAAC E124 User manual

FAAC

FAAC E124 User manual

FAAC XRS485 User manual

FAAC

FAAC XRS485 User manual

FAAC 615 BPR User manual

FAAC

FAAC 615 BPR User manual

FAAC H4 Operating and maintenance manual

FAAC

FAAC H4 Operating and maintenance manual

FAAC TM XA R 433 User manual

FAAC

FAAC TM XA R 433 User manual

FAAC 578D User manual

FAAC

FAAC 578D User manual

FAAC E024 User manual

FAAC

FAAC E024 User manual

FAAC 624 BLD User manual

FAAC

FAAC 624 BLD User manual

FAAC 410 MPS User manual

FAAC

FAAC 410 MPS User manual

FAAC E604 User manual

FAAC

FAAC E604 User manual

FAAC MASTER-T User manual

FAAC

FAAC MASTER-T User manual

FAAC E124 Instruction Manual

FAAC

FAAC E124 Instruction Manual

FAAC 844 T User manual

FAAC

FAAC 844 T User manual

FAAC 844 MC-T User manual

FAAC

FAAC 844 MC-T User manual

FAAC E145S User manual

FAAC

FAAC E145S User manual

FAAC DAAB EP105 User manual

FAAC

FAAC DAAB EP105 User manual

FAAC E844 3PH User manual

FAAC

FAAC E844 3PH User manual

FAAC E124 Instruction Manual

FAAC

FAAC E124 Instruction Manual

FAAC 844 MPSR User manual

FAAC

FAAC 844 MPSR User manual

FAAC 455 D User manual

FAAC

FAAC 455 D User manual

FAAC 540 BPR User manual

FAAC

FAAC 540 BPR User manual

FAAC E045 User manual

FAAC

FAAC E045 User manual

Popular Control Unit manuals by other brands

Zte RSU82 user manual

Zte

Zte RSU82 user manual

Dimplex VWU 65 Installation and operating instruction

Dimplex

Dimplex VWU 65 Installation and operating instruction

SPI Lasers redPOWER FVCU Instructions for use

SPI Lasers

SPI Lasers redPOWER FVCU Instructions for use

Cooper Z-WAVE RF232 Quick Start Guiude

Cooper

Cooper Z-WAVE RF232 Quick Start Guiude

TP-Link Omada SM311LS V5 installation guide

TP-Link

TP-Link Omada SM311LS V5 installation guide

Siemens SIWAREX MS quick guide

Siemens

Siemens SIWAREX MS quick guide

Ampak AP6330 user manual

Ampak

Ampak AP6330 user manual

Infineon GPT12 PWM Capture 1 manual

Infineon

Infineon GPT12 PWM Capture 1 manual

Captron CANEO 41 Series Original operating instructions

Captron

Captron CANEO 41 Series Original operating instructions

Generac Power Systems SMM Owners & installation manual

Generac Power Systems

Generac Power Systems SMM Owners & installation manual

Delta Computer Systems TMC 188/40 Series manual

Delta Computer Systems

Delta Computer Systems TMC 188/40 Series manual

Whadda WPI322 user manual

Whadda

Whadda WPI322 user manual

Bradley EFX 120 Series Installation

Bradley

Bradley EFX 120 Series Installation

Burkert 0301 operating instructions

Burkert

Burkert 0301 operating instructions

Train-Tech Scenic Sounds GM782 manual

Train-Tech

Train-Tech Scenic Sounds GM782 manual

Vaillant VR 920 Safety instructions

Vaillant

Vaillant VR 920 Safety instructions

CALEFFI 544 Series manual

CALEFFI

CALEFFI 544 Series manual

Alinx FH1223 user manual

Alinx

Alinx FH1223 user manual

manuals.online logo
manuals.online logoBrands
  • About & Mission
  • Contact us
  • Privacy Policy
  • Terms and Conditions

Copyright 2025 Manuals.Online. All Rights Reserved.