manuals.online logo
Brands
  1. Home
  2. •
  3. Brands
  4. •
  5. Festo
  6. •
  7. Industrial Equipment
  8. •
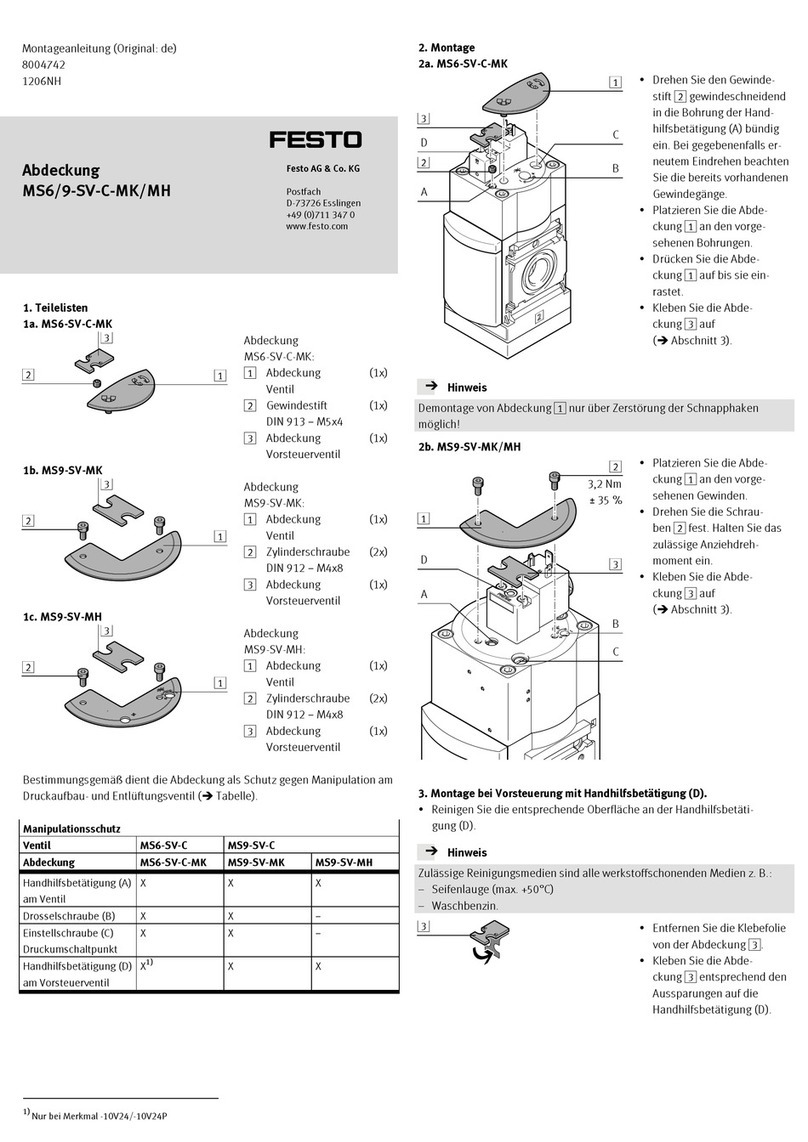
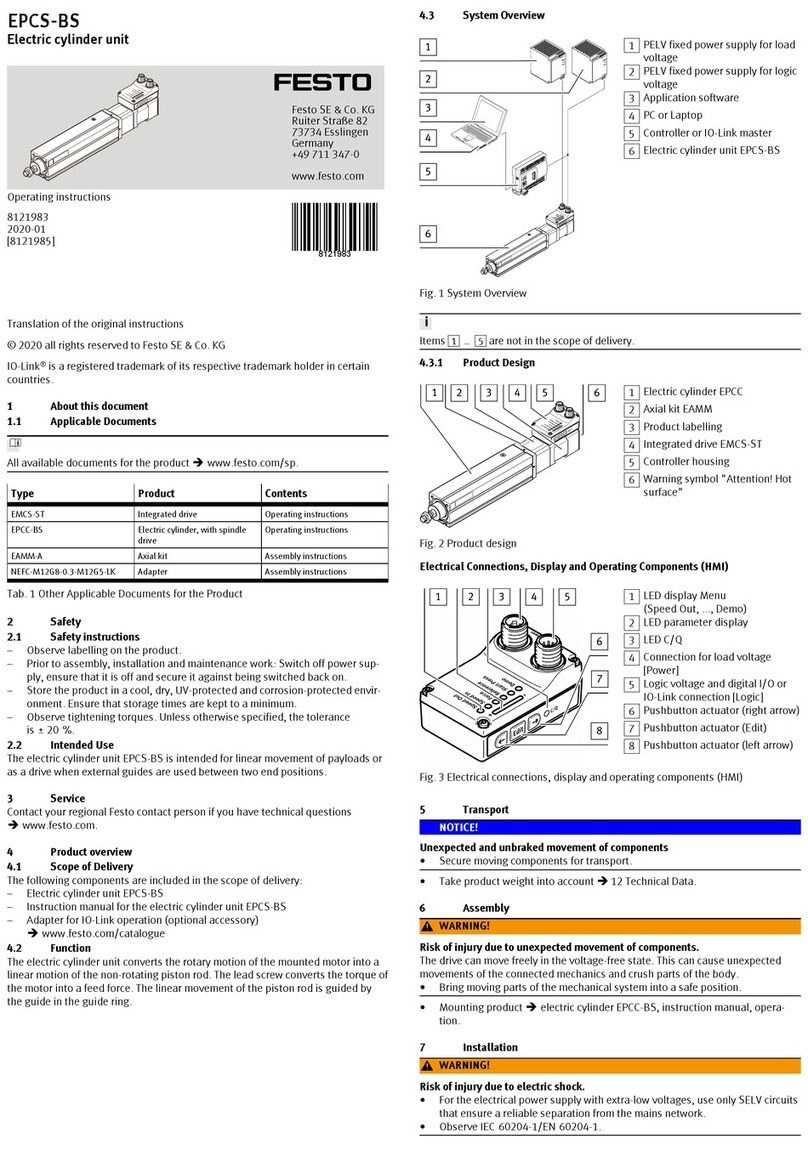
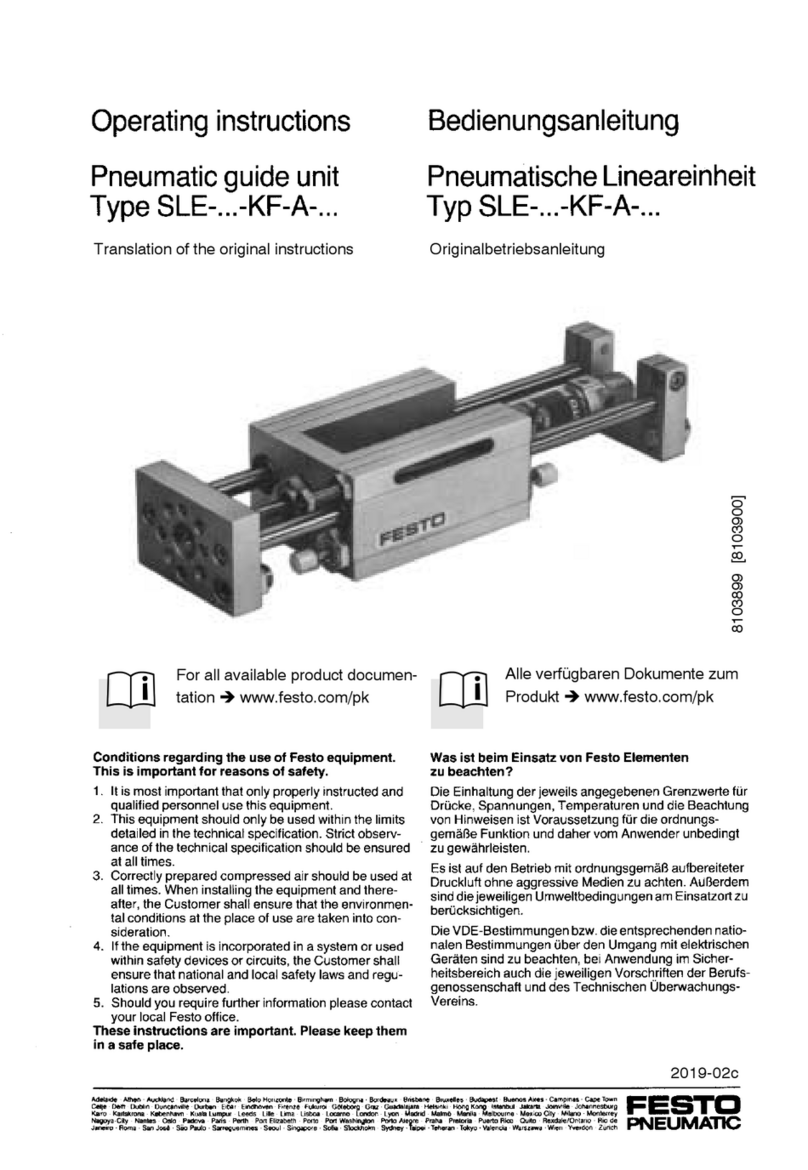
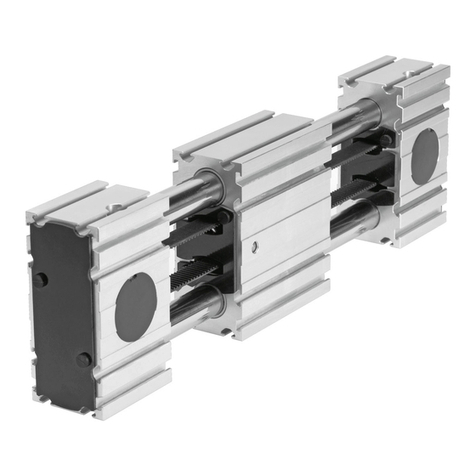
  9. Festo ELGA-BS-KF-80 User manual

Festo ELGA-BS-KF-80 User manual

Translation of the original instructions
1 Further applicable documents
All available documents for the product èwww.festo.com/pk.
Observe further applicable documents:
– Instruction manual for motor mounting kit.
2 Safety
2.1 General safety instructions
– The product may only be used in its original status without unauthorised
modifications.
– Only use the product if it is in perfect technical condition.
– Observe product labelling.
– Take into consideration the ambient conditions at the location of use.
– Before working on the product, switch off the power supply and secure it
against being switched back on. Only switch on the power supply when the
product has been assembled and installation work is complete.
– Comply with the handling specifications for electrostatically sensitive devices.
– Observe tightening torques. Unless otherwise specified, the tolerance is
±20%.
2.2 Intended use
The spindle axis is intended to be used for positioning payloads in combination
with tools or as a drive when external guides are used.
A rotating ball screw drive converts the rotation of a motor into straight-line
motion. As a result, the slide moves backwards and forwards. The slide is ball-
bearing guided. The reference position of the slide can be queried by means of a
proximity sensor aB.
The spindle axis is approved for slide and yoke operating modes è Fig.1,
è Fig.2.
Fig. 1 Slider operating mode
Fig. 2 Yoke operating mode
2.3 Training of skilled personnel
– Installation, commissioning, service and disassembly should only be conduc-
ted by skilled personnel.
– The skilled personnel must be familiar with the installation of electrical and
pneumatic control systems.
2.4 Approvals
The product fulfils the requirements of EU directives and comes with the CE mark-
ing. .
The product-relevant EC directives and standards are listed in the declaration of
conformity èwww.festo.com/sp.
2.5 Further information
– Accessories èwww.festo.com/catalogue.
– Spare parts èwww.festo.com/spareparts.
– Documents and literature èwww.festo.com/sp.
3 Product range overview
3.1 Not included in the delivery
Designation Part number/type
Pressure grease gun with needle-pointed nozzle 647958/LUB-1 èwww.festo.com/spareparts.
Blast pipe, axial outlet port 647959/LUB-1-TR-I
èwww.festo.com/spareparts.
Blast pipe, radial outlet port 647960/LUB-1-TR-L
èwww.festo.com/spareparts.
Roller bearing grease LUB-KC1 from Festo
èwww.festo.com/spareparts.
Tab. 1 Accessories
3.2 Product design
1Drive shaft
2Thread for motor mounting kit
3Cover strip
4Slide
5Thread/centring holes for attach-
ment components
6Thread for optional switch
lug/measuring system
7Relubrication opening for ball
screw
8Profile housing with ball guide
9Sealing air connection
10 Thread/centring holes for foot
mounting
11 Relubrication openings for recircu-
lating ball bearing guide
12 Slots for proximity sensors
13 Slots for mounting/accessories
Fig. 3 Product design
4 Transport and storage
Unexpected movement of components. The spindle axis is non-braking. Without
input torque, the slide is freely movable.
• Secure slide during transport.
– Take product weight into account è 9 Technical data: mechanical.
– Comply with maximum permitted support clearances when attaching trans-
portation aids è 10 Characteristic curves.
– Store and transport the product in its original packaging. The original pack-
aging offers sufficient protection from typical stresses.
– Ensure short storage times.
– Choose cool, dry, well-shaded, corrosion-resistant locations.
5 Assembly
5.1 Mechanical installation
Prerequisites:
– Do not modify the screws and threaded pins. Exception: Direct request in
these operating instructions to make changes.
– Select the motor and motor mounting kit from the Festo
catalogueèwww.festo.com/catalogue. When using other motors, observe
the limit values for forces, torques and speed
è 9 Technical data: mechanical.
– Assembling the motor è 1 Further applicable documents.
– Connect motor cables only after the spindle axis is mounted.
8093059
ELGA-BS-KF
Spindle axis
8093059
2018-05b
[8093061]
Instructions| Operating
Festo AG & Co. KG
Ruiter Straße 82
73734 Esslingen
Germany
+49 711 347-0
www.festo.com
Fig. 4 Motor assembly
The reference position is lost when the motor is dismounted (e.g., when turning
the motor around).
• Start homing è 6 Commissioning.
Mounting position vertical or diagonal:
WARNING!
Risk of injury due to falling working loads.
In a power failure or if the spindle nut breaks, the working load may fall.
• Only use motors with integrated spring-loaded holding brakes.
• Implement external safety precautions to prevent the spindle nut from break-
ing (e.g. tooth clinking, moveable bolts or emergency buffers).
Fig. 5 Working load
Assembling the spindle axis
Prerequisites:
• Position the spindle axis in such a way that its operating elements are access-
ible (e.g. relubrication openings).
• Install spindle axis without tension or distortion.
Fig. 6 Assembly surface flatness
• Fasten spindle axis to a mounting surface with flatness of 0.05% of the stroke
length, but max. 0.5mm. For gantry applications, attention must also be paid
to parallel alignment or product heights in alignment of the axes. For addi-
tional information, contact your local Festo Service èwww.festo.com.
• Take the required support clearances into consideration
è 9 Technical data: mechanical.
Interfaces for mounting components
On the cover On the profile
e.g. with foot mounting HPE e.g. with slot nuts NST e.g. with profile mounting MUE
Tab. 2 Interfaces for mounting components
Danger of screws being pulled out if the spindle axis is only mounted to the cov-
ers and the torque load around the longitudinal axis is too great.
• If there is high loading, mount the spindle axis on the profile with additional
mounting components.
1. Select mounting components èwww.festo.com/catalogue.
2. Mount the mounting components outside the positioning range (avoid colli-
sions).
3. Mount the spindle axis.
4. Tighten the retaining screws evenly.
Size 70 80 120 150
Screw (cover) M5 M8
Tightening torque [Nm] 6 24
Tab. 3 Tightening torques of the retaining screws
Mounting attachments
Requirements
An uneven attachment component bends the slide and shortens the service life of
the guide.
• Use an attachment component with an even surface. Evenness: t=0.01 mm
Fig. 7 Evenness of payload
Fig. 8 Position the payload
• Set down nominal load in such a way that the tilt moment resulting from force
F (parallel to the axis of movement) and lever arm are kept as small as pos-
sible è Fig.8.
Fig. 9 Protruding payload
• Avoid collisions of the mounting part and payload with other mounting parts
è Fig.9.
For attachment components with their own guide:
• Adjust the guide and axis so that they are exactly parallel or use a connection
that permits tolerance compensation. This will prevent overloading of the
guide.
Mounting:
Fig. 10 Max. screw-in depth
• Fasten the attachment to the slide with screws and centring sleeves. Observe
the maximum screw-in depth D and tightening torque
è Tab. 4 Mounting the payload.
Size 70 80 120 150
Screw M5 M6 M5 M6 M5 M6 M6 M8
Max. screw-in depth D [mm] 7.5 9.5 12.5 14
Tightening torque [Nm] 6 10 6 10 6 10 10 24
Centring H7 [mm] Æ5 Æ9 Æ9
Tab. 4 Mounting the payload
Mounting accessories
To protect the end positions against uncontrolled excess travel:
• Check whether proximity sensors are necessary (as safety limit switches or
hardware limit switches).
If proximity sensors are used as limit switches:
• Preferably use proximity sensors with normally-closed function. These will
protect a spindle axis against excess travel of the end position in case of a
broken proximity sensor cable.
If proximity sensors are used as reference switches:
• Use proximity sensors that correspond to the input of the controller being
used.
• Use proximity sensors with switch lug. Assembly instructions
èwww.festo.com/sp.
Mounting options for proximity sensors
Fig. 11 In the slots
Fig. 12 With sensor bracket
• Avoid external influence caused by magnetic or ferritic parts in the vicinity of
the proximity sensors. Distance to slot nuts: ≥10 mm.
Avoid contamination:
• Use slot covers in all unused slots èwww.festo.com/catalogue.
Fig. 13 Remove threaded pin
• Connect sealing air. To do this, remove the threaded pin on the cover and
connect compressed air/vacuum è Fig.13.
6 Commissioning
WARNING!
Danger of crushing as a result of moving loads
• Do not reach into the path of the moving components.
• Install the corresponding protective devices (e.g. protective grille).
Fig. 14 Unexpected movement of components.
Incorrect specification values for the braking ramp in STOP statuses (e.g. EMER-
GENCY OFF, Quick Stop) result in an overloading of the spindle axis and can des-
troy it or drastically reduce service life.
• Check the settings for all braking ramps in the controller or the higher-order
control system (deceleration values and jerk).
• Taking the travel speed, moveable load and mounting position into account,
set the delay values (brake delay and delay times) in such a way that the max-
imum drive torque or feed force of the spindle axis used is not exceeded.
• Take the travel speed, moveable load and mounting position into account.
• Use the Festo PositioningDrives design software to configure the spindle axis
èwww.festo.com.
Block-shaped acceleration profiles (without jerk limitation) cause high peaks in
the drive force that can lead to an overloading of the drive. Due to overshooting
effects, positions outside of the permissible range may also occur. A jerk-limited
acceleration specification reduces vibrations in the entire system and has a posit-
ive effect on stress in the mechanical system.
• Check adjustments to the controller settings (e.g. jerk limitation, smoothing
of the acceleration profile).
Procedure Purpose Note
Travel check Determining the approach dir-
ection of the motor
Even with identical control,
motors of the same design can
turn in opposite directions due
to different wiring.
Homing to reference switch Comparison of real situation to
the image of the controller
The homing run may only be
performed towards the refer-
ence switch
èwww.festo.com/sp.
Test run Checking the overall behaviour Check the requirements:
– The slide moves through
the intended positioning
cycle completely.
– Slide stops as soon as a
limit switch is reached.
After a successful test run, the
spindle axis is ready for opera-
tion.
Tab. 5 Commissioning
7 Maintenance
Check wear:
• Check reversing backlash (reverse play) of the slide for wear of the spindle
nut during each maintenance procedure. The wear on the ball screw will lead
to increased noise in the long term and eventually cause the ball screw drive
to block or the spindle nut to break.
Size 70 80 120 150
Maximum permissible revers-
ing backlash
[mm] 0.1 0.2
Tab. 6 Maximum permissible reversing backlash
Checking the cover strip:
– Check the cover strip after every 2000km of operating distance. Waves on
the cover strip are a sign of wear on the belt reversal device.
– Whenever waves form, retighten cover strip on both sides:
1. Loosen the screws è Fig.15, 5.
2. Push the cover strip into the cover.
3. Tighten cover strip with a clamping element è Fig.15, 6.
4. Tighten the screws. Tightening torque: 2 Nm.
If the cover strip can no longer be retensioned:
• Replace belt reversal devices èwww.festo.com/spareparts.
Lubricating the spindle and guide:
1Relubrication opening of the ball
screw
2Cover strip
3Relubrication openings of the
guide
4Cover
5Screws
6Clamping element
Fig. 15 Lubricating the ball screw and guide
1. Calculate load comparison factor fv with the help of the formula for combined
loads è 9 Technical data: mechanical.
Fig. 16 Lubrication interval
2. Read off lubrication interval Sint è Fig.16.
The lubrication interval Sint is dependent on the load acting on the product.
Load factors:
• Dusty and dirty environment
•Nominal stroke >2000 mm or <300 mm
• Travel profile Z triangular operation (frequent acceleration and braking)
•Ambient temperature >+40 °C
•Age of the product >3 years
If one of these factors applies, halve the lubrication interval Sint.
If several factors apply at the same time, reduce the lubrication interval Sint by
three-quarters.
3. Lubricate the guide and ball screw at all relubrication openings è Fig.15.
Accessories and permitted lubricants è 3.1 Not included in the delivery.
Amount of lubricant at each relubrication opening:
Size 70 80 120 150
Amount of lubricant
Ball screw [g] 2 2.5 3 15
Guide [g] 0.4 0.8 2.0 3.4
Tab. 7 Amount of lubricant
7.1 Cleaning and maintenance
• Clean the spindle axis with a soft cloth as required. Cleaning agents include
all non-abrasive media.
8 Malfunctions
8.1 Fault clearance
Malfunction Possible cause Remedy
Coupling distance incorrect Observe the permissible coup-
ling spacings
èwww.festo.com/sp.
Install the axis so it is free of
tension; maintain evenness of
the bearing surface
è 5.1 Mechanical installation.
Change arrangement of the
tool/payload.
Align the spindle axis so that it
is exactly parallel to the second
spindle axis.
Tensions
Change the travel speed
Controller is incorrectly set Changing the parameters
Squeaking noises, vibrations or
the axis is not running
smoothly.
Insufficient lubrication at guide. Lubricate the spindle axis
è 7 Maintenance.
Malfunction Possible cause Remedy
Guide defectiveSqueaking noises, vibrations or
the axis is not running
smoothly. Guide or cover strip reversal
devices worn
Send spindle axis to Festo or
contact the local Festo service.
Coupling spins. Check the assembly of the
motor mounting kit
èwww.festo.com/sp.
Load levels are too high. Reduce load mass/torques.
Slide does not move.
Retaining screws on tool are
too long.
Observe the maximum screw-in
depth è Mounting attachments
The reversing backlash is too
large è 7 Maintenance
The idling torque increases.
Wear Return spindle axis to Festo for
repair è 8.2 Repair.
Slide travels over end position. Proximity sensors do not oper-
ate
Check proximity sensor, con-
nections and controller.
Cover strip has waves. Retension cover strip
è 7 Maintenance
Aluminium wear on spindle
axis.
Wear on belt reversal device.
Replace the belt reversal device
èwww.festo.com/spareparts.
Tab. 8 Fault clearance
8.2 Repair
• Remove motor cables and mounting components.
If repairs are required:
– Send the spindle axis to the Festo repair service.
– Information about spare parts and accessories
èwww.festo.com/spareparts.
8.3 Disposal
Dispose of the packaging and the axis at the end of its useful life through environ-
mentally friendly recycling in accordance with applicable specifications.
9 Technical data: mechanical
Size1) 70 80 120 150
Spindle pitch 10 10 20 10 25 40
Design Electromechanical axis with ball screw
Guide Recirculating ball bearing guide
Mounting position Any
Max. feed force Fv[N] 650 1600 3400 6400
Max. no-load driving torque2) [Nm] 0.45 0.75 2.25 6.5
Maximum speed [1/min] 3000 3600 3000
Max. speed [m/s] 0.5 1 0.6 1.5 2
Max. acceleration [m/s2] 15
Repetition accuracy [mm] ±0.02
Reversing backlash (new) [mm] <0.01
Reversing backlash (limit
value)
è 7 Maintenance
Feed constant [mm/U] 10 20 10 25 40
Ambient temperature [°C] –10…+60
Degree of protection IP40
2nd degree of surface torque
ly[mm4] 165x-
103
310x1031.24x1064.70x-
106
lz[mm4] 472x-
103
977x1033.80x10611.81-
x106
Max. radial force on drive
shaft
[N] 220 250 500 4000
Maximum permissible forces on the slide
Fy[N] 1500 2500 5500 5500
Fz[N] 1850 3050 6890 11000
Maximum permissible torques on the slide
Mx[Nm] 16 36 104 167
My=Mz[Nm] 132 228 680 1150
Determination of the load compensation factor for com-
bined loads:
Information on materials Contains paint-wetting impairment substances
Materials
Cover, profile, slide Anodised aluminium
Size1) 70 80 120 150
Spindle pitch 10 10 20 10 25 40
Guide, screws, ball bearings,
spindles, cover strip
Steel
Coverings PA, POM
Belt reversal POM
Buffer NBR
Weight
Zero stroke length [kg] 2.2 3.8 10.5 25.2
Per metre of stroke [kg] 3.3 4.6 9.9 21.0
1) The PositioningDrives software design tool is available for sizing.
2) Measured at max. speed.
Tab. 9 Technical data, mechanic, size 70…150
10 Characteristic curves
Force Fy/Fz and support spacing L at a max. sag of 0.5 mm
Fig. 17 Support clearance
Fig. 18 Force distribution

ELGA-BS-KF-70

ELGA-BS-KF-80

ELGA-BS-KF-120

ELGA-BS-KF-150
Fig. 19

ELGA-BS-KF-70

ELGA-BS-KF-80

ELGA-BS-KF-120

ELGA-BS-KF-150
Fig. 20
Speed v as a function of working stroke l

ELGA-BS-KF-70-10P
Fig. 21

ELGA-BS-KF-80-10P

ELGA-BS-KF-80-20P
Fig. 22

ELGA-BS-KF-120-10P

ELGA-BS-KF-120-25P
Fig. 23

ELGA-BS-KF-150-40P
Fig. 24
• Graphs on maximum feed force (N) of all sizes èwww.festo.com/catalogue.

This manual suits for next models

3

Other Festo Industrial Equipment manuals

Festo DMES Series User manual

Festo

Festo DMES Series User manual

Festo EPCC-BS-25 User manual

Festo

Festo EPCC-BS-25 User manual

Festo YXCL User manual

Festo

Festo YXCL User manual

Festo DGPI AIF Series User manual

Festo

Festo DGPI AIF Series User manual

Festo VABD Series User manual

Festo

Festo VABD Series User manual

Festo MS6 Series User manual

Festo

Festo MS6 Series User manual

Festo HGR A Series User manual

Festo

Festo HGR A Series User manual

Festo HGPLE User manual

Festo

Festo HGPLE User manual

Festo VABF-S4-1-V2B1 series User manual

Festo

Festo VABF-S4-1-V2B1 series User manual

Festo VMPA-HB B Series User manual

Festo

Festo VMPA-HB B Series User manual

Festo CPE PRS Series User manual

Festo

Festo CPE PRS Series User manual

Festo VMPAL-LW User manual

Festo

Festo VMPAL-LW User manual

Festo HGPM-xxx-G series User manual

Festo

Festo HGPM-xxx-G series User manual

Festo DHTG User manual

Festo

Festo DHTG User manual

Festo ESG Series User manual

Festo

Festo ESG Series User manual

Festo PVGA Series User manual

Festo

Festo PVGA Series User manual

Festo FRC D Series User manual

Festo

Festo FRC D Series User manual

Festo SLE-KF-A Series User manual

Festo

Festo SLE-KF-A Series User manual

Festo EPCC-BS-KF User manual

Festo

Festo EPCC-BS-KF User manual

Festo EADC-E12 User manual

Festo

Festo EADC-E12 User manual

Festo OVEM-05 User manual

Festo

Festo OVEM-05 User manual

Festo CPV14-VI-P Series User manual

Festo

Festo CPV14-VI-P Series User manual

Festo YJKP-NGS User manual

Festo

Festo YJKP-NGS User manual

Festo EAMM-U-110-D80-100A Assembly instructions

Festo

Festo EAMM-U-110-D80-100A Assembly instructions

Popular Industrial Equipment manuals by other brands

KEBCO COMBILINE E6 Series Instructions for use

KEBCO

KEBCO COMBILINE E6 Series Instructions for use

AirVac PCBRM15 user manual

AirVac

AirVac PCBRM15 user manual

Master cool 91498 instruction manual

Master cool

Master cool 91498 instruction manual

Oriental motor GFS5G FR Series operating manual

Oriental motor

Oriental motor GFS5G FR Series operating manual

Alfalaval Toftejorg TZ-74 instruction manual

Alfalaval

Alfalaval Toftejorg TZ-74 instruction manual

Strack PMOK-V04 operating instructions

Strack

Strack PMOK-V04 operating instructions

Gema OptiCenter OC06 Operating instructions and spare parts list

Gema

Gema OptiCenter OC06 Operating instructions and spare parts list

Thomas&Betts Elastimold 151SOP operating instructions

Thomas&Betts

Thomas&Betts Elastimold 151SOP operating instructions

Delta 32-325 instruction manual

Delta

Delta 32-325 instruction manual

HunterDouglas Luxalon Profix Installation instruction

HunterDouglas

HunterDouglas Luxalon Profix Installation instruction

DryAIR 300GTS Service manual

DryAIR

DryAIR 300GTS Service manual

FEB 825YD Series installation instructions

FEB

FEB 825YD Series installation instructions

Carbide 3D Shapeoko HDZ 4.0 Assembly guide

Carbide 3D

Carbide 3D Shapeoko HDZ 4.0 Assembly guide

Alfalaval M15 instruction manual

Alfalaval

Alfalaval M15 instruction manual

Roadready IntelliStage IS8RC manual

Roadready

Roadready IntelliStage IS8RC manual

Gema OptiCenter OC07 Operating instructions and spare parts list

Gema

Gema OptiCenter OC07 Operating instructions and spare parts list

Alfalaval ThinkTop D30 instruction manual

Alfalaval

Alfalaval ThinkTop D30 instruction manual

woodmizer LASTEC 621ER Product information bulletin

woodmizer

woodmizer LASTEC 621ER Product information bulletin

manuals.online logo
manuals.online logoBrands
  • About & Mission
  • Contact us
  • Privacy Policy
  • Terms and Conditions

Copyright 2025 Manuals.Online. All Rights Reserved.