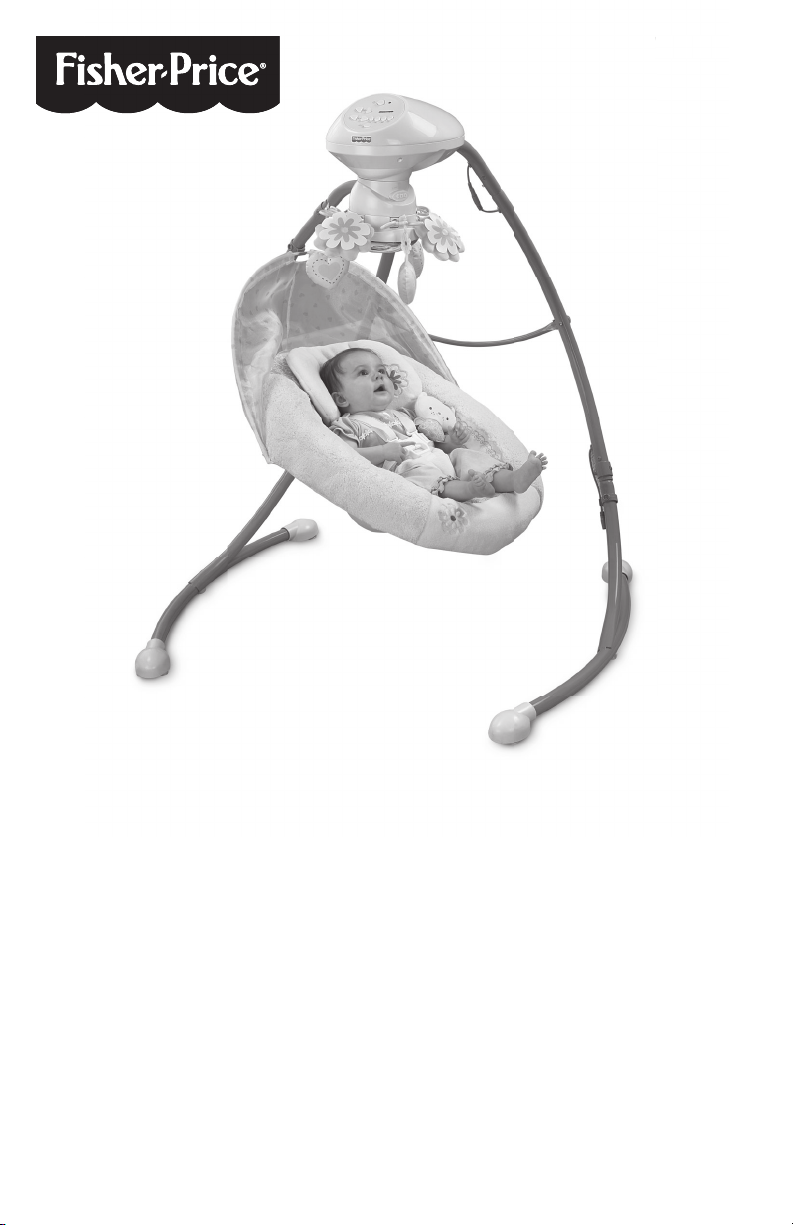
Fisher-Price W9510 User manual
Other Fisher-Price Baby Swing manuals

Fisher-Price
Fisher-Price P1397 User manual

Fisher-Price
Fisher-Price CCL87 User manual

Fisher-Price
Fisher-Price L8339 User manual

Fisher-Price
Fisher-Price 79596 User manual

Fisher-Price
Fisher-Price 75986 User manual

Fisher-Price
Fisher-Price BMF35 User manual

Fisher-Price
Fisher-Price 79008 User manual

Fisher-Price
Fisher-Price FFJ00 User manual

Fisher-Price
Fisher-Price 79006 User manual

Fisher-Price
Fisher-Price B3002 User manual

Fisher-Price
Fisher-Price HBX70 Quick setup guide

Fisher-Price
Fisher-Price W9505 User manual

Fisher-Price
Fisher-Price X7046 User manual

Fisher-Price
Fisher-Price N6020 User manual

Fisher-Price
Fisher-Price Y8641 User manual

Fisher-Price
Fisher-Price FLG89 User manual

Fisher-Price
Fisher-Price 79381 User manual

Fisher-Price
Fisher-Price GHY58 User manual

Fisher-Price
Fisher-Price C5859 User manual

Fisher-Price
Fisher-Price Y5708 User manual