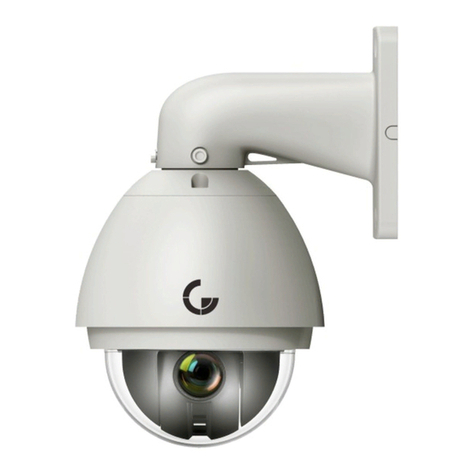
Genie WIP2PTZ25P User manual

Quick Start Guide
Please read these instructions carefully before operating the unit
and keep for further reference.
2MP H.265 IP IR 4” 25x Optical
Zoom PTZ Camera with
Starlight and PoE
WIP2PTZ25P

ii
Intro Section
Please read this instruction carefully before operating the product and keep it for further
reference. All examples and pictures used here are for reference only.
The contents of this manual are subject to change without notice.
CAUTION:
• If the product does not work properly, please contact your dealer or the nearest service
centre. Never attempt to disassemble the camera yourself. We shall not be responsible
for any problems caused by unauthorised repair or maintenance.
• Do not allow water or liquid into the camera while in use.
• When using the product, you must be in strict compliance with the electrical safety
regulations of the nation and region.
• When the product is mounted on wall or ceiling, the device needs to be firmly fixed.
• Make sure the power supply voltage is correct before using the camera.
• Do not drop the camera or subject it to any physical shock.
• If cleaning, please use a clean soft cloth with a little neutral detergent to wipe it gently.
• Do not aim the camera at the sun or in any area where there is bright lighting.
• The device may be burned out by a laser beam, so when any laser equipment is in use,
make sure that the surface of the device will not be exposed to the laser beam.
• Do not place the camera in extremely hot, cold , dusty or damp locations, and do not
expose it to high electromagnetic radiation.
• To avoid heat accumulation, good ventilation is required for operating environment.

Contents
iii
1.0 Introduction..........................................................................................................4
1.1 Product Features...........................................................................................4
1.2 Product Dimensions.....................................................................................4
1.3 Specification.................................................................................................5
2.0 Overview..............................................................................................................7
3.0 Installation............................................................................................................8
3.1 Micro SD Card Installation............................................................................8
3.2 Wall Mount Installation ................................................................................9
3.3 Ceiling Mount Installation............................................................................10
4.0 Network Connection ...........................................................................................11
5.0 Preset Description ...............................................................................................12

4
The Genie WIP2PTZ25P is a powerful PTZ camera with accurate pan, tilt and zoom
performance. The camera provides a wide monitoring range as well as a full 2MP high
definition resolution at 25/30fps. The camera is rated IP66 which means it works well
outdoors with effective protection against lightning. The camera also features AI functions
such as face recognition, face comparison and tracking.
1.1 Product Features
• Face recognition
• Face comparison
• Target counting
• Alarm triggering by human or vehicle
• Smart human or vehicle tracking, manual tracking, auto tracking (via software setting)
• 1/2.8″ progressive scan CMOS
• Up to 1920×1080 resolution
• Minimum illumination: Colour: 0.005 lux @ (F1.6 AGC ON) B&W: 0.001 lux@ (F1.6 AGC
ON) 0 Lux with IR
• 25x optical zoom, 16x digital zoom
• 120 dB WDR, 3D DNR, Smart IR
• Smart IR with distance to 150m
• IP66 ingress protection
• Smart TM 1.0 (Thermal Management)
• Up to 150m IR distance
• Smart H.265/H.264 video compression
• 0.5Tops Deep-learning Engine
• Smart tracking of human/vehicle
• Smart detection and perimeter protection
• IP66,-30°C~55°C, ADC12 + PC/GF
• PoE+ (802.3.at, class 3) and DC12V
• API and SDK
• Requires WPTZWB bracket
1.2 Product Dimensions
1.0 Introduction
40mm
145mm
268mm
173mm

Quick Start Guide 2MP H.265 IP IR 4” 25x Optical Zoom PTZ Camera with Starlight and PoE
5
1.3 Specification
Camera
Image Sensor 1/2.8″progressive scan CMOS
Minimum Illumination Colour: 0.005 Lux @ (F1.65, AGC ON),
B&W: 0.001Lux @(F1.65, AGC ON) 0 Lux with IR
Image Setting Flip, Mirror, Saturation, Brightness, Sharpness, AGC, and AWB
adjusted by client software/browser
Shutter Speed 1/1 s – 1/100,000 s
White Balance Auto/Manual/Indoor/Outdoor
Gain Auto/Manual
Day & Night IR Cut filter
Digital Zoom 16x
Privacy Mask No
3D DNR Auto/Manual
BLC Yes
HLC Yes
WDR 120 dB
Defog Electronic
EIS Yes
Regional Exposure No
Picture Overlay
Logo picture could be overlaid on
video with 128×128pixels,24bits BMP
format
Lens
Focus Length f=4.8–120mm lens,25x optical
Zoom Speed Approx. 3.6s (optical zoom, widetele)
Field of View
Horizontal:57.6° to 2.5°(wide-tele)
Vertical: 34.4° to 1.4°(wide-tele)
Diagonal: 64.5° to 2.9°(wide-tele)
Working Distance Wide: 1.0m ~ INF, Tele: 1.5m ~ INF
Aperture Range F1.65 ~ F3.8 (Wide-tele)
Compression
Standard
Pan Range 360°endless
Pan Speed Configurable, from 0.1~80°/s, Preset speed: 80°/s
Tilt Range From -5° to 90°
Tilt Speed Configurable, from 0.1°~ 80°/s, Preset
speed: 80°/s
Proportional Zoom Yes
Preset 360
Cruise 8 cruises, up to 16 presets for each
cruises
Trace 4 traces, record time over 3 minutes
for each trace
Power Off Memory Support
Action Mode Preset/Cruise/Track/Auto Scan/Random Scan
3D Positioning Support
PTZ Position Display Support
Schedule Task Preset / Cruise / Track / Random Scan / Boundary Scanning
/ Dome reboot

Quick Start Guide 2MP H.265 IP IR 4” 25x Optical Zoom PTZ Camera with Starlight and PoE
6
Network
Maximum Resolution 1920×1080
Main Stream 1920×1080, 1280×720 25/30fps
Sub Stream 25fps (720p, 704×576, 352×288)
30fps (720p, 704×480, 352×240)
Third Stream 25fps (704×576, 640×480, 352×288)
30fps (704×480, 640×480, 352×240)
SVC Yes
Video Compression H.265/H.264/MJPEG
Audio Enhancement No
Protocols
HTTP, HTTPS, IPv4/IPv6, 802.1x, QoS, FTP, SMTP, UPnP,
SNMP,DNS, DDNS, NTP, RTSP, RTCP, RTP, TCP/IP, UDP, IGMP,
ICMP,DHCP, PPPoE
Simultaneous Live View Up to 6 channels
User / Host Up to 16 users, 3 levels: Administrator,
Advanced User and Normal User
Security Measures
User authentication (ID and PW), Host authentication (MAC
address); HTTPS encryption, IEEE802.1x port-based network
access control, IP address filtering
Smart Features
Basic Event Motion detection, video exception alarm, SD card full, SD card
error
Face Recognition Default off, max 15 human faces per second
Face Compare Default off
People Density Not support by this version
Smart Detection
Intrusion detection, Line crossing detection, Region entrance
detection, Region exiting detection, Scene change detection,
target counting, Support alarm triggering by human or
vehicle, filtering flag/animal.
Smart Tracking Manual Tracking, Auto Tracking (human or vehicle by software
setting)
System
Integration
Alarm Interface None
Audio Interface None
Alarm Linkage Alarm actions, Memory Card Video Record, Trigger Recording,
Upload to FTP/Memory Card, Send Email, etc.
Network Interface 1x RJ45 10M/100M Adaptive Ethernet (Support PoE 802.3.at)
CVBS None
RS485 None
Storage On-Body memory card slot, support microSD/SDHC/SDXC, up
to 256G
API Onvif compatible, support TVT SDK and 3rd party
management platform
Client N9000 1.4.5, NVMS 2.0; and 3rd party client
Web Browser IE8–11, Chrome41.0–44, Firefox30.0–51, Safari8.0–11
IR IR Distance 150m
Smart IR Yes
Others
Power DC12V or PoE+ (802.3.at, class 3), (Max 22W, include IR on,
Heater on, Fan working)
Working Conditions -30°C ~ 55°C (-22°F ~ 131°F), 90%RH less (
non-condensing), Cold start at – 20°C
Storage Conditions -40°C ~ 65°C ; ≤ 95% RH
Protection IP66, 4000V Lightning Protection, Surge Protection and
Voltage Transient Protection
Material Aluminum Alloy, PC+GF10%
Certification IP66,ROHS,CE,FC
Dimensions Φ 173 × 268 mm
Weight Approx. 2.1 Kg (13.22 lb.)
7
1. Ethernet Connector
2. Power Connector
3. Safety Wire
2.0 Overview
Cable Connection
Network Cable
DC12V
1. Loosen the nut from the main element.
2. Run the network cable (without RJ 45 connector) through both elements. Then crimp
the cable with RJ 45 connector.
3. Connect the cable to the hermetic connector. Then tighten the nut and the main
cover.
Connecting Network Cable

8
3.1 Micro SD Card Installation
This PTZ camera supports wall or ceiling mounting. Please select a way to install as needed.
Also, please make sure the wall is strong enough to bear the dome camera’s weigh and the
camera is powered off during installation. The following instructions are for reference only.
1. Loosen the four screws of the cover and then remove the cover.
2. Insert a micro SD card as indicated below and then install the cover back.
3.0 Installation
Insert Micro SD Card

Quick Start Guide 2MP H.265 IP IR 4” 25x Optical Zoom PTZ Camera with Starlight and PoE
9
3.2 Wall Mount Installation
1. Pull the cables through the bracket. 2. Secure the PTZ camera to
the bracket with screws.
3. Drill the screw holes on the wall
according to the drill template.
Then insert the plastic plugs into
the holes.
4. Insert two screws to the holes as
indicated by the arrows (left) and leave
12mm clearance.
5. Connect the cables and then hang
the bracket on the wall.
6. Attach the bracket to the
wall with four screws.

Quick Start Guide 2MP H.265 IP IR 4” 25x Optical Zoom PTZ Camera with Starlight and PoE
10
3.3 Ceiling Mount Installation
1. Install the ceiling mounting bracket according to the following diagram.
2. Mount the adapter tube to the
bracket and secure it with a screw.
Adapter Tube
3. Secure the ceiling mounting bracket to
the ceiling.
4. Connect cables and then hook
the safety wire to the adapter
tube.
5. Fasten the PTZ camera to the adapter
tube with screws firmly.

11
Access the Camera through the IP Tool
1. Make sure that the camera and the PC are well connected via LAN.
2. Find the IP-Tool from the CD and then install it in the computer. After that, run the IP
Tool as shown below.
3. Modify the IP address. The default IP address of this camera is 192.168.226.201. Click the
information of the camera listed in the above table to show the network information
on the right hand. Modify the IP address and gateway of the camera and make sure its
network address is in the same local network segment as that of the computer. Please
modify the IP address of your device according to the practical situation.
4. Double-click the camera listed in the IP-Tool or manually enter the IP address in
the address bar of the web browser to connect the PTZ. Then follow directions
to download and install the plugin. Enter the username and password in the login
interface. The default username is admin; the default password is 123456.
4.0 Network Connection
For example, the IP address of your computer is 192.168.1.4. So the IP address of the
camera shall be changed to 192.168.1.X and the gateway shall be changed to 192.168.1.1.
After modification, please enter the password of the administrator and click “Modify”
button to modify the settings. The default password of the administrator is “123456”.

12
5.0 Preset Description
Call Preset
Call No. 90 Preset Run track 1
Call No. 91 Preset Run cruise 1
Call No. 92 Preset Run cruise 2
Call No. 93 Preset Run cruise 3
Call No. 94 Preset Run cruise 4
Call No. 95 Preset OSD menu
Call No. 97 Preset Enable random scan
Call No. 99 Preset Enable P-PSCAN
Set Preset
Set No. 91 Preset Set random scan(start scanning from preset 91)
Set No. 92 Preset Set left border of P-PSCAN
Set No. 93 Preset Set right border of P-PSCAN
Table of contents
Other Genie Security Camera manuals

Genie
Genie WAHD2DVAF User manual

Genie
Genie ZD2812IR User manual

Genie
Genie TPIR-607 Series User manual

Genie
Genie PWIP4BVAF User manual

Genie
Genie PWIPNW4B User manual

Genie
Genie WIPX8VDVAF5 User manual

Genie
Genie SSIP2BVAF User manual

Genie
Genie SSIP2B User manual

Genie
Genie TPH-4000P User manual

Genie
Genie WIPX8BVAF5 User manual

Genie
Genie PWIPN2EBV User manual

Genie
Genie WIP2BVLG User manual

Genie
Genie WIPX2LBVLPR User manual

Genie
Genie WIP1VD User manual

Genie
Genie HDI221 User manual

Genie
Genie ZD49IR User manual

Genie
Genie GAHD18IRPTZ User manual

Genie
Genie UMD300 Series User manual

Genie
Genie SSAHD2D User manual

Genie
Genie ZD2812IR User manual