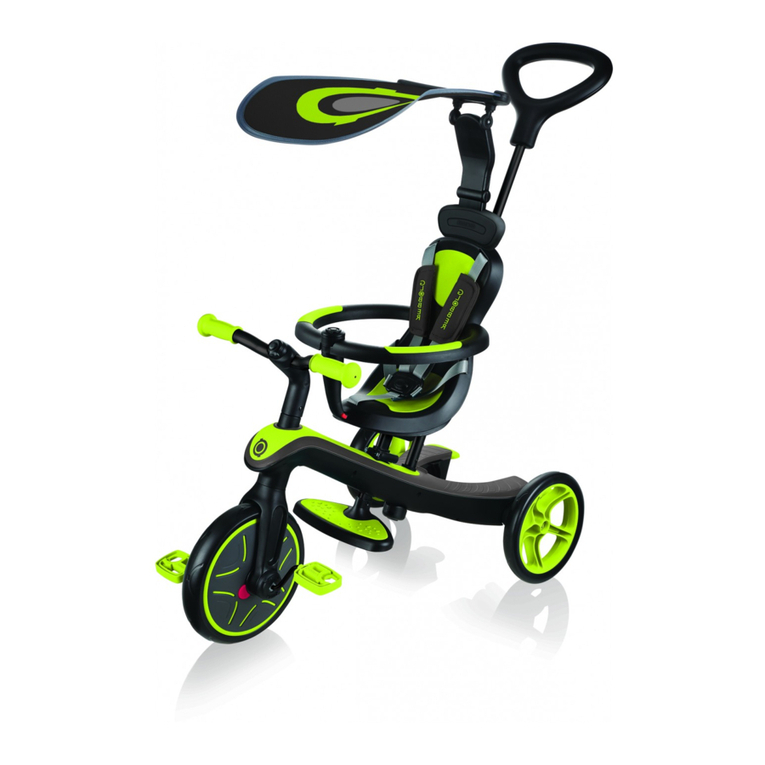
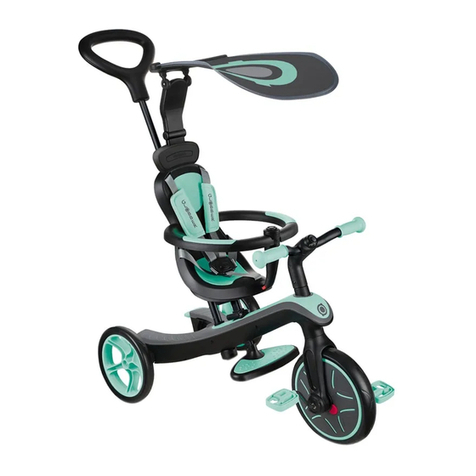
GLOBBER TRIKE 3 IN 1 User manual

i
Conrm to
ANSI Z315.1 & ASTM F963
www.globber.com
TRIKE
• 3in1

2
1
2
3
4
5
1 2 12
6
7
OK!

3
1
2
3
4
5
1 2 12
6
7
OK!

1
1
2
2
3
1
OK!
2
2
1
1
!
OK!
A B
B C
4

1
1
2
2
3
1
OK!
2
2
1
1
!
OK!
A B
B C
5

6
!
WARNING:
TO AVOID SERIOUS INJURY: Continuous adult supervision required; never use near motor vehicles;
never use near streets, swimming pools, hills, steps, or sloped driveways; Always wear shoes when
using the product. Never allow more than 1 rider.
Adult assembley required. Choking hazard to children under the age of 3 year - contains small parts
prior to assembly.
!
WARNING:
- Not to be used by children over the age of 5 years due to size limitation.
- Tricycle mode: Intended for children 10 months to 36 months. Walking bike mode: Intended for children 2 - 5 years.
- Maximum child’s weight: 44 lbs. (20kg)
- Plastic bags can be dangerous. To avoid suffocation, Keep plastic bags away from babies and children.
- Instruct children on proper use of this product before allowing them to ride.
- This product is not to be used in a manner other than for which it is intended.
- This product is intended for outdoor domestic family use only.
- It is recommended that rider always wear a properly fitted helmet that complies with U.S. Consumer Product Safety
Commission (CPSC) Standard 16 CFR 1203.
- Do not step or stand on back of frame which will cause product overturned.
- Do not attempt to modify the product . For help contact Globber USA consumer service.
Importer: Globber USA - 50 Fountain Plaza, suite 1400, Buffalo, New York, 14202 USA.

7
P8
P10
P12
P14
OWNER’S MANUAL
MANUEL D’UTILISATION
使用说明
取扱説明書
ENGLISH
FRANÇAIS
简体中文
日本語

Please carefully read the instructions before assembling and using the product. Keep the
instructions for future reference.
Be careful when unpacking and assembling the product.
This product must be assembled by a responsible adult.
Remove all the parts which are not necessary for play before giving the product to your child.
Warning! Secure the child in the harness at all times.
Warning! Do not step or stand on back of frame which will cause product overturned.
Tricycle mode: Warning! Not to be used by children over 36 months; insufcient strength to support.
HOW TO ASSEMBLE EXPLORER TRIKE 3in1
1. The front wheel’s fork needs to be aligned with the frame of the trike; then insert the stem of
the front wheel’s fork into the frame.
2. Take the handlebars and align them with the front wheel by making sure the stem of the front
wheel’s fork slots into the handlebars’ column. Make sure the handlebars are placed in the
correct direction with the top column facing outwards, away from the seat. Push the handlebars
down until you hear a click to securely x them in place.
3. Turn the pedal locks of the front wheel in the direction of the unlocked symbol; place the
pedals in the front wheel’s slots. Turn the pedal lock in the direction of the locked symbol to
secure the pedals in the front wheel. You may need to hold the opposite pedal lock to ensure
that the pedal doesn’t spin freely.
4. To install the rear wheels, you need to unscrew the knob at the end of the wheel assembly. The
brakes of the rear wheels must be pointing inward when they are installed for all trike stages.
Place the wheel in the hexagonal slot at the rear of the trike frame and ensure that the brake is
upwards and doesn’t touch the ground. Once the wheel is in the correct position, you need to
re-screw the knob back into the wheel slot to ensure the wheel will remain securely in place.
5. To insert the saddle, you must rst open the clamp and press the bottom spring-loaded button
on the saddle stem. Then, push the saddle down until you hear a click. Close the clamp. The
saddle is adjustable with 2 available heights (31cm; 34cm). The minimum insertion depth is
where “MAX” is marked on the stem when placing the top spring-loaded button in the saddle’s
stem hole. This is the highest height of the saddle. The maximum insertion of the saddle is
pushing the saddle down until the saddle’s stem is all the way down. This is the lowest height
of the saddle.
6. Take the footrest and slide it up the saddle stem. You must press the spring-loaded button at
the bottom of the saddle stem; the footrest is secure once you hear a click and twist the knob
under the footrest to 90 degrees. The footrest must be facing forwards, not backwards, to be in
the correct position.
Warning! Check footrest is securely locked before every use.
7. To assemble the parent handlebar, take the top part of the parent handle, where there is the
black handle, and place it into the bottom shaft by pressing the spring-loaded button. There
are 2 available heights on the parent handlebar (92cm; 96.5cm). Make sure to align the spring-
loaded button with the holes; you must hear a click to ensure the handle is securely in place.
To secure the parent handlebar to the trike, carefully place the shaft through the saddle’s hole
and into the hole on the trike’s frame. Once you hear a click, the pole is secure.
To remove the parent handle, you must press the red button under the trike’s frame; then
release the shaft and carefully lift the parent handle out.
HOW TO OPERATE THE FREEWHEEL MODE:
The front wheel has two modes of operation.
Unlocked mode: when the pedals are turning independently from the front wheel.
Locked mode: when the pedals and the front wheel are connected together and move as one.
To put the front wheel in Locked mode, you need to align the spot on the red button to the arrows on
the inner hub; press the red button on the locked symbol side until you hear a click.
To put the front wheel in Unlocked mode, you need to align the spot on the red button to the arrows
on the inner hub; press the red button on the unlocked symbol side until you hear a click.
Warning! Freewheel function is to be used only with the parent handle (Push bar).
Warning! Check that the push bar (parent handle) is locked in position before use.
Warning! Automatic freewheeling ensures the tricycle can be pushed safely while the child’s feet
rest on the pedals without the pedals turning.
HOW TO OPERATE THE BRAKES:
The following explanation is only applicable for EXPLORER TRIKE 3in1 guided trike mode.
• To operate the rear wheels’ brakes, you need to push the rear brakes down by applying
pressure with your foot. You must always use both rear brakes when you need to stop the
tricycle from moving. The brakes are locked and the tricycle will remain stationary once you
hear a click after pushing down both brakes.
• To unlock the brakes, you need to fully lift up both brakes with your foot. The tricycle is mobile
once you hear a click after pushing up both brakes.
• The left brake controls the left-hand side rear wheel and the right brake controls the right-hand
side rear wheel.
TRANSFORM GUIDED TRIKE TO TRAINING TRIKE (A-B)
When the child is old enough to pedal, take off the push bar, and put the front wheel in locked mode
to allow pedalling.
1. Press the red button at the bottom of the frame to remove the parent handle.
2. Remove the footrest by turning the knob 90 degrees, then press the spring-loaded button on
the left-side of the saddle stem.
You can store the footrest at the back of the seat by sliding it into its dedicated spot.
Warning! Remove footrest when the child’s heel is interfering with it while pedaling.
8
ENGLISH

TRANSFORM TRAINING TRIKE TO BALANCE BIKE (B-C)
1. Unscrew the knob at the end of the wheel assembly. Place the wheel inside of the Trike
frame. Slide the wheel in the hexagon shaped hole and screw back the knob onto the wheel.
Repeat the procedure for the other wheel. Make sure the brakes do not touch the ground.
2. Put the pedal lock of the front wheel in the unlocked position. Remove the pedals from the
wheel; you can store them at the rear of the saddle.
• Warning! Protective equipment should be worn. Not to be used in trafc. Always wear safety
equipment (helmet, elbow-pads, kneepads, gloves).
• Braking for walking bike: The product can be braked with the feet. The child can stop
moving by stopping walking/running. Please take care that your child can always stop from
the speed it produces and wears appropriate shoes.
GENERAL INSTRUCTIONS OF USE:
- Prior to use, make sure that the product has been assembled properly. Check all the connection
elements: steering column; footrest; seat; safety belt; safety ring must be correctly adjusted and
make sure that the locking mechanisms are securely locked. Check the product before the child
rides to determine if there are any potentially hazardous parts or conditions.
- Children should be supervised by adult while riding this product. Special care should be taken to
instruct children in safe riding.
- Do not use on the public highways, examples of safe riding area: To be used on at and no
gravel areas (playground, Public Square)
- Do not use this product near a staircase, on a slope, on a road or on a wet surface.
- More mobility child grows; the more potential hazards increase. At home, be sure to remove
frames or mirrors hung too low and could break, and any object that could fall in the event of
impact. Corner table can also be a danger.
- Do not allow more than one rider on the product at a time.
- Be sure the child wears clothes and appropriate footwear when using product.
- Be sure the rider keeps both hands on the handlebars for proper control.
- Do not allow the rider to wear anything that obstructs hearing and visibility, or which impairs the
functioning of product.
- The product should be used with caution since skill is required to avoid falls or collisions causing
injury to the user or third parties.
MAINTENANCE AND SECURITY:
- Security checks: check periodically the product to identify any loose or dislocated element
particularly the wheels, pedals, seat and handlebars.
- Periodic cleaning will bring a good life. Wipe the product with a dry cloth if it has been soiled.
- Regularly check the condition of abrasion and avulsion.
- Regularly check that parts are not broken or damaged, if this happens, stop using this product.
- Regular checks can prevent an accident.
ADDITIONAL INFO
For questions and inquiries please contact us at: contact@globber.com
WARRANTY
The manufacturer warranties this product to be free of manufacturing defects for period of 2 years
from date of purchase. This limited Warranty does not cover normal wear and tear, tire, tube or
cables, or any damage, failure or loss caused by improper assembly, maintenance, or storage.
This Limited Warranty will be void if the product is ever
• used in a manner other than for recreation or transportation;
• modied in any way;
• rented
The manufacturer is not liable for incidental or consequential loss or damage due directly or
indirectly to the use of this product.
Globber does not offer an extended warranty. If you have purchased an extended warranty, it must
be honoured by the store at which it was purchased.
For your records, save your original sales receipt with this manual and write the product name
below.
………………………………………………………………………..
SPARE PARTS
To order spare parts for this product, please visit our website www.globber.com
9
ENGLISH

Veuillez lire attentivement les instructions avant d’assembler et d’utiliser le produit. Conservez ces
instructions pour toute référence future.
Faites attention lorsque vous déballez et assemblez le produit.
Ce produit doit être assemblé par un adulte responsable.
Retirez toutes les pièces inutiles avant de donner le produit à votre enfant.
Attention ! Sécurisez toujours l’enfant avec le harnais.
Attention ! Personne ne doit grimper ou se tenir à l’arrière du cadre car le produit serait renversé.
Mode tricycle : Attention ! Ce produit n’est pas conçu pour les enfants de plus de 36 mois ; force
de soutien insufsante.
COMMENT ASSEMBLER LE TRICYCLE EXPLORER TRIKE 3-en-1
1. La fourche de la roue avant doit être alignée avec le cadre du tricycle ; puis insérez le
montant de la fourche de la roue avant dans le cadre.
2. Prenez le guidon et alignez-le avec la roue avant en vous assurant que le montant de la
fourche de la roue avant s’insère dans la colonne du guidon. Assurez-vous que le guidon
est positionné dans le bon sens avec la colonne supérieure orientée vers l’extérieur, loin du
siège. Poussez le guidon vers le bas jusqu’à ce que vous entendiez un déclic pour le xer
en position.
3. Tournez les verrous des pédales sur la roue avant dans le sens du symbole non verrouillé ;
placez les pédales dans les fentes de la roue avant. Tournez les verrous des pédales dans le
sens du symbole verrouillé pour xer les pédales dans la roue avant. Vous devrez peut-être
maintenir le verrou de la pédale opposée pour vous assurer que la pédale ne tourne pas
librement.
4. Pour installer les roues arrière, vous devez dévisser le bouton à l’extrémité de l’assemblage
des roues. Les freins des roues arrière doivent être orientés vers l’intérieur quand ils sont
installés sur le tricycle. Placez la roue dans le trou hexagonal à l’arrière du châssis du tricycle
et assurez-vous que le frein est orienté vers le haut et ne touche pas le sol. Une fois que la
roue est en position correcte, vous devez revisser le bouton dans la fente de la roue pour
assurer que la roue reste bien en place.
5. Pour insérer la selle, vous devez d’abord ouvrir la pince et appuyer sur le bouton à ressort
situé en bas de montant de la selle . Ensuite, abaissez la selle jusqu’à ce que vous
entendiez un déclic. Fermez la pince. La selle est réglable avec 2 hauteurs disponibles (31
cm ; 34 cm). La profondeur d’insertion minimale est indiquée par le repère « MAX » indiqué
sur le montant lors de l’insertion du bouton à ressort supérieur dans le trou du montant de la
selle. Il s’agit de la plus haute hauteur de la selle. L’insertion maximale de la selle pousse la
selle vers le bas jusqu’à ce que le montant de la selle soit complètement enfoncé. Il s’agit de
la plus basse hauteur de la selle.
6. Prenez le repose-pieds et faites-le glisser vers le haut du montant de la selle. Vous devez
appuyer sur le bouton à ressort situé au bas du montant de la selle ; le repose-pied est
sécurisé lorsque vous entendez un déclic en tournant le bouton sous le repose-pieds sur 90
degrés. Le repose-pieds doit être orienté vers l’avant et non vers l’arrière pour le placer dans
sa position correcte.
Attention ! Vériez que le repose-pieds est bien verrouillé avant chaque utilisation.
7. Pour assembler la barre parentale, prenez sa partie supérieure où se trouve la poignée
noire, et insérez-la dansle montant inférieuren appuyant sur le bouton à ressort. La barre
parentale peut se régler sur 2 hauteurs disponibles (92 cm ; 96,5 cm). Assurez-vous
d’aligner le bouton à ressort avec les trous ; vous devez entendre un déclic pour vous
assurer que le guidon est bien en place Pour sécuriser la barre parentale au tricycle, placez
soigneusement le mancheà travers le trou de la selle et dans le trou du châssis du tricycle.
Une fois que vous entendez un déclic, le montant est sécurisé.
Pour retirer la barre parentale, vous devez appuyer sur le bouton rouge sous le cadredu
tricycle ; puis relâchez le manche et soulevez délicatement la barre parentale pour l’enlever.
COMMENT UTILISER LE MODE ROUE LIBRE :
La roue avant permet deux modes de fonctionnement.
Mode déverrouillé : lorsque les pédales tournent indépendamment de la roue avant.
Mode verrouillé : lorsque les pédales et la roue avant sont reliées ensemble et fonctionnent
simultanément.
Pour mettre la roue avant en mode verrouillé, vous devez aligner le point sur le bouton rouge avec
les èches du moyeu intérieur. Appuyez sur le bouton rouge du côté du symbole de verrouillage
jusqu’à entendre un déclic.
Pour mettre la roue avant en mode verrouillé, vous devez aligner le point sur le bouton rouge avec
les èches du moyeu intérieur. Appuyez sur le bouton rouge du côté du symbole de déverrouillage
jusqu’à entendre un déclic.
Attention ! La fonction de roue libre doit être utilisée uniquement avec la poignée parentale (barre
pour pousser).
Attention ! Vériez que la barre pour pousser (poignée parentale) est bien verrouillée avant
l’utilisation .
Attention ! La fonction de roue libre automatique permet de pousser le tricycle en toute sécurité
pendant que l’enfant pose ses pieds sur les pédales qui ne tournent pas.
COMMENT FAIRE FONCTIONNER LES FREINS :
Les explications suivantes ne s’appliquent que pour le mode guidé EXPLORER TRIKE 3-in-1 .
• Pour faire fonctionner les freins des roues arrière, vous devez pousser le frein arrière vers le
bas en appliquant une pression avec votre pied. Vous devez toujours utiliser les deux freins
arrière lorsque vous devez empêcher le tricycle de bouger. Les freins sont verrouillés et le
tricycle reste immobile dès que vous entendez un déclic après avoir appuyé sur les deux
freins .
• Pour déverrouiller les freins, vous devez lever complètement les deux freins avec votre pied.
Le tricycle est mobile lorsque vous entendez un déclic après avoir relevé les deux freins .
• Le frein gauche commande la roue arrière gauche et le frein droit contrôle la roue arrière
droite.
10
FRANÇAIS

TRANSFORMEZ LE TRICYCLE GUIDÉ EN TRICYCLE D’ENTRAÎNEMENT (A-B)
Lorsque l’enfant est en âge de pédaler, retirez la barre parentale et mettez la roue avant en mode
verrouillé pour permettre le pédalage.
1. Appuyez sur le bouton rouge en bas du cadre pour enlever la poignée parentale.
2. Retirez le repose-pied en tournant le bouton sur 90 degrés, puis appuyez sur le bouton à
ressort sur le côté gauche du montant de la selle .
Vous pouvez stocker le repose-pieds à l’arrière du siège en le glissant dans son rangement
prévu.
Attention ! Retirez le repose-pieds lorsque le talon de l’enfant le touche en pédalant.
TRANSFORMEZ LE TRICYCLE D’ENTRAÎNEMENT EN VÉLO D’ÉQUILIBRE (B-C)
1. Dévissez le bouton à l’extrémité de la roue. Placez la roue à l’intérieur du cadre du tricycle.
Faites glisser la roue dans le trou hexagonal et revissez le bouton sur la roue. Répétez la
procédure pour l’autre roue. Assurez-vous que les freins ne touchent pas le sol.
2. Mettez le verrou des pédales de la roue avant en position déverrouillée. Retirez les pédales
de la roue ; vous pouvez les stocker à l’arrière de la selle. .
• Attention ! Un équipement de protection doit être porté. Ce produit ne doit pas être utilisé
dans la circulation. L’enfant doit toujours porter un équipement de sécurité (casque,
coudières, genouillères, gants).
• Freinage pour le vélo d’équilibre : Le produit peut être freiné avec les pieds. L’enfant peut
arrêter le produit en cessant de marcher / courir. Veillez à ce que votre enfant puisse toujours
s’arrêter à la vitesse qu’il produit et porte des chaussures appropriées.
INSTRUCTIONS GÉNÉRALES D’UTILISATION :
- Avant l’utilisation, assurez-vous que le produit a été correctement assemblé. Vériez tous les
éléments de connexion : colonne de direction; repose pieds; siège; ceinture de sécurité; le cadre
de sécurité doit être correctement ajusté et assurez-vous que les mécanismes de verrouillage
sont bien enclenchés. Vériez le produit avant que l’enfant ne monte pour déterminer s’il existe
des pièces ou des conditions potentiellement dangereuses.
- Les enfants doivent être surveillés par un adulte lorsqu’ils utilisent ce produit. Des précautions
particulières doivent être prises pour apprendre aux enfants à conduire en toute sécurité.
- Ce produit ne doit pas être utilisé sur des routes publiques ni des zones de circulation : Il doit
être utilisé sur des zones plates et non gravelées (terrains de jeu, place publique)
- Ce produit ne doit pas être utilisé près d’un escalier, d’une pente, d’une route ou sur une surface
mouillée.
- Plus la mobilité des enfants augmente; plus les dangers potentiels augmentent. À la maison,
veillez à retirer les cadres ou les miroirs trop bas qui pourraient se briser, ainsi que tout objet
susceptible de tomber en cas d’impact. Les coins d’une table peuvent aussi représenter un
danger.
- Ne laissez pas plus d’un utilisateur à la fois sur le produit.
- Assurez-vous que l’enfant porte des vêtements et des chaussures appropriées lors de l’utilisation
du produit.
- Assurez-vous que l’enfant garde les deux mains sur le guidon pour un contrôle adéquat.
- Ne laissez pas l’enfant porter quoi que ce soit qui gênerait l’ouïe et la visibilité ou qui gênerait le
fonctionnement du produit.
- Le produit doit être utilisé avec prudence, car il est nécessaire de faire preuve de compétence
pour éviter les chutes ou les collisions causant des blessures à l’utilisateur ou à des tiers.
ENTRETIEN ET SÉCURITÉ :
- Contrôles de sécurité : vériez périodiquement le produit pour identier tout élément desserré ou
disloqué, en particulier les roues, les pédales, la selle et le guidon.
- Un nettoyage régulier assurera une longue durée de vie du produit. Essuyez le produit avec un
chiffon sec s’il est sale.
- Vériez régulièrement l’état d’abrasion et d’avulsion.
- Vériez régulièrement que les pièces ne sont ni cassées ni endommagées. Le cas échéant,
cessez d’utiliser ce produit.
- Des contrôles réguliers peuvent empêcher un accident.
INFORMATIONS COMPLÉMENTAIRES
Si vous avez des questions, veuillez nous contacter à l’adresse suivante : contact@globber.com
GARANTIE
Le fabricant garantit que ce produit est exempt de défauts pendant une période de 2 ans à
compter de la date d’achat. Cette garantie limitée ne couvre pas l’usure normale, les pneus,
les tubes ou les câbles, ou tout dommage, défaillance ou perte causé par un assemblage, une
maintenance ou un stockage incorrect.
La garantie limitée est annulée si le produit est
- utilisé pour un autre usage que les loisirs ou le transport ;
- modié que quelque façon que ce soit ;
- loué
Le fabricant n’est pas responsable des pertes ou dommages accidentels ou consécutifs dus
l’utilisation directe ou indirecte de ce produit.
Globber ne propose pas d’extension de garantie. Si vous avez acheté une extension de garantie,
elle doit être honorée par le magasin par lequel elle a été achetée.
Pour vos dossiers, veuillez sauvegarder l’original de votre ticket de caisse avec ce manuel et
écrivez le nom du produit.
………………………………………………………………………..
PIÈCES DE RECHANGE
Pour commander des pièces de rechange pour ce produit, veuillez visiter le site internet:
www.globber.com
11
FRANÇAIS

请在组装和使用产品前仔细阅读说明书。请妥善保管说明书以备日后参考之用。
在拆封和组装产品时请注意安全。
此产品必须由一名负责任的成年人组装。
在将产品交给您的孩子之前,请移除所有非使用产品所必须的部件。
警告!请每次都用安全带系好孩子。
警告!请勿踩在或站在车架后部,否则产品会翻倒。
三轮车模式:警告!请勿给超过36个月大的孩子使用;产品不足以支撑他们的重量。
如何组装 EXPLORER TRIKE 3in1(探路者三轮车“三合一”)
1. 先将车轮的前叉与三轮车的车架对齐;然后将车轮前叉立管插入车架。
2. 握住车把手,将车轮前叉立管插进把手杆中,使车把手与前轮对齐。确保车把手的方
向安装正确,顶杆面朝外,背对座椅。将车把手向下推,直到听到咔嗒一声,表示它们
已牢牢固定到位。
3. 将前轮的脚踏锁朝解锁标志的方向转动;将脚踏安装到前轮的狭槽中。将脚踏锁朝锁
定标志的方向转动以将脚踏固定在前轮上。您可能需要握住另一端的脚踏锁以免脚踏
自由地旋 转。
4. 要安装后轮,您需要拧开位于车轮总成末端的旋钮。在所有三轮车阶段,后轮的刹车
在安装时都必须指向内侧。将车轮安装到三轮车车架后方的六边形狭槽中,并确保刹
车朝上且不会碰到地面。车轮安装到位后,您需要重新将旋钮拧回到车轮的狭槽上,
以确保车轮能一直牢牢地固定到位。
5. 要插入车座,您必须先打开夹扣并按下底端车座立管上的弹簧按钮。然后,将车座向
下推,直到听到咔嗒一声。扣紧夹扣。车座有两个高度可调(31厘米;34厘米)。最小
插入深度在立管上用“MAX”标记,即将顶端的弹簧按钮置入车座立管孔时的深度。
此时车座的高度最大。若要插入最大深度,则将车座向下一路推到底即可。此时车座
的高度最小。
6. 握住搁脚板,将其滑到车座立管上。您必须按下车座立管底端的弹簧按钮;当听到咔嗒一
声并将搁脚板下的旋钮拧至90度时,搁脚板便固定住了。搁脚板的正确位置必须是面朝
前 ,而 不 是 朝 后 。
警告!每次使用前均应检查搁脚板是否已牢牢锁紧。
7. 要组装后推把手,握住后推把手的顶部,即黑色握把的位置,按下弹簧按钮将其插入
底轴。后推把手有两个高度可调(92厘米;96.5厘米)。确保弹簧按钮和孔对齐;必须
听到咔嗒一声才能保证把手已牢牢固定到位。要将后推把手固定到三轮车上,您需要
小心地将轴穿过车座上的孔,插到三轮车架的孔里。当听到咔嗒一声时,杆子就固定
到 位 了。
要移除后推把手,您必须按下位于三轮车架底部的红色按钮;然后松开轴并小心地将
后推把手抽出来。
如何操作自由车轮模式:
前轮有两种运行模式。
解锁模式:此模式下踏板不和前轮固定在一起,可以独立转动。
要将前轮设置为锁定模式,需使红色按钮上的圆点与内毂上的箭头对齐;按下锁定标志
一侧的红色按钮直到听到咔嗒一声。
要将前轮设置为解锁模式,需使红色按钮上的圆点与内毂上的箭头对齐;按下解锁标志
一侧的红色按钮直到听到咔嗒一声。
警告!自由车轮模式只能在使用后推把手(推把)的时候使用。
警告!使用前请务必检查推把(后推把手)是否锁紧到位。
警告!自动自由车轮模式下,您可以安全地推动三轮车,孩子脚放在踏板上踏板也不会
随意转动。
如何操作刹车:
以下解释仅适用于EXPLORERTRIKE3in1(探路者三轮车“三合一”)的引导三轮车
模式。
-要操作后轮的刹车,您需要用脚向下踩后刹。您每次都必须将两个后刹都踩住才能让三
轮车停止移动。当您踩住两个刹车并听到咔嗒一声时,刹车就被锁定了,三轮车将保持
静止。
-要解除刹车,您需要用脚将两个刹车都完全抬起。当您抬起两个刹车并听到咔嗒一声
时,车子便可移动了。
-左刹控制的是左边的后轮,右刹控制的是右边的后轮。
将引导三轮车转变为训练三轮车 (A-B)
当孩子足够大可以骑行的时候,拿掉推把,将前轮设置为锁定模式好让孩子能够骑行。
按下车架底部的红色按钮来移除后推把手。
-将旋钮转动90度,然后按下车座立管左侧的弹簧按钮即可移除搁脚板。
-您可以把搁脚板存放在座椅背部专门用来放搁脚板的地方
警告!如果孩子踩踏板时脚跟会被搁脚板妨碍到,则请移除搁脚板。
12
简体中文

将训练三轮车转变为平衡车 (B-C)
1. 拧开车轮总成末端的旋钮。将车轮放在三轮车架内。将车轮滑入六边形的孔中并将
旋钮重新拧回到车轮上。另一个车轮的安装方法同理。请确保刹车不会碰到地面。
2. 解开前轮的踏板锁。将踏板从车轮上卸下;您可以将它们存放在车座的后面。
警告!孩子应穿戴好护具。请勿在马路上使用。请每次都给孩子穿戴好安全护具(头
盔、护肘、护膝、手套)。
滑步车的制动:本产品可以用脚刹车。孩子停止走动/跑动就可以停止移动。请留意您
孩子的车速,使其一直处于可停下来的范围,并注意给孩子穿上合适的鞋子。
常规使用说明:
-在使用之前,请先确保产品组装无误。请检查所有的连接部分:转向柱、搁脚板、座
椅、安全带、护栏等必须调整正确并确保锁紧机构均已牢牢锁紧。请在孩子骑行前检
查产品,确定是否存在任何可能带来潜在危险的部件或情况。
-孩子应当在成年人的监护下骑乘本产品。应当特别注意指导儿童如何安全骑行。
-请勿在公路上使用本产品,可安全骑行的区域的例子有:平坦无碎石的区域(操场、
公共广场)
-请勿在楼梯附近、斜坡上、道路上或潮湿的表面使用本产品。
-孩子骑行的速度越快,潜在的危险就越大。在家里,请确保移除任何挂得过低、可能
破碎的框架或镜子,以及任何可能因骑行意外而掉落的物品。角桌也可能成为安全隐
患。
-请不要让多人同时骑乘本产品。
-使用本产品时,请确保孩子穿着衣服和合适的鞋子。
-请确保骑行者双手都握在车把手上,以合理地控制方向。
-请勿让骑行者穿戴任何阻碍视听,或是会损害产品功能的物品。
-使用本产品时应多加小心,因为没有足够技巧的话,可能会发生跌倒或碰撞事件,导
致使用者或第三方人员受伤。
保养和安全事项:
-安全检查:请定期检查产品是否有任何松动或错位的部分,特别是车轮、踏板、座椅
和车把手。
-定期清洁可以延长产品使用寿命。产品弄脏时可用干布擦拭。
-请定期检查产品是否有磨损和撕裂的情况。
-请定期检查部件是否有断裂或其他损坏情况,如果有,请停止使用本产品。
-定期检查可以预防事故的发生。
附加信息
如有任何疑问或需要咨询,请联系我们:[email protected]
保修
制造商为本产品的制造瑕疵提供为期2年的免费保修,保修期从购买之日开始计算。此
有限保修不包括正常使用条件下轮胎、管子或线绳出现的磨损或损坏,亦不包括因组
装、维护或收纳不当而造成的任何损坏或损失。
若出现以下情况,本有限保修将无法生效:
-出于非休闲娱乐或代步用途使用;
-进行任何方式的改装或改造;
-租赁
因使用本产品而直接或间接导致的附带或相关损失或损伤,制造商概不负责。
Globber不提供延长保修。有偿延长保修必须向出售此产品的商家购买。
请妥善保存销售收据原件和本说明书,并记下产品名称,以备日后参考。
__________________________
备用配件
如需要订购此产品备用配件,请访问我们的网站:www.globber.com
13
简体中文

説明書をよく読んでから、製品を組み立て、使用してください。今後参照できるよう説明書を保管してください。
製品の梱包を解き、組み立てる時は慎重に行ってください。
製品の組み立ては、責任ある大人の方が行わなければなりません。
遊びに必要のない部品は全て取り外してから、製品をお子様に与えてください。
警告!常にお子様の安全ベルトを締めてください。
警 告!製 品 が ひ っくり返 る ので、フレ ーム の 後 ろを 踏 ん だり 、立 ったりしな いでくだ さい 。
三輪車モード:警告!支える力が充分ないため、36カ月以上のお子様には使用させないでください。
エクスプローラー トライク 3in1の組み立て方法
1. 前輪のフォークは三輪車のフレームに合わせる必要があり、その後に前輪のフォークの柄をフレー
ム に 挿 入 してくだ さい 。
2. ハンドルバーをつかみ 、前 輪 のフォークの 柄がハンドルバーの軸 に差し込まれているか 確 認して、
前輪に合わせます。上の軸が外側を向き、シートから離れているように、ハンドルバーが正しい方向
になっていることを確認します。カチッと音がして所定の位置に固定されるまで、ハンドルバーを下
に 押 してくだ さい 。
3. 前輪のペダルロックを解錠マークの方向に回すと、ペダルが前輪のスロットに入ります。ペダルロッ
クを施錠マークの方向に回すと、前輪のペダルが固定されます。ペダルが自由に回転しないことを
確認するには、反対のペダルロックをつかむ必要がある場合があります。
4. 後輪を取り付けるには、車輪の機構の端にあるノブのネジを緩める必要があります。後輪のブレー
キは、どの三輪車のモードでも、取り付けられれば内側を向いていなければなりません。三輪車のフ
レームの後部にある六角形のスロットに車輪を入れ、ブレーキが上を向き、地面に触れていないこ
とを確認します。正しい位置に車輪が入ったら、ノブのネジを車輪スロットに再び締め直し、車輪が
所定の位置にしっかりとはまっていることを確認します。
5. サドルを挿入するには、まずクランプを開き、サドルの柄にある下部のスプリング入りボタンを押す
必 要 があります。続 いて、カチッと音 がするまでサドルを下に押します。クランプを閉じます。サドル
は2つの高さ(31cm、34cm)に調整可能です。挿入の深さが最小なのは、上のスプリング入りボ
タンをサドルの柄の穴に入れた時の、柄に「MAX」という印がある所です。これがサドルの最高の高
さです。サドルの挿入が最大になるのは、サドルの柄が一番下に来るまでサドルを押し込んだ時で
す。これが サドルの最 低の高さです。
6. フットレストをつかみ、サドルの柄の上にずらします。サドルの柄の下部にあるスプリング入りボタ
ンを押す必 要 があります。その時 、カチッという音がしたらフットレストは 固 定されているので、フッ
トレストの下のノブを90度にひねります。正しい位置にするには、フットレストは下向きではなく、上
向きにする必 要 があります。
警告!毎回使用前にはフットレストがしっかりと固定されているかチェックしてください。
7. 保護者用ハンドルバーを組み立てるには、保護者用ハンドルの上の部分、すなわち、黒いハンドルが
ある部分をつかみ、それをスプリング入りボタンを押すことにより下部シャフトに入れます。保護者
用ハンドルバーの高さは、2種類(92cm、96.5cm)が利用可能です。スプリング入りボタンが穴に
合ってるか確認してください。その時、ハンドルが所定の位置にしっかりとはまっていれば、カチッと
音がするはずです。保護者用ハンドルバーを三輪車に固定するには、サドルの穴を通して三輪車の
フレームの穴へシャフトを慎重に入れます。カチッという音がしたら、ポールは固定されています。
保護者用ハンドルを取り外すには、三輪車のフレームの下の赤いボタンを押し、その後、シャフトを
外し、慎重に保護者用ハンドルを持ち上げて取り外します。
フリーホイール・モードの操作方法:
前輪には2つの操作モードがあります。
解錠モード:前輪と独立してペダルが回転する場合。
施錠モード:ペダルと前輪が接続され、一体化して動く場合。
前輪を施錠モードにするには、赤いボタンの点を内側のハブの矢印に合わせる必要があります。その際、カチッと
いう音がするまで施錠マーク側の赤いボタンを押します。
前輪を解錠モードにするには、赤いボタンの点を内側のハブの矢印に合わせる必要があります。その際、カチッと
いう音がするまで解錠マーク側の赤いボタンを押します。
警告!フリーホイール機能は、保護者用ハンドル(プッシュバー)と一緒に使用するものです。
警告!プッシュバー(保護者用ハンドル)が所定の位置にロックされているかチェックしてから使用してください。
警告!自動フリーホイール機能では、ペダルが回転せずに、お子様の足をペダルに乗せたまま三輪車を押すことが
出来るようになります。
ブレーキの操作方法:
以下の説明が当てはまるのは:エクスプローラートライク3in1幼児用三輪車のガイド付き三輪車モードのみで
す。
• 後輪のブレーキを操作するには、足で圧力を加えて、リアブレーキを下に押す必要があります。三輪車の動き
を止める必要がある時は、必ず両方のリアブレーキを使用する必要があります。両方のブレーキを押した後
にカチッという音がしたら、ブレーキはロックされ、三輪車は動かないままになります。
• ブレーキのロックを外すには、両方のブレーキを足で完全に持ち上げる必要があります。両方のブレーキを
押した後にカチッという音がしたら、三輪車は動きます。
• 左ブレーキは左手側の後輪を、右ブレーキは右手側の後輪をコントロールします。
ガイド付き三輪車をトレーニング用三輪車に変える: (A-B)
お子様が充分成長しペダルがこげるようになったら、前輪を施錠モードにしてペダルを使えるようにして
ください 。
1. フレームの下部にある赤いボタンを押し、保護者用ハンドルを取り外します。
2. ノブを90度回し、続いて、サドルの柄の左側にあるスプリング入りボタンを押します。
フットレストをその専用の場所までずらして、シートの後部に収納します。
警告!フットレストは、ペダルをこぐ時にお子様のかかとの邪魔にある場合、取り外してください。
14
日本語

トレーニング用三輪車をバランスバイクに変える: (B-C)
1. 車輪の機構の端にあるノブのネジを緩めます。一つの車輪を三輪車のフレームの中に入れます。
車輪を六角形の穴にスライドさせ、車輪のノブを締め直します。他の車輪にも同じ手順を繰り返
します。ブレーキが 地 面に触 れていないことを確 認します。
2. 前輪のペダルロックを解錠の位置にします。車輪からペダルを取り外します。ペダルはサドルの後
部に収 納できます。
• 警告!保護具は必ず摩耗するものです。路上では使用しないでください。常に安全具(ヘルメッ
ト 、肘 当 て 、膝 当 て 、手 袋 )を 着 用 し て く だ さ い 。
• ウォーキングバイクのブレーキ操作:製品は足でブレーキがかかります。お子様が歩く/走るの
を止めると、動きが止められます。常にお子様がバイクの出すスピードを止められ、適切な靴を履
いているか気にかけてあげてください。
一般的な使用方法:
-使用する前に、製品が適切に組み立てられていることを確認してください。接続部分(ステアリング
軸、フットレスト、シート、安全ベルト、安全リング)が全て正しく調整され、ロック機構がしっかりと施
錠されていることをチェックしてください。お子様が乗る前に製品をチェックし、何らかの危険性のあ
る部品や症状がないか判定してください。
-お子様がこの製品に乗る時は大人の方が見守ってあげてください。特別な注意を払って、お子様に安
全 な 乗り 方 を 教 えてください 。
-公道では使用しないこと。安全な乗車場所の例:平らで砂利のない場所で使用すること(遊び場、
公園)
-階段の近く、坂道、道路、濡れた面の上でこの製品を使用しないでください。
-お子様が成長して動きが大きくなるほど、潜在的な危険性が増します。ご家庭では、極端に低い所
に掛かっている額縁や鏡、衝突した場合に落下する可能性のある物があれば必ず取り外してくださ
い 。コ ー ナ ー テ ー ブ ル も 危 険 で す 。
-一度に二人以上を製品に乗らせないでください。
-製品を使用する時は、お子様が服を着て、適切な履物を履いているか確認してください。
-乗る人は適切な操作のため必ずハンドルバーに両手を置いてください。
-聴覚や視覚の妨げになる物、または製品の機能を損なう物は乗る人に着せないようにしてください。
-ユーザーまたは第三者の怪我につながる転倒や衝突を避けるにはスキルが必要であるため、製品は
注 意 してご 利 用ください 。
メ ン テ ナ ン ス と 安 全:
-安全チェック:製品のパーツに緩みや外れがないか、特に車輪、ペダル、シートおよびハンドルバーを
定期的にチェックしてください。
-定期的にクリーニングすると長持ちします。汚れたら製品を乾いた布で拭いてください。
-摩耗や剥離の症状がないか定期的にチェックしてください。
-部品の破損や損傷がないか定期的にチェックし、もし発生した場合はこの製品の使用を停止してく
ださい。
-定期的にチェックすれば事故を防止できます。
補足情報
ご質問などは、下記にお問い合わせください:contact@globber.com
保証
メーカーでは、本製品の製造上の欠陥に対し、購入日から2年の間、無償で保証します。本有限保証では、通常の
摩耗や割れ、タイヤ、チューブ、ケーブル、その他不適切な組立、メンテナンス、保管により発生した損傷、過失また
は損失は対象外となります。
本制有限保証は、製品に次の形跡がある場合は無効となります。
•レクリエーションまたは移動以外の用途で使用された
•何らかの改造を施された
• レン タル に 供 され た
本製品の使用により直接的または間接的に発生する、偶発的または結果的損害や損傷に対し、メーカーは責任
を負いません。
Globberでは、延長保証を提供致しません。お客様が延長保証をご購入された場合、お買い求めの小売店によ
る特 典と考えられます。
記録のため、領収書の原本を本マニュアルと共に保管し、商品名を下記にメモしてください。
_____________________________________________
スペア部品
本製品のスペア部品のご注文の際は、当社ウェブサイトwww.globber.comにアクセスしてください。
15
日本語

ID DEVELOPMENT LIMITED
Room 1302, 13/F, Chevalier House,
45 - 51 Chatham Road South, Tsim Sha Tsui,
Kowloon, Hong Kong
Made in China
Fabriqué en Chine
Parc d’activités de la Boisse Dagneux
Rue de l’industrie BP 99
01123 Montluel Cedex – France
Ref.: 631
IM_TRIKE3in1_1912
www.globber.com
Table of contents
Languages:
Other GLOBBER Bicycle manuals

GLOBBER
GLOBBER MY FREE 1C User manual

GLOBBER
GLOBBER EXPLORER TRIKE 4in1 DELUXE PLAY User manual

GLOBBER
GLOBBER LEARNING BIKE User manual

GLOBBER
GLOBBER EXPLORER TRIKE 4in1 User manual

GLOBBER
GLOBBER TRIKE User manual

GLOBBER
GLOBBER TRIKE User manual

GLOBBER
GLOBBER GO BIKE User manual

GLOBBER
GLOBBER GO BIKE User manual

GLOBBER
GLOBBER EXPLORER DELUXE PLAY User manual

GLOBBER
GLOBBER Trike 2in1 User manual