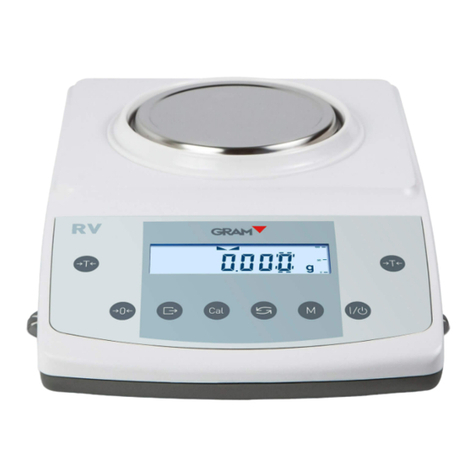
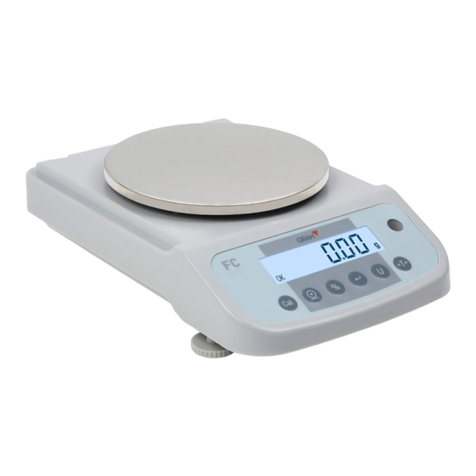
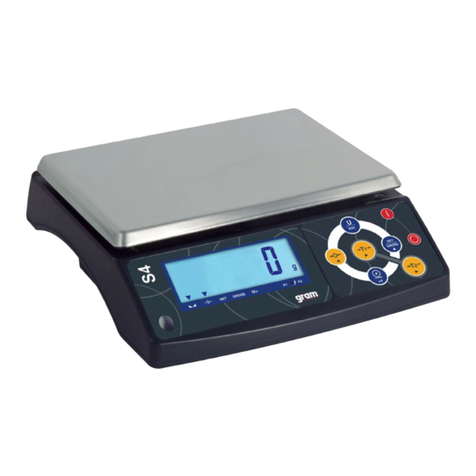
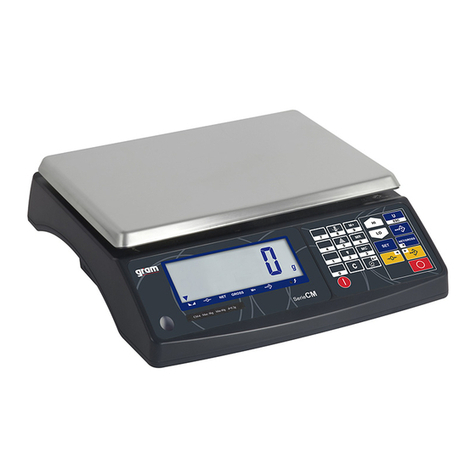
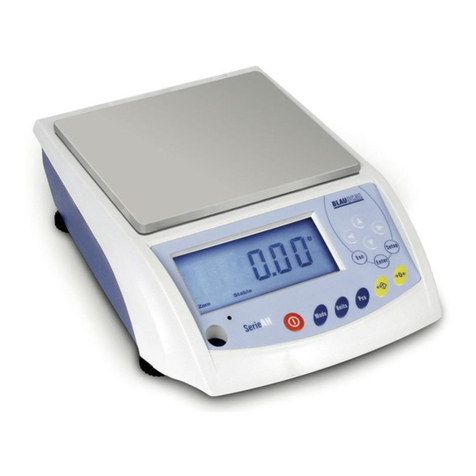
Gram GEC Series User manual

OPERATION MANUAL
SERIES GEC
Models
GEC-6
GEC-15
GEC-30
REV. 1A9M06

ENGLISH
SPECIFICATIONS
Display
LCD, height 14.5mm
6/7/7 (Unit weight / Weight / Total pieces)
Pan size (mm)
245 x 355 (W x H)
Dimensions
(mm)
387 x 365 x 117(W x L x H)
Net weight (kg)
3.7kg
Operation
temperature
0 ℃ to +40℃
RH
Less than 85%
Power
9V / 500mA, AC adaptor; rechargeable battery 6V
Output
RS-232C
Model
GEC-6
GEC-15
GEC-30
Maximal
Capacity
6kg
15kg
30kg
d =
0.2g
0.5g
1g
Precision
1/30000
1/30000
1/30000

DISPLAY AND KEYBOARD
LCD Display
Ø Weight display
Ø Unit weight display
Total pieces display
Indicates that battery voltage is low, the battery must be charged.
Indicates that display shows the net weight, after making a tare.
Indicates that weight is stable.
Indicates that the scale is in zero point, if you are not using the tare function.

Indicates the PLU number.
Indicates the accumulated weighing.
Indicates that the high limit of a weight or number of pieces has been
configured.
Indicates that the low limit of a weight or number of pieces has been
configured.
KEYBOARD DESCRIPTION
To turn off the scale.
To turn on t h e scale.
To reset th e d i s p l a y t o z e r o
To perform a tare

~
Numerical keys and decimal point to introduce data.
Key to delete data
Press this key to activate the alarm in high / low limits function.
Press this key to make weighing accumulations.
Press this key to view the total weight accumulated or the total number
of pieces accumulated.
Press this key to save, introduce or modify the weight of a sample.
Memorizes the unit weight of a sample.
Memorizes the number of pieces of a sample.
Change the indicator from the scale pan (A) to external platform
(optional) (B).
To view the gross weight, net weight or tare weight.
Recall of 24 direct PLU’s
COUNTING PIECES FUNCTION
Introduction of unit weight directly through the keyboard.
1. In weighing mode, use the numerical and decimal key to input the unit
weight. (Unit weight in grams)

2. Press the the unit weight will change.
3. If the key is not pressed in 4 seconds, the entered value will be
deleted.
Sampling introduction through number of pieces – Method 1
1. Place a number of pieces on the weighing pan.
2. In weighing mode, use the numerical and decimal keys to input the
number of pieces placed on the pan.
3. Press the key to calculate the unit weight of each piece.
4. If the key is not pressed in 4 seconds, the entered value will be
deleted.
Sampling introduction through number of pieces – Method 2
1. Be sure that the weighing pan is empty and the unit weight display is at
zero.
2. Press the key, the second display will show and the
third will show by default as 100.
3. Use the numerical and decimal keys to input the quantity of pieces.
4. Place the pieces on the weighing pan. The unit weight will be
automatically calculated.
Note: If the scale is connected to an auxiliary platform (B) and the
weighing mode is in B position (auxiliary platform) ), after pressing the
key, the input sampling will continue automatically in mode A
(scale)
Sampling introduction through number of pieces – Method 3
1. Be sure that weighing pan is empty and unit weight display is at zero.
2. Place a number of pieces on the weighing pan.
5. Press the key, the second display will show and the third
the value for default as 100.
3. Use the numerical keys to input the quantity.

4. Remove the pieces from the weighing pan. The unit weight will be
automatically calculated.
Note: If the scale is connected to an auxiliary platform (B) and the
weighing mode is in B position (auxiliary platform) ), after pressing the
key, the input sampling will continue automatically in mode A
(scale)
Sampling introduction through number of pieces – Method 4
If the unit weight is not deleted, add or remove pieces and press the
key to calculate again the unit weight.
Auto-sampling operation.
After the sampling introduction, the scale will automatically do the sampling in
mode A (scale) of any small item. Placing a new object on the weighing pan,
the scale will automatically do the sampling.
The auto-sampling function can be disabled in configuration menu CAL 1
PLU´S OPERATION
PLU Data setting
Configuration of direct PLU (keys 1 ~24)
1. Input the unit weight of the piece (see sampling introduction section)
2. Press the PLU key , the display will flash the message
3. Select the desired PLU key (1 – 24)

4. Press the PLU key to confirm and save. The message will stop
flashing.
Example
To input the unit weight of a piece of 0.5 g: Press:
1. Press the PLU key, the message will flash.
2. Press the desired PLU key, for example: , the PLU indicator will
show 3 then the symbol will flash.
3. Press again the key, the PLU indicator will show 15 then the
symbol will flash.
4. Press the PLU key to confirm, after a bip the unit weight for PLU 15 will
be of 0.5 g.
Configuration of indirect PLU´s ( 0 ~ 999 )
1. Input the unit weight of the piece (see sampling introduction section)
2. Press the PLU key, the display will show the flashing
message.
3. Use the numerical keys to select the desired PLU number.
4. Press the PLU key to confirm and save. The message will
stop flashing.
l If any data is entered in 30 seconds, the scale will automatically exit of
configuration mode and will return to normal weighing mode.

Recall of PLUs
Recall of a direct PLUs (keys 1 – 24)
l In normal weighing mode, press PLU key once (1 – 24) to access PLU
(bottom key)
l Press again the same PLU key to access to PLU (top key)
Example:
1. Press once the key, the PLU number 3 will be automatically
recalled. The display will show 3 below .
2. Press the same key again. The PLU number 15 will be
automatically recalled. The display will show 15 below .
Recall of an indirect PLU (0 – 999)
1. In normal weighing mode, keep pressed the PLU until the scale gives
a double beep, then release the key.
2. Use the numerical keys to introduce the desired PLU number and then
press the PLU key to recall it.
Change the value of a PLU
1. When the message appears on the display, press the PLU key.
The unit weight value will flash.
2. Change the unit weight value according to previous procedure and press
PLU key to confirm and save.

WEIGHING ACCUMULATIONS M+
1. Place a weight on the weighing pan and input his weight, press the M+
key. When the scale gives a beep and the display shows the ACC
message, the data will be automatically stored.
2. Remove the weight from the weighing pan and place another one on
the pan. Input the unit weight and press the M+ key. When the scale
gives a beep and the display shows the message ACC, the data will
be automatically stored.
l If after each operation, the weight is not removed from the pan,
pressing the M+ key the scale will make a long beep and it can
not save the data of following weighing.
l The scale can store up to 180 weighings.
Total weighing accumulations MR
1. In weighing mode, press the MR key, the display WEIGHT will remain
at zero. The display PIECE WEIGHT will show and the
display PCS the total number of pieces.
2. The display WEIGHT will show the total weight accumulated. The
number located in top side of message ACC means the number of
weighing made.
3. Press again the MR key to exit from function without delete data.
(When the option CAL 1: MR REC is configured to exit) or press again
the MR key to exit and delete data.
4. If optional Printer LP-50 is connected to the scale, the total weight
accumulated and the total of pieces will be printed (When the option
CAL 1: MR REC is configured to delete)

OTHER FUNCTIONS
LIMITS WEIGHT
1. Press the ALARM key. The display PCS will show the message
2. The display PIECE WEIGHT shows the high limit configuration for a
number of pieces. Input the high limit value using the numerical keys.
3. Press the ALARM key. Now the display PCS shows the message
. Input the low limit value for a number of pieces using the
numerical keys.
4. Press the ALARM key. The display PCS will show . Input the
high limit for weight using the numerical keyboard. (The unit weight must
be in grams)
5. Press the ALARM key. The display PCS will show the message .
Input the low limit for weight using the numerical keyboard (The unit
weight must be in grams)
6. Press the ALARM key to confirm and save all input data.
Note:
l If number of pieces or weight placed on the pan exceeds the high
predetermined value, the scale will give a beep.
l If number of pieces or weight placed on the pan is below the low
predetermined value, the scale will give a beep.
l The beep mode can be modified in parameters menu, CAL 1.

INTRODUCTION OF TARE VALUE
(Through the keyboard)
1. In weighing mode, input the Tare value using the numerical keys (The unit
weight is grams)
2. Press the key to confirm and save. (If this key is not pressed in 4
seconds, the entered value will be automatically deleted)
Note: It is not possible to input a Tare value that exceeds the capacity of
the scale.
AUXILIAR PLATFORM (B)
1. Press the A/B key to activate the scale (A) or the auxiliary platform (B)
2. The initial zero is the zero configured in calibration procedure. It means
that the weight located on the pan will be displayed accurately when the
scale is turned on.
3. Reset zero range is 10% of maximal capacity.
Configuration and calibration.
1. With scale disconnected, press and hold any key and then press the I key
to connect it. The display will show the CAL 1 message.
2. Press the C key to navigate through the different menus: CAL 1, CAL 2,
CAL 3, CAL 4 and CAL 5
3. Select the menu CAL 1, press the to access to general
configuration.

4. Select the menu CAL 2, press the to access to configuration of
auxiliary platform (B)
5. Select the menu CAL 3, press the to access to print configuration
6. Select the menu CAL 4, press the to access to calibration
configuration.
7. Select the menu CAL 5, press the to access to linearity calibration
procedure.
Note: To configure the menus CAL 4 and CAL 5, is necessary to remove
the JP3 jumper from PCB. Once the configuration is completed, place the
JP3 jumper in the original place again.
GENERAL CONFIGURATION (CAL 1)
Press the C key to navigate through different options and press the
to confirm the introduced data.
1. AUTO TURN-OFF
Display
Comments
Aut.oFF
oFF
Auto Turn-off disabled.
Aut.oFF
5
Auto Turn-off after 5 minutes of not in use.
Aut.oFF
10
Auto Turn-off after 10 minutes of not in use.
Aut.oFF
20
Auto Turn-off after 20 minutes of not in use.
Aut.oFF
30
Auto Turn-off after 30 minutes of not in use.

2. BACKLIGHT
Display
Descriptions
b.LiGHt
oFF
Backlight disabled
b.LiGHt
on
Backlight enabled.
b.LiGHt
AUto
Automatic Backlight.
3. rE.tArE – REPETITION OF THE TARE
Display
Descriptions
rE.tArE
oFF
Tare repetition disabled
rE.tArE
on
Tare repetit i on enabled
4. rE.SAnP – AUTO-SAMPLING
Display
Descriptions
rE.SAnP
oFF
Auto-sampling function disabled
rE.SAnP
on
Auto-sampling function enabled
5. Hi bEEP – ALARM OF HIGH LIMIT
Display
Explanation
Hi.bEEP
ALArn
oFF
High limit alarm disabled
Hi.bEEP
ALArn
SHort
High Limit alarm. Sound format: continuous short
beeps.

Hi.bEEP
ALArn
LonG
High Limit alarm. Sound format: continuous long
beeps. .
6. Lo bEEP – ALARM OF LOW LIMIT
Display
Descriptions
Lo.bEEP
ALArn
oFF
Low limit alarm disabled
Lo.bEEP
ALArn
SHort
Low Limit alarm. Sound format: continuous short
beeps.
Lo.bEEP
ALArn
LonG
Low Limit alarm. Sound format: continuous long
beeps.
7. ZERO TRACKING
Display
Descriptions
trAcE
oFF
Zero tracking disabled.
trAcE
on
Zero tracking enabled.
8. LEVEL STABILITY OF THE SCALE (A)
Display
Descriptions
StAbLE
XX
1 - 10
Configuration of level of stability using the numerical
keys.
X: Level of stability: 1~10
Level for default: 5

9. UNIT WEIGHT
Display
Descriptions
Unit
lb
Configuration of unit weight in lb.
Unit
1000g
Configuration of unit weight in kg
10. ACCUMULATION OF WEIGHINGS
Display
Descriptions
NPluS
Add Pr
Press the M+ key to accumulate the weight
and print out the results.
NPluS
Prt
Press the M+ key to print out the results only
(in this parameter, the Total key is disabled).
NPluS
Add
Press the M+ key to accumulate the weight only.
11. ACCUMULATED TOTAL
Display
Descriptions
Nr rEC
LEAuE
Press the MR key to view the accumulated total.
Pressing it again will delete the accumulation data.
Nr rEC
ClEAr
Press the MR key to view the accumulated total.
Pressing it again will delete the data from the
memory. (Note: When the optional LP-50 printer
is connected to the scale, pressing the M+ key
for a second time will delete the data from
the memory and the totals will be printed.
The serial connection in the CAL3 menu
should be configured to LP-50).

AUXILIARY PLATFORM CONFIGURATION (B) –CAL 2-
Press the C key to navigate between the different menu options. Use the
numerical keypad to enter the data and press the key to confirm and
save.
1. Configuration of capacity - auxiliary platform (B) -
Display
Descriptions
b.LoAd
xxxxxxx
GrAN
Configuration of the auxiliary platform capacity
in grams.
If 0 value is entered, the auxiliary platform (B)
will be disabled.
2. Configuration of resolution – auxiliary platform (B) -
Display
Descriptions
b.d=
xxxxx
GrAN
Configuration of the auxiliary platform resolution (d)
in grams.
Min. d is 1 gram.
Max. d is 65535 grams.
3. Configuration of stability level - auxiliary platform (B) -
Display
Descriptions
b.StAbL
x
1-10
Configuration of the stability level of the auxiliary
platform (B).
X: 1~10 stability level.
(Default stability level is: 3)
Minimum level is 1, allowing for faster stabilization time but with a slower filter.
Maximum level is 9, allowing for more filter but with slower stabilization time.
4. Zero-point calibration
Display
Descriptions
XXXXXX
0
b.Pnt. 0
The first row shows the AD value, the second row
shows “0” and the third one shows “b.Pnt. 0”.
Make sure that the weighing pan is empty. When the AD value is stable, press
this key:

5. Configuration of the value of the calibration weight
Display
Descriptions
XXXXXX
XXXXXXX
b.Pnt.CAL
The first row shows the AD value, the second row
shoes the calibration weight (Unit: grams) and
the third row shows “b.Pnt.CAL”.
The default calibration weight value is 1000 g. Use
the numerical keypad to enter the desired value.
1. Place the calibration weight on the weighing pan.
2. Use the numerical keypad to enter the value of the calibration weight
in grams.
3. When the AD value is stable, press the key to complete
the calibration.
PRINT CONFIGURATION (CAL 3)
This section is only applicable in models with RS-232C data output.
Press the C key to navigate between the different options and press the
key to confirm.
1. Baud rate
Display
Descriptions
bAud
2400
Set the transmission speed to 2400.
bAud
4800
Set the transmission speed to 4800.
bAud
9600
Set the transmission speed to 9600.
bAud
19200
Set the transmission speed to 19200.
2. Parity
Display
Descriptions
PAritY
7-E-1
Set parity to 7-E-1.
PAritY
7-o-1
Set parity to 7-o-1.

PAritY
7-n-2
Set parity to 7-n-2.
PAritY
8-n-1
Set parity to 8-n-1.
3. Printout
Display
Descriptions
Print
PrESS
Press the M+ key to print out the result of a weighing.
Press the C key within MR mode to print out
the result of the accumulation of weighings
and the accumulated total.
Print
StAbLE.1
Press the M+ key to print out the data of a weighing
(Net wt, Pc. wt, Pc. count) when the scale is stable
and the weight is > 0.
Press the MR key to not print.
Print
StAbLE.2
Press the M+ key to print out the net weight
when the scale is stable and the weight is > 0.
Press the MR key to not print.
Print
ALL.1
Press the M+ key to print out a single weighing.
Press the C key within MR mode to print out the result
of the accumulation of weighings and total
accumulation.
Printing of weighing data (Net wt, Pc. wt, Pc. count)
when the scale is stable and the weight is > 0.
Print
ALL.2
Press the M+ key to print out a single weighing.
Press the C key within MR mode to print out
the result of the accumulation of weighings and total
accumulation.
Print
oFF
Print function disabled.
Note: To use the print function, ADD (M Plus) in the CAL 1 parameter
should be configured to Add Pr.

4. Peripherals
Display
Descriptions
rENOtE
LP50
Connection to an LP-50 thermal printer.
rENOtE
PC
Connection to a PC for data transmission.
CALIBRATION PROCEDURE (CAL 4)
Remove the JP3 jumper before proceeding to calibration.
In the Calibration menu, press the C key to navigate between the different
options. Use the numerical keypad to enter the data and press the key
to confirm and save.
1. Selection of maximum capacity
Display
Descriptions
Kg
Lb
Viewed max. capacity varies with the default wt unit.
LoAd
03
LoAd
06
Configure maximum capacity as 3 kg/6lb.
LoAd
06
LoAd
12
Configure maximum capacity as 6 kg/12lb.
LoAd
15
LoAd
30
Configure maximum capacity as 15 kg /30lb.
LoAd
30
LoAd
60
Configure maximum capacity as 30 kg/60lb.
LoAd
50
LoAd
100
Configure maximum capacity as 50 kg/100lb.
Note: The capacity will be shown in the display in kg. or lb. according
to the weighing unit configured in the CAL 1 menu.
2. Zero-point calibration
Display
Descriptions
XXXXXX
0
Pnt. 0
The first row shows the AD value, the second row
shows “0” and the third one shows “Pnt. 0”.
This manual suits for next models
3
Table of contents
Other Gram Scale manuals

Gram
Gram AM-3000 Installation manual

Gram
Gram K3X Series User manual

Gram
Gram WHITE MEL SERIES User manual

Gram
Gram Xtrem F User manual

Gram
Gram S4 Series User manual

Gram
Gram AHS 300 User manual

Gram
Gram FV 220 User manual

Gram
Gram EH 500 User manual

Gram
Gram C6 1T User manual

Gram
Gram K3iX Series User manual