GB Please read carefully these operating instructions before putting the machine into operation.
A.V. 2 Reprints, even partial, are subject to approval. Technical changes reserved.
Devise
Battery Charger V 421 C
(Serial) Equipment
Professional charging cable, clamps with insulated handles,
ammeter, mixed poling protection, thermal protection,
additional fuse 50 A.
Area of Use.
The professional charger for normal and quick-acting
charging and vehicle start-up Large wheels facilitate easy
travel.
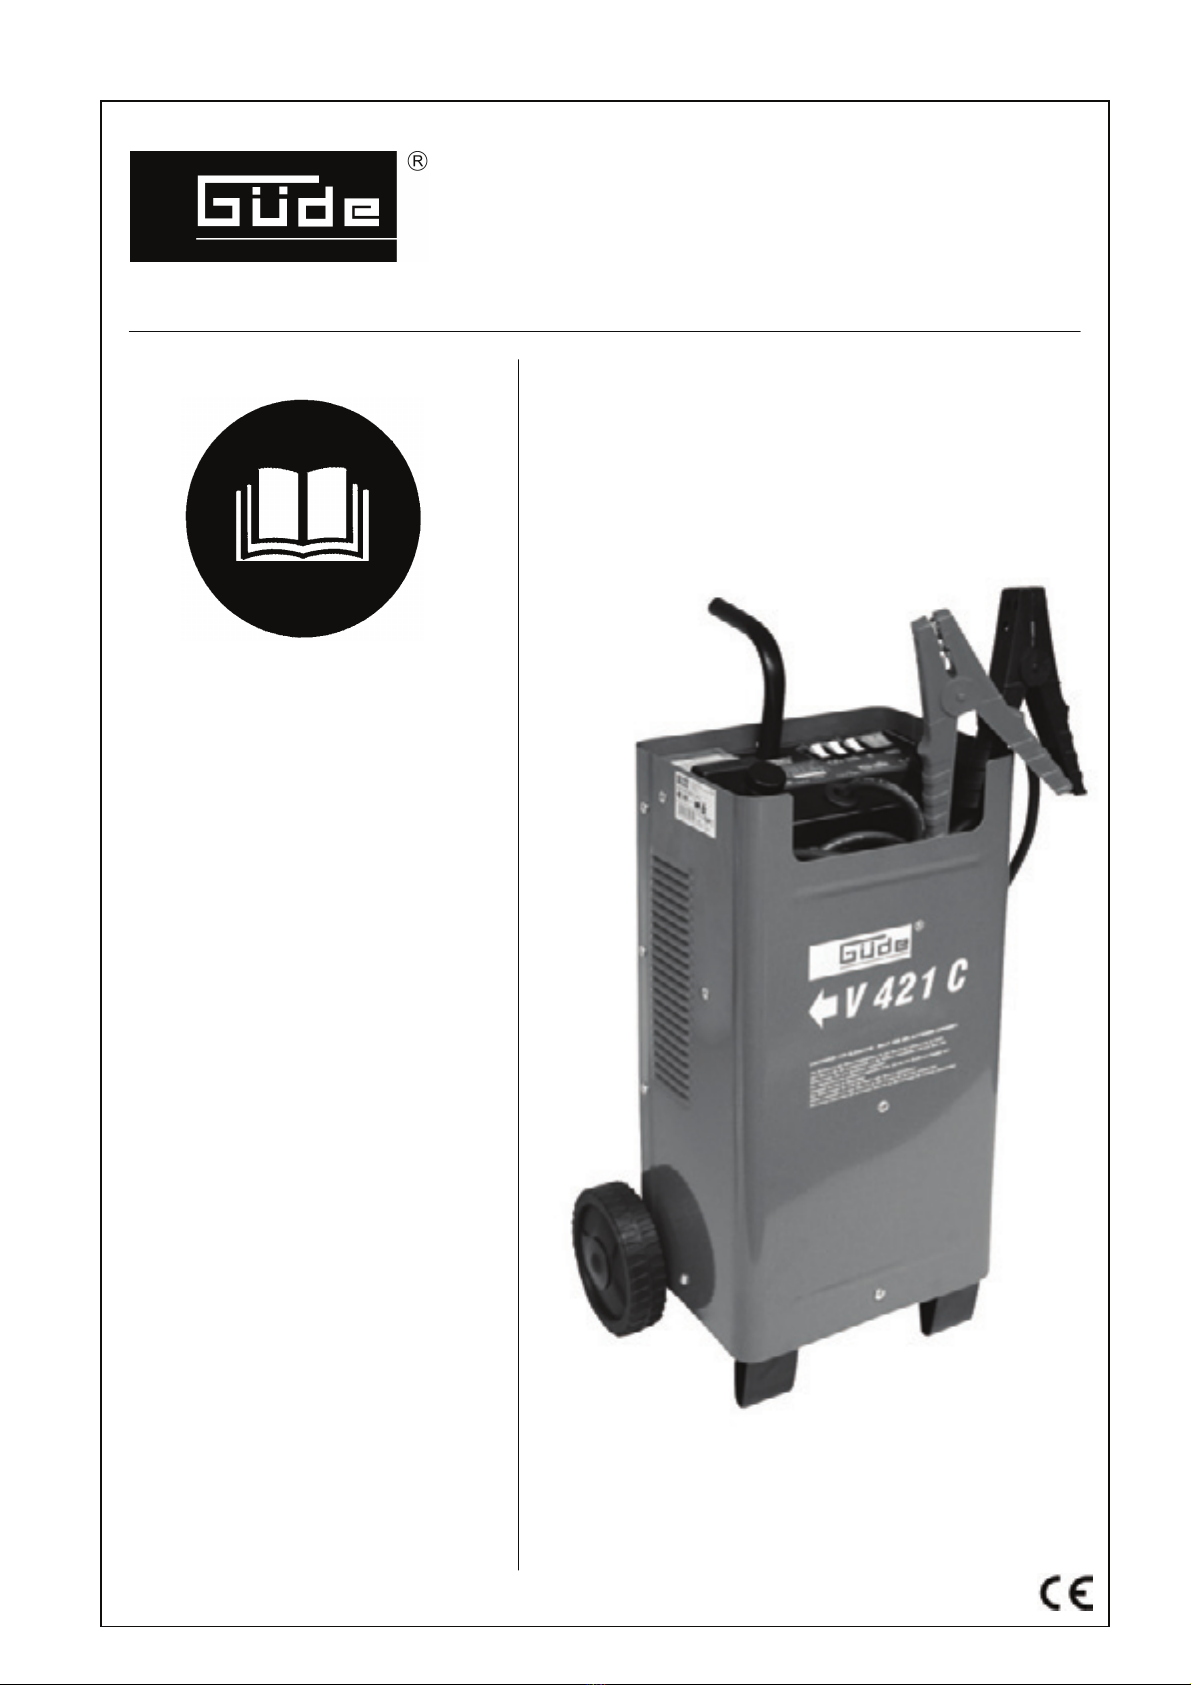
Scope (Fig. 1+2)
1. Wheels
2. Axle
3. Screws
4. supporting foot
5. Wheels covers
6. Screws
7. Handle
8. Charger
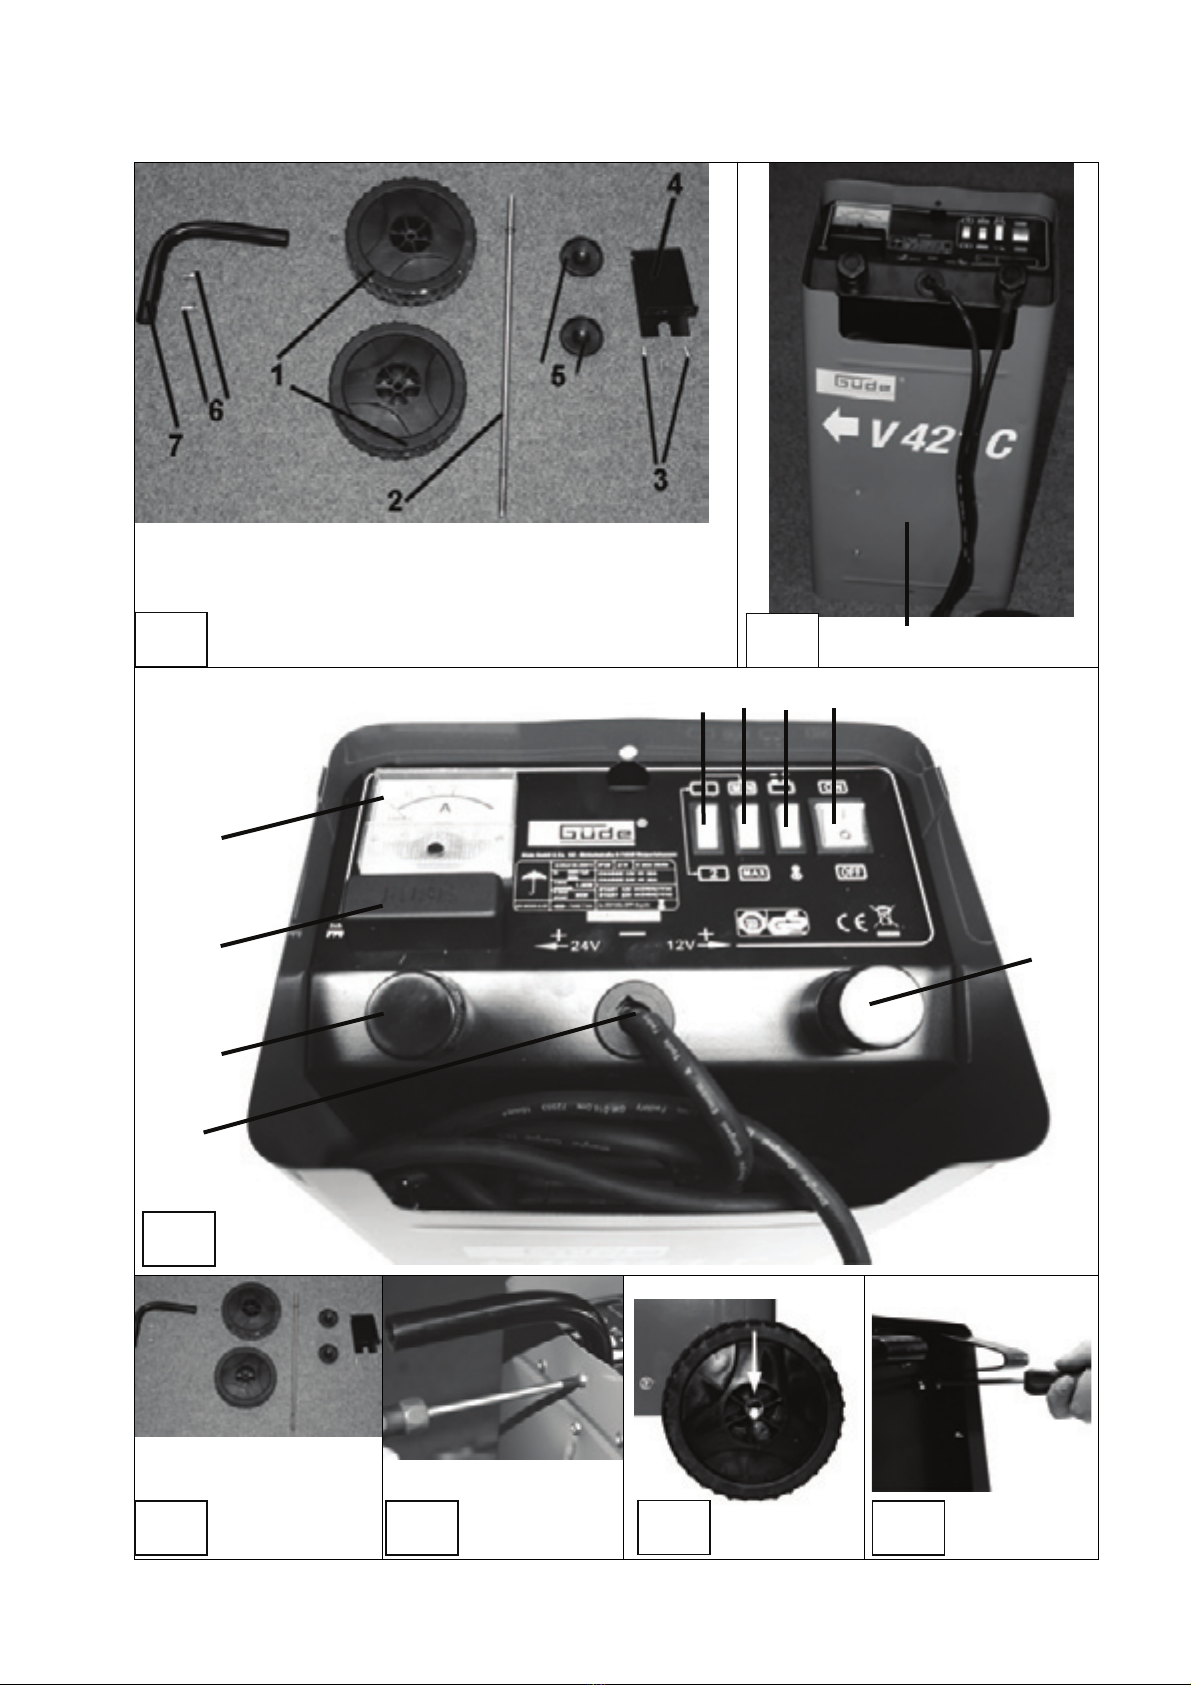
Description of Unit (Fig. 3)
1. On/Off switch .
2. connection 12 V
3. ground
4. connection 24 V
5. cut-out fuse
6. ammeter
7. switching degree 1 + 2
8. charging min – max
9. charging or battery start up
Guarantee
The guarantee solely covers inadequacies caused by material
defect or manufacturing defect.
Original payment voucher with the sales date needs to be
submitted for any claim in the guarantee period.
The guarantee does not cover any unauthorised use such as
appliance overloading, use of violence, damage as a result of
any unauthorised interference or caused by foreign items.
Failing to follow the operating and assembly instructions and
common wear are also not included in the guarantee.
General Safety Regulations
This instruction manual should be read carefully before
the initial use of the unit. If in doubt with regard to
connection and operation, contact the manufacturer (servicing
department).
Observe the instructions below carefully to provide for a
high degree of safety:
Warning: Do not operate unless with current
protection (FI) fitted!
Caution!
•Keep your workplace clean and tidy. Messy
workplace and disorder on the table increase the risk of
accident and injury.
•Mind the conditions of the environment you work in.
Do not use electric tools in moist and wet surroundings.
Provide for sufficient lighting. Do not expose the
electric tools to the rain or high atmospheric
moisture. Do not switch on in an area containing
inflammable liquids or gases.
•Do not admit any strangers to the machine. Visitors
and bystanders, children and the sick in particular keep
at a sufficient distance from your workplace.
•Provide for safe storage of the tools. The tools that
are not in current need should be stored at a dry
unapproachable or an elevated place.
•Watch out for the cable. Do not pull the cable. To
unplug, always grasp at the plug. Keep the cable at a
safe distance from sources of heat, oil and sharp edges.
•Provide against unintentional switching. Always
make sure that the tool switch is in OFF position before
plugging in.
•When working outdoors, use special extension
cables. To work outdoors, special extension cables are
needed, mark in the appropriate way.
•Always remain concentrated. Mind what you are
doing. Use common sense. Do not use electrical tools
when feeling tired. .
•Watch out for damaged parts. Check out the unit
before use. Are some parts damaged? If the damage is
slight, reconsider whether the unit is able of perfect and
safe operation.
•Prevent any electrical shock. Avoid any contact of
your body with grounded articles, e.g. water piping,
heating radiators, stoves and fridges.
•Use approved parts only. For maintenance and
repairs, use genuine spare parts only. The spare parts
may be obtained from an authorised servicing centre.
•Warning! Use of accessories and additional parts other
than those recommended in the operating manual may
present a threat for persons and things.
Initial Operation Safety Instructions
•Before starting set-up or maintenance of the unit,
disconnect it from the source.
Connect the charger until the power supply, if all
the settings and the terminals are properly connected.
•Having removed the packing, make sure that the
condition of the unit and any of its component is perfect.
•Unwind the power cable completely and put it so the
pole terminals cannot get in touch with each other.
•If necessary, use an extension cable to extend the
power cable; it must be of the same cross section as the
power cable. Never use cable of smaller cross section.
•Keep the clamps, terminals and upper surface of the
battery clean, if necessary, use the wire brush to clean
the battery terminals. In this way, a good electrical
contact will be provided and better charging efficiency
secured.
•Never mix connections poling! ( (-) black; (+) red )
•The charging voltage should be same as that shown on
the battery i; the value is equal to the number of cells of
a storage battery multiplied by two
(3 cells = 6 V; 6 cells = 12 V; 12 cells = 24 V).
•Before charging, put the unit on a stable base and make
sure that noting will prevent air flow through the
respective holes. A good cooling system must be
guaranteed.
•Do not charge more batteries at a time.
•The battery closure should be removed after cleaning
the terminals not to have dust and dirt falling in the tubs.
•Provide for the electrolyte covering the plates up to the
height of 4-5 mm at least, If necessary, add distilled
water that may be obtained at shops for this purpose.