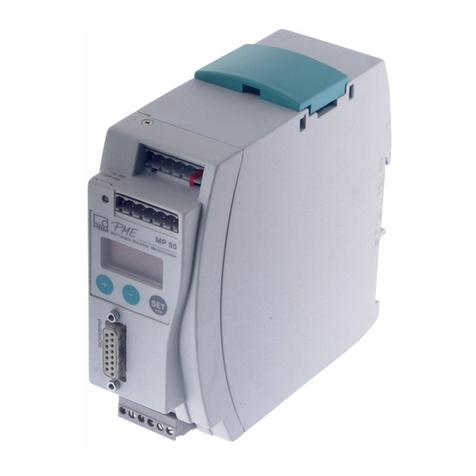
HBM MP55 User manual

Artisan Technology Group is your source for quality
new and certied-used/pre-owned equipment
• FAST SHIPPING AND
DELIVERY
• TENS OF THOUSANDS OF
IN-STOCK ITEMS
• EQUIPMENT DEMOS
• HUNDREDS OF
MANUFACTURERS
SUPPORTED
• LEASING/MONTHLY
RENTALS
• ITAR CERTIFIED
SECURE ASSET SOLUTIONS
SERVICE CENTER REPAIRS
Experienced engineers and technicians on staff
at our full-service, in-house repair center
WE BUY USED EQUIPMENT
Sell your excess, underutilized, and idle used equipment
We also offer credit for buy-backs and trade-ins
www.artisantg.com/WeBuyEquipment
REMOTE INSPECTION
Remotely inspect equipment before purchasing with
our interactive website at www.instraview.com
LOOKING FOR MORE INFORMATION?
Visit us on the web at www.artisantg.com for more
information on price quotations, drivers, technical
specications, manuals, and documentation
Contact us: (888) 88-SOURCE | sales@artisantg.com | www.artisantg.com
SM
View
Instra

A0563-5.6 en
PME industrial
measurement
electronics linked
to a field bus
MP55 module
Operating manual
Artisan Technology Group - Quality Instrumentation ... Guaranteed | (888) 88-SOURCE | www.artisantg.com

Artisan Technology Group - Quality Instrumentation ... Guaranteed | (888) 88-SOURCE | www.artisantg.com

3
PME-MP55
HBMA0563-5.6 en
Contents Page
Safety instructions 4. . . . . . . . . . . . . . . . . . . . . . . . . . . . . . . . . . . . . . . . . . . . .
1 Introduction 7. . . . . . . . . . . . . . . . . . . . . . . . . . . . . . . . . . . . . . . . . . . . . . . . .
1.1 List of components and accessories supplied 7. . . . . . . . . . . . . . . .
1.2 Introduction 7. . . . . . . . . . . . . . . . . . . . . . . . . . . . . . . . . . . . . . . . . . . . . .
2 Choose amplifier settings with the aid of DIP switches 8. . . . . . . . .
3 Fitting/removing the MP55 12. . . . . . . . . . . . . . . . . . . . . . . . . . . . . . . . . . .
3.1 Linking several modules 13. . . . . . . . . . . . . . . . . . . . . . . . . . . . . . . . . . .
4 Connections 14. . . . . . . . . . . . . . . . . . . . . . . . . . . . . . . . . . . . . . . . . . . . . . . .
4.1 Functional overview of the MP55 14. . . . . . . . . . . . . . . . . . . . . . . . . . .
4.2 Supply voltage and remote contact I/Os 15. . . . . . . . . . . . . . . . . . . . .
4.2.1 External supply voltage for the control I/Os 16. . . . . . . . . . . . . .
4.3 Transducers 17. . . . . . . . . . . . . . . . . . . . . . . . . . . . . . . . . . . . . . . . . . . . .
4.4 CAN-interface 19. . . . . . . . . . . . . . . . . . . . . . . . . . . . . . . . . . . . . . . . . . . .
4.5 Synchronisation 20. . . . . . . . . . . . . . . . . . . . . . . . . . . . . . . . . . . . . . . . . .
5 Setting up and operation (MP55) 21. . . . . . . . . . . . . . . . . . . . . . . . . . . . . .
5.1 Operating principles 21. . . . . . . . . . . . . . . . . . . . . . . . . . . . . . . . . . . . . .
5.2 Commissioning 24. . . . . . . . . . . . . . . . . . . . . . . . . . . . . . . . . . . . . . . . . . .
5.3 Overview of all groups and parameters 25. . . . . . . . . . . . . . . . . . . . . .
5.3.1 Set up all parameters 26. . . . . . . . . . . . . . . . . . . . . . . . . . . . . . . .
6 Declaring the significant parameters 30. . . . . . . . . . . . . . . . . . . . . . . . . .
7 CAN interface description 38. . . . . . . . . . . . . . . . . . . . . . . . . . . . . . . . . . . .
7.1 Introduction 38. . . . . . . . . . . . . . . . . . . . . . . . . . . . . . . . . . . . . . . . . . . . . .
7.2 Cyclical data transmission 38. . . . . . . . . . . . . . . . . . . . . . . . . . . . . . . . .
7.3 Parameter assignment 39. . . . . . . . . . . . . . . . . . . . . . . . . . . . . . . . . . . .
7.4 Object directory: communications profile section
as defined in CANopen (CiA-DS301) 41. . . . . . . . . . . . . . . . . . . . . . . .
7.5 Object directory: manufacturer-specific objects 44. . . . . . . . . . . . . . .
7.6 Manufacturer-specific objects in FLOAT data format 53. . . . . . . . . . .
7.7 Examples 55. . . . . . . . . . . . . . . . . . . . . . . . . . . . . . . . . . . . . . . . . . . . . . .
8 Error messages/operating status (LED) 57. . . . . . . . . . . . . . . . . . . . . . .
9 Specifications 60. . . . . . . . . . . . . . . . . . . . . . . . . . . . . . . . . . . . . . . . . . . . . . .
10 Keyword index 63. . . . . . . . . . . . . . . . . . . . . . . . . . . . . . . . . . . . . . . . . . . . . .
Artisan Technology Group - Quality Instrumentation ... Guaranteed | (888) 88-SOURCE | www.artisantg.com

4PME-MP55
HBM A0563-5.5 en
Safety instructions
Use in accordance with the regulations
The MP55 module and its connected transducers are to be used exclusively
for measurement tasks and directly related control tasks. Use for any addi-
tional purpose shall be deemed to be not in accordance with the regulations.
In the interests of safety, the instrument should only be operated as described
in the User Manual. It is also essential to observe the appropriate legal and
safety regulations for the application concerned during use. The same applies
to the use of accessories.
The device must not be connected directly to the mains supply. The
maximum permissible supply voltage is 18...30 V.
General dangers of failing to follow the safety instructions
The MP55 module corresponds to the state of the art and is safe to operate.
The instrument can give rise to further dangers if it is inappropriately installed
and operated by untrained personnel.
Everyone involved with the installation, commissioning, maintenance or repair
of the instrument must have read and understood the User Manual and in par-
ticular the technical safety instructions.
Conditions on site
Protect the device from direct contact with water (IP20).
Maintenance and cleaning
The MP55 module is maintenance-free. Please note the following points when
cleaning the housing:
- Before cleaning, disconnect the devices from the power supply.
- Clean the housing with a soft, slightly damp (not wet!) cloth. You should
never use solvent, since this could damage the labelling on the front panel
and the display.
- When cleaning, ensure that no liquid gets into the device or connections.
Artisan Technology Group - Quality Instrumentation ... Guaranteed | (888) 88-SOURCE | www.artisantg.com

5
PME-MP55
HBMA0563-5.5 en
Residual dangers
The scope of supply and list of components provided with the MP55 cover
only part of the scope of measurement technology. In addition, equipment
planners, installers and operators should plan, implement and respond to the
safety engineering considerations of measurement technology in such a way
as to minimise residual dangers. Prevailing regulations must be complied with
at all times. There must be reference to the residual dangers connected with
measurement technology.
Any risk of residual dangers when working with the MP55 is pointed out in this
introduction by means of the following symbols:
Symbol: WARNING
Meaning: Dangerous situation
Warns of a potentially dangerous situation in which failure to comply with
safety requirements can lead to death or serious physical injury.
Symbol: CAUTION
Meaning: Possible dangerous situation
Warns of a possibly dangerous situation in which failure to comply with safety
requirements can cause damage to property or lead to some form of physical
injury.
Symbol: NOTE
Means that important information about the product or its handling is being
given.
Symbol:
Meaning: CE mark
The CE mark enables the manufacturer to guarantee that the product com-
plies with the requirements of the relevant EC directives (the declaration of
conformity is available at http://www.hbm.com/support/dokumentation).
Artisan Technology Group - Quality Instrumentation ... Guaranteed | (888) 88-SOURCE | www.artisantg.com

6PME-MP55
HBM A0563-5.5 en
Working safely
Error messages should only be acknowledged if the cause of the error is re-
moved and no further danger exists.
The instrument complies with the safety requirements of DIN EN 61010,
Part 1 (VDE 0411, Part 1).
To ensure adequate immunity from interference, use only Greenline shielded
ducting (place the shield of the transducer cable onto the connector housing).
The MP55 module must be operated with an extra-low safe voltage (supply
voltage 18 to 30 V DC).
Conversions and modifications
The MP55 module must not be modified from the design or safety engineering
point of view except with our express agreement. Any modification shall ex-
clude all liability on our part for any damage resulting therefrom.
In particular, any repair or soldering work on motherboards is prohibited.
When exchanging any modules, only original HBM parts must be used.
Qualified personnel
This instrument is only to be installed and used by qualified personnel strictly
in accordance with the technical data and with the safety rules and regulations
which follow. It is also essential to comply with the appropriate legal and
safety regulations for the application concerned during use. The same applies
to the use of accessories.
Qualified personnel means persons entrusted with the installation, assembly,
commissioning and operation of the product who possess the appropriate
qualifications for their function.
Maintenance and repair work on an open device with the power on must only
be carried out by trained personnel who are aware of the dangers involved.
Artisan Technology Group - Quality Instrumentation ... Guaranteed | (888) 88-SOURCE | www.artisantg.com

7
PME-MP55
HBMA0563-5.5 en
1 Introduction
1.1 List of components and accessories supplied
List of components supplied:
D1 MP55 module
D3 x 6-pin terminal plugs, coded
Order No.: 3.3312-0251 (terminal plug 3);
3.3312-0252 (terminal plug 4); 3.3312-0250 (terminal plug 1)
D10-pin ribbon cable jack-connector
D1 User Manual for the MP55 module
Accessories:
D15-pin Sub-D connector for transducer, Order No.: 3.3312-0182
DStandard ribbon cable, 10pin, 1.27 mm pitch
1.2 Introduction
The MP55 module from the PME product line is a carrier-frequency amplifier,
and is ideal for connecting the widest possible technological varieties of force,
pressure, torque and displacement transducers as well as load cells. The
MP55 module is set up, and its parameters are assigned, using either the key-
board and display or the PME Assistent. The PME Assistent provides an easy
operator interface under MS-Windows and this is used for assigning parame-
ters to modules (as described in the ”PME Assistant” online help).
µP
A
D
Smart signal condi-
tioning, e.g. limit va-
lue switch
D
A
Keyboard & display
MP55
Carrier-frequency
transducer excitation
Analogue output
Control I/Os
CANopen in-
terface
24 V
DC
DC Supply voltage
Fig. 1.1: Block diagram of the MP55 module
Artisan Technology Group - Quality Instrumentation ... Guaranteed | (888) 88-SOURCE | www.artisantg.com

8PME-MP55
HBM A0563-5.5 en
2 Choose amplifier settings with the aid of DIP switches
NOTE
The DIP switches must be set up/changed before the PME is fitted.
Various settings are defined with DIP switches and can be read out via the
display (see chapter 5.3). These are the settings for
bridge excitation voltage, effective range, bridge type, analogue output,
master/slave, terminating bus impedance, edge steepness
To set up the DIP switches proceed as shown in Fig. 2.1.
Unscrew the
cover
1
2
S1/S2
S5
S10
S11
S12
Fig. 2.1: Open the housing; position of the DIP switches
Artisan Technology Group - Quality Instrumentation ... Guaranteed | (888) 88-SOURCE | www.artisantg.com

9
PME-MP55
HBMA0563-5.5 en
ON ON
Upper
board:
Lower
board:
S10
S11
123456123456
ON
123456
S10 S11 S12
ON ON
S2 S1
S12
123
ON
S5
1
2
3
5
4
6
1
2
3
5
4
6
1
2
3
5
4
6
ON ON ON
123456 12 3456
Master/
Slave
Analogue
output
Bridge
type
Analogue output
Bridge ex-
citation vol-
tage
123456 123456
ON ON
S2 S1
Switch positions
must not be changed!
Input
range
Bridge ex-
citation
voltage
Bridge
type
Input
range
Amplifier type
S10, S11 and
S12 and S5
S1 and S2
Factory settings:
WARNING
1
2
3
ON
Artisan Technology Group - Quality Instrumentation ... Guaranteed | (888) 88-SOURCE | www.artisantg.com

10 PME-MP55
HBM A0563-5.5 en
S11
123456
ON
S1
S2 S1
S12
Bridge type1)
Full bridge
Half bridge
LVDT
123456
ON
S12
123456
ON
123456
ON
123456
ON
123456
ON
Input range*) 2)
123456
ON
123456
ON
3 mV/V
50 mV/V
123456
ON
123456
ON
123456
ON
123456
ON
500 mV/V
S5
S1
S1
S12
S12
S1 S11
S1 S11
S1 S11
123456
ON
S2
Bridge excitation voltage3)
5 V
2.5 V
1 V
123456
ON
S11
1234 56
ON
123456
ON
123456
ON
123456
ON
Analogue output4)
123456
ON
S11
123
ON
S5
"10 V
"20 mA
123456
ON
123
ON
123456
ON
4...20 mA
V
mA
S2 S11
S2 S11
S5
S11
S11
Factory setting:
See Tab. 1.1 on the opposite page
Switch pos. I
Switch pos. II
Switch pos. III
Fig. 2.2: Setting up an amplifier
1) Check this in the display under the TRANSDUCER group, parameter ”Trans.type”; see page 25
2) Check this in the display under the TRANSDUCER group, parameter ”Input”; see page 25
3) Check this in the display under the TRANSDUCER group, parameter ”Excitation”; see page 25
4) Check this in the display under the ANALOG OUTPUT group, parameter ”ModeUa”, see page 25
*) mV/V values by reference to 5 VUB(see table Tab. 1.1 on the following page)
Artisan Technology Group - Quality Instrumentation ... Guaranteed | (888) 88-SOURCE | www.artisantg.com

11
PME-MP55
HBMA0563-5.5 en
Master/Slave
123456
ON
S10
123456
ON
Master
Slave
S10
S10
Fig. 2.3: Setting up an amplifier (Continued)
Terminating bus resistor
Toggle switch for termination resistor
(see page 19)
ON OFF
S14
Fig. 2.4: Toggle switch for termination resistor
Bridge excitation voltage [V] Input range [mV/V]
Switch position ISwitch position II Switch position III
5 3 50 500
2.5 6 100 1000
1 15 250 2500
Tab. 1.1: Input ranges for different bridge excitation voltages
Transducer type and rated data Bridge type Bridge excitation
voltage
Input range
Strain gauge force transducer
2 mV/V=20 kN
Full bridge 5 V 3 mV/V
Inductive displacement transducer
80 mV/V
Half bridge 2.5 V 100 mV/V
Inductive displacem. trans. 10 mV/V Half bridge 1 V 15 mV/V
Piezoresistive transducer 400 mV/V Half bridge 1 V 250 mV/V
Potentiometric transducer 1000 mV/V Half bridge 2.5 V 1000 mV/V
Tab. 1.2: Useful options
Artisan Technology Group - Quality Instrumentation ... Guaranteed | (888) 88-SOURCE | www.artisantg.com

12 PME-MP55
HBM A0563-5.5 en
3 Fitting/removing the MP55
Fig. 3.1: Fitting to a support rail
Fig. 3.2: Removal
CAUTION
The support rail must be on protection circuit potential .
Artisan Technology Group - Quality Instrumentation ... Guaranteed | (888) 88-SOURCE | www.artisantg.com

13
PME-MP55
HBMA0563-5.5 en
3.1 Linking several modules
1st 2nd
3rd
Colour coding
on pin 1
Ribbon cable jack-connector
Recommended di-
stance from the rib-
bon cable jack-con-
nector
Further devices are interconnected
via this connector.
58mm
Fig. 4.1: Connecting ribbon cable
Several MP55 modules can be connected via one ribbon cable. This cable
serves as the local link for supply voltage and synchronisation between mod-
ules. No more than eight modules should be interconnected over one ribbon
cable.
Artisan Technology Group - Quality Instrumentation ... Guaranteed | (888) 88-SOURCE | www.artisantg.com
14 PME-MP55
HBM A0563-5.5 en
4 Connections
Warning
Comply with the safety instructions before putting the instrument into
service.
4.1 Functional overview of the MP55
Terminal plug 1:
Power supply and CAN-bus,
synchronisation
Transducer connection (15-pin sub-D
connector) including transducer
excitation
Terminal plug 3:
Potential-separated control inputs
(24 V-level), analogue output
Touch-sensitive
control keys
2-line LCD display
Terminal plug 2: (same pin
assignment as terminal plug 1)
CAN adapter for PC/laptop
connection, assigning parameters
via CAN-bus
Terminal plug 4:
Potential-separated control outputs
(24 V-level), external power supply for
control inputs
LED
Local link for CAN-bus, supply voltage and synchronisation between modules,
Terminating bus resistor
Artisan Technology Group - Quality Instrumentation ... Guaranteed | (888) 88-SOURCE | www.artisantg.com

15
PME-MP55
HBMA0563-5.5 en
4.2 Supply voltage and remote contact I/Os
Four removable terminal plugs are available for connections.
0 V
SYN
Analogue-
OUT
"10 V
"20 mA
4...20 mA IN1
IN2
IN3
IN4
0 V
24 V
OUT1
OUT2
OUT3
OUT4
Terminal plug 3
Terminal plug 4
LH
Terminal plug 1
Connecting the power
supply:
The MP55 module must be connected to an external
18-30 V supply voltage (24 V nominal).
Warning
DTwist the power supply conductors and fit them with
sleeves.
DScrew the conductors to terminal plug 1.
DInsert the terminal plug into the uppermost jack.
DSwitch on power supply.
IN = digital input OUT = digital output
More information on I/Os can be found in chapter 6, page 35.
CAUTION In the event of a power failure to the MP55 module, all control
outputs are set to 0 V.
24 V
Labeling
Labeling
Labeling
Terminal plug 2
CAN
Fig. 4.2: Pin assignment for terminal plugs
The 4 terminal plugs are coded so that they can be inserted in the 4 jacks
without any confusion. Jacks are fitted with coded lateral guides and terminal
plugs are fitted with coded pins.
Artisan Technology Group - Quality Instrumentation ... Guaranteed | (888) 88-SOURCE | www.artisantg.com
16 PME-MP55
HBM A0563-5.5 en
4.2.1 External supply voltage for the control I/Os
Example: PLC connection
OUT3
24 V*
0 V*
max. 0.5 A
MP55 module PLC Relay
0 V*
max. 0.5 A
OUT1
Terminal plug 4
24 V
Fig. 4.3: Connection to a PLC
The controlinputs are available on terminal plug 3, the controloutputs are
available on terminal plug 4, and they are all galvanically isolated from the in-
ternal supply voltage (see also chapter 6, ”Declaring the significant parame-
ters” page 30).
*)The control-outputs must be supplied with an external voltage (ground
and 24 V).
Artisan Technology Group - Quality Instrumentation ... Guaranteed | (888) 88-SOURCE | www.artisantg.com

17
PME-MP55
HBMA0563-5.5 en
4.3 Transducers
The following transducer types can be connected to the MP55 module:
ye
Strain gauge and inductive full
bridges, piezoresistive transducers
Transducer
connection jack
8
5
6
15
Hsg.
13
12
wh
bk
re
bu
gn
gy
ye
Wiring colours: wh= white; bk= black; bu= blue; re= red; ye= yellow; gn= green;
gy= grey
8
5
6
13
12
1
2
3
Potentiometric transducers
8
5
6
15
Sensor circuit (-)
Cable shielding
8
5
6
13
12
wh
bk
bu
gn
gy
Sensor circuit (-)
Sensor circuit (+)
Cable shielding
Strain gauge and inductive half
bridges
1
8
9
15
LVDT transducers
Measuring signal (+) Measuring signal (+)
Bridge excitation
voltage (-) Bridge excitation
voltage (-)
Bridge excitation
voltage (+)
Measuring signal (-)
Sensor circuit (+)
Hsg.
13
12
Hsg.
Hsg.
Bridge excitation
voltage (+)
Sensor circuit (-)
Cable shielding
Measuring
signal (+)
Bridge excitation
voltage (-)
Bridge excitation
voltage (+)
Sensor circuit (+)
Sensor circuit (-)
Cable shielding
Measuring signal
(+)
Bridge excitation
voltage (-)
Bridge excitation
voltage (+)
Sensor circuit (+)
Measuring signal
(-)
Fig. 4.4: Connecting various transducers
Artisan Technology Group - Quality Instrumentation ... Guaranteed | (888) 88-SOURCE | www.artisantg.com

18 PME-MP55
HBM A0563-5.5 en
When installing a transducer with a four-wire connection, you must connect
the sensor lines with the corresponding bridge excitation line (Pin 5 with Pin
12, Pin 6 with Pin 13) 1).
Wiring colours: wh= white; bk= black; bu= blue; re= red; ye= yellow; gn= green; gy= grey
8
5
6
15
Hsg.
13
12
wh
bk
re
bu
ye
Feedback bridges for four-wire connection
Four-wire connection:
Full bridge
8
5
6
15
Hsg.
13
12
wh
bk
gn
bu
ye
Four-wire connection:
Half bridge
gy
Fig. 4.5: Four-wire transducer connection
NOTE
Use standard HBM cable for the transducer connection. When using
other shielded, low-capacitance measuring cable, connect the trans-
ducer cable shielding to the connector housing in accordance with the
HBM Greenline concept (publication S1578). This ensures EMC protec-
tion.
1) For cable lengths in excess of 50 m, one resistor with half the value of the bridge resistance (RB/2) must
be switched on at the transducer in place of each of the feedback bridges. If the transducers are cali-
brated in six-core circuit, the resistors must be switched on directly in the sensor circuit.
Artisan Technology Group - Quality Instrumentation ... Guaranteed | (888) 88-SOURCE | www.artisantg.com
19
PME-MP55
HBMA0563-5.5 en
4.4 CAN-interface
The CAN-bus is connected via terminal plug 1. A maximum of 32 CAN users
can be connected to a bus segment (in accordance with the CANopen specifi-
cation). The CAN-bus needs a terminating impedance of 120 Ω in the first and
last bus users. The bus line can have a maximum of two terminating resistors.
The MP55 module has a built-in terminating resistor which is enabled by
toggle switch S14 (see page 11).
Low High
1st device
Fig. 4.6: Connecting the CAN interface
CAN-High
CAN-Low
connect the terminating
resistor here (toggle
switch)
First device in
the bus line Last device in
the bus line
Do not connect the termina-
ting resistor
CAN connection
in accordance
with Fig. 4.6
connect the terminating
resistor here (toggle
switch)
Fig. 4.7: CAN-bus operation with several modules (maximum 32 in accordance
with standard)
NOTE
If the first or last device in the bus line is not a PME module, one 120 W
resistor must be connected for each of these outside devices.
Artisan Technology Group - Quality Instrumentation ... Guaranteed | (888) 88-SOURCE | www.artisantg.com
Other manuals for MP55
2
Table of contents
Other HBM Control Unit manuals