manuals.online logo
Brands
  1. Home
  2. •
  3. Brands
  4. •
  5. HEIDENHAIN
  6. •
  7. Accessories
  8. •
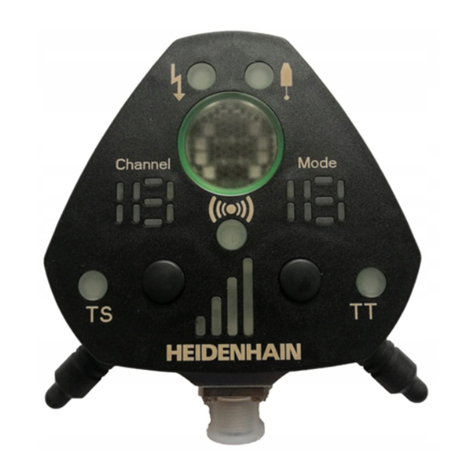
  9. HEIDENHAIN TT 460 User manual

HEIDENHAIN TT 460 User manual

3/2016
TT 460
Mounting Instructions
Montageanleitung
Instructions de montage
Istruzioni di montaggio
Instrucciones de montaje
取付説明書
安装说明
安裝指導手冊
설치 지침
Índice
Página
4Notas de aviso
8 Permiso para la transmisión por radio
12 Elementos suministrados
16 Dimensiones
20 Montaje elemento de palpación
22 Configuración del modo de funcionamiento
26 Pares en la transmisión por radio
28 Montaje
30 cambiar palpador / vástago de unión
34 Cambio de batería
38 Centering
40 Signal sequence
Indice
Pagina
4Avvertenze
8 Approvazione per trasmissione radio
12 Standard di fornitura
16 Dimensioni
20 Montaggio dell’elemento di tastatura
22 Settaggio del modo di funzionamento
26 Accoppiamento in modalità radio
28 Montaggio
30 Sostituzione di spina di collegamento /
elemento di tastatura
34 Sostituzione delle batterie
38 Centering
40 Signal sequence
Sommaire
Page
4Avertissement
8 Approval for radio transmission
12 Objet de la fourniture
16 Dimensions
20 Montage élément de palpage
22 Réglage du mode de fonctionnement
26 Couplage en mode Radio
28 Montage
30 Remplacer la tige d’assemblage /
élément de palpage
34 Changement des batteries
38 Centering
40 Signal sequence
Inhalt
Seite
4Warnhinweise
8 Funkerlaubnis
12 Lieferumfang
16 Abmessungen
20 Montage Antastelement
22 Einstellung des Betriebsmodus
26 Paaren im Funkbetrieb
28 Montage
30 Verbindungsstift / Antastelement wechseln
34 Batteriewechsel
38 Zentrieren
40 Signalfolge
2
Contents Page
4Warnings
8 Approval for radio transmission
12 Items supplied
16 Dimensions
20 Mounting the probe contact
22 Setting the operating mode
26 Pairing during wireless operation
28 Mounting
30 Exchanging the connection pin / probe contact
34 Battery exchange
38 Centering
40 Signal sequence
목차
페이지
6 경고
10 무선 전송 승인
14 제공 품목
18 규격
21 프로브 접점 설치
24 작동 모드 설정
27 무선 작업 중 페어링
29 설치
32 연결 핀 / 프로브 접점 교환
36 배터리 교환
39 센터링
41 신호 순서
頁碼
6 警告
10 核准無線電傳輸
14 供應的項目
18 警告
21 安裝接觸探盤
24 設置操作模式
27 無線操作過程中配對
29 安裝
32 更換連結銷/探測板偏斜
36 電池更換
39 中心定位
41 信號程序
目錄
页
6 提示
10 无线电信号传输许可
14 零部件
18 尺寸
21 安装触盘
24 设置操作模式
27 无线操作的配对
29 安装
32 更换断点插针/触盘
36 更换电池
39 定心
41 信号顺序
目录
目次
ページ
6 注意事項
10 無線通信の認証
14 梱包品
18 寸法
21 検出ディスクの取付け
24 操作モードの設定
27 無線操作時のペアリング
29 取付
32 結合ピン/検出ディスクの交換
36 電池交換
39 センタリング(校正)
41 信号シーケンス
3
Page
6Warnings
10 Approval for radio transmission
14 Items supplied
18 Dimensions
21 Mounting the probe contact
24 Setting the operating mode
27 Pairing during wireless operation
29 Mounting
32 Exchanging the connection pin / probe contact
36 Battery exchange
39 Centering
41 Signal sequence
Contents


Notas de aviso
Atención: El montaje y la puesta en marcha deben ser realizados por un especialista cualificado,
observando las prescripciones locales de seguridad.
No dejar caer el palpador.
Avvertenze
Attenzione: Il montaggio e la messa in funzione devono essere eseguite da personale qualifucato
nel rispetto delle norme di sicurezza locali.
Non far cadere il tastatore.
Avertissement
Attention: le montage et la mise en service doivent être assurés par un personnel qualifié dans le
respect des consignes de sécurité locales.
Ne pas laisser tomber le palpeur.
Warnhinweise
Achtung: Die Montage und Inbetriebnahme ist von einer qualifizierten Fachkraft unter Beachtung
der örtlichen Sicherheitsvorschriften vorzunehmen.
Tastsystem nicht fallen lassen.
4
Warnings
Note: Mounting and commissioning is to be conducted by a qualified specialist under compliance
with local safety regulations.
Do not drop the touch probe.
    
Calibrar el palpador, antes de la puesta en marcha, con el ciclo de calibración del control.
Abrir la cámara de las baterías con una moneda.
Retirar la tapa de protección de la batería antes de la primera puesta en marcha.
Calibrare il tastatore prima della messa in funzione con il ciclo di calibrazione del controllo numerico.
Aprire il coperchio del vano batterie con una moneta
Prima della messa in funzione rimuovere la protezione della batteria.
Avant la mise en service, étalonner le palpeur avec le cycle d’étalonnage de la commande.
Ouvrir le compartiment à batteries à l’aide d’une pièce.
Enlever le capot de protection de la batterie avant la première mise en service.
Tastsystem vor Inbetriebnahme mit Kalibrierzyklus der Steuerung kalibrieren.
Batteriefach mit einer Münze öffnen.
Vor erster Inbetriebnahme die Schutzkappe der Batterie entfernen.
5
Calibrate the touch probe with the calibration cycle of the control before commissioning.
Use a coin to open the battery compartment.
Remove the battery’s protective cap before initial operation.


경고
주의: 설치 및 조정은 한국의 안전도 규정에 의하여 작업을 수행할 수 있는 공인된 기술자에 의해
수행되어야 합니다.
터치 프로브를 떨어뜨리면 안됩니다.
警告
注意:安裝與調整要經由已認證的專業人員指導以符合當地安全規範要求。
探針請勿掉落.
注意:安装和调试时必须符合当地安全要求并由具有资质的专业人员操作
请不要使测头跌落.
提示
注意事項
注意:取付け及び試運転は設置国の安全規格のもとで有資格の専門家により実施するようにし
てください。
タッチプローブを落とさないでください.
6
Warnings
Note: Mounting and commissioning is to be conducted by a qualified specialist under compliance
with local safety regulations.
Do not drop the touch probe.
    
커미셔닝하기 전 컨트롤의 교정 사이클로 터치 프로브를 교정하세요.
배터리 보관함을 열 때 동전을 사용하세요.
초기 가동 전 보호 캡을 제거하세요.
調試之前請先使用控制器的校準程式以校準接觸探頭。
用硬幣打開電池盒.
初始操作必須先行拆下電池保護蓋.
调试开始前用数控系统的校准循环校准测头。
用一枚硬币打开电池舱。
开始工作前拆下电池保护盖。
試運転の前に制御装置の校正サイクルによってタッチプローブ/工具測長器を校正してください。
コイン等を用いて電池収納部を開けてください
初期運転の前にバッテリーの保護キャップを取り外してください。
7
Calibrate the touch probe with the calibration cycle of the control before commissioning.
Use a coin to open the battery compartment.
Remove the battery’s protective cap before initial operation.
USA
FCC User information (USA only)
acc. Section 15.19
This device complies with Part 15 of the FCC Rules. Operation is subject to the following two conditions:
(1) this device may not cause harmful interference, and
(2) this device must accept any interference received, including interference that may cause undesired operation.
acc. Section 15.21
Changes or modifications not expressly approved by the party responsible for compliance
could void the user’s authority to operate the equipment.
acc. Section 15.105
NOTE: This equipment has been tested and found to comply with the limits for a Class B digital device, pursuant to part 15 of the FCC Rules. These
limits are designed to provide reasonable protection against harmful interference in a residential installation. This equipment generates, uses and can
radiate radio frequency energy and, if not installed and used in accordance with the instructions, may cause harmful interference to radio communica-
tions. However, there is no guarantee that interference will not occur in a particular installation. If this equipment does cause harmful interference to
radio or television reception, which can be determined by turning the equipment off and on, the user is encouraged to try to correct the interference
by one or more of the following measures:
- Reorient or relocate the receiving antenna.
- Increase the separation between the equipment and receiver.
- Connect the equipment into an outlet on a circuit different from that to which the receiver is connected.
- Consult the dealer or an experienced radio/ TV technician for help.
FCC ID YJKTSX6TTX6
General information
Transceiver unit characteristics:
Operation frequency: 2400-2483,5 MHz
Modulation: O-QPSK
Permiso para la transmisión por radio Para el funcionamiento en modo transmisión (ver pág. 22)
Approvazione per trasmissione radio Per l’operatività in modo radio (vedi pagina 22).
Autorisation pour transmission radio Pour le fonctionnement en mode radio (voir page 22).
Funkerlaubnis Für den Betrieb im Funkmodus (siehe Seite 22).
8
Approval for radio transmission For operation in radio mode (see page 22).
Europe
Canada IC: 11148A-TSX6TTX6
RSS Gen Issue 3 Sect. 7.1.3
This device complies with Industry Canada licence-exempt RSS standard(s). Operation is subject to the following two conditions:
(1) this device may not cause interference, and
(2) this device must accept any interference, including interference that may cause undesired operation of the device.
Le présent appareil est conforme aux CNR d‘Industrie Canada applicables aux appareils radio exempts de licence. L‘exploitation est autorisée aux
deux conditions suivantes :
(1) l‘appareil ne doit pas produire de brouillage, et
(2) l‘utilisateur de l‘appareil doit accepter tout brouillage radioélectrique subi, même si le brouillage est susceptible d‘en compromettre le fonctionne
ment.
Die DR. JOHANNES HEIDENHAIN GmbH erklärt hiermit, dass sich dasTastsystemTT460 in Übereinstimmung mit den grundlegenden
Anforderungen und den übrigen einschlägigen Bestimmungen der Richtlinie 1999/5/EG befindet.
Die Konformitätserklärung kann unter folgender Adresse angefordert werden:
DR. JOHANNES HEIDENHAIN GmbH
Dr.-Johannes-Heidenhain-Straße 5
83301Traunreut, Germany
oder www.heidenhain.de
DR. JOHANNES HEIDENHAIN GmbH hereby declares that the TT460 touch probe system is in compliance with the essential
requirements and other relevant provisions of Directive 1999/5/EC.
The EC Declaration of Conformity can be requested from
DR. JOHANNES HEIDENHAIN GmbH
Dr.-Johannes-Heidenhain-Straße 5
83301 Traunreut, Germany
or www.heidenhain.de
9
China
Taiwan
Korea
Japan 204-360008
무선 전송 승인
보충 페이지 참조
무선 모드에서 작동(22 페이지 참조)
核准無線電傳輸
見補充頁
在無線電模式操作(見第22頁)。
无线电信号传输许可
参见附录页
无线电操作模式(参见第22页)。
無線通信の認証 無線モードでの操作用(22ページを参照してください)
10
Approval for radio transmission For operation in radio mode (see page 22.)
11

Elementos suministrados
vástago de unión adicional (con fusible mecánico ID 827590-01)
El elemento de palpación depende de la variante del aparato
Standard di fornitura
spine di collegamento aggiuntive ( con punta di rottura nominale ID 827590-01)
Elemento di tastatura a seconda della variante del sistema
Objet de la fourniture
tige de liaison supplémentaire (avec point de rupture ID 827590-01)
Elément de palpage dépendant de la version
Lieferumfang
zusätzlicher Verbindungsstift (mit Sollbruchstelle ID 827590-01)
Antastelement abhängig von Gerätevariante
12
Items supplied
Additional connection pin (rated break point lD 827590-01)
Probe contact depends on device variant
 









SE 660
ID 744719-01
SE 642
ID 652792-xx
Pedir por separado: Elemento de palpación
para cuchilla de torno
Kit de recambio del vástago
Zócalo de montaje
Soporte para SE 64x Soporte para SE 660
Da ordinare separatamente: Elemento di tastatura
Kit di sostituzione spine
Base di montaggio
Per utensile per tornire
Supporto per SE 64x Supporto per SE 660
Commander séparément: Elément de palpage
Kit de rechange tige
Socle de montage
pour outil de tour
Support de SE 64x Support de SE 660
Separat bestellen: Antastelement
Ersatzteilkit Stift
Montagesockel
für Drehwerkzeug
Halter für SE 64x Halter für SE 660
13
To be ordered separately: Probe contact
Spare parts kit for connection pin
Mounting base
For lathe tool
Holder for SE 64x Holder for SE 660

제공 품목
추가 연결 핀(정격 중단점 ID 827590-01)
프로브 접점은 장치에 따라 달라집니다.
供應的項目
額外的連結銷(具有額定斷點lD827590-01)
取決於不同設備而異的接觸探盤。
零部件
附加插针(额定断点lD827590-01)
与具体设备类型有关的触盘
梱包品
結合ピン(過度な衝撃を受けると折れる機構付lD827590-01)
検出ディスクは製品種類により異なります
14
Items supplied
Additional connection pin (rated break point lD 827590-01)
Probe contact depends on device variant
SE 660
ID 744719-01
SE 642
ID 652792-xx
 









별도로 주문하려면: 프로브 접점
연결 핀 예비 부품 키트
마운팅 베이스
선반 공구용
SE 64x용 홀더 SE 660용 홀더
須另外訂購的項目: 接觸探盤
連結銷零件包
安裝底座
對於車床
SE64x安裝支架 SE660安裝支架
需单独订购: 触盘
插针的备件
安装座
车刀应用
SE64x支架 SE660支架
別売品:
検出ディスク
結合ピン用の予備部品
固定ベース
旋盤用
SE64x用ホルダー SE660用ホルダー
15
To be ordered separately: Probe contact
Spare parts kit for connection pin
Mounting base
For lathe tool
Holder for SE 64x Holder for SE 660
Tolerancing ISO 8015
ISO 2768 - m H
< 6 mm: ±0.2 mm
mm

 




 





 

















Dimensiones
Fijación con garras excéntricas
Dimensioni
Fissaggio con graffette
Dimensions
Fixation avec griffes de serrage
Abmessungen
Befestigung mit Spannpratzen
16
Dimensions
Mounting with fixing clamps
Tolerancing ISO 8015
ISO 2768 - m H
< 6 mm: ±0.2 mm
mm








Fijación sobre zócalo de montaje (accesorio)
Fissaggio della dima di montaggio (accessorio)
Fixation avec socle de montage (accessoire)
Befestigung auf Montagesockel (Zubehör)
17
Fastening on mounting base (accessory)
Tolerancing ISO 8015
ISO 2768 - m H
< 6 mm: ±0.2 mm
mm

 




 





 

















규격
고정 클램프로 마운팅
尺寸
使用固定夾安裝
尺寸
用固定夹安装
寸法
固定クランプによる取付け
18
Dimensions
Mounting with fixing clamps
Tolerancing ISO 8015
ISO 2768 - m H
< 6 mm: ±0.2 mm
mm








마운팅 베이스(액세서리)에 고정
使用安裝基座(配件)固定
固定在安装座上(辅件)
固定ベースを使用した取付け(別売品)
19
Fastening on mounting base (accessory)





Montaje elemento de palpación
Atención: La aplicación de fuerza puede dañar el vástago de unión
Elementos suministrados
Montaggio dell’elemento di tastatura
Attenzione: una forza eccessiva potrebbero rompere le spine di collegamento
Standard di fornitura
Montage élément de palpage
Attention: La force exercée peut détruire la tige de liaison
Fourniture standard
Montage Antastelement
Achtung:Krafteinwirkung kann Verbindungsstift zerstören
Im Lieferumfang enthalten
20
Mounting the probe contact
Caution:Too much force can destroy the connection pin
Included in delivery

Other manuals for TT 460

2

Other HEIDENHAIN Accessories manuals

HEIDENHAIN LC 2x1 User manual

HEIDENHAIN

HEIDENHAIN LC 2x1 User manual

HEIDENHAIN LC 415 User manual

HEIDENHAIN

HEIDENHAIN LC 415 User manual

HEIDENHAIN SE 660 User manual

HEIDENHAIN

HEIDENHAIN SE 660 User manual

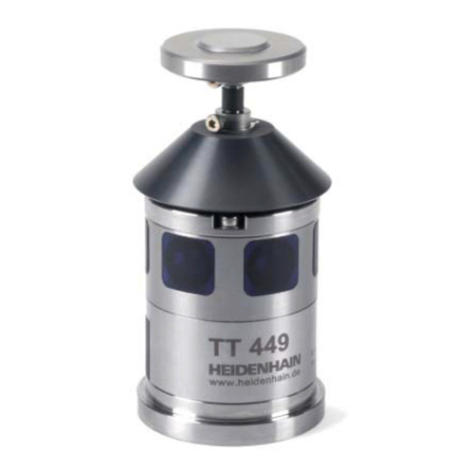
HEIDENHAIN TT 449 User manual

HEIDENHAIN

HEIDENHAIN TT 449 User manual

HEIDENHAIN LC 2x1 User manual

HEIDENHAIN

HEIDENHAIN LC 2x1 User manual

HEIDENHAIN PP 271R User manual

HEIDENHAIN

HEIDENHAIN PP 271R User manual

HEIDENHAIN TS 740 User manual

HEIDENHAIN

HEIDENHAIN TS 740 User manual

HEIDENHAIN TS 649 User manual

HEIDENHAIN

HEIDENHAIN TS 649 User manual

HEIDENHAIN ERN 430 User manual

HEIDENHAIN

HEIDENHAIN ERN 430 User manual

HEIDENHAIN LIC 4007 User manual

HEIDENHAIN

HEIDENHAIN LIC 4007 User manual

HEIDENHAIN TTR ERM 2200 User manual

HEIDENHAIN

HEIDENHAIN TTR ERM 2200 User manual

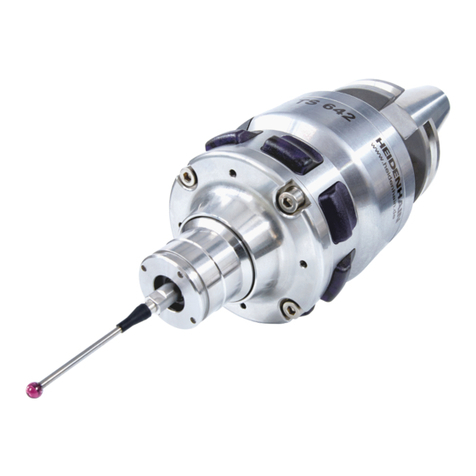
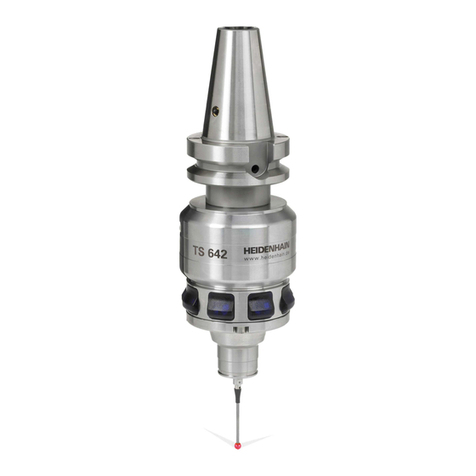
HEIDENHAIN TS 642 User manual

HEIDENHAIN

HEIDENHAIN TS 642 User manual

Popular Accessories manuals by other brands

Seifert SlimLine Pro SlimLine Pro instruction manual

Seifert

Seifert SlimLine Pro SlimLine Pro instruction manual

IPMobileNet B32450-25 Product owners manual

IPMobileNet

IPMobileNet B32450-25 Product owners manual

Focusrite Red 8Pre user guide

Focusrite

Focusrite Red 8Pre user guide

NetPing 813S2 user guide

NetPing

NetPing 813S2 user guide

Ednet 8000 Quick installation guide

Ednet

Ednet 8000 Quick installation guide

Formax CJ-10 Operation manual

Formax

Formax CJ-10 Operation manual

Tascam IF-AE8 owner's manual

Tascam

Tascam IF-AE8 owner's manual

STI STI-3610 quick start guide

STI

STI STI-3610 quick start guide

Leviton OPB15 manual

Leviton

Leviton OPB15 manual

Judd Communications Depth Sensor manual

Judd Communications

Judd Communications Depth Sensor manual

Philips OlfaPure user manual

Philips

Philips OlfaPure user manual

Proxitron LID 010 user manual

Proxitron

Proxitron LID 010 user manual

Panasonic MA3S781D Specification sheet

Panasonic

Panasonic MA3S781D Specification sheet

Orion OWP10UBT instruction manual

Orion

Orion OWP10UBT instruction manual

Simply Automated Computer Interface Module UMC manual

Simply Automated

Simply Automated Computer Interface Module UMC manual

S&S Northern Merlin CO2 AVG Installation & operation manual

S&S Northern

S&S Northern Merlin CO2 AVG Installation & operation manual

Middle Atlantic Products ICOMP-COOL Quiet-Cool Series instruction sheet

Middle Atlantic Products

Middle Atlantic Products ICOMP-COOL Quiet-Cool Series instruction sheet

Renogy RC-P72000-01 manual

Renogy

Renogy RC-P72000-01 manual

manuals.online logo
manuals.online logoBrands
  • About & Mission
  • Contact us
  • Privacy Policy
  • Terms and Conditions

Copyright 2025 Manuals.Online. All Rights Reserved.