Hella ONYX.TAG wind Setup guide

Installation instructions and Instructions for use
These instructions must be read
prior to installation
and use!
Wind sensor ONYX.TAG wind
Operating guidelines
Installation instructions and Instructions for use
Table of Contents
Preliminary remarks HELLA Wind sensor ONYX.TAG wind.................................................3
General notes.......................................................................................................................4
Safety instructions ................................................................................................................5
Scope of delivery..................................................................................................................6
Device description ................................................................................................................6
Technical data ......................................................................................................................7
Installation ............................................................................................................................8
Configuration ......................................................................................................................10
Status bar ...........................................................................................................................11
Replacing the battery..........................................................................................................12
Ideal use of the radio signal................................................................................................12
Fault removal......................................................................................................................13
Disposal..............................................................................................................................14
Installation instructions and Instructions for use
Subject to technical modifications – Date of Issue May/2023 3
Preliminary remarks HELLA
Wind sensor ONYX.TAG wind
With this HELLA product you have opted for a high-quality product with a most up-to-date
technology that can nevertheless be easily installed and operated. We describe the basic
installation, commissioning and operation of the wind sensor ONYX.TAG wind in these
instructions
The following symbols will assist you with the installation or use and require a safety-
conscious conduct:
Attention!
This symbol indicates instructions that, if disregarded, can put the user in
danger.
Attention!
This symbol indicates instructions that, if disregarded, can potentially result
in damage to the product.
This symbol indicates instructions for use or helpful information.
This symbol requires you to act.
This symbol indicates parts of the product, for which you will find important
information in these installation instructions.
Installation instructions and Instructions for use
4 Subject to technical modifications – Date of Issue May/2023
General notes
Questions
In case of questions concerning the installation or the use of your product, please consult
your authorized specialist shop.
Warranty
Warranty claims are subject to statutory limitation periods. Service parts are excluded
from the warranty; the same applies for changes in color and changes in characteristics
caused by UV radiation.
Liability
Should the notes and information given in these instructions be disregarded or if the
product is misused or used for the wrong purpose, the manufacturer declines the
guarantee for damage to the product. In these cases the liability for consequential
damage to any parts or persons is ruled out as well
Legal notes
The graphs and texts of these instructions were carefully prepared. We cannot be held
liable for any errors and their potential consequences! Subject to technical modifications
to the product and to these instructions! These instructions include copyrighted
information. All rights reserved! The listed product or brand names are trademarks of the
respective owners.
EC declaration of conformity
The HELLA Sonnen- und Wetterschutztechnik GmbH hereby declares that this product
complies with the basic requirements and the other applicable regulations of the EC
directives. The complete declaration of conformity can be found in the download area of
our website https://www.hella.info.

Installation instructions and Instructions for use
Subject to technical modifications – Date of Issue May/2023 5
Safety instructions
The safety instructions as well as the appropriate instructions must be read
carefully before installation and use. In case of non-observance of the
directions and information given in these instructions and in case of
improper installation and operation or unintended use, the manufacturer
shall not accept any warranty claims concerning any damage to the
product. In these cases the liability for consequential damage to any parts
or persons is ruled out as well.
- Set-up, examination, commissioning and error correction of the unit must
only be performed by authorised or trained expert staff.
- Follow the described installation steps and pay attention to
recommendations and notes.
- Keep these instructions in a safe place.
- Only use unmodified original parts from HELLA.
- In case of unauthorised opening of the device, improper use, incorrect
installation or incorrect operation, there is a risk of damage to persons or
property.
- Never let children play with the unit.
ONYX.TAG wind does not protect the awning from sudden, strong gusts of
wind. If there is a risk of such weather conditions, close the system
manually!
Dismantle the ONYX.TAG wind only for maintenance purposes. Mount the
ONYX.TAG wind in the front rail of the awning to ensure proper functioning.
Observance of regulations and rules
The building owner is responsible for the observance of statutory rules and
country-specific provisions on site.
Installation instructions and Instructions for use
6 Subject to technical modifications – Date of Issue May/2023
Scope of delivery
The following components are included in the scope of delivery:
- Wind sensor ONYX.TAG wind
- CR2032 Battery (already inserted)
- Mounting plate
- Fillister head screw M4x12
- Threaded plate
- Adhesive pad
Device description
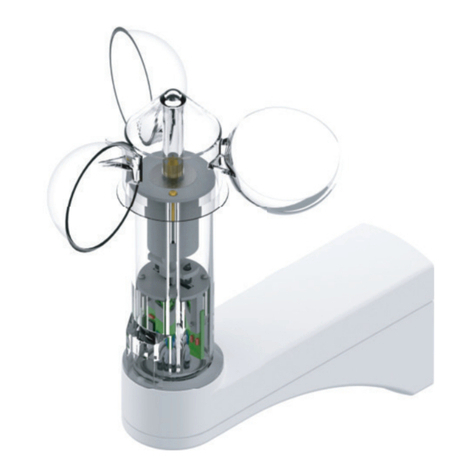
ONYX.TAG wind
Art. no. 50680701
868MHz/ 2.4GHz
ONYX.TAG wind is a battery-operated wind sensor for awnings. ONYX.TAG wind enables
automatic retraction of the awning when the wind causes it to vibrate strongly. The sensor
can be used in conjunction with all ONYX control units. In addition, the ONYX.TAG wind
can quickly and easily be linked to the ONYX smart home control system with
ONYX.CENTER.
Legend
LED status display Programming button
QR code CR2032 button cell
Covering
The programming button (4) and the CR2032 button cell (5) are located behind the
cover (3).
1 4
2 5
3
1
23
45
Installation instructions and Instructions for use
Subject to technical modifications – Date of Issue May/2023 7
Technical data
Voltage supply 3 V DC CR2032 lithium battery (230 mAh)
Operating time of the battery 2 years
IP rating IP54
Permitted operating temperature range -20 °C to +60 °C
Radio frequency 0+]*+]ɛDQG
Transmission power 12.6 mW (868.3 MHz)/ 2.5 mW (2.4 GHz)
Dimensions L x B x H 40 x 40 x 12.5 mm
Weight 15 g
Installation instructions and Instructions for use
8 Subject to technical modifications – Date of Issue May/2023
Installation
ONYX.TAG wind sticks magnetically to the mounting plate supplied. The
mounting plate can be fixed in the front rail of the awning in two different
ways:
A The mounting plate (1) is screwed to the
front rail of the awning using the mounting
material included in the delivery (Fillister
head screw (2) and threaded plate (3)).
B The mounting plate (1) is glued into the
front rail of the awning using the adhesive
pad (4) included in the delivery.
Legend
Mounting plate Threaded plate
Fillister head screw M4x12 Adhesive pad
1 3
2 4
1 23
4 1

Installation instructions and Instructions for use
Subject to technical modifications – Date of Issue May/2023 9
Installation
Mounting example
Legend
ONYX.TAG wind
Front rail
1
2
1
2
Installation instructions and Instructions for use
10 Subject to technical modifications – Date of Issue May/2023
Configuration
Before configuring ONYX.TAG wind, download HELLA’s free “ONYX” App
from the App store or Google Play to your smart phone.
Bluetooth must be activated on your smart phone to configure the wind
sensor ONYX.TAG.
Bluetooth is not required for operating the wind sensor later on.
Configuration ONYX.TAG wind without ONYX.CENTER
First, a hand-held radio transmitter / wall-mounted radio transmitter must be
set up according to the respective instructions for use. The important thing
is that the desired awning has already been taught-in before configuring the
ONYX.TAG wind. Now, in “Configure devices” and “+”, scan in the QR code
on the rear side of ONYX.TAG wind. Then follow the instructions on the
screen.
Configuration ONYX.TAG wind with ONYX.CENTER
First of all, ONYX.CENTER must be configured completely according to the
“Instructions for use” enclosed. The important things is that the desired
awning has already been taught-in. The “Configuration mode” in the App
must be activated. You find it under “Settings”. Now, in “Devices” and “+”,
scan in the QR code on the rear side of ONYX.TAG wind. Then follow the
instructions on the screen.
Setting the triggering sensitivity
If an ONYX.CENTER is available, “Configuration mode” must be active in
the settings of the ONYX App on the smart phone. Then go to “Devices”,
then to the pencil symbol next to the respective sensor, then to “Advanced
settings” and finally to “Triggering sensitivity”.
Resetting to factory settings
The wind sensor can be reset to factory settings by holding down the
programming button for more than 10 seconds. The wind sensor flashes red
during this time. After successful reset, the wind sensor flashes green
briefly.
Installation instructions and Instructions for use
Subject to technical modifications – Date of Issue May/2023 11
Status bar
The status bar (3) is provided at the rear side of the Centerbox ONYX.CENTER. The
status bar provides information about the current status and possible error causes of the
Centerbox.
Lights displayed Colour Meaning
Rainbow coloured
Restart after replacing the battery /
by pressing the programming
button
Wind sensor not configured
Green
Restart after replacing the battery /
by pressing the programming
button
Wind sensor configured
white Bluetooth activated
Green Bluetooth activated, unit connected
(5x) red Battery capacity < 10%
The LED status display switches off automatically after some time to save
energy.
Installation instructions and Instructions for use
12 Subject to technical modifications – Date of Issue May/2023
Replacing the battery
To replace the CR2032 button cell, open the cover. Now remove the battery
from the battery holder. If required, use a slotted screwdriver as shown in
the figure below. When replacing the battery, make sure that it is correctly
aligned in the battery holder (“+” of the button cell is facing upwards when
inserted).
Battery replacement mode ONYX.TAG wind without ONYX.CENTER
When using without ONYX.CENTER, the battery replacement mode is
automatically activated when the battery is empty. The awning will thus
retract and can be extended for 6 seconds.
Battery replacement mode ONYX.TAG wind with ONYX.CENTER
If the awning is retracted and the wind sensor is not accessible, the “battery
replacement mode” can be activated in the “ONYX” App on the smart phone
when using ONYX.CENTER. The “Configuration mode” must be active in
the settings for this purpose. Then go to “Devices”, then to the pencil
symbol next to the respective sensor, then to “Advanced settings” and
finally to “Battery replacement mode”. In battery replacement mode, the
awning can be extended to a freely selectable position, to be able to
remove the sensor.
Ideal use of the radio signal
Radio systems that send on the same frequency may cause interference
with reception.
It must be considered that the range of the radio signal is limited by
statutory regulations and structural measures.

Installation instructions and Instructions for use
Subject to technical modifications – Date of Issue May/2023 13
Fault removal
Problem Possible cause Troubleshooting
The awning retracts
for no apparent
reason and can no
longer be fully
extended.
CR2032 battery is
empty.
Replace the CR2032 battery as described
in point “Replacing the battery”.
CR2032 battery
inserted the wrong
way round.
Check the battery alignment as per the
figure for battery replacement.
Awning retracts too
often in light wind.
Triggering sensitivity
of the sensor too
high.
Setting the triggering sensitivity as per point
“Configuration - Setting the triggering
sensitivity”.
Awning does not
retract despite strong
winds.
Triggering sensitivity
of the sensor too
low.
Setting the triggering sensitivity as per point
“Configuration - Setting the triggering
sensitivity”.
Wind sensor cannot
be trained. The
status display
flashes white.
Bluetooth not
activated on the
smart phone.
Activate Bluetooth in the system settings of
the smart phone.
Wind sensor cannot
be trained. Status
display is not lit.
CR2032 battery is
empty.
Replace the CR2032 battery as described
in point “Replacing the battery”.
CR2032 battery
inserted the wrong
way round.
Check the battery alignment as per the
figure for battery replacement.
Installation instructions and Instructions for use
14 Subject to technical modifications – Date of Issue May/2023
Disposal
Dispose of the device in accordance with the current country-specific
regulations for electronic scrap (e.g. suitable collecting points).
According to the current regulations, batteries are to be disposed of at the
retailer or the municipal collection points.
Installation instructions and Instructions for use
HELLA Interior Venetian
Blinds
regulate the lighting in a
room very comfortably,
immediately gracing it
with much more
atmosphere.
HELLA Insect screens
and you decide who is
allowed to come in and
who isn't.
HELLA Pleated Blind
folds up very compactly
and protects very well
against the sun and nosey
glances where only little
space is available.
HELLA Outdoor Blinds
serve for the light
regulation, as view
protection, anti-glare blind
and heat protection.
HELLA Front-mounted
Roller Shutter
for more safety and
protection against rain,
wind, heat, the cold, noise,
incident light and nosey
glances, also available for
subsequent installation.
HELLA Vertical awning
With toggle catch
mechanism for a lovely
façade design with perfect
heat and glare protection.
For questions, wishes and ideas:
HELLA Infoline +43/(0)4846/6555-0
HELLA Sonnen- und Wetterschutztechnik GmbH
A-9913 Abfaltersbach, No. 125
Phone: +43/(0)4846/6555-0
Fax: +43/(0)4846/6555-134
e-mail: office@hella.info
Internet: http://www.hella.info
Other Hella Accessories manuals

Hella
Hella PAN 7040 User manual

Hella
Hella PM03 Setup guide

Hella
Hella CLEO 5530 Setup guide

Hella
Hella PM07 protect Setup guide

Hella
Hella SOLEYA User manual

Hella
Hella CLEO 7040 Setup guide

Hella
Hella C2 Setup guide

Hella
Hella SOLANYA Setup guide

Hella
Hella SOLEYA Setup guide

Hella
Hella VIVA 7040 Setup guide


