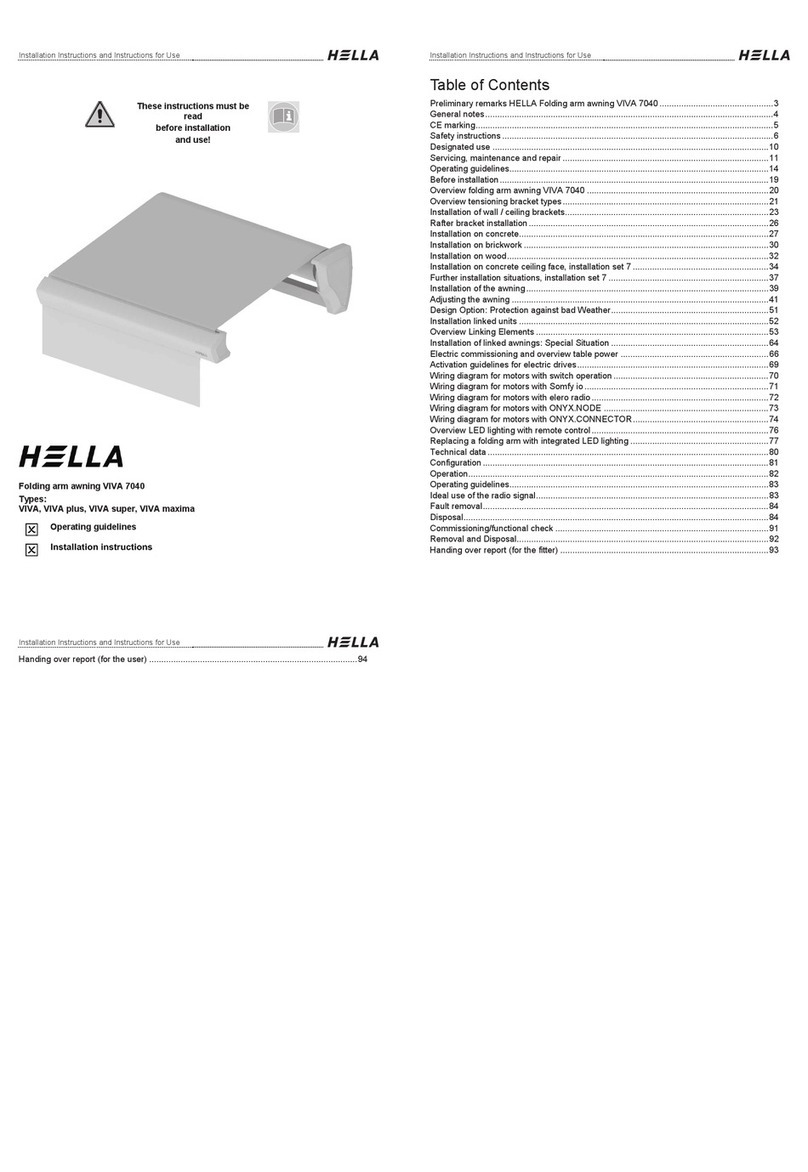
Hella ELEGANZA Setup guide

Installation instructions and Instructions for use
These instructions must be read
prior to installation
and use!
Pergola awning ELEGANZA / ELEGANZA protect
Operating guidelines
Installation instructions and Instructions for use
Table of Contents
Preliminary remarks HELLA Pergola awning ELEGANZA / ELEGANZA protect..................3
General notes.......................................................................................................................4
CE marking...........................................................................................................................5
Safety instructions ................................................................................................................7
Designated use ..................................................................................................................11
Servicing, maintenance and repair .....................................................................................12
Operating guidelines...........................................................................................................15
Before installation...............................................................................................................16
Overview: Tools for the installation.....................................................................................17
Overview ELEGANZA ........................................................................................................18
Column types’ overview......................................................................................................19
Installation box ...................................................................................................................20
Installing the guide rails......................................................................................................25
Installation of the columns..................................................................................................29
Cross brace installation (front)............................................................................................34
Installation pull cords..........................................................................................................38
Installing the lateral end caps.............................................................................................40
Installation of the guiding tubes ..........................................................................................41
Installing the anti-lift device ................................................................................................42
Mounting Varioplus roller blind - freely suspended.............................................................44
Mounting Varioplus roller blind - rail-guided .......................................................................45
Installation/wiring LED........................................................................................................50
Malfunctions .......................................................................................................................53
Wiring diagram for motors with ONYX.CONNECTOR........................................................56
Wiring diagram for motors with ONYX.NODE ....................................................................57
Wiring diagram for motors with Somfy io............................................................................58
Wiring diagram for motors with switch operation ................................................................59
Wiring diagram for LED lighting ONYX/Somfy io................................................................60
Operating instructions and configuration with ONYX..........................................................61
Instructions for use and configuration with Somfy ..............................................................62
Activation guidelines for electric drives...............................................................................63
Commissioning/functional check ........................................................................................64
Removal .............................................................................................................................65
Handing over report (for the fitter) ......................................................................................66
Handing over report (for the user) ......................................................................................67
Installation instructions and Instructions for use
Subject to technical modifications. – Date of issue
January/2023
3
Preliminary remarks HELLA
Pergola awning ELEGANZA / ELEGANZA protect
With this HELLA product you have opted for a high-quality product with a most up-to-date
technology that can nevertheless be easily installed and operated. In these instructions we
describe the basic installation, commissioning and use.
For authorized specialist staff
For the consumer (user)
The following symbols will assist you with the installation or use and require a safety-
conscious conduct:
Attention!
This symbol indicates instructions that, if disregarded, can put the user in
danger.
Attention!
This symbol indicates instructions that, if disregarded, can potentially result
in damage to the product.
This symbol indicates instructions for use or helpful information.
This symbol requires you to act.
Attention!
This symbol indicates a risk of injury or danger to life due to an electric
shock.
This symbol indicates parts of the product, for which you will find important
information in these installation instructions.
Installation instructions and Instructions for use
4
Subject to technical modifications. – Date of issue
January/2023
General notes
Questions
In case of questions concerning the installation or the use of your product, please consult
your authorized specialist shop.
Spare parts/repairs
Spare parts are available at your HELLA specialist shop. Only spare parts that are
approved by HELLA are allowed to be used.
Warranty/guarantee
Precondition for warranty and guarantee is a correct and regular maintenance of the sun
protection device (at least once a year).
Warranty claims are subject to statutory limitation periods. Service parts are excluded
from the warranty; the same applies for changes in color and changes in characteristics
caused by UV radiation.
Liability
In case of non-observance of the directions and information given in these instructions
and in case of improper operation or unintended use, the manufacturer shall not accept
any warranty claims concerning any damage to the product. In these cases, the liability
for consequential damage to any parts or persons is ruled out as well.
Legal notes
The graphs and texts of these instructions were carefully prepared. We cannot be held
liable for any errors and their potential consequences! Subject to technical modifications
to the product and to these instructions! These instructions include copyrighted
information. All rights reserved! The listed product or brand names are trademarks of the
respective owners.

Installation instructions and Instructions for use
Subject to technical modifications. – Date of issue
January/2023
5
CE marking
The pergola awning ELEGANZA by HELLA is in compliance with the declaration of
performance according to the Construction Products Regulation; if the unit is operated with
a motor drive it is additionally in compliance with the Machinery Directive and the
Guideline for Electromagnetic Compatibility; in case of proper use, the awning corresponds
to the basic requirements of the harmonised standard EN 13561. The respective
declarations are deposited with the manufacturers.
The CE identification applies for the delivery status of the product. Specifications regarding
wind resistance when installed are provided in the product documentation. The product
mounted meets the requirements of the specified standard only, if
the awning is installed with the recommended type and number of brackets.
during installation the information and instructions given in these instructions as well
as the information and instructions of the manufacturers of the screws / dowels have
been observed,
the product is installed with the recommended type and number of fasteners/screws.
No changes, rebuildings or extensions, with the exception of those described in these
instructions, are allowed with this product. The fixed CE-label expires with any change,
rebuilding or extension.
HELLA Sonnen- und Wetterschutztechnik GmbH
A-9913 Abfaltersbach 125
21
LE-PEMA-01-001
EN 13561:2004+A1:2008
Pergola awning
ELEGANZA
Exterior textile sun protection
Wind resistance class 2
Installation instructions and Instructions for use
6
Subject to technical modifications. – Date of issue
January/2023
CE marking
The pergola awning ELEGANZA protect (side seam guided) by HELLA is in compliance
with the declaration of performance according to the Construction Products Regulation; if
the unit is operated with a motor drive it is additionally in compliance with the Machinery
Directive and the Guideline for Electromagnetic Compatibility; in case of proper use, the
awning corresponds to the basic requirements of the harmonised standard EN 13561. The
respective declarations are deposited with the manufacturers.
The CE identification applies for the delivery status of the product. Specifications regarding
wind resistance when installed are provided in the product documentation. The product
mounted meets the requirements of the specified standard only, if
the awning is installed with the recommended type and number of brackets.
during installation the information and instructions given in these instructions as well
as the information and instructions of the manufacturers of the screws / dowels have
been observed,
the product is installed with the recommended type and number of fasteners/screws.
No changes, rebuildings or extensions, with the exception of those described in these
instructions, are allowed with this product. The fixed CE-label expires with any change,
rebuilding or extension.
HELLA Sonnen- und Wetterschutztechnik GmbH
A-9913 Abfaltersbach 125
21
LE-PMZS-01-001
EN 13561:2004+A1:2008
Pergola awning
ELEGANZA protect
Exterior textile sun protection
Wind resistance class 3
Installation instructions and Instructions for use
Subject to technical modifications. – Date of issue
January/2023
7
Safety instructions
These installation instructions refer to prefabricated elements, that (1) for
100% are made from parts, which are defined by us, and (2) which are
made in manufacturing processes, which are defined by us too; in all other
cases we do not provide any guarantee!
The safety instructions as well as the appropriate instructions must be read
carefully before installation and use. In case of non-observance of the
directions and information given in these instructions and in case of
improper installation and operation or unintended use, the manufacturer
shall not accept any warranty claims concerning any damage to the
product. In these cases, the liability for consequential damage to any parts
or persons is ruled out as well.
- Follow the described installation steps and pay attention to
recommendations and notes.
- Keep these instructions in a safe place.
- All installation and removal works, as well as maintenance and repair
works are only allowed to be carried out by authorised and qualified
specialist staff.
- If switching, automatic or radio control devices are used to operate the
units, the information given in the enclosed instructions of the
manufacturer must be observed.
- During operation do not put your hand into or touch movable parts.
- Ensure that clothing or body parts cannot get caught on the unit.
- Observe the regulations for prevention of accidents of the employer's
liability insurance association!
- Before operation check the unit for visible damage. If the unit is
damaged, it should not be used; please consult authorized specialist
staff immediately.
- Risk of injury and accident due to the weight of the product!
- Take safety measures against the danger of squashing, especially when
operating the unit with automatic devices.
- Place the operating switch within sight of the unit, but not near any of the
moving parts.
- Never let children play with the unit.
A sun protection device with electric drive cannot be retracted without
current. Therefore we recommend the use of an emergency power
generating unit, especially in regions with frequent power failures.
Danger of suffocation!
Ensure that the foil cannot get into the hands of children. Keep the foil in a
safe place.
Installation instructions and Instructions for use
8
Subject to technical modifications. – Date of issue
January/2023
Safety instructions
Attention! Risk of injury or danger to life due to an electric shock!
- Set-up, examination, commissioning and error correction of the unit must
only be performed by authorised or trained expert staff (as per VDE
0100).
- Switch off the current to the connecting lines when working at the unit.
There is danger to life! Take safety precautions against unintentional
switching on!
- Check the electrical wires regularly for damage. Do not use the unit if
any damage is found.
- Our electrically driven units are in accordance with the regulations for
power plants acc. to VDE 0100. We cannot guarantee for the operational
reliability of the unit with non-approved modifications.
- White motor cables are not UV-resistant and must therefore be routed in
empty conduits, cable ducts, or similar.
- The enclosed installation instructions of the electrical devices supplied
must be observed.
Units with motor drive:
The drives used are operated with a voltage of AC 230V/50Hz. Please
check the power supply provided by your utility company before connecting.
Any other voltage can destroy the drives.
Winter operation:
Snow or ice can destroy the unit.
The unit may only be operated, if no ice or snow is lying on the cover.
During this time automatic control devices must be switched to
manual operation.

Installation instructions and Instructions for use
Subject to technical modifications. – Date of issue
January/2023
9
Safety instructions
To prevent damage, please retract your sun protection device with rain,
snowfall or wind.
If automatic control devices are used, adjust the wind controller analogously
to the installed wind resistance class of your sun protection device.
The wind class specifications apply to the structure of the unit. The
prerequisite for this is a suitable mounting base. This means that the wind
class can be downgraded based on the mounting base.
Wind resistance class 0 = wind force <4 (Beaufort),
a performance not required or not measured (according to DIN 13561) or a
product, that does not comply with the requirements of the wind resistance
class 1.
Wind resistance class 1 = wind force 4 (Beaufort),
moderate breeze, moderate wind, moves twigs and thin branches, whirls up
dust and loose paper
Velocity 20 – 27 km/h = 5.5 – 7.4 m/s
Wind resistance class 2 = wind force 5 (Beaufort),
fresh breeze, fresh wind. Smaller deciduous trees start to sway, white
crests are formed on lakes.
Velocity 28 – 37 km/h = 7.5 – 10.4 m/s
Wind resistance class 3 = wind force 6 (Beaufort),
strong wind, strong branches sway, it is difficult to hold an umbrella,
telegraph cables sough in the wind
Velocity 38 – 50 km/h = 10.5 – 13.8 m/s
Installation instructions and Instructions for use
10
Subject to technical modifications. – Date of issue
January/2023
Safety instructions
If it is necessary to lift the awning via ropes at a higher altitude, the awning
must
- be removed out of the packaging.
- be tied to the pull ropes in such a way, that a slipping out of the awning is
prevented,
- lifted evenly in a horizontal position.
The same applies for the removal of the awning.
It is not allowed that climbing aids are leaned against or fixed to the awning.
They must have a stable base and provide a firm support. Only use
climbing aids with an appropriate carrying capacity.
When working at higher heights, there is risk of falling. Please make sure
that suitable fall protection devices are used.
Awnings are only allowed to be used for the purpose specified in the
instructions for use. Changes, such as extensions or rebuildings, that are
not provided by the manufacturer, are only allowed to be carried out with
the manufacturer’s written approval.
Additional loadings such as objects that are sticked to the awning or cable
tensionings can damage the awning or lead to its crashing, and are
therefore not allowed.
Installation instructions and Instructions for use
Subject to technical modifications. – Date of issue
January/2023
11
Designated use
Sun protection
Thermal protection
Sight screen
Glare protection
limited rain protection
Installation instructions and Instructions for use
12
Subject to technical modifications. – Date of issue
January/2023
Servicing, maintenance and repair
With the purchase of your awning you have opted for a high-quality product. To enjoy your
awning for as long as possible, please observe the following information:
Notes to awning covers made of brand acrylic fibres
Brand acrylic fibres, as used for awnings, are materials of the highest quality for awnings.
As they are dope-dyed, these materials show the highest light- and color-fastness. In
addition, their resistance to tearing and resistance to weather, rotting and environmental
effects is unsurpassed. Furthermore, a special textile finishing makes them dirt-, water-, oil-
and grease resistant. The awning cover is heavily tested. At the weaving plant, at the
awning manufacturer and during awning fabrication. As with other covers, differences in
the surface uniformity can also occur with the awning cover. When viewing from the top or
seeing through, you will perhaps find small knots, spots of color, irregular runs of threads
or minimal differences and displacements in the design and rapport, as well as differences
in the color. Please note, that the awning will cause a different color effect in sunlight and
in shade. Naturally, the optical color perception depends on the composition and the
intensity of the emerging light. With increasing depth of color, more light will be absorbed
and less will be reflected. Therefore dark coloured covers let through a small amount of
light, while light colors let a lot of light through. Due to the part-absorption, the composition
of the light shining through will be modified, which results in other color perceptions.
Due to the coloured pigments embedded in the cover and the impregnation, shadings
caused by crinkles or crumple folds can appear, that, especially with light colors, become
visible as strips of shade.
The function, strength or density of the cover will not be reduced by that. Minor differences
in colors between the different cover strips or differences in colors with regard to the
collection of samples cannot be ruled out. The fabrication of several strips also with varying
widths depends on the overall width of the awning.
Ripples in the cover and wrinkling at the seams can arise, because the cover is double
rolled up at the seams.
The highest strain is on the seams of the cover. When rolling up the cover, the seams and
hems lie on top of each other, intensifying the strain. Hems and seams will be pressed flat,
increasing in length. As a result, the lateral seams of the cover can hang down slightly.
Sagging as a result of the own weight of the cover is possible. These specified
phenomenons are not faults in the awning cover, which have been overseen in the testing;
they are unavoidable due to technical, material and physical regularities. They therefore do
not entitle the customer to any refusal or reduction of the purchase price.
Correspondingly, the guidelines for the assessment of ready-made awning covers,
summarized by the German Federal Association "Manufacture of technical textile
registered association" (Bundesverband Konfektion Technischer Textilien e. V.), are also
an integral part of our conditions of sale and delivery.

Installation instructions and Instructions for use
Subject to technical modifications. – Date of issue
January/2023
13
Servicing, maintenance and repair
Cleaning
As a sun protection device fixed outside, the unit can get dirty in the
course of time. This will not reduce the usability of your unit. The powder-
coated parts of your unit will remain presentable for longer, if they are
cleaned regularly with a soft woollen cloth.
Do not use solvents, alcohol (rubbing alcohol) or scouring cleansing
agents!
Leaves or other foreign material lying on the awning cover and in the
awning cassette must be removed immediately. There is danger of
damage or crashing to the awning.
Preventive measures
If you have to draw in the cover in a wet condition, please draw it out for
drying when the next opportunity arises, to prevent marks caused by mould
or mildew.
Installation instructions and Instructions for use
14
Subject to technical modifications. – Date of issue
January/2023
Servicing, maintenance and repair
Maintenance
Maintenance
All inspection and maintenance works must be carried out by a
specialised company from HELLA or a HELLA partner. Regularly check
the electrical wires of motor driven units for damage. Check the
mechanical parts of your unit for visible damage. After exceptional events
such as storm, hail, sleet, maloperation or the like, the unit must be
checked for noticeable damage prior to operating it. If the unit is
damaged, it must not be used; consult authorized specialist staff
immediately. It is recommended to have the unit maintained by specialist
staff on an annual basis. This way wear is detected at an early stage and
damage to the unit is prevented.
An unintentional switching on of electrically driven awnings is possible.
Make sure, that the awning is switched dead during cleaning or
maintenance work (e.g. building cleaner).
The automatic control device must be switched dead when working in the
operating range of the awning. There is danger of squashing and danger
of fall hazards.
In addition, it has to be ensured, that an unintentional manual operation
of the awning is prevented. This may be done by disconnecting the
power supply or by unplugging the plug-in coupling from the motor.
If the awning is operated manually, the operating crank handle must be
hooked out and kept in a safe place.
Repair works
Repair works
Improper repair works may cause both risk of injury to persons or
damage to the units. All repair works must be carried out by a specialised
company from HELLA or a HELLA partner. Use original HELLA spare
parts only.
Installation instructions and Instructions for use
Subject to technical modifications. – Date of issue
January/2023
15
Operating guidelines
Motor drive
The awning can be extended
or retracted by activating a
switch, a hand-held radio
transmitter or an automatic
device.
End positions:
The lower end position
(awning is extended) is
adjusted in the factory. Please
observe the enclosed
instructions of the
manufacturer of the motor if
any modification is required.
The upper end position
(awning is retracted) is
automatically switched off by
the motor by torque.
Installation instructions and Instructions for use
16
Subject to technical modifications. – Date of issue
January/2023
Before installation
Check the product immediately for possible shipping damage and for
compliance with the delivery receipt.
If parts are missing or damaged, please consult your supplier immediately.
Check the mounting base and ensure that the mounting material to be used
complies with the given conditions to guarantee proper installation. In case
of doubt, please seek advice from a specialist enterprise for fixing
techniques.
The packaging cardboard box should not be exposed to humidity. To
protect it from rain during transport, it should be covered by a foil.
Carry larger units by two persons. Transport and store the units carefully to
prevent injury of persons and damage to the product.
Remove the packaging material carefully. When using a knife, be careful
not to damage the packaging content and to avoid cuts!
Dispose of the packaging material via recycling.
Caution!
A wrong installation can endanger the user seriously. Please strictly
observe the installation instructions. Close off the place of installation.
When working at higher heights, there is risk of falling. Suitable ascent
supports, scaffoldings and fall protection devices are to be used. Please
make sure that the ascent supports stand solidly and provide a firm grip.

Installation instructions and Instructions for use
Subject to technical modifications. – Date of issue
January/2023
17
Overview: Tools for the installation
Battery-powered drill
Depending on the mounting
base (Bit AW 10, AW 20)
Bit extension
Drilling bit
Drill set
acc. to Mounting base
Level Measuring tape Pencil
Screwdriver Spanners
or ratchet
Allen key
Combination pliers or
long-nosed pliers
Side cutter
Installation instructions and Instructions for use
18
Subject to technical modifications. – Date of issue
January/2023
Overview ELEGANZA
Legend
Box (2-part) With column fixed (standard)
Wall bracket Type A Conduit
Lateral end cap Anti-lift device
Guide rail Curtain and front rail
Cross-beam round
1 6
2 7
3 8
4 9
5
1
2
3
4
5
6
7
8
9
Installation instructions and Instructions for use
Subject to technical modifications. – Date of issue
January/2023
19
Column types’ overview
fixed column (std) lowerable column (optional)
Important information regarding the usage of a lowerable column:
- Only one column may be lowerable per unit.
- In the case of combined units, centre columns must not be lowerable under any
circumstances, i.e. columns that can be lowered with a hand crank may only be installed
as edge columns.
- The range of lowering depends on the final width of the unit and is already set and
limited ex-works. This adjustment range must not be changed independently under any
circumstances.
- The unit may not be retracted or extended under any circumstances when the column is
lowered. For driving operation, the lowerable column must be cranked up so that the
front cross brace is horizontal.
Disregarding these instructions can cause damage to the units.
Complete width
[mm]
max. lowering
2000 110
2500 130
3000 160
3500 190
4000 210
4500 240
5000 260
5500 290
6000 320
Installation instructions and Instructions for use
20
Subject to technical modifications. – Date of issue
January/2023
Installation box
Slide in suspension brackets
Take the box out of the
cardboard packaging and
remove the foils. Place the
box on two prepared trestles.
Remove the lateral covering
caps (1). For this, loosen the
countersunk screw (2) in the
upper covering profile (3).
Then pull the covering cap
off to the side.
Slide the hanging consoles
(4) supplied into the groove
of the lower covering profile
(6). Then screw the threaded
pin (5) into the hanging
console.
Three suspension brackets
are supplied from a complete
width of 4000 mm; and only
two up to this complete
width.
Legend
Lateral end cap
Countersunk screw M4x6
Roof profile
Hanging console
Threaded pin M6x8
Lower covering profile
1
2
3
4
5
6
4
5
6
1
2
3
4
5
6

Installation instructions and Instructions for use
Subject to technical modifications. – Date of issue
January/2023
21
Installation box
Distribute the suspension brackets
Legend
Threaded pin M6x8
Hanging console
Divide the hanging consoles (2) evenly
over the width of the box. Make sure
that the edge distances (<=500 mm) of
the outer brackets are not exceeded.
Clamp the brackets by tightening the
threaded pins (1).
Then measure dimension B (distance
between the outer hanging consoles).
This dimension is needed for marking
the positions of the mounting brackets
on the wall.
The third hanging console (from FB
4000 mm) is always mounted exactly in
the middle between the two outer
hanging consoles.
1
2
500
≤
500
≤
==
B
2
2
1
Installation instructions and Instructions for use
22
Subject to technical modifications. – Date of issue
January/2023
Installation box
Mounting the mounting brackets on the wall
Draw the mounting positions of the
wall brackets (2) on the wall. The
distance between the two outer
wall brackets corresponds to the
previously measured dimension B.
Please refer to the order papers for
the mounting height (1).
Attach the wall brackets (2) to the
wall using the appropriate
mounting material.
Position two ladders of the same
height below the mounting
brackets.
Hanging the box in the wall bracket
Place the box on the top of the
ladders. Please make sure that the
box is placed safely and that it
cannot fall down.
Lift the box evenly in pairs and
hang the box with the hanging
consoles (3) in the bolts of the wall
brackets (2).
When you have hinged in the box
and released it, it lowers down until
the hanging console is in contact
with the wall bracket.
Legend
Mounting/complete height
Wall bracket
Hanging console
1
2
3
=
=
B
1
2
2
2
3
3
Installation instructions and Instructions for use
Subject to technical modifications. – Date of issue
January/2023
23
Installation box
Screwing in the threaded pins and securing them
Put the threaded bolt (1) from the mounting material into the passage in the
hanging console (2) and then turn it through the thread on the other side of
the hanging console. Turn the threaded bolt through the entire thread in the
hanging console.
Then turn the hexagon screw (3) into both sides of the threaded bolt (1), in
order to secure the bolt. First push the washer (4) over the hexagon screw.
Legend
Threaded bolt (on the face side with inner thread)
Hanging console
Hexagon screw M6x20
Washer M6
1
2
3
4
1
21
21
3
4
Installation instructions and Instructions for use
24
Subject to technical modifications. – Date of issue
January/2023
Installation box
Screwing in the threaded pins and securing them
Secure the threaded bolt
additionally by screwing the
threaded pin (1) into the
threaded hole in the hanging
console (2).
Legend
Threaded pin M4x4
Hanging console
Removing the transportation lock
Loosen the threaded pin (2).
Which is screwed into the
lug of the side part (3).
However, do not unscrew
the threaded pin completely.
Then push the transport
safety device (1) to the front.
Legend
Transport safety device
Threaded pin M8x8
Side part
1
2
1
2
3
2
1
1
2
3
3
1

Installation instructions and Instructions for use
Subject to technical modifications. – Date of issue
January/2023
25
Installing the guide rails
Preparations single guide rail before mounting
Mounting the guiding tube holder and the holder for the cross brace on the guide
rail
Place the guide rails (1) on two prepared trestles. Push the sliding blocks
(6) - 2 per bracket - into the groove of the guide rail. Screw the conduit
bracket (2) with the sliding blocks (6). Only slightly fasten the screws on the
bracket for the cross-beam (3), so that the bracket is still moveable.
The position of bracket (2) and (3) should be identical on the left and right
guide rail.
The spacer plate (5) must always be aligned in a way that the slanted side
of the plate faces the slanted part of the guide rail.
Legend
Guide rail Spacer plate for bracket of cross profile
Conduit bracket Sliding block
Bracket for cross-beam Cylinder-head screw M8x22
(for conduit bracket)
Spacer plate for conduit bracket Cylinder-head screw M8x25
(for bracket cross-beam)
1 5
2 6
3 7
4 8
23
1
6
5
3
2
4
6
78
Installation instructions and Instructions for use
26
Subject to technical modifications. – Date of issue
January/2023
Installing the guide rails
Preparations double guide rail before mounting
Mounting the guiding tube holder and the centre joint on the guide rail
Place the double guide rail on two prepared trestles. Push the sliding blocks
(4) - 2 per bracket - into the groove of the guide rail. Screw the conduit
bracket (1) and the conduit bracket (2) with the sliding blocks (4). Do not
forget the spacer plate (5). Please make sure that the conduit brackets (1
and 2) are slightly displaced, so that the conduit brackets can be screwed
afterwards.
Screw the middle hinge (3) with the sliding blocks. Do not forget the spacer
plate (6). Only slightly fasten the screws of the middle hinge (3), so that it
can still be moved.
Legend
Conduit bracket for installation 1 Spacer plate for conduit bracket
Conduit bracket for installation 2 Spacer plate for middle hinge
Middle hinge Fillister head screw M8x22
Sliding block Fillister head screw M8x25
1 5
2 6
3 7
4 8
4
3
2
1
1
5
72
3
6
8
Installation instructions and Instructions for use
Subject to technical modifications. – Date of issue
January/2023
27
Installing the guide rails
Place the guide rails onto the box.
First extend the front rail by approx. 15 cm.
To do this, connect the unit to a test cable
and operate the unit.
Insert the runners (6) of the front rail (1) into
the channel provided in the guide rail.
Only with ELEGANZA protect:
With ELEGANZA protect systems, the zip
fastener (5) of the cover must be threaded
into the inner guide strips (4) beforehand.
Push the guide rail (2) over the strut (3) of
the side part further until it stops.
Caution with systems with LED or Varioplus:
Follow the instructions on the next page.
Tighten the threaded pin (7) in the lug of the
side part. This clamps the guide rail to the
side part. When sliding the guide rails on,
place cardboard or such under the end of
the guide rail to prevent scratching.
Legend
Front rail
Guide rail
Strut of the side part
Inner guide strip (with ELEGANZA protect)
Zip fastener (with ELEGANZA protect)
Guide rollers
Threaded pin (in the lug of the side part)
1
2
3
4
5
6
7
7
26
5
4
3
2
4
1
5
3
Installation instructions and Instructions for use
28
Subject to technical modifications. – Date of issue
January/2023
Installing the guide rails
Place the guide rails onto the box.
Attention for systems with
Varioplus:
For systems with Varioplus roller
blind, make sure that the
protruding retraction aid (4) on
the drive side guide rail (5) is
guided out at the corresponding
point in the side part (3).
Attention for guide rails with
LED:
When sliding on, it must be
ensured that the cable (7) of the
LED strips is not damaged. The
cable (7) must be threaded
through under the lug (8) and
then it runs outwards between
the lug (8) and the lower covering
profile (6).
When the guide rails are
mounted, the box, together with
guide rails, hang on the wall. For
units with small sloping
projection, it is advisable to
underlay the ends of the guide
rails (e.g. with trestles) - as a
relief. Units with larger sloping
projection support themselves via
the guide rails on the floor.
Legenda
Conduit bracket
Bracket for cross-beam
1
2
5
3
4
687
5
3
1
2

Installation instructions and Instructions for use
Subject to technical modifications. – Date of issue
January/2023
29
Installation of the columns
Marking the column position
Preparing the columns
Mark the mounting
positions of the columns
on the floor. Please take
the column distance (1)
from the order and
measure it from the wall
(fixing level) to the middle
of the column.
Also take the complete
width (2) from the order.
Complete width is the
distance between the
axes of the columns.
Place the columns within
easy reach at the front
end of the guide rails.
In this process, pay
attention to the alignment
of the columns (see
bottom picture).
Legend
Column distance (according to
order)
Complete width (as per order)
Wall
Column on the left side
Column on the right side
1
2
3
4
5
2
1
3
45
1
2
Installation instructions and Instructions for use
30
Subject to technical modifications. – Date of issue
January/2023
Installation of the columns
Swivelling the unit open
Swivel the unit up evenly on
both sides.
Hold the unit in position.
Take the column and place it
under the guide rail.
To do this, slide the bracket
for the cross-beam (1) over
the attachment (2), which is
mounted on top of the
column.
Insert the screw (3) from the
outside inwards through the
boreholes, to connect the
column with the guide rail.
Two persons are required for
this entire step.
Legend
Bracket for cross-beam
Attachment (mounted on the column)
Fillister head screw M10x70
1
2
3
2
3
1
Installation instructions and Instructions for use
Subject to technical modifications. – Date of issue
January/2023
31
Installation of the columns
Swivelling the unit open
To be noted at the middle situation!
When you have swivelled the
unit upwards, hold it in position.
Then place the double guide
rail (3) on the centre column.
Make absolutely sure that the
middle hinge (1), which is
mounted on the guide rail,
rests on the attachment (2) of
the centre column. The double
guide rail is only connected
with the column by installing
the front cross-beam.
After aligning the system, be
sure to tighten the screws,
which secure the middle hinge
(1) to the guide rail.
Legend
Middle hinge
Attachment (on the centre column)
Double guide rail
1
2
3
2
3
1
2
1
Installation instructions and Instructions for use
32
Subject to technical modifications. – Date of issue
January/2023
Installation of the columns
Aligning the unit
Place the columns in the previously marked positions. Remeasure the
diagonals (1) and the widths (2, 3). The diagonal dimension as well as the
width dimensions must be equal. Verify that the guide rails are
perpendicular to the box. If necessary, the columns must be moved slightly.
Align the columns on all sides using a spirit level.
Please mark the final
position of the column base
(4) on the floor after
alignment. Tighten the
screws (5) in the bracket for
the cross-beam.
Legend
Column distance (according to order)
Column base
Screws in bracket cross-beam
(M8*25)
3
4
5
90°
90°
3
1
2
1
4
5

Installation instructions and Instructions for use
Subject to technical modifications. – Date of issue
January/2023
33
Installation of the columns
Screw column feet to the floor
Bore the holes for the anchor
bolts (3) using an
appropriate drill (1).
Clean the remaining dirt/dust
(blow out) from the
boreholes and drive the
anchor bolts (3) into the
boreholes.
Then tighten the nuts of the
anchor bolts firmly.
Legend
Drill
Floor (mounting base column)
Anchor bolt with washer and nut
1
2
3
1
2
2
3
Installation instructions and Instructions for use
34
Subject to technical modifications. – Date of issue
January/2023
Cross brace installation (front)
for
single units
The covering cap (1) for the
column base must be fitted
before inserting the front
cross-beam (3).
To do this, push the covering
cap (1) over the column from
above. The screw (2) must
be removed again for this.
Place the cross-beam (3)
between the columns and
screw it to the brackets of
the columns on both sides.
To do this, use the screw (2),
which is already inserted in
the brackets.
For units with Varioplus roller
blind, the Varioplus roller
blind is installed instead of
the cross-beam. For
installation, see chapter
"Installation of Varioplus
roller blind".
Legend
Covering cap for column base
Fillister head screw M10x70
Front cross-beam
1
2
3
1
2
3
2
Installation instructions and Instructions for use
Subject to technical modifications. – Date of issue
January/2023
35
Cross brace installation (front)
for installation combinations
Start element:
Place the front cross-beam
(1) from above between the
columns and screw the
cross-beam to the columns
on both sides.
Use the screws (2) / (4) from
the mounting material for
this.
Middle and end element:
Note the following for the
middle/end element: Attach
the middle hinge (3) to the
left side of the cross-beam
(1) before installing the
cross-beam (1). Use the
screw (4) from the mounting
material.
Legend
Cross-beam
Cylinder-head screw M10x70 (for
edge columns)
Middle hinge
Cylinder-head screw M10x20 (for
middle hinges)
1
2
3
4
1
2
1
4
4
1
3
4
Installation instructions and Instructions for use
36
Subject to technical modifications. – Date of issue
January/2023
Cross brace installation (front)
for installation combinations
Middle and
end element
Push the stainless steel bolt
(2) from the mounting
material through the slot in
the attachment of the middle
hinge. Push the bolt in until it
rests in the borehole in the
already mounted middle
hinge (3). The bolt protrudes
approx. 5 mm into the middle
hinge.
Take the cross-beam (5) to
be mounted and thread the
middle hinge (3) mounted on
it over the bolt (2). Make
sure that the bolt is also
securely fit in the recess (4)
in the middle hinge.
Legend
already mounted cross-beam
Stainless steel bolt
Middle hinge
Recess for bolt (in the middle hinge)
cross-beam to be mounted
1
2
3
4
5
1
2
3
1
2
3
1
2
3
3
4
5

Installation instructions and Instructions for use
Subject to technical modifications. – Date of issue
January/2023
37
Cross brace installation (front)
for installation combinations
Middle and end
element
Screw the middle hinge (4)
with the sliding blocks in the
guide rail, by using the
screws (1) from the
mounting material.
Secure the bolt in the
attachment (3) of the column
by screwing the screw (2).
Legend
Fillister head screw M8x25
Fillister head screw M6x45
Attachment column (for combination)
Middle hinge
1
2
3
4
1
1
2
3
4
Installation instructions and Instructions for use
38
Subject to technical modifications. – Date of issue
January/2023
Installation pull cords
- Place the pull cords over the runner in the awning box (1).
- Guide the pull cords in the channel for the runners up to the deflection
roller in the crosshead (5). (The pull cords must be threaded through in
the guide rail behind the runners of the carriage).
- Guide the pull cords from the bottom to the top over the deflection roller
(5).
- Guide back the pull cords on the top of the channel for the runners.
- Guide the pull cord loops (3) over the bolts of the pull cord fixation (4)
(located in the accessories, it may have to be removed from the front rail
beforehand).
- Pull the pull cords (approx. 300 mm) and push the pull cord fixation into
the carriages (2) until it is locked in place.
Legend
Runner in the awning box Pull cord fixation
Carriage Deflection roller in the crosshead die
Pull cord loop Carriage plug
1 4
2 5
3 6
6
4
6
2
4
3
300
34
5
1
2
Installation instructions and Instructions for use
Subject to technical modifications. – Date of issue
January/2023
39
Installation pull cords
The installation and removal of the pull cords should be performed by two
persons.
Do not twist the pull cords!
To release the pull cord fasteners, remove the small plugs (6) from the
carriages (2) and relieve the strain on the pull cords by pulling them in the
direction of the drop profile. Insert a screwdriver into the opening of the
carriages and press them down. The pull cord is now released and can be
carefully lowered. Close the opening by means of a plug again.
The pull cords are under tension.
Mounting guide rail end caps
After attaching the pull
cords, put the guide rail end
cap (1) on the guide rail. Fix
the guide rail end cap by
tightening the threaded pins
(2).
Legend
Guide rail end cap
Threaded pin M8
1
2
1
2
Installation instructions and Instructions for use
40
Subject to technical modifications. – Date of issue
January/2023
Installing the lateral end caps
Put the lateral cover caps (1) onto the side parts (2) of the awning box. The
positioning nipples (3) must protrude into the recesses of the side parts.
Due to the screwed magnets (4), the cover caps are then independently
holding onto the side part (2). Screw the cover cap additionally with the roof
profile (6). Therefore, use screw (5).
For installations with Varioplus roller shutters or LED, the cover caps
shall be only mounted when the wiring on the side part is finished
Screw the guide rails to the side part.
Screw the guide rails to the
strut of the side parts (2).
Use the screws (5) from the
mounting material.
Legend
Covering cap
Side part
Positioning nipple
Magnet
Countersunk screw M4x6
Roof profile
1
2
3
4
5
6
4
3
1
2
5
6
5

Installation instructions and Instructions for use
Subject to technical modifications. – Date of issue
January/2023
41
Installation of the guiding tubes
Insert the conduit (1)
between the conduit
brackets (3). Screw the
conduit with the screws (2)
from the mounting material.
If necessary, align the
conduit brackets. (ensure
equal distances)
Pay attention to the different
arrangement of the conduits
in case of 1 or 2 conduits.
Legend
Conduit
Fillister head screw M10x55
Conduit bracket
Arrangement in case of one conduit
Arrangement in case of two conduits
1
2
3
4
5
=
=
1
2
1
2
3
==
==
~800-1000
4
5
Installation instructions and Instructions for use
42
Subject to technical modifications. – Date of issue
January/2023
Installing the anti-lift device
Slide the slot stones (1) into
the groove of the guide rails
(2). Then screw one
clamping part on the spring
side (3) and one clamping
part on the clamping side (4)
per unit to the slot stones.
Use the provided fastening
screws (5).
Push the pressure spring (7)
into the side hole of the
clamping part (3). Then
thread the wire cable (6)
(with pressed-on sleeve)
through the clamping part
(3). Cut it to the appropriate
length and mount the
threaded fitting (8) on it. To
do this, insert the cable into
the fitting as far as it will go
and clamp it with the two
threaded pins.
Screw the threaded fitting (8)
into the clamping part (4).
This tensions the cable.
Fix the fitting by tightening
the hexagon nut.
Legend
Sliding block Fillister head screw M8x20
Guide rail Wire cable with pressed.on clamping sleeve
Clamping part (spring side) Pressure spring
Clamping part (clamping side) Threaded fitting M8
1 5
2 6
3 7
4 8
=
=
1
2
3
4
5
3
6
7
8
4
8
Installation instructions and Instructions for use
Subject to technical modifications. – Date of issue
January/2023
43
Installing the anti-lift device
The anti-lift device (1) may
always only be mounted
directly above a conduit
bracket (2).
Through tensioning the wire
cable, the guide rails could
then otherwise be
contracted. This can have a
negative impact on the
installation’s functionality.
The double guide rail has no
guide grooves on the upper
side for the sliding blocks.
Therefore, the clamping
parts must be fixed with
drilling screws (4) on the
double guide rail (3).
Legend
Anti-lift device
Conduit
Double guide rail
Self-drilling head screw ø4.8x22
Plain washer
1
2
3
4
5
1
2
3
4
5
Installation instructions and Instructions for use
44
Subject to technical modifications. – Date of issue
January/2023
Mounting Varioplus roller blind - freely suspended
Installation
The Varioplus roller blind is
delivered already complete
and only needs to be
installed in the structure of
the ELEGANZA. A Varioplus
roller blind can only be used
in conjunction with rigid
(non-lowerable) columns.
The drive side of the
Varioplus (1) is always on
the drive side of the unit.
The installation of the
Varioplus roller blind is
identical to the installation of
the cross-beam:
Place the Varioplus roller
blind (2) between the
columns and screw it to the
brackets (5) of the columns
on both sides.
Use the screw (4) / (6) from
the mounting material for
this.
Legend
Drive side of Varioplus
Varioplus roller blind
Motor cable VP (10 m)
Cylinder-head screw M10x70 (for
edge columns)
Bracket for cross-beam
Cylinder-head screw M10x20 (for
middle hinges)
1
2
3
4
5
6
1
2
3
2
4
2
4
5

Installation instructions and Instructions for use
Subject to technical modifications. – Date of issue
January/2023
45
Mounting Varioplus roller blind - rail-guided
Installation
The Varioplus roller blind is
delivered already complete
and only needs to be
installed in the structure of
the ELEGANZA. A Varioplus
roller blind can only be used
in conjunction with rigid
(non-lowerable) columns.
The drive side of the
Varioplus (1) is always on
the drive side of the unit.
The installation of the
Varioplus roller blind is
identical to the installation of
the cross-beam:
Place the Varioplus roller
blind (2) between the
columns and screw it to the
brackets (5) of the columns
on both sides.
Use the screw (4) from the
mounting material for this.
Legend
Drive side of Varioplus
Varioplus roller blind
Motor cable VP (10 m)
Cylinder-head screw M10x70 (for
edge columns)
Bracket for cross-beam
1
2
3
4
5
1
32
4
2
4
5
2
Installation instructions and Instructions for use
46
Subject to technical modifications. – Date of issue
January/2023
Mounting Varioplus roller blind - rail-guided
Installation
Connect the Varioplus roller
blind (2) to an appropriate
setting cable and extend the
blind approx. 300 mm.
Take the enclosed guide
rails (7) and insert the
downpipe insert (9). Repeat
this on the opposite side.
Now place the guide rails (7)
in the corresponding
positions on the columns (6).
Make sure that the Varioplus
roller blind is aligned
properly, so that the guide
rail can be positioned in the
notch without any problems.
Legend
Drive side of Varioplus
Varioplus roller blind
Column profile
Guide rail 27x19mm C-shape
1
2
6
7
ca. 300
2
1
7
7
2
6
Installation instructions and Instructions for use
Subject to technical modifications. – Date of issue
January/2023
47
Mounting Varioplus roller blind - rail-guided
Installation
Screw the guide rail (7) onto
the column profile (6) with
the enclosed screws, using a
cordless screwdriver.
Pay attention to the
distances of the boreholes
and the position of the guide
rail (7), to avoid untrue
drilling.
Legend
Bracket for cross-beam
Column profile
Guide rail 27x19 mm C-shape
Covering cap for ground plate
A Column profile width
5
6
7
8
7
6
5
7
HV
HV
≥ 400 50
50
5
A
5
6
8
≥ 400
A
Installation instructions and Instructions for use
48
Subject to technical modifications. – Date of issue
January/2023
Mounting the Varioplus roller blind
Wiring
For units with Varioplus roller blinds, the drive-side guide rail (1) is already
prepared for a cable duct at the factory. It is delivered with a long hole
milling as well as a retracted retraction aid (2).
Connect cable (3) from the Varioplus roller blind to the end of the retraction
aid (2), which protrudes from the long hole. (Detail A). Use insulating tape
or such for this purpose. Now pull on the box-side end of the retraction aid
(2) and at the same time slowly push the cable into the guide rail over the
long hole, until the cable comes out at the box-side end of the guide rail.
Two persons are needed for this step.
Legend
Guide rail
Retraction aid (already retracted in the factory)
Varioplus roller blind cable (10 m)
1
2
3
1
22
A
22
3

Installation instructions and Instructions for use
Subject to technical modifications. – Date of issue
January/2023
49
Mounting the Varioplus roller blind
Wiring
Fix the cable (3) from the Varioplus roller blind with cable ties (4) to the side
part at the recesses provided for the purpose.
Legend
Varioplus roller blind cable
Cable tie
3
4
3
3
4
4
Installation instructions and Instructions for use
50
Subject to technical modifications. – Date of issue
January/2023
Installation/wiring LED
View: Box in delivery condition
View: Box with mounted guide rails (LED in box and guide rails)
In the delivery condition, the supply line (2) for the LED control unit and the connecting
cables (with STAK2) for the LED strips protrude from the upper covering profile (1).
Depending on the order, that can be up to three such connecting cables (3/4/5). If the
guide rails are mounted, 3 more cables (with STAS2) are added to the box. These are the
connecting cables of the LED strips from the two guide rails (7/8) and the lower covering
profile/box profile (6).
Legend
Roof profile Connecting cable for LED box
Supply line LED control unit Connecting cable LED strips box
Connecting cable LED FS right Connecting cable LED strips FS left
Connecting cable LED FS left Connecting cable LED strips FS right
1 5
2 6
3 7
4 8
3
1
2
45
8
6
7
Installation instructions and Instructions for use
Subject to technical modifications. – Date of issue
January/2023
51
Installation/wiring LED
Detail cable
outlet LED in box
Detail cable outlet LED in guide rail
With LED in the boxthe
cable of the LED strip (6)
comes out of the groove of
the floor profile (9).
With LED in the guide
railthe cable of the LED strip
(7/8) comes out between the
side part (10) and the floor
profile (9).
When installing the guide
rails, make absolutely sure
that the cable of the LED
strip is not damaged or
crushed and thread it
carefully out through the gap
between the side panel and
the floor profile.
Put the Hirschmann connectors together
and stow them in the roof profile
Now connect the connection
cables of the LED control
unit (STAK2) with the
connection cables of the
LED strips (STAS2). To do
this, plug the Hirschmann
connectors together.
Then slide the Hirschmann
connectors into the
compartment of the roof
profile where the LED control
unit is also stowed.
6
9
78
9
10
Installation instructions and Instructions for use
52
Subject to technical modifications. – Date of issue
January/2023
Installation/wiring LED
Tighten the cables of the
LED strips and the cable of
the LED control unit tautly
and fix them with cable ties
(11) on the side part (12).
There are recesses (13) in
the side part (12), where the
cable ties can be threaded
through.
Legend
Cable LED control unit
Cable tie
Side part
Recesses for cable tie
In the case of unit
combinations, it is necessary
to remove the upper
covering profile for wiring the
LED strips.
2
11
12
13
11
11
11
12
2
13
13
13

Installation instructions and Instructions for use
Subject to technical modifications. – Date of issue
January/2023
53
Malfunctions
What is the matter, if...
... the front rail moves to the awning box
askew?
The awning(s) was/were not diagonally
aligned during installation.
Solution: Measure the
diagonal as described in
Chapter “Aligning the unitd
align the awning accordingly.
The tension on the right side or guide rail is
too high or too little on the left side or guide
rail.
Solution: Check the tension
as described in Chapter
“Installation of the pull cords”.
The awning cover is sewn askew.
Solution: Place a small fabric
remnant underneath the right
outer seam of the awning
cover. For this purpose it is
necessary to completely
extend the awning. This has
the effect that the awning cover
rolls up slightly thicker and
brings the front rail closer to
the awning box.
The spring mechanics on the left side is
defective.
Solution: Loosen the pull cord
on the left side. Try to turn the
tape pulley. If the tape pulley
cannot be turned at all or very
easily, the spring mechanics is
defective and must be
replaced.
Installation instructions and Instructions for use
54
Subject to technical modifications. – Date of issue
January/2023
Malfunctions
What is the matter, if...
... the front rail moves centrally to the
awning box?
The tension is too high on both sides.
Solution: Check the tension
as described in Chapter
“Installation of the pull cords”. If
necessary, take off one lapping
of the pull cords of the tape
pulleys.
Installation instructions and Instructions for use
Subject to technical modifications. – Date of issue
January/2023
55
Malfunctions
What is the matter, if...
... the cover slacks in the extended condition?
The tension is too low on one or both sides.
Solution: Check the tension as described in Chapter “Installation of the pull
cords”. Place an additional lapping of the pull cords on the tape pulleys if
necessary.
One or both spring mechanics are defective.
Solution: Loosen the pull cords and try to turn the tape pulleys. If one or
both tape pulley(s) cannot be turned at all or very easily, they are defective
and must be replaced.
The end position of the motor is not set correctly. The front rail extends too far.
Solution: Reset the end position of the motor in accordance with the
supplied setting instructions.
Installation instructions and Instructions for use
56
Subject to technical modifications. – Date of issue
January/2023
Wiring diagram for motors with
ONYX.CONNECTOR
Legend
Junction box
ONYX.
CONNECTOR
Motor
Hirschmann
STAK 3
Hirschmann
STAS 3
STAS 3
STAS 3 for power supply
1 Neutral conductor N
2PhaseL
3 Connection 3 not assigned
4 Protective conductor PE
STAK 3
STAK 3 for motor
connection
1 Neutral conductor N
2PhaseUP
3PhaseDOWN
4 Protective conductor PE
For more details on the electrical connections, instructions for use and
programming, please refer to the section “Instructions for use and
configuration with ONYX” or the supplied documents.
1
2
3
5
6
ONYX.CONNECTOR
2
2
3
3
1
1
4
4
PEN
M
~
NLPE
4
4
1
1
3
3
2
2
PEN
L
1
2
3
5
6
5
6
44
321
123
44

Installation instructions and Instructions for use
Subject to technical modifications. – Date of issue
January/2023
57
Wiring diagram for motors with ONYX.NODE
Legend
Junction box
ONYX.NODE
Button
Motor
For more details on the electrical connections, instructions for use and
programming, please refer to the section “Instructions for use and
configuration with ONYX” or the supplied documents.
1
2
3
4
ONYX.NODE
0+N
NNL L
LOCAL MOTOR
POWER
M
~
N
L
PE
1
2
34
Installation instructions and Instructions for use
58
Subject to technical modifications. – Date of issue
January/2023
Wiring diagram for motors with Somfy io
Legend
Junction box
Hirschmann plug connection
Somfy io motor
Hirschmann STAK 3
Hirschmann STAS 3
For more details concerning the electrical connections, powers, operating
instructions and programming, please refer to the enclosed documents of
the manufacturer or the HELLA installation instructions.
With the radio system Somfy io all receivers must be taught one after
another (order does not matter), i.e. do not connect several receivers to the
network at the same time as the radio system does not support a
simultaneous teaching process of multiple components.
1
2
3
5
6
M
~
N
LPE
4
4
1
1
3
3
2
2
1
2
3
5
6
Installation instructions and Instructions for use
Subject to technical modifications. – Date of issue
January/2023
59
Wiring diagram for motors with switch operation
Legend
Junction box
Switch
Hirschmann plug connection
Motor
Hirschmann STAK 3
Hirschmann STAS 3
For more details concerning the electrical connections, powers, operating
instructions and programming, please refer to the enclosed documents of
the manufacturer or the HELLA installation instructions.
It is essential that switches for the awning drive be electrically and
mechanically locked.
1
2
3
4
5
6
M
~
N
LPE
4
4
1
1
3
3
2
2
1
2
3
4
5
6
Installation instructions and Instructions for use
60
Subject to technical modifications. – Date of issue
January/2023
Wiring diagram for LED lighting ONYX/Somfy io
Legend
Junction box
Control unit LED
ONYX/Somfy io
Connection of LED strips
For more details concerning the electrical connections, instructions for use
and programming, for “ONYX”, please refer to the section “Instructions for
use and configuration with ONYX”, or the supplied documents for ONYX
and Somfy.
1
2
3
NL
NL
1
230 V AC
24 V DC
LED 1 LED 2 LED 3
+ - + - + -
2
3

Installation instructions and Instructions for use
Subject to technical modifications. – Date of issue
January/2023
61
Operating instructions and configuration with
ONYX
General
Before configuring, download HELLA’s free app ONYX from the App
store/Google Play to your smart phone.
Before you can use the unit with ONYX.CENTER or ONYX.CLICK, it must
be added in the ONYX app. You will find additional information regarding
the configuration in the instructions for ONYX.CENTER / ONYX.CLICK
directly in the ONYX app or in the download area on our homepage
https://www.hella.info.
Precondition:
The unit is already set up and supplied with electricity.
Stand alone configuration with ONYX.CLICK
To configure the unit, you first have to connect to the ONYX.CLICK hand-
held radio transmitter via the ONYX app. The system is configured and
added under “Configure devices” and “+”. All settings for existing sensors
can be made under “ ” and “Advanced setting” of the respective device.
Smart home configuration with ONYX.CENTER
To configure the unit, you simply have to connect to ONYX.CENTER in the
ONYX app. Use “+” to configure and add the installation. All settings for
existing sensors can be made under “Automatic”.
Attention!
When configuring ONYX.CENTER, “Configuration mode” must be active! It
can be found under “Settings”.
Installation instructions and Instructions for use
62
Subject to technical modifications. – Date of issue
January/2023
Instructions for use and configuration with Somfy
Please refer to the enclosed instructions of the manufacturer for the Somfy
unit operating possibilities via control devices.
Installation instructions and Instructions for use
Subject to technical modifications. – Date of issue
January/2023
63
Activation guidelines for electric drives
The motors we use are drives with integrated planetary gear, brakes, limit
stops at the top and at the bottom, and thermo cut-off switches, also not
only a motor, but a complete drive system.
In some respect, the drives do NOT correspond to other household
electrical consumers. Please strictly observe the following notes and safety
instructions.
The construction, checking, commissioning and error-correcting of the
electrical system are only allowed to be carried out by an electrician (acc. to
VDE 0100). In case of improper connection, considerable danger can arise
for the user.
-Follow the wiring diagram precisely!
- We cannot accept responsibility for damage, that can result from
improper installation.
- Never simultaneously activate the drives with an UPWARDS and a
DOWNWARDS signal!
-Keep a break of approx. 0.5 seconds between the UPWARDS and
the DOWNWARDS command (is often neglected with Instabus EIB-
systems).
Drives with mechanical end position adjustment must not be controlled in
parallel.
Radio interference suppression
The drives are provided with a radio interference suppression according to
the current VDE standards and EC Guidelines. If the drives are operated
with other devices, that include interferences, it is the fitter's duty - as part of
the obligation to suppress interference - to ensure that the entire unit
complies with the current regulations.
Operation in wet spaces
The drives are "splash-proof"; if they are operated in wet spaces, the VDE-
guidelines, inter alia VDE 0100/Parts 701, 702, the guidelines of the local
electric supply companies and of the TÜV must be observed and fulfilled.
Both the instructions and notes given in these instructions, as well as
the instructions and notes given in the respective enclosed
instructions of the manufacturers of the drive systems must be
observed.
Installation instructions and Instructions for use
64
Subject to technical modifications. – Date of issue
January/2023
Commissioning/functional check
Extend and retract the unit in and out completely. When extending the unit
for the first time, make sure no one is in the operating radius or standing
below the unit.
Make sure that during the later operation the units can be extended freely
and without blockings. Do not extend the unit, if objects or persons are in
the operating radius of the sun protection unit. Please observe the safety
instructions.
After the first extending check the mounting material and the construction
elements for strength.
Automatic control devices or switches, that are not in the operator's field of
vision, may not be used for test runs of motor driven units.
We recommend the use of a test cable for the provisional operation of the
motor.
Check all settings.
Check all screwed connections for tightness.
The awning is a sun protection device that is only allowed to be used for the
intended use. Wrong use can put the user in danger.
Additional loadings such as objects that are sticked to the awning or cable
tensionings can damage the awning or lead to its crashing, and are
therefore not allowed.
Clean the elements (see maintenance instructions).
Pass these instructions as well as possible instructions of the motor, switch
and control manufacturer on to the user.
Brief the user, whereupon you provide comprehensive information on the
safety and user instructions of the system.
Have the correct design of the system as well as the installation and briefing
with the safety information confirmed in writing (see handover report).

Installation instructions and Instructions for use
Subject to technical modifications. – Date of issue
January/2023
65
Removal
Switch the unit dead and take safety precautions against unintentional
switching on.
The removal is carried out in reverse order to the installation.
Attention: The threaded bolt (see chapter Installation box) that is screwed
into the mounting bracket, may be only removed when the guide rails have
been disassembled. Otherwise there is a risk that the box will be levered
out of the mounting bracket!
Installation instructions and Instructions for use
66
Subject to technical modifications. – Date of issue
January/2023
Handing over report (for the fitter)
Dear Customer,
We are glad that you have opted for a HELLA brand product. Our units are fabricated with
greatest care and many years of experience.
The instructions for use and the installation instructions have been handed over and must
be read before using the product.
An introduction has taken place.
The safety instructions were pointed out.
Your product
Pergola awning ELEGANZA / ELEGANZA protect
was manufactured in accordance with EN 13561:2004+A1:2008
and was installed professionally and handed over on the
...........................................................................................................................................
Dealer
Name
Place
Postal code
Date
Name
Street
Customer
Place
House number
Signature
Signature
Date
First name
Installation instructions and Instructions for use
Subject to technical modifications. – Date of issue
January/2023
67
Handing over report (for the user)
Dear Customer,
We are glad that you have opted for a HELLA brand product. Our units are fabricated with
greatest care and many years of experience.
The instructions for use and the installation instructions have been handed over and must
be read before using the product.
An introduction has taken place.
The safety instructions were pointed out.
Your product
Pergola awning ELEGANZA / ELEGANZA protect
was manufactured in accordance with EN 13561:2004+A1:2008
and was installed professionally and handed over on the
...........................................................................................................................................
Dealer
Name
Place
Postal code
Date
Name
Street
Customer
Place
House number
Signature
Signature
Date
First name
Installation instructions and Instructions for use
HELLA Interior Venetian
Blinds
regulate the lighting in a
room very comfortably,
immediately gracing it
with much more
atmosphere.
HELLA Insect screens
and you decide who is
allowed to come in and
who isn't.
HELLA Pleated Blind
folds up very compactly
and protects very well
against the sun and nosey
glances where only little
space is available.
HELLA Outdoor Blinds
serve for the light
regulation, as view
protection, anti-glare blind
and heat protection.
HELLA Front-mounted
Roller Shutter
for more safety and
protection against rain,
wind, heat, the cold, noise,
incident light and nosey
glances, also available for
subsequent installation.
HELLA Vertical awning
With toggle catch
mechanism for a lovely
façade design with perfect
heat and glare protection.
For questions, wishes and ideas:
HELLA Infoline +43/(0)4846/6555-0
HELLA Sonnen- und Wetterschutztechnik GmbH
A-9913 Abfaltersbach, No. 125
Phone: +43/(0)4846/6555-0
Fax: +43/(0)4846/6555-134
e-mail: office@hella.info
Internet: http://www.hella.info
Other manuals for ELEGANZA
1
This manual suits for next models
1
Table of contents
Other Hella Accessories manuals
Hella
Hella ONYX.TAG wind Setup guide
Hella
Hella ONYX.WEATHER User manual

Hella
Hella C2 Setup guide

Hella
Hella PM03 Setup guide

Hella
Hella SOLEYA Setup guide
Hella
Hella SOLEYA User manual

Hella
Hella APS-R Manual

Hella
Hella PM07 protect Setup guide
Hella
Hella 8JB 007 242-011 User guide

Hella
Hella APS-90 Manual
