manuals.online logo
Brands
  1. Home
  2. •
  3. Brands
  4. •
  5. Helvex
  6. •
  7. Bathroom Fixture
  8. •
  9. Helvex FB-110-38-3.5 User manual

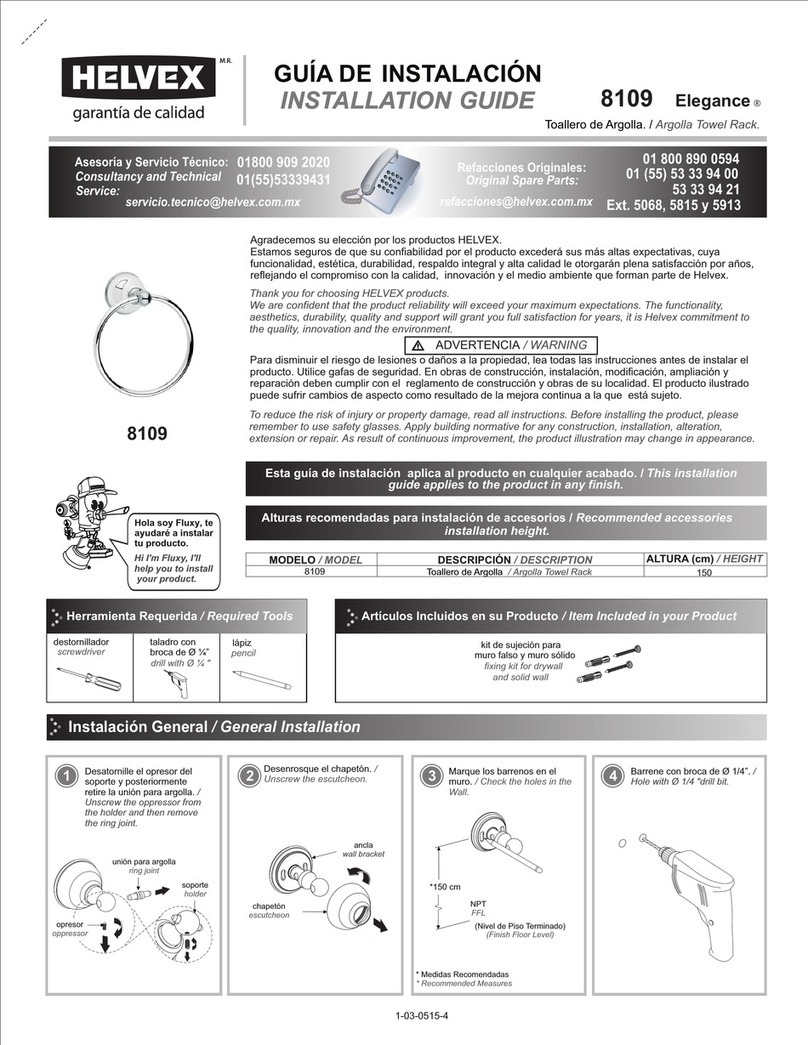
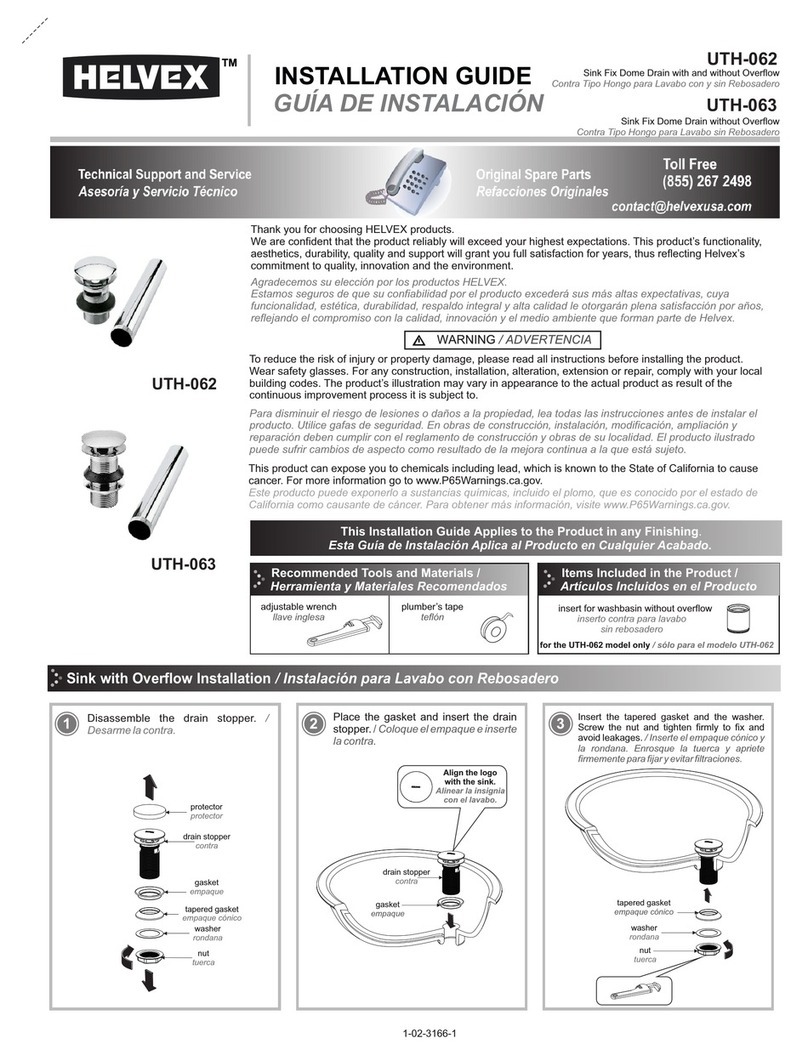
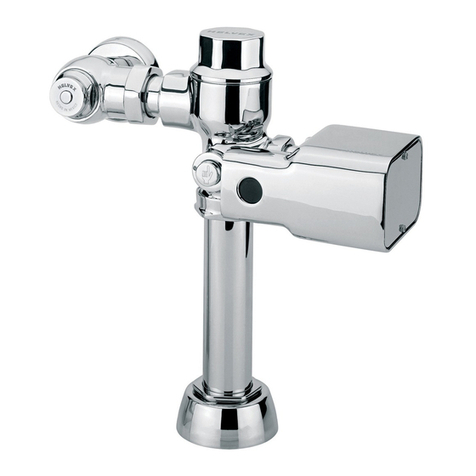
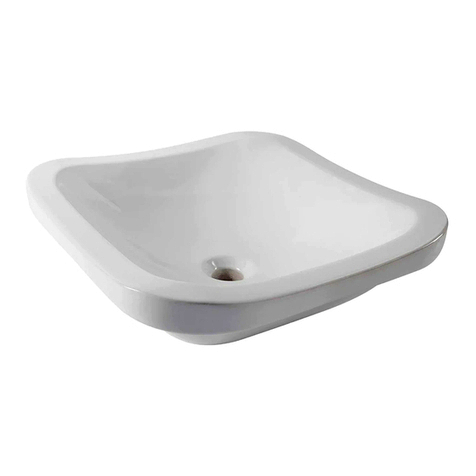
Helvex FB-110-38-3.5 User manual

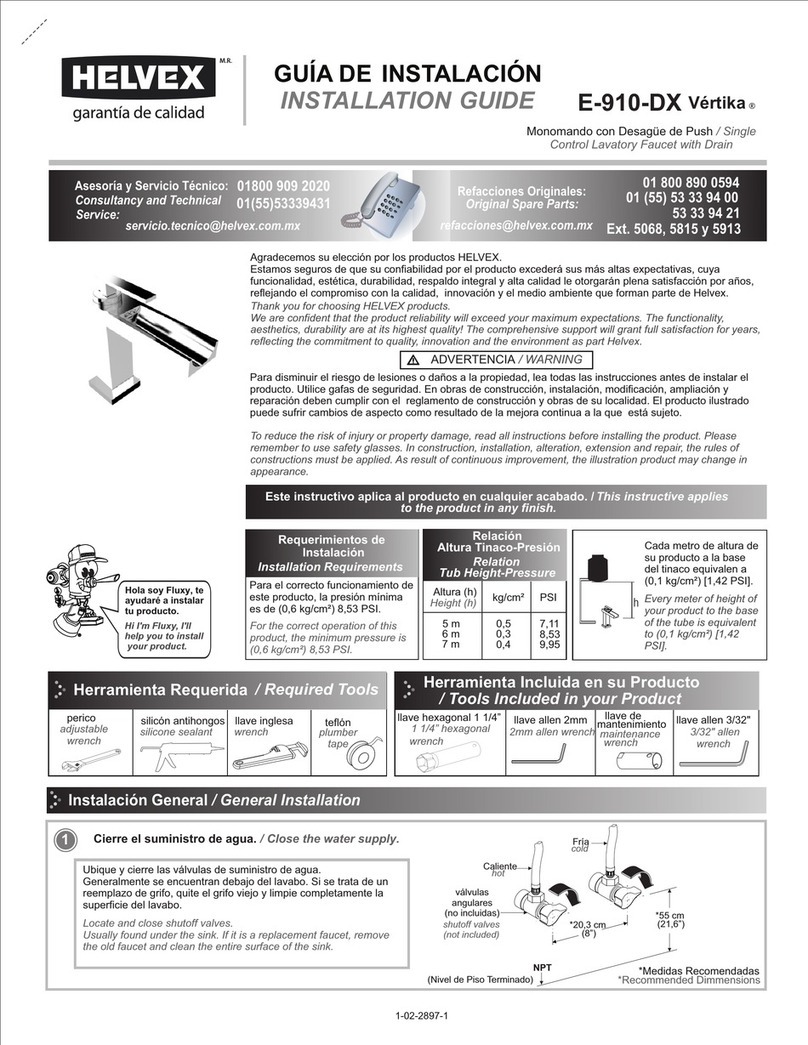
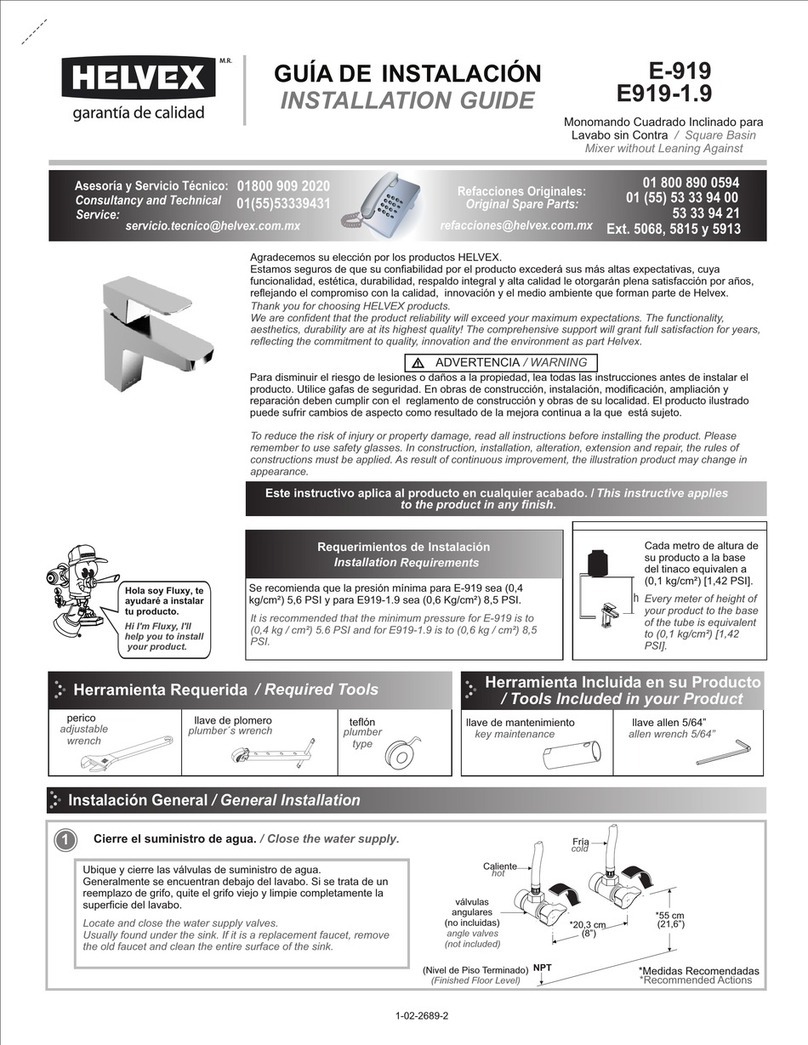
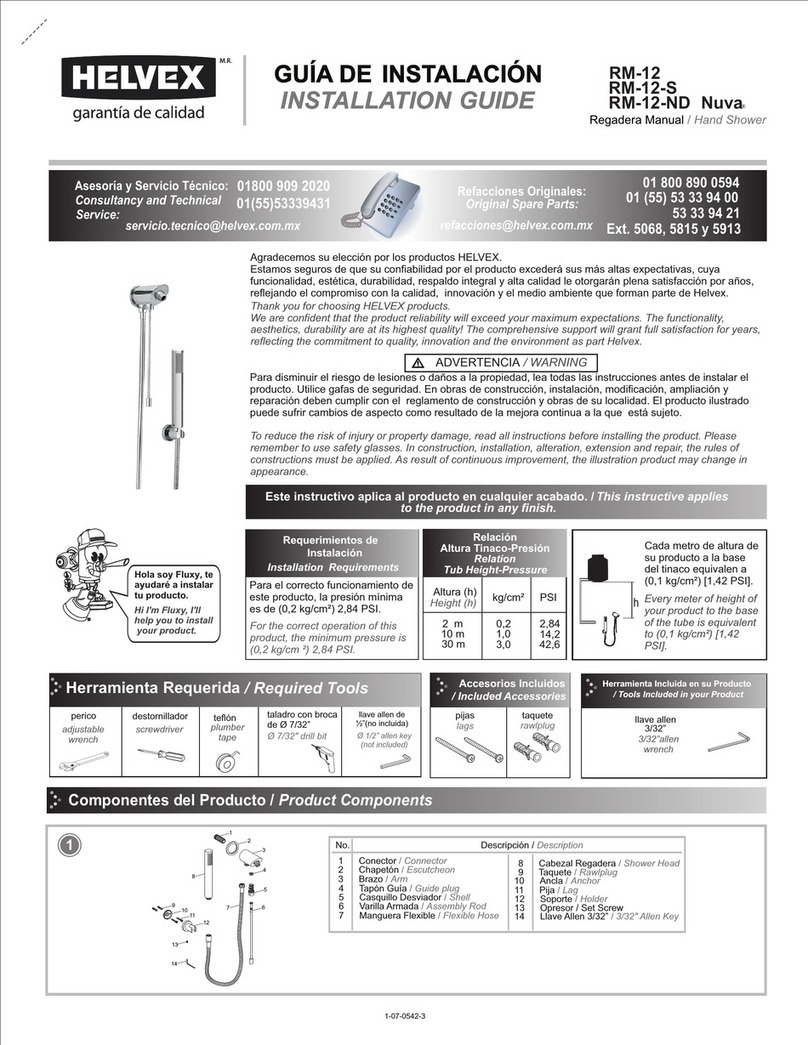
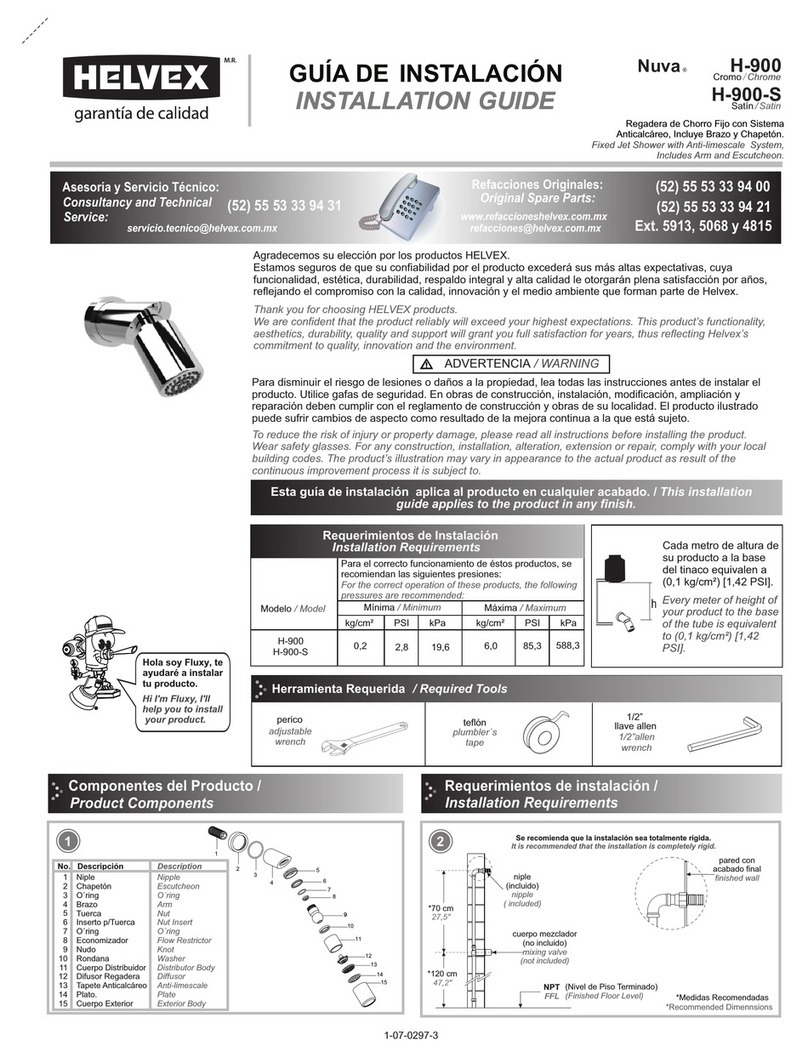
ADVERTENCIA / WARNING
Este instructivo aplica al producto en cualquier acabado. / This instructive applies
to the product in any finish.
Herramienta Requerida
desarmador plano teflón
/ Required Tools
teflon
flathead
screwdriver
Herramienta Incluida en su Producto
/ Tools Included in your Product
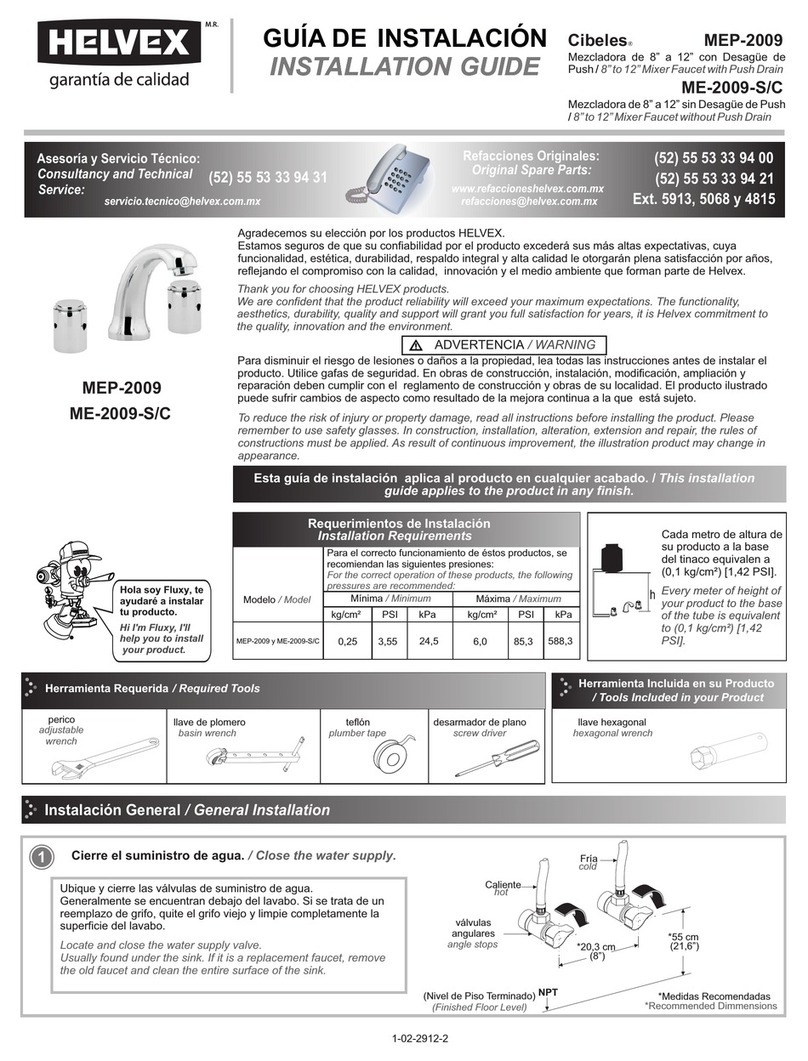
Cada metro de altura de
su producto a la base
del tinaco equivalen a
(0,1 kg/cm²) [1,42 PSI].
Every meter of height of
your product to the base
of the water tank (0,1
kg/cm²) [1,42 PSI]
equivals.
Requerimientos de
Instalación
Para el correcto funcionamiento de
este producto, la presión mínima
es de (2,0 kg/cm²) 28,4 PSI.
Relación
Altura Tinaco-Presión
10 m
30 m
40 m
PSI
Altura (h)
14,2
42,7
85,3
kg/cm²
1,0
3,0
4,0
INSTALLATION GUIDE
GUÍA DE INSTALACIÓN
1-06-1016-1
For the correct operation of this
product, the minimum pressure is
(2,0 kg/cm ²) 28,4 PSI.
Installation Requirements Relation
Tub Height-Pressure
Height (h)
Fluxómetro de Sensor Electrónico de
Batería para W. C. / Battery Powered
Sensor Flushometer for WC
Para disminuir el riesgo de lesiones o daños a la propiedad, lea todas las instrucciones antes de instalar el
producto. Utilice gafas de seguridad. En obras de construcción, instalación, modificación, ampliación y
reparación deben cumplir con el reglamento de construcción y obras de su localidad. El producto ilustrado
puede sufrir cambios de aspecto como resultado de la mejora continua a la que está sujeto.
Agradecemos su elección por los productos HELVEX.
Estamos seguros de que su confiabilidad por el producto excederá sus más altas expectativas, cuya
funcionalidad, estética, durabilidad, respaldo integral y alta calidad le otorgarán plena satisfacción por años,
reflejando el compromiso con la calidad, innovación y el medio ambiente que forman parte de Helvex.
Thank you for choosing HELVEX products.
We are confident that the product reliability will exceed your maximum expectations. The functionality,
aesthetics, durability are at its highest quality! The comprehensive support will grant full satisfaction for years,
reflecting the commitment to quality, innovation and the environment as part Helvex.
To reduce the risk of injury or property damage, read all instructions. Before installing the product, please
remember to use safety glasses. In construction, installation, alteration, extension and repair, the rules of
constructions must be applied. As result of continuous improvement, the illustration product may change in
appearance.
FB-110-38-3.5
llave inglesa
wrench
cortador de tubo
pipe cutter flushvalve wrench
llave plana para fluxómetro 5/64” allen wrench
llave allen 5/64”
Dimensiones Recomendadas / Recommended Dimensions
Especificaciones Técnicas / Technical specifications
6 Baterías Alcalinas Tamaño AA (6 x LR6)
Tensión de Alimentación: 9 Vcc.
Consumo Máximo de Potencia: 3 Watts.
6 AA Alkaline Batteries (6 x LR6)
Voltage: 9 VDC.
Maximum Power Consumption: 3 Watts.
Hola soy Fluxy, te
ayudaré a instalar
tu producto.
Hi I'm Fluxy, I'll
help you to install
your product.
1
Nota: La tubería debe ser de
Ø 32mm (Ø 1 ¼”) desde la
alimentación.
Note: The pipe diameter should
be Ø 32mm (Ø1 ¼ ")from the
feeding tube
tubería de alimentación
Ø 32mm (Ø 1 ¼”) (no
incluida)
supply pipe Ø 32mm
(Ø 1 ¼") (not included)
reducción campana de
Ø 32 a 25,4 mm (Ø 1 ¼”
- 1”) (no incluida)
reduction bell Ø 32 to 25,4mm
(1 ¼" - 1") (not included)
*A Verificar la dimensión
de acuerdo a la ubicación
del mueble W. C.
* A Check the dimension
according to the location
of the unit W. C.
adaptador
(incluido)
adapter
(included)
*A
tubo Ø 25,4 mm (Ø 1”) (no incluido)
pipe Ø 25,4 mm (Ø 1") (not included)
cámara de aire con tubo de 32mm
(1¼”) air chamber tube 32mm (1¼”)
tubo Ø 32 mm (Ø 1 ¼”)
(no incluido)
tube Ø 32mm(Ø 1 ¼”)
(not included)
60 cm
(23,6”)
60 cm
(23,6”)
[email protected]
Original Spare Parts:
Consultancy and Technical
01(55)53339431
01800 909 2020 01 (55) 53 33 94 00
Refacciones Originales:
Asesoría y Servicio Técnico:
Ext. 5068, 5815 y 5913
Service:
53 33 94 21
01 800 890 0594
[email protected]
El aparato no debe utilizarse por personas
(incluyendo niños) con capacidades físicas
sensoriales o mentales reducidas, o carezcan
de experiencia o conocimiento, a menos que
reciban supervisión o capacitación.
Los niños deben supervisarse para que no
jueguen con el aparato.
The device should not be used by persons
(including children) with reduced physical
sensory or mental capabilities, or lack of
experience and knowledge, unless they
receive supervision or training.
Children should be supervised to not play with
the appliance.
22
* Medidas recomendadas.
* Recommended dimesions.
11,5 - 13 cm
(4,5” - 5,1”)
pared con
acabado
final
finish wall
24 - 28 cm
(9,4” - 11”)
6 - 16 cm
(2,4” - 6,3”)
NPT
(Nivel de Piso Terminado)
(Finished Floor Level)
2
12
6
7
10
11
9
8
3
2
1
Para spud de Ø 38 mm
For Ø 38 mm spud
Componentes del Producto / Product Components
4
5
13
3
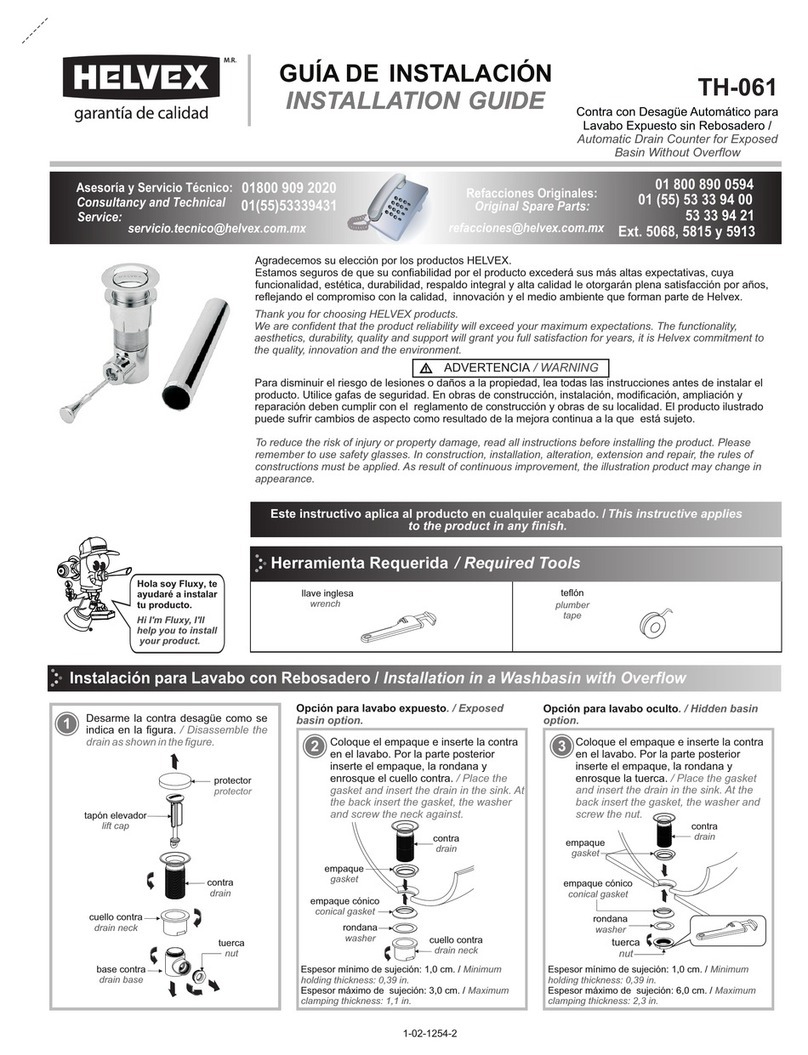
Desarme el fluxómetro. /
Disassemble the flushometer.
4
Instalación General / General Installation
5
cortador de
tubo
(no incluido)
pipe cutter
(not included)
camisa
cover tube
A
llave de
retención
stop valve
adaptador
adapter
chapetón
escutcheon llave de
retención
stop valve
camisa
cover tube
llave de
retención
stop valve
cuerpo armado
body assembly
adaptador
adapter
tuerca
nut
dispositivo
electrónico
electronic
device
14
Nota: El tubo de descarga o niple mide 9” de
largo y se puede recortar.
Note: The length of the nipple is 9" and can be
trimmed.
15
16
17
15
DESCRIPCIÓN
Cúpula Ciega Fluxómetro
Émbolo 3.5L
Rondana Vulcanizada
Dispositivo Electrónico Flux Baterias
Botón Accionador Mecánico
Anillo de Presión
O´ring 2-123
Llave de Retención Armada
Adaptador
Tubo Camisa
Chapetón Llave de Retención
O´ring 2-118
Tapón p/Fluxómetro de Doble Botón
Kit de mantenimiento
Rondanas y Tuerca Spud 38 c/Bolsa
Kit Rondanas Spud de 38 mm
Chapetón Grande Spud 38 c/Bolsa
No.
1
2
3
4
5
6
7
8
9
10
11
12
13
14
15
16
17
DESCRIPTION
Flushometer Blind Dome
3,5 L Piston
Vulcanized Washer
Electronic Device
Override Button
Locking Ring
O´ring 2-123
Stop Valve
Adapter
Cover Tube
Stop Valve Escutcheon
O´ring 2-118
Cap for Button Holder
Maintenance Kit
Washers and Nut Spud 38 w / Bag
Spud Kit 38mm Washers
Big Spud Flange 38 w/Bag
Nota: Recorte la camisa si es necesario.
Note: Trim cover tube if necessary.
Presente la llave de retención y el adaptador (incluido) con respecto a la ubicación del
mueble. / Present the stop valve and adapter (included) according to the location of the
toilet.
3
chapetón
escutcheon
llave de
retención
stop valve
camisa
cover tube
8
Solde el adaptador. / Weld the
adapter.
67
tubería de alimentación
Ø 25 mm (1”) (no incluida)
supply pipe Ø 25 mm (1 ")
(not included)
pared con
acabado final
finish wall
adaptador
(incluido)
adapter (included)
A
Nota: La instalación puede ser izquierda o derecha.
Note: Installation can be left or right.
cuerpo armado
body assembly
cortador de tubo(no incluido)
pipe cutter (not included)
niple
nipple
Coloque el cuerpo armado y verifique
la distancia (B) y si es necesario
recorte el niple. / Place the body
assembly and check the distance (B)
and if necessary cut the nipple.
B
Arme el niple para spud. / Assemble the nipple for the spud.
9
tuerca
nut
rondana
washer
rondana de hule
rubber washer
rondana de hule
rubber washer
rondana
washer
tuerca
nut
niple recto
de 38 mm
straight nipple
38 mm
tapón
cap
Verifique el apriete
del spud. / Check
the tightness of
the spud.
chapetón
escutcheon
spud
(no incluido)
(not included)
cuerpo armado
body assembly
botón
accionador
override button
Coloque el chapetón y enrosque el cuerpo armado sin apretar. /
Place the escutcheon and screw the body assembly loosely.
10 Coloque el niple armado. / Place the nipple assembly.
11
cuerpo
armado
body
assembly
llave de
retención
stop valve
niple
armado
nipple assembly
Nota: Enrosque el niple armado, posteriormente apriete firmemente el cuerpo
armado a la llave de retención.
Note: Screw nipple assembly, then firmly tighten the body assembly to stop valve.
Verifique que las rondanas estén
bien colocadas. / Check that the
washers are properly installed.
Nota: Si requiere el cambio de posición del
cuerpo armado, desenrosque el tapón y el
botón accionador e inviértalos en su
posición.
Note: If you require repositioning of the
body assembly, unscrew the cap and the
override button and toogle their positions.
A: Longitud final.
A: Final Length
Inserte el chapetón con la camisa y
enrosque la llave de retención. / Insert
the flange with the cover tube and
screw the stop valve.
luz roja
parpadeando /
red light blinking
4
Cierre la llave de retención y abra el
suministro general del agua, retire la
cúpula, la rondana y émbolo. / Close
the stop valve and open the general
water supply, remove the dome, the
washer and piston.
13
cúpula
dome
rondana
washer
cúpula
dome
rondana
washer
émbolo
(color naranja)
piston
(orange color)
dispositivo
electrónico
electronic device
Coloque el dispositivo electrónico. /
Place the electronic device.
12 Coloque la rondana, la cúpula y
posteriormente abra la llave de
retención para purgar. / Place the
washer, dome and then open the stop
valve to purge.
14
filtro
filter
Cierre la llave de retención, retire la
cúpula, rondana y el dispositivo
electrónico. / Close the stop valve,
remove the dome washer and the
electronic device.
dispositivo
electrónico
electronic device
rondana
whaser
cúpula
dome
Verifique que no exista basura en el
orificio, en el filtro y en la cúpula. En
caso de la existencia de residuos,
limpie a chorro de agua. / Check that
there is not waste inside the hole in the
filter and in the dome. In case of any
residues, clean with water jet.
orificio
orifice
cúpula
dome
Coloque el émbolo, la rondana, la
cúpula, el dispositivo electrónico y abra
la llave de retención completamente. /
Place the piston, the whaser, the
dome, the electronic device and open
the stop valve completely.
15 16 17
basura
garbage
porta pila
battery holder
verifique que no se doblen
los filamentos / check the
pins are not bent
Conecte el conector del sensor en el
porta pila. / Connect the sensor in the
battery holder.
18 Retire el porta pila. / Remove the
battery holder. 19
porta pila
battery holder
20 Espere hasta que la luz roja deje de
parpadear. / Wait until the red light
stops flashing.
dispositivo
electrónico
electronic device
rondana
whaser
cúpula
dome
émbolo
(color naranja )
piston
(orange color)
conector del sensor
sensor connector
5
Cambio de Pila / Battery Replacement
26 27
Cambie las pilas por una nuevas. /
Replace batteries with a new one.
Arme nuevamente. / Reassemble.
Retire el porta pilas. / Remove the
battery holder
25
NOTA: Cuando la luz roja parpadea, indica cambio de pila.
NOTE: When the red light flashes, is necessary the battery replacement.
24 Luz roja parpadeando
Red light blinking
cambio de pila
battery replacement
=
luz roja
parpadeando
red light blinking
23
40 cm +/- 15%
(ajuste de fábrica)
40 cm + / - 15%
(factory setting)
El fluxómetro también posee un botón de
accionamiento manual en caso de que se
requiera. / The flushometer also has a hand
operated override button if required.
botón de
acción manual
hand operated
override button
Operación /Operation
22 Accione tres veces permitiendo el ciclo completo de descarga
entre cada accionamiento. / Do three complete flushes by
pressing the override button.
botón
button Coloque la etiqueta
antibacterial. / Place the
anti-bacterial label.
21
Al retirarse el usuario el sensor ya no percibe la presencia del
mismo y el sistema se acciona automáticamente en 2,5 seg.
descargando un volumen de agua de 3,2 a 3,5 litros. / When the
user leaves the sensor detection zone, the system automatically
flushes 0,84 to 0,92 gallons of water.
porta pilas
battery holder
porta pila
battery holder
Verifique la polaridad de las pilas /
Check the polarity of the batteries
porta pilas
battery holder
pilas
batteries
Introduzca el porta pila con pila e inserte la tapa con el empaque
y apriete enroscando los tornillos. / Insert the battery holder with
battery cover and insert and tighten the gasket by tightening the
screws.
empaque
gasket tapa
cover
porta pila con pilas
battery holder with batteries
6
28
29
Mantenimiento del Émbolo / Piston Maintenance
Periodo óptimo de mantenimiento preventivo del émbolo: Cada 6 meses.
Optimal preventive piston maintenance: Every 6 months.
Cierre la llave de retención y genere una descarga de agua para
liberar la presión en el cuerpo. / Close the stop valve and press
the override button to release the pressure in the body.
botón
button
llave de retención
stop valve
cúpula
dome
rondana
washer
émbolo
(color naranja)
piston (orange color)
Retire la cúpula, rondana y el émbolo.
/ Remove the dome, washer and piston.
30 Desarme el émbolo, lave a chorro de agua y reemplace las piezas que tengan desgaste si es necesario, finalmente arme nuevamente. /
Disassemble the piston and wash with water jet and replece wear parts if necessary, finally reassemble.
31 32
botón
button
llave de retención
stop valve
Limpieza del Dispositivo Electrónico / Cleaning Electronic Device
Cierre la llave de retención. / Close the stop valve. Retire el dispositivo electrónico. / Remove the electronic
device.
dispositivo
electrónico
electronic device
cúpula
dome
tornillo
screw
rondana
washer
asiento con perno
bolt seat
llantita vulcanizada
(verificar desgaste)
piston vulcanized tire
(check for wear)
(verificar desgaste)
rubber washer
(check for wear)
rondana de hule
émbolo macho
(color naranja)
male piston
(orange color)
émbolo hembra
female piston
Asegúrese que las muescas estén
limpias. / Make sure the notch are
clean.
resorte émbolo
spring piston
perno regulador
adjusting bolts
muesca
notch
33 34
Retire manualmente el cuerpo interior y el filtro, posteriormente
limpie a chorro de agua con cepillo de cerda suave. / Manually
remove the innerbody and filter, then clean with water jet and a
soft brush.
35
36
Ajuste de la Distancia de Detección / Adjusting the Detection Distance
37 38
Coloque una hoja de papel a menos de
5 cm hasta que la luz roja se mantenga
encendida. / Place a sheet of paper
lower than 5 cm until the red light
remains on.
Inmediatamente mueva la hoja de papel a la distancia deseada, y mantengala en esa
posición hasta que la luz roja se apague. Posteriormente verifique la distancia ajustada,
arme y coloque el porta pila en su lugar. / Immediately move the paper to the desired
distance, and keep it in that position until the red light turns off. Then check the set distance,
assemble and place the battery holder .
luz roja
red light
7
filtro
filter
cuerpo interior
innerbody
botón
button
La distancia de detección esta calibrada de fábrica a 40 cm +/- 7,5 cm.
The detection distance is factory calibrated at 40 cm + / - 7.5 cm.
Retire el porta pila. / Remove the battery holder.
Desconecte y conecte. / Disconnect and connect.
Mantenga la hoja hasta que la
luz roja se apague. / Keep the
blade until the red light turns off.
rango de
ajuste
adjustment
range
8º
40 cm
(15,7”)
20 cm
(7,9”)
hoja de papel
paper sheet
Nota: Verifique la distancia ajustada.
Note: Check the set distance.
hoja de papel
paper sheet
dispositivo
electrónico
electronic device
hoja de papel
paper sheet
8º
luz roja
parpadeando
red light blinking
5 cm max.
Arme nuevamente y enrosque el dispositivo electrónico al
cuerpo del fluxómetro. Finalmente abra completamente la llave
de retención. / Reassemble and screw the electronic device to
the body assembly then fully open the stop valve.
porta pila
battery holder
porta pila
battery holder
verifique que no se doblen
los filamentos / check the
pins are not bent
conector del sensor
sensor connector
HELVEX, S. A. DE C.V. Calzada Coltongo 293, Col. Industrial Vallejo 02300 Del. Azcapotzalco, México, D.F. Tel. (55) 53-33-94-00.
Es muy importante seguir las siguientes instrucciones para conservar los
acabados de los productos HELVEX, con brillo y en perfecto estado:
1. Utilice únicamente agua y un paño limpio.
2. No utilice fibras, polvos, abrasivos, ni productos químicos.
3. No utilice objetos punzo-cortantes para limpiar los acabados.
4. Se recomienda realizar la limpieza de su producto diariamente.
Nota: Vea nuestros tips en la pag. www.helvex.com.mx
It is very important to follow the instructions below to preserve HELVEX products
finishes, shiny and in perfect condition:
1. Use only water and a clean cloth.
2. Do not use fibers, powders, abrasives, or chemicals.
3. Do not use sharp objects to clean the finish.
4. It is recommended to clean your product daily.
Note: See our tips on: www.helvex.com.mx
Recomendaciones de Limpieza / Cleaning Recommendations
Posibles Causas y Soluciones / Troubleshooting
In Guadalajara:
Contact:
Enter our free
training courses.
In Monterrey:
En la Ciudad de México:
In Mexico City:
En Monterrey:
En Guadalajara:
01 55 53 33 94 00
Ext. 5804, 5805 y 5806 (0133) 36 19 01 13
Comunícate:
Participa en nuestros
cursos gratuitos
de capacitación.
(0181) 83 33 57 67
(0181) 83 33 61 78
8
Problema / Problem Causa / Cause Solución / Solution
El émbolo del fluxómetro no es el correcto. / The flush
valve piston is not correct.
Verifique que el émbolo sea el correcto (color naranja). / Verify
that the piston is correct (orange color).
La llave de retención está parcialmente abierta. / The
stop valve is partially open.
Abra totalmente la llave de retención (pag. 4 paso 17). / Open
fully the stop valve (page 4 step 17).
La presión de operación no es la adecuada. / The
operating pressure is not adequate.
Verifique que la presión mínima de operación sea de 2 kg/cm².
/ Verify that the minimum operating pressure is 2 kg / cm ².
La llave de retención está cerrada. / The stop valve is
closed.
Abra la llave de retención (pag. 4 paso 17). / Open the stop
valve (page 4 step 17).
La línea está obstruída. / The supply line is obstructed.
Verifique que haya un buen flujo del agua retirando el émbolo y
purgando (Pag. 4 pasos 13 al 17). / Check for good water flow
removing the piston and purging (Page 4 steps 13 to 17).
El diámetro de la tubería no es la adecuada (1 ¼"). / The
diameter of the pipe is not adequate (1 ¼ ").
Verifique que la tubería sea la indicada (pag. 1, paso 1,
dimensiones recomendadas). / Check that the tubing is as
stated (page 1, step 1, recommended dimensions).
El alcance del sensor está ajustado a una distancia muy
corta. / The sensor range is set to a very short distance.
Ajuste la distancia de detección (pag. 7). / Adjust the detection
distance (page 7).
La pila esta descargada. / The battery is discharged. Cambie la pila (pag. 5, cambio de pila) / Replacement the
battery (page 5 battery change)
Las conexiones están flojas. / Loose connections .Apriete firmemente. / Tighten.
Las rondanas están torcidas o mal colocadas. / The
washers are bent or misplaced.
Verifique que las rondanas esten colocadas correctamente
(pag. 3, paso 9). / Verify that the washer are positioned
correctly (page 3, step 9).
No cierra el flujo o tarda
en cerrar. / The flow
takes long time to stop or
does not stop.
Acumulación de basura en la esprea del émbolo. /
Debris in the piston orifice.
Realice el mantenimiento del émbolo (pag. 6, mantenimiento del
émbolo). / Do piston maintenance (page 6, piston
maintenance).
Hay fuga en las
conexiones. / There are
leaks in the connections.
La descarga es poca o
nula.
/ Flushing is low or there
is not

Other Helvex Bathroom Fixture manuals

Helvex E-909-S/C User manual

Helvex

Helvex E-909-S/C User manual

Helvex Nautilia M-1006 User manual

Helvex

Helvex Nautilia M-1006 User manual

Helvex H-600 User manual

Helvex

Helvex H-600 User manual

Helvex PIURA PIU-200 User manual

Helvex

Helvex PIURA PIU-200 User manual

Helvex RM-14 User manual

Helvex

Helvex RM-14 User manual

Helvex Elite MI-01-S/C User manual

Helvex

Helvex Elite MI-01-S/C User manual

Helvex TAZF NAO I PARED S-TZF-P User manual

Helvex

Helvex TAZF NAO I PARED S-TZF-P User manual

Helvex LV MARCUS BC User manual

Helvex

Helvex LV MARCUS BC User manual

Helvex AT-2 User manual

Helvex

Helvex AT-2 User manual

Helvex Piura PIU-100 User manual

Helvex

Helvex Piura PIU-100 User manual

Helvex FB-110-32 User manual

Helvex

Helvex FB-110-32 User manual

Helvex REJ-01-AI User manual

Helvex

Helvex REJ-01-AI User manual

Helvex 285-19-1 User manual

Helvex

Helvex 285-19-1 User manual

Helvex Maxima U20105 User manual

Helvex

Helvex Maxima U20105 User manual

Helvex TR-035 User manual

Helvex

Helvex TR-035 User manual

Helvex H-500 User manual

Helvex

Helvex H-500 User manual

Helvex H-3006 User manual

Helvex

Helvex H-3006 User manual

Helvex AC10-TR011 User manual

Helvex

Helvex AC10-TR011 User manual

Helvex LAV MOREA1 User manual

Helvex

Helvex LAV MOREA1 User manual

Helvex RM-14-SD User manual

Helvex

Helvex RM-14-SD User manual

Helvex Explora HOT-105-45 User manual

Helvex

Helvex Explora HOT-105-45 User manual

Helvex Konos 2107 User manual

Helvex

Helvex Konos 2107 User manual

Helvex RMM-27-CR/AI User manual

Helvex

Helvex RMM-27-CR/AI User manual

Helvex Clasica 105 User manual

Helvex

Helvex Clasica 105 User manual

Popular Bathroom Fixture manuals by other brands

CEBIEN UP-I Quick installation

CEBIEN

CEBIEN UP-I Quick installation

Brizo Kintsu 693406 Series quick start guide

Brizo

Brizo Kintsu 693406 Series quick start guide

BETTE BETTEFLOOR Installation

BETTE

BETTE BETTEFLOOR Installation

Brizo Vettis 65088LF-NK manual

Brizo

Brizo Vettis 65088LF-NK manual

Kohler Sterling 441904 installation guide

Kohler

Kohler Sterling 441904 installation guide

Gessi INGRANAGGIO 63924 manual

Gessi

Gessi INGRANAGGIO 63924 manual

VINNOVA 789024B manual

VINNOVA

VINNOVA 789024B manual

Radaway Korfu A Assembly instructions

Radaway

Radaway Korfu A Assembly instructions

VINNOVA 314034-WR-MB Installation instruction

VINNOVA

VINNOVA 314034-WR-MB Installation instruction

Franke CAMPUS HDTX504 Installation and operating instructions

Franke

Franke CAMPUS HDTX504 Installation and operating instructions

Signature Hardware Hibiscus 948658 quick start guide

Signature Hardware

Signature Hardware Hibiscus 948658 quick start guide

Hans Grohe Rainfinity 100 1jet 26866 Series Assembly instructions

Hans Grohe

Hans Grohe Rainfinity 100 1jet 26866 Series Assembly instructions

KAWAJUN SH-026-3 quick start guide

KAWAJUN

KAWAJUN SH-026-3 quick start guide

Tiger BOSTON 5851.6.00 Series Mounting instructions

Tiger

Tiger BOSTON 5851.6.00 Series Mounting instructions

METHVEN Minimalist 01-2206 installation guide

METHVEN

METHVEN Minimalist 01-2206 installation guide

antoniolupi MYSLOT 72 installation instructions

antoniolupi

antoniolupi MYSLOT 72 installation instructions

TASSILI ELSA 3041286 installation guide

TASSILI

TASSILI ELSA 3041286 installation guide

AQUAESTIL ARWEN Mounting instructions

AQUAESTIL

AQUAESTIL ARWEN Mounting instructions

manuals.online logo
manuals.online logoBrands
  • About & Mission
  • Contact us
  • Privacy Policy
  • Terms and Conditions

Copyright 2025 Manuals.Online. All Rights Reserved.