manuals.online logo
Brands
  1. Home
  2. •
  3. Brands
  4. •
  5. Helvex
  6. •
  7. Bathroom Fixture
  8. •
  9. Helvex LV STALA User manual

Helvex LV STALA User manual

INSTALLATION GUIDE
GUÍA DE INSTALACIÓN
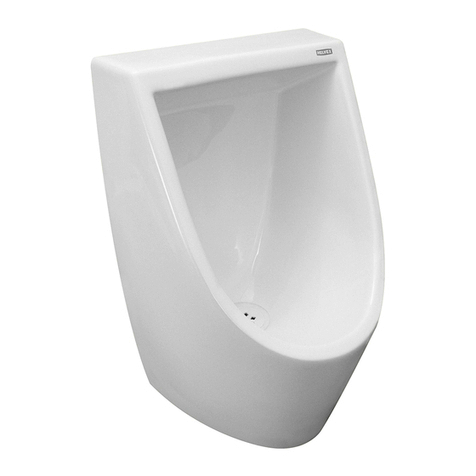
Lavabo de Sobreponer y Sobrecubierta sin
Rebosadero. / Washbasin for
Superimpose and on Surface without
Overflow.
LV STALA
Installation
lápiz
pencil
1
flexómetro
flexometer
taladro
drill
pistola con silicón
antihongos
anti-fungus silicone
Relación
Herramienta Requerida / Required Tools
Dimensiones Generales / General Dimensions
Especificaciones Técnicas / Technical specifications
• Cerámica al alto brillo porcelanizada.
• Grado de calidad “A”.
• Alta resistencia mecánica.
• Esmalte vítreo de alta resistencia.
• Instalación sobre cubiertas de mármol, granito, cantera, madera, etc.
• Ceramic porcelain enamel to high brightness.
• Quality Grade "A".
• High mechanical strength.
• highly resistant vitreous enamel.
• Installation of marble countertops, granite, quarry, wood, etc.
Hola soy Fluxy, te
ayudaré a instalar
tu producto.
Hi I'm Fluxy, I'll
help you to install
your product.
[email protected]
Original Parts:
Consultancy and Technical
01(55)53339431
01800 909 2020 01 (55) 53 33 94 00
Refacciones Originales:
Asesoría y Servicio Técnico:
Ext. 5068, 5815 y 5913
Service:
53 33 94 21
01 800 890 0594
[email protected]
Para disminuir el riesgo de lesiones o daños a la propiedad, lea todas las instrucciones antes de instalar el
producto. Utilice gafas de seguridad. En obras de construcción, instalación, modificación, ampliación y
reparación deben cumplir con el reglamento de construcción y obras de su localidad. El producto ilustrado
puede sufrir cambios de aspecto como resultado de la mejora continua a la que está sujeto.
Agradecemos su elección por los productos HELVEX.
Estamos seguros de que su confiabilidad por el producto excederá sus más altas expectativas, cuya
funcionalidad, estética, durabilidad, respaldo integral y alta calidad le otorgarán plena satisfacción por años,
reflejando el compromiso con la calidad, innovación y el medio ambiente que forman parte de Helvex.
To reduce the risk of injury or property damage, read all instructions before installing the product. Please
remember to use safety glasses. In construction, installation, alteration, extension and repair, the rules of
constructions must be applied. As result of continuous improvement, the illustration product may change in
appearance.
ADVERTENCIA / WARNING
Esta guía de instalación aplica al producto en cualquier acabado. / This installation
guide applies to the product in any finish.
Thank you for choosing HELVEX products.
We are confident that the product reliability will exceed your maximum expectations. The functionality,
aesthetics, durability, quality and support will grant you full satisfaction for years, it is Helvex commitment to
the quality, innovation and the environment.
sierra
caladora
jigsaw tool
*Recommended Dimensions
*Medidas Recomendadas
Nivel de Piso Terminado
Finish Floor Level
*83,8 cm
(33")
26,0 cm
(10,2")
31,1 cm
(12,2")
1*Ø 3,2 cm
(1 1/4")
cubierta
cover
22,7 cm
(8,9")
455 cm
(17,9”)
NPT
FFL
*50 cm
(19,6")
sellador adhesivo
adhesive
sealant
Línea Central para
perforaciones de
Mezcladora /
Central Line for
Mixer
*26,0 cm
(10,2")
2
5
4
6
Se recomienda utilizar el lavabo 12
horas después de su instalación. /
We recommend using the washbasin
12 hours after installation.
2
Voltee el lavabo, coloque la contra (no incluida) y aplique
sellador adhesivo. / Turn the sink, place the counter (not
included) and apply adhesive sealant.
Coloque el lavabo en posición, limpie el excedente de sellador
adhesivo. Mantenga fijo el lavabo sobre la cubierta hasta que
seque el sellador. / Place the sink into position, wipe off excess
adhesive sealant. Keep the sink fixed on the cover until the
adhesive sealer dries.
Apliqué silicón antihongos. Instale el monomando y el desagüe (no incluidos). / Apply anti-fungus silicone. Install the mixer and the drain
(not included).
*Ø 8,0 cm
(3,1”)
3
Coloque el lavabo en la posición deseada y marque el centro
del barreno sobre la cubierta para la instalación de la contra y
perfore un barreno de . Ø 8,0 cm / Place the sink in the desired
position and mark the center hole on the cover to install the
against and drill of Ø 3,1”
Limpie la superficie sobre la que se colocará el lavabo. / Clean
the surface on which the sink will be placed.
2
cubierta
cover
Instalación General para Sobreponer / General Installation for Superimpose
barreno para
contra desagüe
drain hole for against
Línea Central para perforaciones
de Mezcladora ó Monomando /
Central Line for Mixer or Single
Handle Drilling
silicón antihongos
anti-fungus silicone
14,0 cm
(5,5”)
monomando
mixer
desagüe
drain
*26,0 mm
(10,2”)
cubierta
cover
sellador adhesivo
adhesive sealant
*Recommended Dimensions
*Medidas Recomendadas
3
Instalación General para Sobrecubierta / General Installation for Surface
10
9
11
Verifique que el lavabo entre libremente. / Check that the sink
enters freely.
Voltee el lavabo, coloque la contra (no incluida). / Turn the sink
over, place the counter (not included).
Aplique el sellador adhesivo a la ceja del lavabo. / Apply the
adhesive sealant to the sink edge.
8
Recorte la línea guía de la plantilla y colóquela sobre la cubierta
a instalar el lavabo. / Cut the guide line from the template and
place it on the cover to install the sink.
Marque el contorno recortado en la cubierta y realice el corte,
siguiendo la línea trazada, para formar la abertura. -/ Mark the
outline over the cover and make a cut along the traced line to
form the opening.
7
cubierta
cover
12 Coloque el lavabo haciendo coincidir el contorno. / Position the
sink by matching the outline.
Para cubiertas de madera sin abertura o similar, realice lo siguiente: / For wood decks without opening or similar, do the following:
Si la cubierta ya tiene abertura proceda a lo siguiente: / If the cover already has opening, proceed as follows:
Al terminar, verifique que la periferia de la abertura
este libre de rebabas o exceso de material. / When
finished, check that the periphery of the opening is
free of burrs or excess material.
ceja
edge
plantilla
template
sellador adhesivo
adhesive sealant
líneas guía para recorte
clipping guide line
marca
de contorno
contour mark
PLANTILLA DE INSTALACIÓN PARA LAVABO DE SOBRECUBIERTA LV STALA
4
01 55 53 33 94 00
Ext. 5804, 5805 y 5806 (0133) 36 19 01 13
Comunícate:
Participa en nuestros
cursos gratuitos
de capacitación.
(0181) 83 33 57 67
(0181) 83 33 61 78
In Guadalajara:
Contact:
Enter our free
training courses.
In Monterrey:
En la Ciudad de México:
In Mexico City:
En Monterrey:
En Guadalajara:
Es muy importante seguir las siguientes instrucciones para conservar los
acabados de los productos HELVEX, con brillo y en perfecto estado:
1. Utilice únicamente agua y un paño limpio.
2. No utilice fibras, polvos, abrasivos, ni productos químicos.
3. No utilice objetos punzo-cortantes para limpiar los acabados.
4. Se recomienda realizar la limpieza de su producto diariamente.
Nota: Vea nuestros tips en la pag. www.helvex.com.mx
It is very important to follow the instructions below to preserve HELVEX products
finishes, shiny and in perfect condition:
1. Use only water and a clean cloth.
2. Do not use fibers, powders, abrasives, or chemicals.
3. Do not use sharp objects to clean the finish.
4. It is recommended to clean your product daily.
Note: See our tips on: www.helvex.com.mx
Recomendaciones de Limpieza / Cleaning Recommendations
HELVEX, S. A. DE C. V. Calzada Coltongo # 293, Col. Industrial Vallejo, Del. Azcapotzalco, C. P. 02300, Ciudad de México.
Posibles Causas y Soluciones / Troubleshooting
14
Mantenga fijo el lavabo sobre la cubierta, el tiempo que sea
necesario, hasta que seque el sellador adhesivo y aplique
silicón antihongos . / Keep the sink fixed on the cover, as long
as necessary, until the adhesive sealer dries and apply anti-
fungus silicone.
13 Instale el monomando y el desagüe (no incluidos). / Install the
mixer and the drain (not included).
monomando
mixer
desagüe
drain
Se recomienda utilizar el lavabo 12 horas
después de su instalación. / We recommend
using the washbasin 12 hours after installation.
silicón antihongos
anti-fungus silicone
Probelma / Problem Causas / Causes Soluciones / Solutions
Contra floja.
/ Against loose.
Apriete la contra. /
Tighten the counter.
Filtración en la contra del lavabo.
/ Filtration in against the sink.
El lavabo no esta fijo. / The sink
is not fixed.
Para Lavabo de Sobreponer / For Washbasin for Superimpose
Probelma / Problem Causas / Causes Soluciones / Solutions
Contra floja.
/ Against loose.
Apriete la contra. /
Tighten the counter.
Filtración en la contra del lavabo.
/ Filtration in against the sink.
No se colocó el adhesivo.
/ The adhesive was not placed.
Colocar sellador adhesivo en la ceja del lavabo (Pág. 3, paso 11). /
Attach adhesive sealant to the sink edge (Page 3, step 11).
El lavabo no esta fijo. / The sink
is not fixed.
Para Lavabo de Sobrecubierta / For Washbasin for on Surface
Acabado final
INSTRUCCIONES:
1.-Recorte siguiendo la Línea Guía (Límite Máximo ó Límite
Mínimo), mostrada en la plantilla.
2.-Verifique que no intervengan elementos como tubería,
estructuras metálicas, cajones etc. en el espacio donde se
va a instalar el lavabo.
3.-Coloque la plantilla sobre la superficie a instalar el lavabo.
4.-Marque el contorno recortado en la superficie.
5.-Corte la superficie siguiendo el contorno.
6.-Siga las indicaciones para la instalación.
7.-Coloque un sellador en la pestaña del lavabo para evitar
filtraciones.
PLANTILLA DE INSTALACIÓN PARA LAVABO DE SOBRECUBIERTA LV STALA
Línea Guía para Recorte
Límite Máximo
Línea Central para perforaciones
de Mezcladora o Monomando
50.8mm
2"
Línea Guía para Recorte
Límite Mínimo
NIVEL 1
Línea Exterior del Lavabo
33.45mm
1.317"
455mm
17.913"
227.5mm
8.957"
227.5mm
8.957"
Helvex no se hace responsable del mal uso de la plantilla
.
254mm
10"
Esta es una referencia dimensional, cuando se imprima a escala, la línea debe medir 254mm (10").
260.95mm
10.273"
*
Medidas Recomendadas
*

Other Helvex Bathroom Fixture manuals

Helvex Alika E-920 User manual

Helvex

Helvex Alika E-920 User manual

Helvex H-3012 User manual

Helvex

Helvex H-3012 User manual

Helvex TZF NAO P User manual

Helvex

Helvex TZF NAO P User manual

Helvex VPH-1 User manual

Helvex

Helvex VPH-1 User manual

Helvex BR-470 User manual

Helvex

Helvex BR-470 User manual

Helvex MG MOJAVE User manual

Helvex

Helvex MG MOJAVE User manual

Helvex Futura RM-7 User manual

Helvex

Helvex Futura RM-7 User manual

Helvex H-3003 User manual

Helvex

Helvex H-3003 User manual

Helvex Vertika H-904 User manual

Helvex

Helvex Vertika H-904 User manual

Helvex E-909-S/C User manual

Helvex

Helvex E-909-S/C User manual

Helvex TV-201 User manual

Helvex

Helvex TV-201 User manual

Helvex Europeo MEP-2001-S/L User manual

Helvex

Helvex Europeo MEP-2001-S/L User manual

Helvex LAV MARCUS BC W User manual

Helvex

Helvex LAV MARCUS BC W User manual

Helvex H-106-S User manual

Helvex

Helvex H-106-S User manual

Helvex AC-10 User manual

Helvex

Helvex AC-10 User manual

Helvex Vertika E-910-DX User manual

Helvex

Helvex Vertika E-910-DX User manual

Helvex TR-012-S User manual

Helvex

Helvex TR-012-S User manual

Helvex Clasica II 205 User manual

Helvex

Helvex Clasica II 205 User manual

Helvex Clasica 105 User manual

Helvex

Helvex Clasica 105 User manual

Helvex THP-968 User manual

Helvex

Helvex THP-968 User manual

Helvex UH-3301-WA User manual

Helvex

Helvex UH-3301-WA User manual

Helvex PIURA PIU-200 User manual

Helvex

Helvex PIURA PIU-200 User manual

Helvex 410-19-1 User manual

Helvex

Helvex 410-19-1 User manual

Helvex H-500 User manual

Helvex

Helvex H-500 User manual

Popular Bathroom Fixture manuals by other brands

DXV Randall D3510210C installation instructions

DXV

DXV Randall D3510210C installation instructions

Fantini Rubinetti Young 3429000701 Care and maintenance

Fantini Rubinetti

Fantini Rubinetti Young 3429000701 Care and maintenance

Akuaplus DUAL5351BL user manual

Akuaplus

Akuaplus DUAL5351BL user manual

Produits Neptune TARON Installation

Produits Neptune

Produits Neptune TARON Installation

Abatement Technologies S4000EU instruction manual

Abatement Technologies

Abatement Technologies S4000EU instruction manual

Zenith 35603BN06 manual

Zenith

Zenith 35603BN06 manual

Hans Grohe Axor Aktiva 27470XX1 Installation instructions / warranty

Hans Grohe

Hans Grohe Axor Aktiva 27470XX1 Installation instructions / warranty

newform MINIMAL 494 instructions

newform

newform MINIMAL 494 instructions

Toto TBP02001 Series installation manual

Toto

Toto TBP02001 Series installation manual

newform HAKA 72018E instructions

newform

newform HAKA 72018E instructions

Gessi 316 54821 manual

Gessi

Gessi 316 54821 manual

Fontana Showers ANDRIA FS145003 installation instructions

Fontana Showers

Fontana Showers ANDRIA FS145003 installation instructions

KEUCO X-Line 33295 Mounting instruction

KEUCO

KEUCO X-Line 33295 Mounting instruction

VARICOR Renova Nr.1 Pro Mounting instruction

VARICOR

VARICOR Renova Nr.1 Pro Mounting instruction

Style selections 9005SSMV instruction sheet

Style selections

Style selections 9005SSMV instruction sheet

Sanela SLWN 18ZL 94183 Mounting instructions

Sanela

Sanela SLWN 18ZL 94183 Mounting instructions

Allen + Roth Davidson-48GP-ORB instruction manual

Allen + Roth

Allen + Roth Davidson-48GP-ORB instruction manual

Relax 63-VP1 Assembly instructions

Relax

Relax 63-VP1 Assembly instructions

manuals.online logo
manuals.online logoBrands
  • About & Mission
  • Contact us
  • Privacy Policy
  • Terms and Conditions

Copyright 2025 Manuals.Online. All Rights Reserved.