manuals.online logo
Brands
  1. Home
  2. •
  3. Brands
  4. •
  5. Helvex
  6. •
  7. Bathroom Fixture
  8. •
  9. Helvex Vertika MR-1001 User manual

Helvex Vertika MR-1001 User manual

Hola soy Fluxy, te
ayudaré a instalar
tu producto.
INSTALLATION GUIDE
1-02-1858-4
Hi I'm Fluxy, I'll
help you to install
your product.
INSTALLATION GUIDE
GUÍA DE INSTALACIÓN
1
Distancias recomendadas / Device Installation
Ranure el muro con las dimensiones indicadas en las imágenes. / Slot the wall with the dimensions indicated in the images.
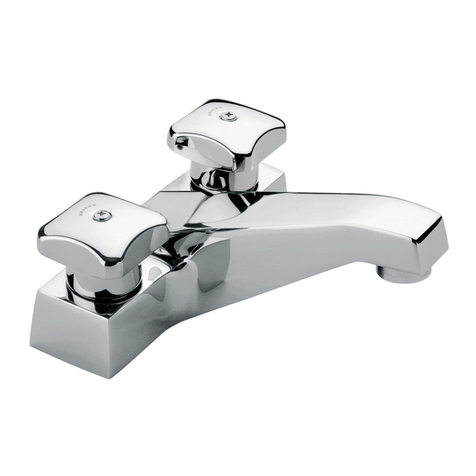
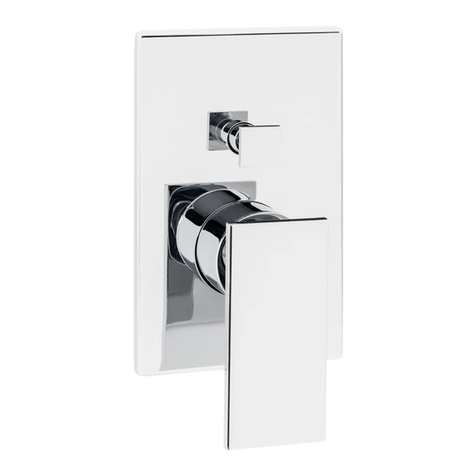
MR-1001
Mezcladora individual de empotrar
para regadera. De roscar. / Single
recessed mixer for shower. Threading
Cromo / Chrome
[email protected]
Original Spare Parts:
Consultancy and Technical
(52) 55 53 33 94 31 (52) 55 53 33 94 00
Refacciones Originales:
Asesoría y Servicio Técnico:
Ext. 5913, 5068 y 4815
Service:
(52) 55 53 33 94 21
[email protected]
Para disminuir el riesgo de lesiones o daños a la propiedad, lea todas las instrucciones antes de instalar el
producto. Utilice gafas de seguridad. En obras de construcción, instalación, modificación, ampliación y
reparación deben cumplir con el reglamento de construcción y obras de su localidad. El producto ilustrado
puede sufrir cambios de aspecto como resultado de la mejora continua a la que está sujeto.
Agradecemos su elección por los productos HELVEX.
Estamos seguros de que su confiabilidad por el producto excederá sus más altas expectativas, cuya
funcionalidad, estética, durabilidad, respaldo integral y alta calidad le otorgarán plena satisfacción por años,
reflejando el compromiso con la calidad, innovación y el medio ambiente que forman parte de Helvex.
To reduce the risk of injury or property damage, read all instructions before installing the product. Please
remember to use safety glasses. In construction, installation, alteration, extension and repair, the rules of
constructions must be applied. As result of continuous improvement, the illustration product may change in
appearance.
ADVERTENCIA / WARNING
Esta guía de instalación aplica al producto en cualquier acabado. / This installation
guide applies to the product in any finish.
Thank you for choosing HELVEX products.
We are confident that the product reliability will exceed your maximum expectations. The functionality,
aesthetics, durability, quality and support will grant you full satisfaction for years, it is Helvex commitment to
the quality, innovation and the environment.
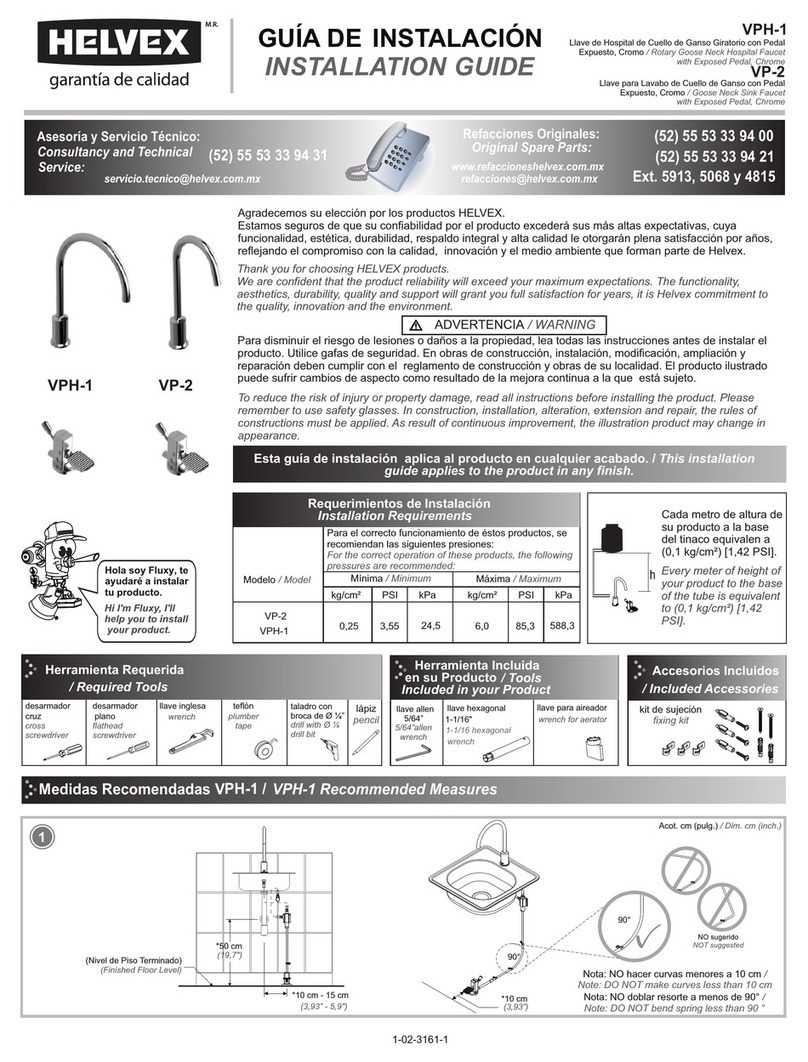
Cada metro de altura de
su producto a la base
del tinaco equivalen a
(0,1 kg/cm²) [1,42 PSI].
Every meter of height of
your product to the base
of the tube is equivalent
to (0,1 kg/cm²) [1,42
PSI].
Requerimientos de Instalación
Installation Requirements
Requerimientos de Instalación
Installation Requirements
Modelo / Model Mínima / Minimum Máxima / Maximum
kg/cm² PSI kPa kg/cm² PSI kPa
Para el correcto funcionamiento de éstos productos, se
recomiendan las siguientes presiones:
For the correct operation of these products, the following
pressures are recommended:
MR-1001 0,25 3,5 24,5 6,0 85,3 588,3
Herramienta Requerida / Required Tools Artículos Incluidos en su Producto
/ Items Included in your Product
perico teflón
plumber
tape
adjustable
wrench
*3,5 cm
*Recommended Dimesions
*Medidas Recomendadas
(1,33”)
Vértika®
llave allen 2 mm
2 mm allen wrench
llave para valvex
valvex wrench
*24 cm
(9,44”)
(2,1” min. - 2,55" max.)
pared con
acabado final
capuchón
cap
wall finish
*5,5 cm min. - *6,5 cm max.
*2,8 cm
(1,1”)
Ensamble el cuerpo con la tubería, cuidando el sentido de flujo. Si va a soldar, retire el capuchón y el valvex. / Assemble the body with the
pipe, taking care of the flow direction. If you are going to weld, remove the cap and the Valvex.
2
Instalación Salida / Faucet Installation
tubería ½” (no incluida)
½ ”pipe (not included)
*30 cm
11,8"
*120 cm
tapón
plug
cámara
de aire
air chamber
*70 cm
25,5"
agua caliente
hot water
valvex II
color rojo
red color
valvex II
color azul
red color
agua fria
cold water
salida para
regadera
shower foucet
conector ½”- 14
NPT (no incluido)
½ ”connector - 14
NPT (not included)
salida a
regadera
shower outlet
valvex
*Recommended Dimesions
*Medidas Recomendadas
NPT (Nivel de Piso Terminado)
(Finished Floor Level)
FFL
(47,2”)
Es necesario que antes de colocar el acabado final, se verifique
que el capuchón quede a nivel del acabado final . / It is
necessary that before placing the final finish, verify that the cap
is at the level of the final finish.
3Coloque su recubrimiento final y retire los capuchones. / Place
your final coating and remove the caps.
4
Instalación General / General Installation
*2,8 cm
1,1"
pared con
acabado final
wall finish
capuchón
cap capuchón
cap
capuchón
cap
Inserte las contra tuercas. / Insert the
locknuts.
5Enrosque la base y el chapetón,
sujetelo enroscando el opresor. /
Screw the base and the flat, fasten it
by screwing the set screw.
6Inserte los bujes en los vástagos de
los cartuchos y posteriormente
coloque los manerales alíneandolos
con el chapetón. / Insert the bushings
into the cartridge stems and then
place the forms aligning them with the
escutcheon.
7
Nota: Antes de ensamblar, purgue la linea de alimentación.
Si va a soldar, retire el capuchón y el Valvex.
Note: Before assembling, purge the power line. If you are
going to weld, remove the cap and the Valvex.
contratuerca
locknut
Valvex II
color rojo
red color
Valvex II
color azul
blue color
Nota: Apriete firmemente.
Note: Tighten.
chapetón
escutcheon
base chapetón
escutcheon base maneral
handle
buje valvex
valvex
bushing
Nota: La ranura no debe coincidir en la posición
del opresor.
Note: The slot must not coincide in the position of
the set screw.
2
3
Ajuste de Instalación / Installation Adjustment
En caso de no tener la distancia requerida entre el adaptador
valvex y el acabado final, continúe ajustando el adaptador
valvex. / If you do not have the required distance between the
valvex adapter and the final finish, continue adjusting the
valvex adapter.
8Ajuste el adaptador valvex, verificándolo con el capuchón. /
Adjust the valvex adapter, checking with the cap.
9
6 mm
0,23"
pared con
acabado final
wall finish
max. rango de ajuste de
el aptador hacia afuera
max. adjustment range of
the outsider
adaptador
valvex
valvex adapter
*2,8 cm
1,1"
* Medida recomendada al llegar a la distancia requerida.
* Recommended measure when arriving at the required distance.
capuchón
cap
capuchón
cap
pared con
acabado final
wall finish
Al llegar a la distancia requerida, enrosque la contratuerca
apretando firmemente. / When you reach the required distance,
screw the locknut tightly tightening.
10 Enrosque la base y el chapetón, sujetelo enroscando el
opresor. / Screw the base and the escutcheon, fasten it by
screwing the setscrew.
11
valvex II
color rojo
red color
valvex II
color azul
red color
contratuerca
locknut
Nota: Apriete firmemente.
Note: Tighten.
base
chapetón
escutcheon
base
chapetón
escutcheon
Inserte los bujes en los vástagos de los cartuchos y
posteriormente coloque los manerales alíneandolos con el
chapetón. / Inserte los bujes en los vástagos de los cartuchos y
posteriormente coloque los manerales alíneandolos con el
chapetón.
12
maneral
handle
buje valvex
valvex
bushing
Nota: La ranura no debe coincidir en la posición del opresor.
Note: The slot must not coincide in the position of the set screw.
Operación / Operation
13 Abra la linea de alimentación principal. Para abrir, cerrar y
regular la temperatura del agua, gire los manerales
respectivamente. / Open the main power line. To open, close
and regulate the water temperature, turn the ways respectively.
valvex II
abre
open
valvex II
abre
open
Es muy importante seguir las siguientes instrucciones para conservar los
acabados de los productos HELVEX, con brillo y en perfecto estado:
1. Utilice únicamente agua y un paño limpio.
2. No utilice fibras, polvos, abrasivos, ni productos químicos.
3. No utilice objetos punzo-cortantes para limpiar los acabados.
4. Se recomienda realizar la limpieza de su producto diariamente.
Visite nuestras páginas www.helvex.com.mx para México y www.helvex.com
para el mercado Internacional
It is very important to follow the instructions below to preserve HELVEX products
finishes, shiny and in perfect condition:
1. Use only water and a clean cloth.
2. Do not use fibers, powders, abrasives, or chemicals.
3. Do not use sharp objects to clean the finish.
4. It is recommended to clean your product daily.
Visit our pages www.helvex.com.mx for Mexico and www.helvex.com
for the International market.
Recomendaciones de Limpieza / Cleaning Recommendations
In Guadalajara:
Contact:
Enter our free
training courses.
In Monterrey:
En la Ciudad de México:
In Mexico City:
En Monterrey: En Guadalajara:
(52) 55 53 33 94 00
Ext. 5806, 5805 y 5804
33 36 19 01 13
Comunícate:
Participa en nuestros
cursos gratuitos
de capacitación.
81 83 33 57 67
81 83 33 61 78
HELVEX, S. A. DE C. V. Calzada Coltongo # 293, Col. Industrial Vallejo, Alcaldía Azcapotzalco, C. P. 02300, Ciudad de México.
Posibles Causas y Soluciones / Troubleshooting
Probelma / Problem Causas / Causes Solucións / Solutions
Abra la válvula principal de agua. /
Open the main water valve.
Existe poco flujo de agua.
/ There is some water flow. La presión de operación no es la adecuada.
/ The operating pressure is not adequate.
No sale agua.
/ No water flow.
Basura obstruyendo las líneas de alimentación. /
Garbage obstructing cartridge entrances.
Retire los valvex y purge la línea. (Pag. 2, paso 2).
/ Remove the cartridges and purge the line. (Page 2, step 2).
Verifique la presión en los requerimientos de instalación (Pag. 1). /
Verify the pressure in the installation requirements (Page 1).
La válvula principal de agua se encuentra cerrada. /
The main water valve is closed.

Other Helvex Bathroom Fixture manuals

Helvex Futura RM-7 User manual

Helvex

Helvex Futura RM-7 User manual

Helvex M-1008 Ultra User manual

Helvex

Helvex M-1008 Ultra User manual

Helvex Nuva RM12-H101 User manual

Helvex

Helvex Nuva RM12-H101 User manual

Helvex 110-32 User manual

Helvex

Helvex 110-32 User manual

Helvex Clasica 105 User manual

Helvex

Helvex Clasica 105 User manual

Helvex 158 User manual

Helvex

Helvex 158 User manual

Helvex Futura II RM-17 User manual

Helvex

Helvex Futura II RM-17 User manual

Helvex MB-1100 User manual

Helvex

Helvex MB-1100 User manual

Helvex Explora H-201 User manual

Helvex

Helvex Explora H-201 User manual

Helvex REJ-01-AI User manual

Helvex

Helvex REJ-01-AI User manual

Helvex LAV MARCUS BC W User manual

Helvex

Helvex LAV MARCUS BC W User manual

Helvex TAZF NAO I PARED S-TZF-P User manual

Helvex

Helvex TAZF NAO I PARED S-TZF-P User manual

Helvex Nuva RM-22 User manual

Helvex

Helvex Nuva RM-22 User manual

Helvex H-3012 User manual

Helvex

Helvex H-3012 User manual

Helvex UIN-05 User manual

Helvex

Helvex UIN-05 User manual

Helvex H-3007 User manual

Helvex

Helvex H-3007 User manual

Helvex PIAZZA PIA-105 User manual

Helvex

Helvex PIAZZA PIA-105 User manual

Helvex 210-32 User manual

Helvex

Helvex 210-32 User manual

Helvex 8109 User manual

Helvex

Helvex 8109 User manual

Helvex Bennu C-78 User manual

Helvex

Helvex Bennu C-78 User manual

Helvex RM-14 User manual

Helvex

Helvex RM-14 User manual

Helvex H-3302 User manual

Helvex

Helvex H-3302 User manual

Helvex FB-110-38-3.5 User manual

Helvex

Helvex FB-110-38-3.5 User manual

Helvex H-600 User manual

Helvex

Helvex H-600 User manual

Popular Bathroom Fixture manuals by other brands

Toto Washlet EK 2.0 installation guide

Toto

Toto Washlet EK 2.0 installation guide

agape LIMON ILIX425 Assembly instructions

agape

agape LIMON ILIX425 Assembly instructions

Gessi RETTANGOLO J manual

Gessi

Gessi RETTANGOLO J manual

Panasonic M Series operating instructions

Panasonic

Panasonic M Series operating instructions

Hans Grohe Croma Select S 180 27258400 Instructions for use/assembly instructions

Hans Grohe

Hans Grohe Croma Select S 180 27258400 Instructions for use/assembly instructions

EZee Life CRP0929 quick start guide

EZee Life

EZee Life CRP0929 quick start guide

Panasonic DH-3ND1 operating instructions

Panasonic

Panasonic DH-3ND1 operating instructions

Duka VR1 Assembling instructions

Duka

Duka VR1 Assembling instructions

Aurlane CAB188 manual

Aurlane

Aurlane CAB188 manual

DURAVIT DuraSystem WD6002 000 000 Mounting instructions

DURAVIT

DURAVIT DuraSystem WD6002 000 000 Mounting instructions

Macro Design DHSC Series Assembly instructions

Macro Design

Macro Design DHSC Series Assembly instructions

KIBI Circular KBF1023 installation guide

KIBI

KIBI Circular KBF1023 installation guide

RAVAK EVOLUTION Mounting instructions

RAVAK

RAVAK EVOLUTION Mounting instructions

Acorn Terrazzo-Ware installation instructions

Acorn

Acorn Terrazzo-Ware installation instructions

OVE TAMPA installation manual

OVE

OVE TAMPA installation manual

RIHO GRID GB400 installation manual

RIHO

RIHO GRID GB400 installation manual

METHVEN 439860 installation guide

METHVEN

METHVEN 439860 installation guide

Axent S70.0100.0040.0 Cleaning instruction

Axent

Axent S70.0100.0040.0 Cleaning instruction

manuals.online logo
manuals.online logoBrands
  • About & Mission
  • Contact us
  • Privacy Policy
  • Terms and Conditions

Copyright 2025 Manuals.Online. All Rights Reserved.