manuals.online logo
Brands
  1. Home
  2. •
  3. Brands
  4. •
  5. Helvex
  6. •
  7. Bathroom Fixture
  8. •
  9. Helvex RM-27 User manual

Helvex RM-27 User manual

This manual suits for next models

2

Other Helvex Bathroom Fixture manuals

Helvex RM-15 User manual

Helvex

Helvex RM-15 User manual

Helvex LV STALA User manual

Helvex

Helvex LV STALA User manual

Helvex H-3006 User manual

Helvex

Helvex H-3006 User manual

Helvex AF-2 User manual

Helvex

Helvex AF-2 User manual

Helvex Cibeles MEP-2009 User manual

Helvex

Helvex Cibeles MEP-2009 User manual

Helvex MB-1102-AIB User manual

Helvex

Helvex MB-1102-AIB User manual

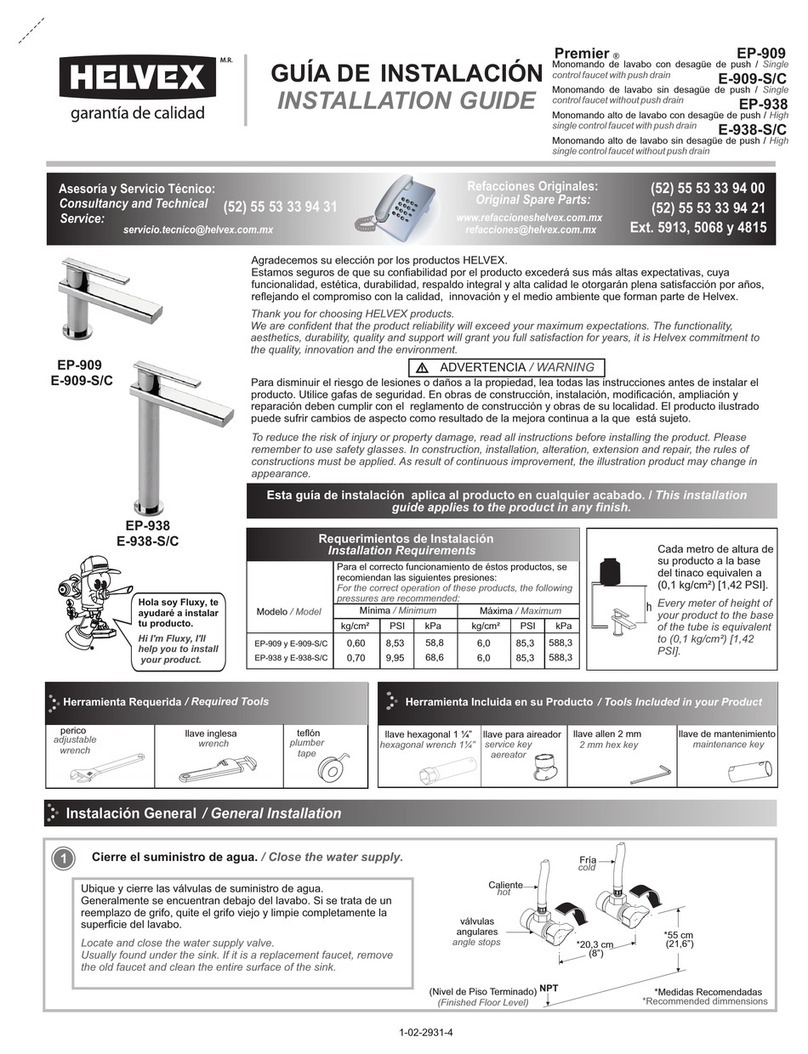
Helvex E-909-S/C User manual

Helvex

Helvex E-909-S/C User manual

Helvex M-1009 User manual

Helvex

Helvex M-1009 User manual

Helvex Piazza PIA105-61CM User manual

Helvex

Helvex Piazza PIA105-61CM User manual

Helvex Nuva E-32 User manual

Helvex

Helvex Nuva E-32 User manual

Helvex H-105 User manual

Helvex

Helvex H-105 User manual

Helvex VCG-2 User manual

Helvex

Helvex VCG-2 User manual

Helvex H-3002 User manual

Helvex

Helvex H-3002 User manual

Helvex UTH-062 User manual

Helvex

Helvex UTH-062 User manual

Helvex Vertika RM-13 User manual

Helvex

Helvex Vertika RM-13 User manual

Helvex PIURA PIU-05 User manual

Helvex

Helvex PIURA PIU-05 User manual

Helvex H-3003 User manual

Helvex

Helvex H-3003 User manual

Helvex PIAZZA PIA-200 User manual

Helvex

Helvex PIAZZA PIA-200 User manual

Helvex TV-302 User manual

Helvex

Helvex TV-302 User manual

Helvex PIAZZA PIA-105 User manual

Helvex

Helvex PIAZZA PIA-105 User manual

Helvex H-3010 User manual

Helvex

Helvex H-3010 User manual

Helvex Vertika 16104 User manual

Helvex

Helvex Vertika 16104 User manual

Helvex TAZF NAO I PARED S-TZF-P User manual

Helvex

Helvex TAZF NAO I PARED S-TZF-P User manual

Helvex H-3010 User manual

Helvex

Helvex H-3010 User manual

Popular Bathroom Fixture manuals by other brands

Kohler Mira Sport Max J03G Installation and user guide

Kohler

Kohler Mira Sport Max J03G Installation and user guide

Moen 186117 Series installation guide

Moen

Moen 186117 Series installation guide

Hans Grohe Raindance Showerpipe 27235000 Instructions for use/assembly instructions

Hans Grohe

Hans Grohe Raindance Showerpipe 27235000 Instructions for use/assembly instructions

Signature Hardware ROUND SWIVEL BODY SPRAY 948942 Install

Signature Hardware

Signature Hardware ROUND SWIVEL BODY SPRAY 948942 Install

fine fixtures AC3TH installation manual

fine fixtures

fine fixtures AC3TH installation manual

LIXIL HP50 Series quick start guide

LIXIL

LIXIL HP50 Series quick start guide

KOLO ATOL PLUS installation manual

KOLO

KOLO ATOL PLUS installation manual

Hans Grohe PuraVida 15073000 Instructions for use/assembly instructions

Hans Grohe

Hans Grohe PuraVida 15073000 Instructions for use/assembly instructions

Toto TS111B8 Installation and owner's manual

Toto

Toto TS111B8 Installation and owner's manual

Kohler K-1158-H2 Homeowner's guide

Kohler

Kohler K-1158-H2 Homeowner's guide

Coram Showers OFFSET QUADRANT manual

Coram Showers

Coram Showers OFFSET QUADRANT manual

baliv DU-2010 manual

baliv

baliv DU-2010 manual

odass OD-1710 instruction manual

odass

odass OD-1710 instruction manual

Oxygenics Evolution Easy installation instructions

Oxygenics

Oxygenics Evolution Easy installation instructions

Bradley Express SS Series installation instructions

Bradley

Bradley Express SS Series installation instructions

DURAVIT C.1 C15240 0090 Instructions for mounting and use

DURAVIT

DURAVIT C.1 C15240 0090 Instructions for mounting and use

Sunshower PURE SOLO manual

Sunshower

Sunshower PURE SOLO manual

Heatstore HSTRL500WTN Installation and operating instructions

Heatstore

Heatstore HSTRL500WTN Installation and operating instructions

manuals.online logo
manuals.online logoBrands
  • About & Mission
  • Contact us
  • Privacy Policy
  • Terms and Conditions

Copyright 2025 Manuals.Online. All Rights Reserved.

ADVERTENCIA / WARNING
Para disminuir el riesgo de lesiones o daños a la propiedad, lea todas las instrucciones antes de instalar el
producto. Utilice gafas de seguridad. En obras de construcción, instalación, modificación, ampliación y
reparación deben cumplir con el reglamento de construcción y obras de su localidad. El producto ilustrado
puede sufrir cambios de aspecto como resultado de la mejora continua a la que está sujeto.
Agradecemos su elección por los productos HELVEX.
Estamos seguros de que su confiabilidad por el producto excederá sus más altas expectativas, cuya
funcionalidad, estética, durabilidad, respaldo integral y alta calidad le otorgarán plena satisfacción por años,
reflejando el compromiso con la calidad, innovación y el medio ambiente que forman parte de Helvex.
Thank you for choosing HELVEX products.
We are confident that the product reliability will exceed your highest expectations, whose functionality,
aesthetics, durability, high quality and comprehensive support grant him full satisfaction for years, reflecting
the commitment to quality, innovation and the environment as part Helvex.
To reduce the risk of injury or property damage, read all instructions before installing the product. Use safety
glasses. In construction, installation, alteration, extension and repair must comply with the rules of
construction an your local. The illustrated product may change in appearance as a result of continuous
improvement to which it is subject.
Este instructivo aplica al producto en cualquier acabado. / This instructive applies
to the product in any finish.
Cada metro de altura de
su producto a la base
del tinaco equivalen a
(0,1 kg/cm²) [1,42 PSI].
Every meter of height of
your product to the base
of the water tank (0,1
kg/cm²) [1,42 PSI]
equivals.
Visite nuestra página
www.helvex.com.mx,
para visualizar los videos
de instalación.
Visit our website
www.helvex.com.mx,
to view the installation
videos.
Requerimientos de
Instalación
Para el correcto funcionamiento de
este producto, la presión mínima
es de ( 1 kg/cm²) 12,8 PSI.
Relación
Altura Tinaco-Presión
9 m
10 m
11 m
PSI
Altura (h)
12,8
14,2
15,6
kg/cm²
0,9
1
1,1
Hola soy Fluxy, te
ayudaré a instalar
tu producto.
Instalación General
*Recommended Actions
*Medidas Recomendadas
INSTALLATION GUIDE
GUÍA DE INSTALACIÓN
1-07-0637-5
For the correct operation of this
product, the minimum pressure is
(1 kg/cm ²) 12,8 PSI.
Hi I'm Fluxy, I'll
help you to install
your product.
Installation Requirements Relation
Tub Height-Pressure
/ General Installation
Height (h)
1
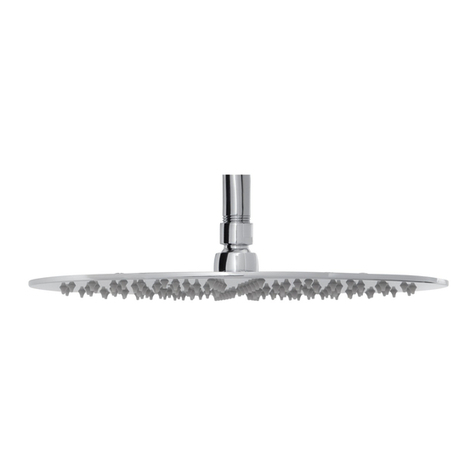
Regadera de Altura Deslizable de Cinco Chorros
con Sistema Anticalcáreo / Sprinkler Slide Height
RM-29
[email protected]
Original Parts:
Consultancy and Technical
01(55)53339431
01800 909 2020 01 (55) 53 33 94 00
Refacciones Originales:
Asesoría y Servicio Técnico:
Ext. 5068, 5815 y 5913
Service:
53 33 94 21
01 800 890 0594
taladro con broca de Ø 7/32”
Herramienta Requerida
perico teflón
/ Required Tools
teflon
adjustable
wrench
Herramienta Incluida en su Producto
/ Tools Included in your Product
desarmador de cruz
screw driver 7/32” drill bit
NPT
RM-27
RM-28
RM-27 RM-28 RM-29
[email protected]
NPT
*3,7cm
1,45”
conector con cuerda
1/2”-14 NPT
(no incluido)
rope connector
1/2 "-14 NPT
(not included)
pared con
acabado final
wall finish
*120 cm
47,2”
cuerpo mezclador
(no incluido)
mixer body
(not included)
(Nivel de Piso Terminado)
(Finished Floor Level)
La regadera manual se
puede colocar a la
izquierda o a la derecha.
The hand shower can be
placed to the left or right.
Regadera Altura Deslizable con Sistema
Anticalcáreo/ Sliding Shower Height System with
Antiscale
7,87”
*20 cm
*120 cm
47,24” *110 cm
43,24”
2
2
Compoentes
n / m nCopone ts
9
10
11
15
14
13
2
4
12
8
67
6
7
5
3
2
1
1
3
5
3
s a i a rIntal c ón Regde a / Spr nk er In tal ati
il s l on
456
Perfore las marcas con broca de
Ø7/32” para concreto (no incluida). /
Drill with drill marks Ø7/32 "concrete
(not included).
Inserte los taquetes (incluidos) en los
barrenos. / Insert anchors (provided)
into the holes.
Retire el tapón de los soportes de
sujeción (incluidos). / Remove the
cap from the mounting brackets
(included).
Inserte los soportes (incluidos) en el
tubo guía. / Insert brackets (included)
into the guide tube.
tapón
plug
soporte
support
789
taquetes
anchors
soporte
(incluido)
bracket
(included)
pija (incluida)
dick (included)
15 15
1 Tapón Tubo guía / Guide tube cap
2 O’ring / O’ring
3 Taquete / Dowel
4 Soporte de Sujeción / Clamping Support
5 Tornillo / Screw
6 O’ring / O’ring
7 Tapón Soporte / Plug Support
8 Soporte de Regadera / Watering Support
10 Empaque / Packing
9 Codo / Elbow
11 Conector p/Regadera /Connector f/Shower
12 Tubo Guía / Guide Tube
13 Manguera Flexible / Flexible Hose
14 Economizador / Economizer
No. Descripción Description
15 Cabezal Regadera / Sprinkler head
Presente el tubo guía y marque. / Present the guide tube and
mark.
tubo guía
guide tube
Ubique los centros de los barrenos y
marque con un punto de golpe. /
Locate the centers of the holes and
mark with a hit point.
punto de
golpe
hit point
soporte
(incluido)
bracket
(included)
tubo guía
guide tube
Fije el tubo guía con las pijas
(incluidas). / Attach the guide tube
with lag screws (included).
pija (incluida)
dick (included)
RM-27 RM-29
RM-28
3
10 11 12
tapón
plug
tapón
plug
Colocar teflón
en las uniones
roscadas.
Place teflon
threaded joints.
Enrosque un extremo de la
manguera (incluida) al codo y el otro
extremo al cabezal regadera
(incluido). / Thread one end of the
hose (included) to the elbow and the
other to the shower head (included).
codo
elbow
Op r c ón /e aiO r tio
pe an
La regadera tiene la opción de 5 chorros diferentes, seleccione
el chorro deseado mediante el giro del plato en cualquier
sentido. / The shower has a choice of 5 different jets, select the
desired plate by rotating the jet in any direction.
9
Los tipos de chorro son:
1. Rocío
2. Lluvia fina
3. Lluvia Gruesa
4. Champagne
5. Masaje
Jet types are:
1.-Dew
2.-Fine Rain
3.- Thick rain
4.-Champagne
5.-Massage
Esta función sólo aplica a los modelos RM-27 y RM-29.
/This feature only applies to the RM-27 and RM-29
models.
1 2 3 4 5
13 Para deslizar el soporte de la regadera oprima el botón y
deslice hacia arriba o hacia abajo. Oriente el soporte en el
ángulo que desee. / To slide the bracket Sprinkler press the
button and slide up or down. Orient bracket in the desired
angle.
14
Pase el dedo por encima de los anticalcáreos para eliminar el
sarro. /Swipe your finger over the limescale to remove tartar.
9
15 Limpie economizador a chorro de agua. / Clean running water
economizer.
16
L pi za
im e
/Cleaning
Los modelos RM-27, RM-28 y RM-29
son de libre mantenimiento.
/ The RM-27, RM-28 and RM-29 models
are maintenance free.
Inserte los tapones de los soportes. /
Insert plugs brackets.
Enrosque el conector a la
alimentación y rosque el codo,
purgue la línea de alimentación antes
de conectar el codo. / Thread the
power connector and thread the
elbow, flush the supply line before
connecting the elbow.
codo
(incluido)
elbow
(included)
alimentación
feeding
llave allen de ½”(no
incluida)
allen wrench ½ "(not
included)
1/2”-14 NPT
conector
1/2 "-14 NPT
connector
cabezal regadera
(incluido)
shower head
(included)
manguera
(incluida)
hose
(included)
HELVEX, S. A. DE C.V. Calzada Coltongo 293, Col. Industrial Vallejo 02300 Del. Azcapotzalco, México, D.F. Tel. (55) 53-33-94-00.
Es muy importante seguir las siguientes instrucciones para conservar los
acabados de los
1. Utilice únicamente agua y un paño limpio.
2. No utilice fibras, polvos, abrasivos, ni productos químicos.
3. No utilice objetos punzo-cortantes para limpiar los acabados.
4. Se recomienda realizar la limpieza de suproducto diariamente.
Nota: Vea nuestros tips en la pag. www.helvex.com.mx
productos HELVEX, con brillo y en perfecto estado:
It is very important to follow the instructions below to preserve HELVEX products
finishes, shiny and in perfect condition:
1. Use only water and a clean cloth.
2. Do not use fibers, powders, abrasives, or chemicals.
3. Do not use sharp objects to clean the finish.
4. It is recommended to clean your product daily.
Note: See our tips on: www.helvex.com.mx
Recomendaciones de Limpieza / Cleaning Recommendations
Posibles Causas y Soluciones / Possible Causes and Solutions
In Guadalajara:
Contact:
Enter our free
training courses.
In Monterrey:
En la Ciudad de México:
In Mexico City:
En Monterrey:
En Guadalajara:
01 55 53 33 94 00
Ext. 5804, 5805 y 5806 (0133) 36 19 01 13
Comunícate:
Participa en nuestros
cursos gratuitos
de capacitación.
(0181) 83 33 57 67
(0181) 83 33 61 78
4
Problema Causa Solución
Fuga en el codo. Leak in
the elbow.
No se colocó cinta teflón en las uniones. / Teflon tape is
not placed on the joints.
Colocar cinta teflón en cada unión, máximo 3 vueltas (pag. 3
paso 11. / Place Teflon tape at each joint, maximum 3 laps
(page 3 step 11).
El economizador está obstruído. / The economizer is
blocked.
Limpie el economizador a chorro de agua (mantenimiento). /
Clean running water economizer (maintenance)
Los anticalcáreos están sucios. / The limescale are dirty. Limpie los anticalcáreos (mantenimiento). / Clean limescale
(maintenance).
Fuga en las conexiones de
la manguera. / Leak at
hose connections.
Las conexiones no están apretadas. / The connections
are not tight. Apriete firmemente las conexiones. / Tighten connections.
Disminución del chorro de
agua. / Decreased water
jet.