manuals.online logo
Brands
  1. Home
  2. •
  3. Brands
  4. •
  5. Helvex
  6. •
  7. Plumbing Product
  8. •
  9. Helvex Mangna DX Mangna DX User manual

Helvex Mangna DX Mangna DX User manual

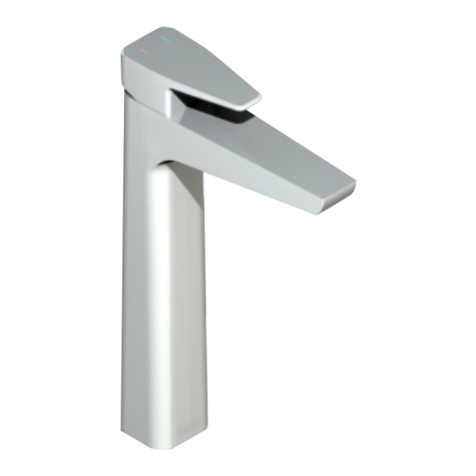
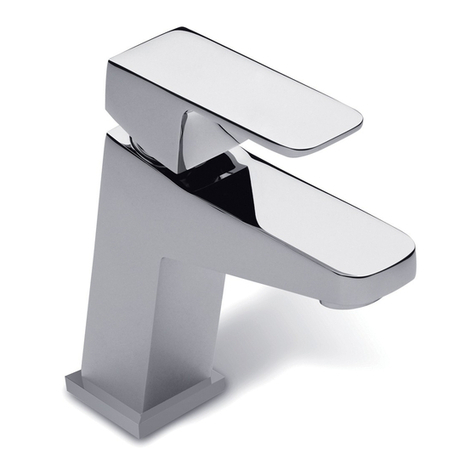
Monomando Alto con Contra de Push /
Tall, Single Control Faucet for Wash Basin
with Push Drain
EP-915 Mangna DX
INSTALLATION GUIDE
GUÍA DE INSTALACIÓN
1-02-2928-2
Para el correcto funcionamiento de
este producto, la presión mínima
es de (0,6 kg/cm²) 8,53 PSI.
5 m
6 m
7 m
7,11
8,53
9,95
0,5
0,6
0,7
For the correct operation of this
product, the minimum pressure is
(0,6 kg/cm²) 8,53 PSI.
Cada metro de altura de
su producto a la base
del tinaco equivalen a
(0,1 kg/cm²) [1,42 PSI].
Every meter of height of
your product to the base
of the water tank (0,1
kg/cm²) [1,42 PSI]
equivals.
PSI
Altura (h) kg/cm²
Height (h)
[email protected]
Original Parts:
Consultancy and Technical
01(55)53339431
01800 909 2020 01 (55) 53 33 94 00
Refacciones Originales:
Asesoría y Servicio Técnico:
Ext. 5068, 5815 y 5913
Service:
53 33 94 21
01 800 890 0594
[email protected]
ADVERTENCIA / WARNING
Para disminuir el riesgo de lesiones o daños a la propiedad, lea todas las instrucciones antes de instalar el
producto. Utilice gafas de seguridad. En obras de construcción, instalación, modificación, ampliación y
reparación deben cumplir con el reglamento de construcción y obras de su localidad.
El producto ilustrado puede sufrir cambios de aspecto como resultado de la mejora continua a la que está
sujeto.
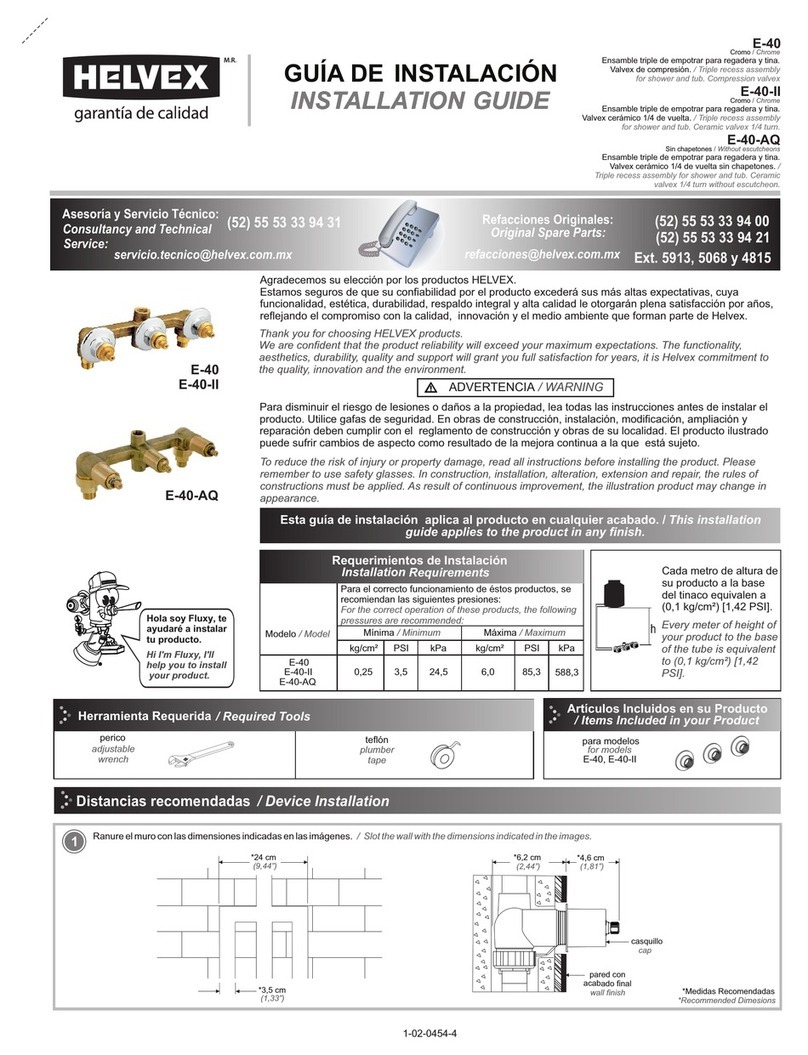
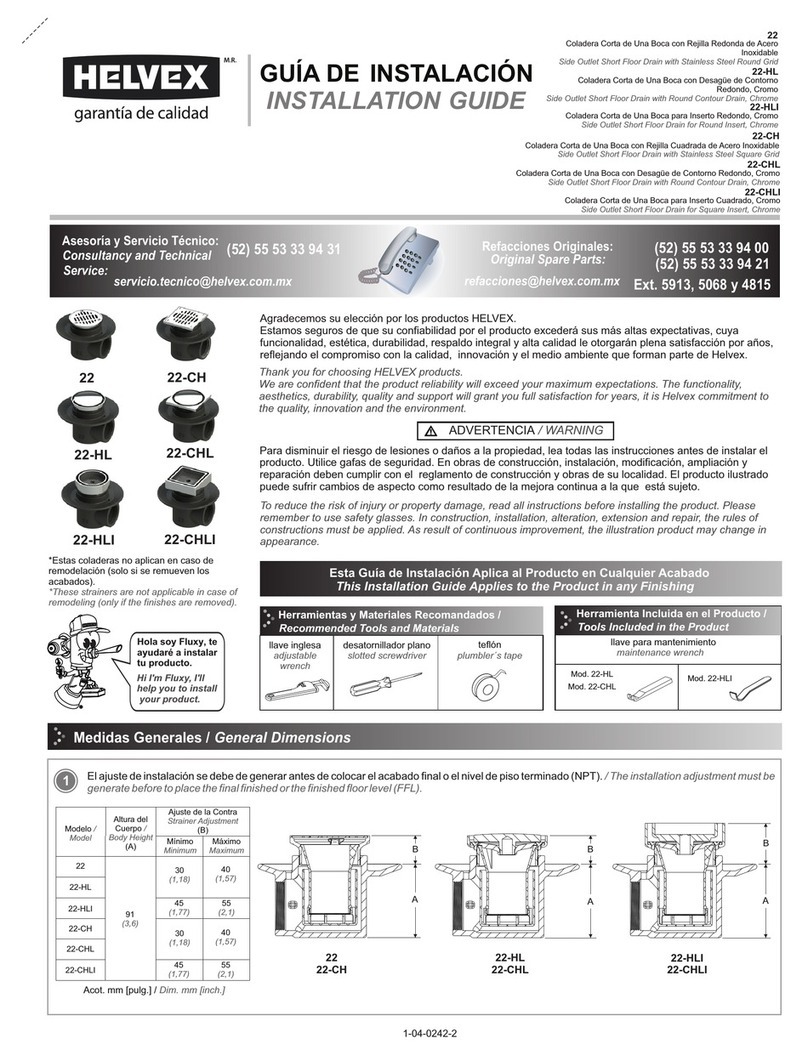
Agradecemos su elección por los productos HELVEX.
Estamos seguros de que su confiabilidad por el producto excederá sus más altas expectativas, cuya
funcionalidad, estética, durabilidad, respaldo integral y alta calidad le otorgarán plena satisfacción por años,
reflejando el compromiso con la calidad, innovación y el medio ambiente que forman parte de Helvex.
Thank you for choosing HELVEX products.
We are confident that the product reliability will exceed your highest expectations. The functionality,
aesthetics, durability are at its highest quality! The comprehensive support will grant full satisfaction for years,
reflecting our commitment to quality, innovation and the environment as part of Helvex.
To reduce the risk of injury or property damage, read all instructions. Before installing the product, please
remember to use safety glasses. In construction, installation, alteration, extension and repair, the rules of
constructions must be applied.
As result of continuous improvement, the product illustration may change in appearance.
Esta guía de instalación aplica al producto en cualquier acabado. / This installartion
guide applies to the product in any finish.
Requerimientos de
Instalación
Relación
Altura Tinaco-Presión
Installation Requirements Relation
Tub Height-Pressure
Herramienta Incluida en su Producto
/ Tools Included in your Product
Herramienta Requerida / Required Tools
perico llave inglesa teflón
wrench teflon
tape
adjustable
wrench hexagonal
wrench 1¼”
llave
aereator
service key
llave p/ llave allen llave de
mantenimiento
key maintenance
hexagonal 1 ¼” 2 mm
aireador
2 mm allen
wrench
Instalación General
hot
Caliente
cold
Fría
*55 cm
(21,6”)
*20,3 cm
angle stops
válvulas
angulares
NPT
(8”)
*Recommended
*Medidas Recomendadas
(Nivel de Piso Terminado)
(Finished Floor Level)
/ General Installation
1Cierre el suministro de agua. / Close the water supply.
Ubique y cierre las válvulas de suministro de agua.
Generalmente se encuentran debajo del lavabo. Si se trata de un
reemplazo de grifo, quite el grifo viejo y limpie completamente la
superficie del lavabo.
Locate and close the water supply valve.
Usually found under the sink. If it is a replacement faucet, remove
the old faucet and clean the entire surface of the sink.
Inserte la salida en el lavabo y
verifique que se coloque el o´ring. /
Insert the faucet in the sink and
check that the gasket is placed
23
Instalación Salida /
2
tuerca
nut
4
Instalación de las Mangueras
/ Installation of Hoses
6
/ Drain Installation
Limpie la superficie.
Clean the surface.
mangueras
(incluidas)
hoses
(included)
Instalación Contra Desagüe
/ Drain Installation
línea de
alimentación
rondana
empaque
gasket
stainless
steel washer
Desenrosque la tuerca, retire la rondana
y el separador. / Remove the stainless
steel washer and shank gasket.
Conecte las mangueras (incluidas) a los tubos de alimentación y
posteriormente a la línea de alimentación. / Connect hoses
(included) to the faucet pipes and then to angle stops.
½-14-NPSM
angle stop
(not included)
Faucet Installation
separador
shank gasket
empaque
gasket
Coloque el separador, rondana y enrosque
la tuerca para sujetar la salida./Place the
shank gasket, stainless steel washer and
tighten the nut to hold the faucet.
separador
shank gasket
rondana
stainless steel
washer nut
tuerca
5Abra el suministro de agua y purgue la línea de alimentación. /
To purge supply lines, open and close angle stops.
líneas de
alimentación
agua caliente
hot water
agua fría
cold water
angle stops
7 8
protector
tuerca
protector
nut
contra de
push
push drain
tubo
tube
empaque
cónico
washer
rondana
tapered
gasked
Desarme la contra desagüe. / Dissamble drain.
empaque
gasket
contra
grid drain
Alinear la insignia
con el lavabo.
Align Logo with sink.
Coloque el empaque e inserte la contra. Place the gasket then insert
the drain.
3
9 10
rondana
washer
empaque
cónico
conical gasket
nut
tuerca
Inserte el empaque cónico, rondana y apriete la tuerca. /
Insert the tapered gasket, washer and tighten the nut.
Enrosque el tubo unión céspol y posteriormente el desagüe (no
incluido). Screw the joint pipe and then east to trap (not included).
Colocar teflón en las
uniones roscadas.
Place teflon tape
around.
tubo unión
céspol
joint pipe
céspol
(no incluido)
Mod. TV-016 ó
TV-017
trap
(not included)
12 Para abrir levante el maneral, para regular la temperatura; gire
a la izquierda para más caliente y a la derecha para más fría. /
To open, lift the handle to regulate the temperature, turn left and
right hotter to colder.
13
+ caliente
hot abrir
open
+ fria
cold
Abra el suministro de agua. / Opening the water supply.
Caliente
hot
cold
Fría
Revise que no existan fugas
encima y debajo del lavabo.
Check for leaks up and
down the lavatory.
Operación
/ Operation
11 Desenrosque la cubierta y extensión superior, coloque el inserto en el cuerpo contra con los o'rings y empaque. Posteriormente
reensamble. / Unscrew the cover and upper extension, place the insert in the body against and o'rings gasket then reassemble.
Instalación para Lavabo sin / Instalation for
cubierta
cover
empaque
gasket
o’rings
extensión superior
uper extension
o’rings
inserto
insert
cuerpo contra
body against
Rebosadero Lavatory without Overflow
4
Operación del Aireador / Operation Aerator
16
aireador
areator llave (incluida)
wrench (included)
Desenrosque el aireador con la llave (incluida) y límpielo a chorro de agua con un cepillo suave. / Unscrew the aerator with wrench (included)
and clean water jet with a soft brush.
Mantenimiento del Aireador / Maintenance Aerator
Direccione el chorro hacia adelante, atrás, izquierda y derecha en cualquier ángulo. / Route the jet forward, backward, left and right at any angle.
15
°8
8°
Se puede direccionar el chorro de agua presionando en cualquier punto del aireador, como se muestra en la figura. / Can direct the jet of water
pressing on any Aerator point, as shown in Fig.
14
8°
5
Desenrosque la tuerca de sujeción con la llave (incluida) y retire el cartucho. / Remove the lock nut with the wrench (included) and remove the
cartridge.
19
17
Apriete firmemente.
Tighten.
Enrosque nuevamente el aireador y colóquelo en la salida. / Screw the aerator and place it back in the faucet.
Mantenimiento del Cartucho / Cartridge Installation
Cierre el suministro de agua antes de comenzar, desenrosque el opresor del maneral, retire el maneral y el chapetón. / Shut off water before
you start, unscrew the setscrew of the handle, remove the handle and escutcheon.
18
maneral
handle
opresor
setscrew
chapetón
escutcheon
cartucho
cartridge
tuerca de sujeción
locknut
Mod. Rh-2529
6
01 55 53 33 94 00
Ext. 5804, 5805 y 5806 (0133) 36 19 01 13
Comunícate:
Participa en nuestros
cursos gratuitos
de capacitación.
(0181) 83 33 57 67
(0181) 83 33 61 78
In Guadalajara:
Contact:
Enter our free
training courses.
In Monterrey:
En la Ciudad de México:
In Mexico City:
En Monterrey:
En Guadalajara:
HELVEX, S. A. DE C.V. Calzada Coltongo 293, Col. Industrial Vallejo 02300 Del. Azcapotzalco, México, D.F. Tel. (55) 53-33-94-00.
Es muy importante seguir las siguientes instrucciones para conservar los
acabados de los productos HELVEX, con brillo y en perfecto estado:
1. Utilice únicamente agua y un paño limpio.
2. No utilice fibras, polvos, abrasivos, ni productos químicos.
3. No utilice objetos punzo-cortantes para limpiar los acabados.
4. Se recomienda realizar la limpieza de su producto diariamente.
Nota: Vea nuestros tips en la pag. www.helvex.com.mx
It is very important to follow the instructions below to preserve HELVEX products
finishes, shiny and in perfect condition:
1. Use only water and a clean cloth.
2. Do not use fibers, powders, abrasives, or chemicals.
3. Do not use sharp objects to clean the finish.
4. It is recommended to clean your product daily.
Note: See our tips on: www.helvex.com.mx
Recomendaciones de Limpieza / Cleaning Recommendations
Posibles Causas y Soluciones / Possible Causes and Solutions
No se colocó el empaque. / The gasket is not placed
Problema / Problem Causas / Causes Solucións / Solutions
Existe poco flujo de agua. /
There is some water flow
Aireador obstruido / Clogged areator
La presión de opreación no es la adecuada. /
The operating pressure is not adequate.
Las Válvulas angulares no estan totalmente abiertas. /
No angle valves are fully open.
Retire el aireador y límpielo. / Remove the aereator and clean.
Verifique que la presión mínima de opreación sea 0,6 Kg/cm² /
Verify that the minimum operating pressure is 0,6 Kg/cm²
Abrir totalmente las válvulas angulares. (Pag. 3, paso 12)
/ Fully open angle valves (page 3, step 12)
La salida está floja.
/ The faucet is loose.
La tuerca esparrago no esta apretada.
/ The shank nut is tight. Apriete firmemente la tuerca espárrago (Pag. 2, paso 4).
/ Tigthen the shank nut /Page 2, step 4).
Hay fuga en las conexiones.
/ There are leaks in the
connections.
Posiblemente no estén firmemente apretadas.
/ Possibly not tight.
Apriete firmemente la conexión (Pag. 2, paso 6) instalación de
mangüeras. / Thigten the connection (page 2, step 6) Install hoses.
No sella la contra.
/ The drain does not seal
Coloque el empaque de la contra superior y apriete firmemente.
/ Place the drain gasket (Page 2, step 8 Drain Installation)

Other Helvex Plumbing Product manuals

Helvex Magna E-83 User manual

Helvex

Helvex Magna E-83 User manual

Helvex UMO8X-INN-01 User manual

Helvex

Helvex UMO8X-INN-01 User manual

Helvex 313-19 User manual

Helvex

Helvex 313-19 User manual

Helvex Kubica TR-036 User manual

Helvex

Helvex Kubica TR-036 User manual

Helvex E-931 User manual

Helvex

Helvex E-931 User manual

Helvex 313-38-4.8 User manual

Helvex

Helvex 313-38-4.8 User manual

Helvex Argos TV-296 User manual

Helvex

Helvex Argos TV-296 User manual

Helvex Squadra E-929 User manual

Helvex

Helvex Squadra E-929 User manual

Helvex TH-062 User manual

Helvex

Helvex TH-062 User manual

Helvex Clasica 100 User manual

Helvex

Helvex Clasica 100 User manual

Helvex 24-CH User manual

Helvex

Helvex 24-CH User manual

Helvex EP-95 User manual

Helvex

Helvex EP-95 User manual

Helvex Clasica 104 User manual

Helvex

Helvex Clasica 104 User manual

Helvex DECO UMO8-DC-01 User manual

Helvex

Helvex DECO UMO8-DC-01 User manual

Helvex MEP-2004 User manual

Helvex

Helvex MEP-2004 User manual

Helvex 342-C User manual

Helvex

Helvex 342-C User manual

Helvex 312-WC-4,8 User manual

Helvex

Helvex 312-WC-4,8 User manual

Helvex NUVA E-46 User manual

Helvex

Helvex NUVA E-46 User manual

Helvex Maxima E-712 User manual

Helvex

Helvex Maxima E-712 User manual

Helvex Europeo EP-2001 User manual

Helvex

Helvex Europeo EP-2001 User manual

Helvex Forza TV-304 Instruction Manual

Helvex

Helvex Forza TV-304 Instruction Manual

Helvex Kubica E-84 User manual

Helvex

Helvex Kubica E-84 User manual

Helvex FC-185-19 User manual

Helvex

Helvex FC-185-19 User manual

Helvex TZF NAO User manual

Helvex

Helvex TZF NAO User manual

Popular Plumbing Product manuals by other brands

American Standard Shower System Kit 1662.600 Specification sheet

American Standard

American Standard Shower System Kit 1662.600 Specification sheet

Bradley S19-120P Installation

Bradley

Bradley S19-120P Installation

Kohler K-75449-BV installation guide

Kohler

Kohler K-75449-BV installation guide

Elkay EWMA4820 Specifications

Elkay

Elkay EWMA4820 Specifications

Mira Mode Maxim Installation and user guide

Mira

Mira Mode Maxim Installation and user guide

BELLOSTA LIFE 0501/1/A Installation instruction

BELLOSTA

BELLOSTA LIFE 0501/1/A Installation instruction

DXV Fresno D35403350 installation instructions

DXV

DXV Fresno D35403350 installation instructions

Conti+ A Series Installation & user manual

Conti+

Conti+ A Series Installation & user manual

Danze D226058 manual

Danze

Danze D226058 manual

Laufen PRO H260950 0001 Series manual

Laufen

Laufen PRO H260950 0001 Series manual

damixa Silhouet RSK 8430629 Installation instruction

damixa

damixa Silhouet RSK 8430629 Installation instruction

Moen A1717 Series quick start guide

Moen

Moen A1717 Series quick start guide

KWC A 125 Installation and service instructions

KWC

KWC A 125 Installation and service instructions

American Standard Savona Bidet 5089.024 Specifications

American Standard

American Standard Savona Bidet 5089.024 Specifications

newform NIO 70422E instructions

newform

newform NIO 70422E instructions

Sloan OPTIMA I.Q. EAF-100 Series Repair Parts and Maintenance Guide

Sloan

Sloan OPTIMA I.Q. EAF-100 Series Repair Parts and Maintenance Guide

Presenza QK81C user manual

Presenza

Presenza QK81C user manual

IKEA YTTRAN user manual

IKEA

IKEA YTTRAN user manual

manuals.online logo
manuals.online logoBrands
  • About & Mission
  • Contact us
  • Privacy Policy
  • Terms and Conditions

Copyright 2025 Manuals.Online. All Rights Reserved.