manuals.online logo
Brands
  1. Home
  2. •
  3. Brands
  4. •
  5. Henny Penny
  6. •
  7. Commercial Food Equipment
  8. •
  9. Henny Penny Wendy's Evolution Elite EEG-251 User manual

Henny Penny Wendy's Evolution Elite EEG-251 User manual

FM05-097F
OPERATOR'S
MANUAL
EEG-251
EEG-252
EEG-253
EEG-254
WWeennddyy’’ss EEvvoolluuttiioonn
EElliittee™™ ((GGaass))
RReedduucceedd OOiill CCaappaacciittyy
OOppeenn FFrryyeerr
Contents
i
Table of Contents
Safety and Compliance.................................................................................................v
Chapter 1 Introduction.....................................................................................................1
1.1 Introduction ...........................................................................................................1
1.2 Features................................................................................................................1
1.3 Proper Care...........................................................................................................1
1.4 Assistance.............................................................................................................1
Chapter 2 Installation ......................................................................................................3
2.1 Introduction ...........................................................................................................3
2.2 Unpacking .............................................................................................................3
2.3 Selecting The Fryer Location ..................................................................................4
2.4 Leveling The Fryer .................................................................................................4
2.5 Ventilation Of Fryer ................................................................................................4
2.6 Gas Supply............................................................................................................5
2.7 Gas Leak Test........................................................................................................8
2.8 Gas Pressure Regulator Setting ..............................................................................8
2.9 Electrical Requirements..........................................................................................8
2.10 Motor Bearings ....................................................................................................9
2.11 Lighting & Shutdown Of Burners ............................................................................9
2.11.1 Lighting Burners.............................................................................................9
2.11.2 Shutdown Burners..........................................................................................9
2.12 Testing The Fryer .................................................................................................9
2.13 Dimensions........................................................................................................10
Chapter 3 Operation......................................................................................................13
3.1 Operating Components ........................................................................................13
3.2 Set-Up Mode .......................................................................................................16
3.3 Filling Or Adding Oil .............................................................................................18
3.3.1 Filling Vat From Bulk Supply ...........................................................................19
3.4 Morning Start-Up Procedures................................................................................19
3.5 Basic Operation ...................................................................................................20
3.6 Idle Mode ............................................................................................................20
3.7 OIL GUARDIAN™ (Auto Top-Off) ..........................................................................21
3.7.1 Manual Top-Off..............................................................................................21
3.8 Selecting A Product With A Different Set-Point .......................................................21
3.9 Replacing The BIB ...............................................................................................21
3.10 Filtering The Shortening......................................................................................22
3.10.1 Smart Touch with Software Version ...............................................................22
3.10.2 Troubleshooting a Filter Error........................................................................23
3.11 Daily Filtering .....................................................................................................23
3.11.1 Smart Touch Software Version ......................................................................23
3.11.2 Troubleshooting a Daily Filter Error................................................................25
3.12 Discarding Oil From Vat ......................................................................................26
3.12.1 Discarding Oil Using Optional Discard Shuttle ................................................26
3.12.2 Discarding Oil Using Optional Bulk Oil Dispose System...................................27
3.12.3 Discard Oil Using Optional Oil Discard Shuttle ODS-400 .................................28
3.12.4 Discard Oil Using Optional Oil Discard Shuttle ODS-450 .................................31
Contents
ii
3.13 Changing The Filter Pad .....................................................................................36
3.14 Removing & Cleaning Basket Rest ......................................................................40
3.15 Clean-Out Mode.................................................................................................41
3.15.1 Smart Touch ................................................................................................41
3.16 Cold Soak Procedure .........................................................................................43
3.17 Check/Replace Drain Pan O-Rings......................................................................43
3.18 Info & Filter Button Stats .....................................................................................45
3.18.1 Info Button Stats ..........................................................................................45
3.18.2 Filter Button Stats.........................................................................................45
3.19 Preventative Maintenance ..................................................................................46
3.20 Clean Blower & Vents.........................................................................................46
Chapter 4 Information Mode ..........................................................................................49
4.1 1. E-Log (Error Code Log).....................................................................................49
4.2 2. Last Load.........................................................................................................50
4.3 3. Daily Stats .......................................................................................................50
4.4 4. Oil Stats...........................................................................................................51
4.5 5. Review Usage..................................................................................................52
4.6 16. USB Support ..................................................................................................53
Chapter 5 Product Program Mode..................................................................................55
5.1 Modifying Product Settings ...................................................................................55
Chapter 6 Level 2 Programming.....................................................................................59
6.1 Special Program Mode .........................................................................................59
6.2 Do Not Disturb .....................................................................................................66
6.3 Clock Set.............................................................................................................67
6.4 Data Logging, Heat Control, Tech, Stat, & Filter Control Modes................................68
Chapter 7 Troubleshooting ............................................................................................69
7.1 Troubleshooting Guide .........................................................................................69
7.2 Error Codes.........................................................................................................70
Contents
iii
Contents
iv
List of Tables
Table 3-1 Operating Controls & Indicators .........................................................................14
Table 3-2 Operating Components .....................................................................................16
Table 3-3 Oil Capacities ...................................................................................................18
Table 3-4 Info Button Stats ...............................................................................................45
Table 3-5 Filter Button Stats .............................................................................................45
Table 3-6 Preventative Maintenance Schedule ..................................................................46
Table 6-1 Special Program Modes ....................................................................................59
Table 6-2 Special Programming Procedures ......................................................................61
Table 7-1 Troubleshooting................................................................................................69
Table 7-2 Error Codes......................................................................................................70
List of Figures
Figure 2-1 Flexible Gas Line & Cable Restraint Installation ...................................................7
Figure 2-2 EEG-25X Side View.........................................................................................10
Figure 2-3 3-Well Back View ............................................................................................ 11
Figure 2-4 4-Well Back View ............................................................................................ 11
Figure 3-1 Operating Controls & Indicators ........................................................................13
Figure 3-2 Operating Components....................................................................................16
Preface
v
SSaaffeettyy aanndd CCoommpplliiaannccee
Henny Penny fryers have many safety features incorporated. However, the only way
to ensure safe operation is to fully understand the proper installation, operation, and
maintenance procedures. The instructions in this manual have been prepared to aid
you in learning the proper procedures. Where information is of particular importance
or is safety related, the words DANGER, WARNING, CAUTION, or NOTICE are used.
Their usage is described as follows:
DDAANNGGEERR!! indicates hazardous situation which, if not
avoided, will result in death or serious injury.
DDAANNGGEERR!!
WWAARRNNIINNGG!! indicates hazardous situation which, if not
avoided, could result in death or serious injury.
WWAARRNNIINNGG!!
CCAAUUTTIIOONN!! indicates hazardous situation which, if not
avoided, could result in moderate or minor injury.
CCAAUUTTIIOONN!!
NOTICE
NOTICE
is used for information considered important
regarding property damage.
Preface
vi
These are the original version controlled Henny Penny instructions for Evolution Elite
Gas (EEG) model 253, 254 (EEG 25x). This manual is available on the Henny Penny
Public website (www.hennypenny.com). Read these instructions completely prior to
installation and operation of this appliance to ensure compliance to all required
installation, operation and safety standards. Read and obey all safety messages to
avoid damage to the appliance and personal injury.
•TThhiiss ffrryyeerr mmuusstt bbee iinnssttaalllleedd aanndd uusseedd iinn aa wwaayy tthhaatt
wwaatteerr ddooeess nnoott ccoonnttaacctt tthhee ooiill wwhhiicchh ccaann ccaauussee
ssppllaasshhiinngg aanndd bbooiilliinngg oovveerr ooff ooiill aanndd sstteeaamm lleeaaddiinngg
ttoo ppeerrssoonnaall iinnjjuurryy;; eexxcclluuddeess nnoorrmmaall pprroodduucctt
mmooiissttuurree..
•BBuurrnn rriisskk!! DDoo nnoott mmoovvee tthhee ffrryyeerr oorr ffiilltteerr ddrraaiinn ppaann
wwhhiillee ccoonnttaaiinniinngg hhoott ooiill.. PPeerrssoonnaall iinnjjuurryy oorr sseerriioouuss
bbuurrnnss ccaann rreessuulltt ffrroomm ssppllaasshhiinngg hhoott ooiill..
PROPER USE AND SERVICE
This appliance is intended for commercial use in kitchens of restaurants, bakeries,
hospitals, etc. but not for the continuous mass production of food such as in a factory
setting. During use the units airborne A-weighted emission sound pressure is below
70 db(A). All repairs must be performed by the manufacturer, its service agent or
similarly qualified persons in order to avoid a hazard.
ELECTRICAL REQUIREMENTS
Always use strain relief. The provided power cord must be installed with a strain relief
in a way that if the strain relief fails, wires L1, L2, L3 and N must draw taunt and fail
first. If the supplied power cord or an existing one becomes damaged, do not use it;
rather, replace it with a known good power cord with a wire size of 4mm, to be wired to
the terminal block. If a flexible power cord is used, it must be HO7RN type.
Additionally the power cord must be oil-resistant, sheathed, flexible cable, no lighter
than ordinary polychloroprene or other equivalent synthetic elastomer-sheathed cord.
The power cord must be replaced by the manufacturer, its service agent or similarly
qualified persons in order to avoid a hazard. It’s recommended that a 30 MA rated
protective device such as a residual current circuit breaker (RCCB) or ground fault
circuit interrupter (GFCI) be used on the fryer circuit. This appliance is not intended to
be operated by means of an external timer or a separate remote control system. Do
not disconnect the ground (earth) plug. This fryer must be adequately and safely
grounded (earthed) or electrical shock could result. Refer to local electrical codes for
correct grounding (earthing) procedures or in absence of local codes, with The
National Electrical Code, ANSI/NFPA No. 70-(the current edition).
Preface
vii
In CANADA, all electrical connections are to be made in accordance with CSA C22.1,
Canadian Electrical Code Part 1, and/or local codes. For equipment with CE mark
only, to prevent electric shock hazard this appliance must be bonded to other
appliances or touchable metal surfaces in close proximity to this appliance with an
equipotential bonding conductor.
WWAASSTTEE EELLEECCTTRRIICCAALL AANNDD EELLEECCTTRROONNIICC EEQQUUIIPPMMEENNTT ((WWEEEEEE)) As of August
16, 2005, the Waste Electrical and Electronic Equipment directive went into effect for
the European Union. Our products have been evaluated to the WEEE directive. We
have also reviewed our products to determine if they comply with the Restriction of
Hazardous Substances directive (RoHS) and have redesigned our products as
needed in order to comply. To continue compliance with these directives, this unit
must not be disposed as unsorted municipal waste. For proper disposal, please
contact your nearest Henny Penny distributor.
MAINTENANCE
Proper daily, weekly, monthly, quarterly and yearly maintenance must be performed
on this appliance to ensure safe and continuous operation. This appliance must never
be cleaned with a water jet or steam cleaning tool. Cleaning brushes are shipped with
the appliance and proper cleaning instructions are included in this manual. Proper
maintenance also increases the usable life of the appliance and oil, which reduces
lifetime operating costs. Additionally, old oil increases the possibility of surge boiling
and fire due to the reduced flash point of the oil. The oil temperature must never
exceed 450⁰ F (230⁰ C).
OPERATION
Unit operates under pressure. Ensure pressure is at zero (0) PSI before unlocking and
opening the lid, opening drain valves or other emptying devices.
PERSONNEL RESTRICTIONS
This appliance is not intended for use by persons (including children) with reduced
physical, sensory or mental capabilities, or lack of experience and knowledge, unless
they have been given supervision or instruction concerning use of the appliance by a
person responsible for their safety. Children should be supervised to ensure that they
do not play with, clean or perform maintenance on the appliance.
VENTILATION
This appliance must be installed in accordance with the manufacturer’s instructions
and only used in suitably ventilated location in accordance with the manufacturer’s
instructions and the regulations in force to prevent the occurrence of unacceptable
concentrations of substances harmful to health. Proper air flow is essential to permit
efficient removal of the steam exhaust and frying odors. Air flow for this model is 33.3
Preface
viii
cfm (56.6 m3/h) of air flow. Read the instructions fully before installing or using the
appliance.
- For gas appliance installations in South Africa, the installation shall be carried out by
a registered installer, and the installation shall comply with requirements of SANS
10087-1 or SANS827 as applicable.
Preface
ix
TTeecchhnniiccaall DDaattaa FFoorr CCEE// AAGGAA MMaarrkkeedd PPrroodduuccttss
Nominal Heat Input (Net):
Nominal Heat Input (Gross):
Supply Pressure:
Test Point Pressure
Natural (I2H) = 19.8 KW (67,560 Btu/h)
Natural (I2E) = 19.8 KW (67,560 Btu/h)
Natural (I2E+) = 19.8 KW (67,560 Btu/h)
Natural (I2L) = 19.8 KW (67,560 Btu/h)
Natural (I2HS) = 19.8 KW (67,560 Btu/h)
Liquid Propane (I3P) = 19.8 KW (67,560 Btu/
h)
Natural (I2H) = 21.98 KW (75,000 Btu/h)
(79.13 MJ/h)
Natural (I2E) = 21.98 KW (75,000 Btu/h)
Natural (I2E+) = 21.98 KW (75,000 Btu/h)
Natural (I2L) = 21.98 KW (75,000 Btu/h)
Natural (I2HS) = 21.98 KW (75,000 Btu/h)
Liquid Propane (I3P) = 21.98 KW (75,000
Btu/h) (79.13 MJ/h)
Natural (I2H) = 20 mbar (2.0 kPa)
Natural (I2E) = 20 mbar
Natural (I2E+) = 20/25 mbar
Natural (I2L) = 25 mbar
Natural (I2HS) = 25 mbar
Liquid Propane (I3P) = 30/37/50 mbar (3.0/
3.7/5.0 kPa)
Natural (I2H) = 8.7 mbar (0.87 kPa)
Natural (I2E) = 8.7 mbar
Natural (I2E+) = N/A
Natural (I2L) = 8.7 mbar
Natural (I2HS) = 8.7 mbar
Liquid Propane (I3P) = 25 mbar (2.5 kPa)
Preface
x
Injector Size Natural (I2H) = 2.08 mm
Natural (I2E) = 2.08 mm
Natural (I2E+) = 1.70 mm
Natural (I2L) = 2.30 mm
Natural (I2HS) = 2.30 mm
Liquid Propane (I3P) = 1.30 mm
Introduction
1
CChhaapptteerr 11 IInnttrroodduuccttiioonn
11..11 IInnttrroodduuccttiioonn
The Henny Penny open fryer is a basic unit of food processing equipment designed to
cook foods better and easier. The micro computer-based design helps make this
possible. This unit is used only in institutional and commercial food service
operations, and operated by qualified personnel.
11..22 FFeeaattuurreess
•Easily cleaned
•Uses 40% less oil
•Full vat or split vat
•Computer control
•Stainless steel construction
•Automatic oil top off
•Self-diagnostic system built into controls
•Built in filter with automatic filtration
•Propane or natural gas; 75,000 BTU/vat (21.97 KW)
11..33 PPrrooppeerr CCaarree
As in any unit of food service equipment, the Henny Penny open fryer does require
care and maintenance. Requirements for the maintenance and cleaning are
contained in this manual and must become a regular part of the operation of the unit
at all times.
NOTICE
: Contact a qualified service technician in case of major maintenance or
repairs to the unit.
11..44 AAssssiissttaannccee
Should you require outside assistance, call your local independent distributor in your
area, or call Henny Penny Corp. at 1-800-417-8405 or 1-937-456-8405.
Introduction
2
Installation
3
CChhaapptteerr 22 IInnssttaallllaattiioonn
22..11 IInnttrroodduuccttiioonn
This section provides the installation and unpacking instructions for the Henny Penny
Evolution Elite® fryer.
DDoo nnoott ppuunnccttuurree tthhee ffrryyeerr wwiitthh aannyy oobbjjeeccttss ssuucchh aass ddrriillllss oorr ssccrreewwss aass
ccoommppoonneenntt ddaammaaggee oorr eelleeccttrriiccaall sshhoocckk ccoouulldd rreessuulltt..
NOTICE
: Installation of this unit should be performed only by a qualified service
technician.
22..22 UUnnppaacckkiinngg
TTaakkee ccaarree wwhheenn mmoovviinngg tthhee ffrryyeerr ttoo pprreevveenntt ppeerrssoonnaall iinnjjuurryy.. TThhee ffrryyeerr
wweeiigghhss aapppprrooxxiimmaatteellyy 660000 llbbss ((227722 kkgg)) ttoo 880000 llbbss ((336633 kkgg))..
Remove filter drain pan and BIB shelf from fryer before removing fryer from
pallet or damage to the unit could result.
NOTICE
: Any shipping damage should be noted in the presence of the delivery agent
and signed prior to his or her departure.
11)) Cut and remove the metal bands from the carton.
22)) Remove carton lid and lift the main carton off the fryer.
33)) Remove corner packing supports (4).
44)) Cut the stretch film from around the carrier/rack box and remove it from the top
of the fryer lid.
55)) Cut and remove the metal bands holding the fryer to the pallet, and remove fryer
from pallet.
Installation
4
22..33 SSeelleeccttiinngg TThhee FFrryyeerr LLooccaattiioonn
TToo pprreevveenntt sseevveerree bbuurrnnss ffrroomm ssppllaasshhiinngg hhoott ooiill,, ppoossiittiioonn aanndd iinnssttaallll ffrryyeerr
ttoo pprreevveenntt ttiippppiinngg oorr mmoovveemmeenntt.. RReessttrraaiinniinngg ttiieess mmaayy bbee uusseedd ffoorr
ssttaabbiilliizzaattiioonn..
TToo aavvooiidd ffiirree aanndd rruuiinneedd ssuupppplliieess,, tthhee aarreeaa uunnddeerr tthhee ffrryyeerr sshhoouulldd nnoott bbee
uusseedd ttoo ssttoorree ssuupppplliieess..
The proper location of the fryer is very important for operation, speed, and
convenience. The location of the open fryer should allow clearances for servicing and
proper operation. Choose a location which will provide easy loading and unloading
without interfering with the final assembly of food orders. Operators have found that
frying from raw to finish, and holding the product in warmers provides fast continuous
service. Keep in mind, the best efficiency will be obtained by a straight line operation,
i.e. raw in one side and finished out the other side. Order assembly can be moved
away with only a slight loss of efficiency.
22..44 LLeevveelliinngg TThhee FFrryyeerr
For proper operation, the open fryer should be level from side-to-side and front to
back. Using a level placed on the flat areas around the vat collar, on the middle well,
and then adjust the casters until the unit is level.
22..55 VVeennttiillaattiioonn OOff FFrryyeerr
The fryer should be located with provision for venting into an adequate exhaust hood
or ventilation system. This is essential to permit efficient removal of the steam exhaust
and frying odors. Special precaution must be taken in designing an exhaust canopy to
Installation
5
avoid interference with the operation of the fryer. We recommend you consult a local
ventilation or heating company to help in designing an adequate system.
NOTICE
: Ventilation must conform to local, state, and national codes. Consult your
local fire department or building authorities.
22..66 GGaass SSuuppppllyy
WWhheenn iinnssttaalllliinngg tthhee ggaass ooppeenn ffrryyeerr,, ddoo nnoott aattttaacchh aann eexxtteennssiioonn ttoo tthhee ggaass
fflluuee eexxhhaauusstt ssttaacckk.. TThhiiss mmaayy iimmppaaiirr pprrooppeerr ooppeerraattiioonn ooff tthhee bbuurrnneerr,, ccaauuss--
iinngg mmaallffuunnccttiioonnss aanndd ppoossssiibbllee nneeggaattiivvee bbaacckk ddrraafftt..
The gas open fryer is factory available for either natural or propane gas. Check the
data plate inside the left front door of the cabinet to determine the proper gas supply
requirement. The minimum supply for natural gas is a 7 inch water column (1.7 kPa)
(17.0 mbar), and a 10 inch water column (2.49 kPa) (24.9 mbar) for propane.
DDoo nnoott aatttteemmpptt ttoo uussee aannyy ggaass ootthheerr tthhaann tthhaatt ssppeecciiffiieedd oonn tthhee ddaattaa ppllaattee..
IInnccoorrrreecctt ggaass ssuuppppllyy ccoouulldd ccaauussee aa ffiirree oorr eexxpplloossiioonn rreessuullttiinngg iinn sseevveerree
iinnjjuurriieess aanndd//oorr pprrooppeerrttyy ddaammaaggee..
Please refer below for the recommended hookup of the fryer to main gas line supply.
TToo aavvooiidd ppoossssiibbllee sseerriioouuss ppeerrssoonnaall iinnjjuurryy::
• Innssttaallllaattiioonn mmuusstt ccoonnffoorrmm wwiitthh llooccaall,, ssttaattee,, aanndd nnaattiioonnaall ccooddeess.. tthhee
AAmmeerriiccaann NNaattiioonnaall SSttaannddaarrdd ZZ222233..11//NNFFPPAA 5544--((tthhee llaatteesstt eeddiittiioonn))
NNaattiioonnaall FFuueell GGaass CCooddee,, aanndd tthhee llooccaall mmuunniicciippaall bbuuiillddiinngg ccooddeess.. IInn
CCaannaaddaa,, tthhee NNaattuurraall GGaass aanndd PPrrooppaannee IInnssttaallllaattiioonn CCooddee iiss CCSSAA
BB114499..11 && IInnssttaallllaattiioonn CCooddeess -- GGaass BBuurrnniinngg AApppplliiaanncceess aanndd llooccaall
ccooddeess.. IInn AAuussttrraalliiaa,, iinn aaccccoorrddaannccee wwiitthh AAuussttrraalliiaann GGaass AAuutthhoorriittyy rruulleess
AASS55660011..11//22--22001100..
•TThhee ffrryyeerr aanndd iittss mmaannuuaall sshhuuttooffff vvaallvvee mmuusstt bbee ddiissccoonnnneecctteedd ffrroomm tthhee
ggaass ssuuppppllyy ppiippiinngg ssyysstteemm dduurriinngg aannyy pprreessssuurree tteessttiinngg ooff tthhaatt ssyysstteemm
aatt tteesstt pprreessssuurreess iinn eexxcceessss ooff 11//22 PPSSIIGG ((33..4455 kkPPaa)) ((3344..55 mmbbaarr))..
•TThhee ffrryyeerr mmuusstt bbee iissoollaatteedd ffrroomm tthhee ggaass ssuuppppllyy ppiippiinngg ssyysstteemm bbyy
cclloossiinngg iittss iinnddiivviidduuaall mmaannuuaall sshhuuttooffff vvaallvvee dduurriinngg aannyy pprreessssuurree
tteessttiinngg ooff tthhee ggaass ssuuppppllyy ppiippiinngg..
•AA ssttaannddaarrdd oonnee iinncchh ((22..5544 ccmm)),, bbllaacckk sstteeeell ppiippee aanndd mmaalllleeaabbllee ffiittttiinnggss
sshhoouulldd bbee uusseedd ffoorr ggaass sseerrvviiccee ccoonnnneeccttiioonnss ffoorr 33 aanndd 44 wweellll ooppeenn
ffrryyeerrss,, aanndd 33//44 iinncchh ((11..9911 ccmm)) ffoorr 22 wweellll..
•DDoo nnoott uussee ccaasstt iirroonn ffiittttiinnggss..
•AAlltthhoouugghh oonnee iinncchh ((22..5544 ccmm)) ssiizzee ppiippee iiss rreeccoommmmeennddeedd ffoorr 33 aanndd 44
wweellllss aanndd 33//44 iinncchh ((11..9911 ccmm)) ffoorr 22 wweellll,, ppiippiinngg sshhoouulldd bbee ooff aaddeeqquuaattee
ssiizzee aanndd iinnssttaalllleedd ttoo pprroovviiddee aa ssuuppppllyy ooff ggaass ssuuffffiicciieenntt ttoo mmeeeett tthhee
mmaaxxiimmuumm ddeemmaanndd wwiitthhoouutt uunndduuee lloossss ooff pprreessssuurree bbeettwweeeenn tthhee mmeetteerr
aanndd tthhee ooppeenn ffrryyeerr.. TThhee pprreessssuurree lloossss iinn tthhee ppiippiinngg ssyysstteemm sshhoouulldd nnoott
eexxcceeeedd aa 00..33 iinncchh wwaatteerr ccoolluummnn ((00..774477 mmbbaarr))..
Installation
6
Provisions should be made for moving the open fryer for cleaning and servicing. This
may be accomplished by:
11.. Installing a manual gas shutoff valve and a disconnect or union.
22.. Installing a heavy-duty design CSA certified connector. In order to be able to
service this appliance, which is provided with casters, a connector complying
with ANSI Z21.69-CAN 6.16 or CAN 1-6.10m88 and a quick-disconnect device,
complying with ANSI Z21.41 or CAN 1-6.9m70, must be installed. It must also
be installed with restraining means to guard against transmission of strain to the
connector as specified in the appliance manufacturer’s instructions.
33.. See Figure 2-1
Flexible Gas Line & Cable Restraint Installation
, page 7 for the
proper connection of flexible gas line and cable restraint.
NOTE: The cable restraint limits the distance the open fryer can be pulled from the
wall. For cleaning and servicing the unit, the cable must be unsnapped from the open
fryer and the flexible gas line disconnected. This allows better access to all sides of
the open fryer. The gas line and cable restraint must be reconnected once the
cleaning or servicing is complete.
Installation
7
Figure 2-1 Flexible Gas Line & Cable Restraint Installation
Installation
8
22..77 GGaass LLeeaakk TTeesstt
TToo aavvooiidd ffiirree aanndd//oorr eexxpplloossiioonn,, nneevveerr uussee aa lliigghhtteedd mmaattcchh oorr ooppeenn ffllaammee
ttoo tteesstt ffoorr ggaass lleeaakkss.. IIggnniitteedd ggaass ccoouulldd rreessuulltt iinn sseevveerree ppeerrssoonnaall iinnjjuurryy
aanndd//oorr pprrooppeerrttyy ddaammaaggee..
NOTICE
: Prior to turning the gas supply on, be sure the gas valve knob on the gas con-
trol valve is in the off position.
Upon initial installation, and after moving the unit, the piping and fittings should be
checked for gas leaks. A simple checking method is to turn on the gas and brush all
connections with a soap solution. If bubbles occur, it indicates escaping gas. In this
event, the piping connections must be redone.
22..88 GGaass PPrreessssuurree RReegguullaattoorr SSeettttiinngg
The gas pressure regulator on the gas control valve is factory set as follows:
• Natural: 3.5 inch water column (0.87 kPa) (8.27 mbar).
• Propane: 10 inch water column (2.49 kPa) (24.9 mbar).
NOTE: The gas pressure regulator has been set by Henny Penny and is not to be
adjusted by the user.
22..99 EElleeccttrriiccaall RReeqquuiirreemmeennttss
•TToo aavvooiidd eelleeccttrriiccaall sshhoocckk,, tthhiiss aapppplliiaannccee mmuusstt bbee eeqquuiippppeedd wwiitthh aann
eexxtteerrnnaall cciirrccuuiitt bbrreeaakkeerr wwhhiicchh iinnccoorrppoorraatteess aa 33 mmmm ddiissccoonnnneeccttiioonn iinn
aallll uunnggrroouunnddeedd ((uunneeaarrtthheedd)) ccoonndduuccttoorrss.. TThhee mmaaiinn ppoowweerr sswwiittcchh iinn
tthhiiss aapppplliiaannccee ddooeess nnoott ddiissccoonnnneecctt aallll lliinnee ccoonndduuccttoorrss..
•TToo aavvooiidd eelleeccttrriiccaall sshhoocckk,, ddoo nnoott ddiissccoonnnneecctt tthhee ggrroouunndd ((eeaarrtthh)) pplluugg..
TThhiiss ffrryyeerr mmuusstt bbee aaddeeqquuaatteellyy aanndd ssaaffeellyy ggrroouunnddeedd ((eeaarrtthheedd)).. RReeffeerr
ttoo llooccaall eelleeccttrriiccaall ccooddeess ffoorr ccoorrrreecctt ggrroouunnddiinngg ((eeaarrtthhiinngg)) pprroocceedduurreess
oorr iinn aabbsseennccee ooff llooccaall ccooddeess,, wwiitthh TThhee NNaattiioonnaall EElleeccttrriiccaall CCooddee,,
AANNSSOO//NNFFPPAA NNoo.. 7700--((tthhee ccuurrrreenntt eeddiittiioonn)).. IInn CCaannaaddaa,, aallll eelleeccttrriiccaall
ccoonnnneeccttiioonnss aarree ttoo bbee mmaaddee iinn aaccccoorrddaannccee wwiitthh CCSSAA CC2222..22,,
CCaannaaddiiaann EElleeccttrriiccaall CCooddee PPaarrtt 11,, aanndd//oorr llooccaall ccooddeess..
NOTICE
: Disconnect power supply before a thorough cleaning or servicing the fryer.
•120 V; 50/60 Hz; 1 PH; 12 A
•230 V; 50 Hz; 1 PH; 7 A
The 120 volt gas fryer is factory equipped with a grounded (earthed) cord and plug for
your protection against shock, and should be plugged into a three-prong grounded
(earthed) receptacle. Do not cut or remove grounding (earthing) prong. Any 230 volt
unit must conform to all local, state, and national codes.

This manual suits for next models

3

Other Henny Penny Commercial Food Equipment manuals

Henny Penny FlexFusion FM08-454-G User manual

Henny Penny

Henny Penny FlexFusion FM08-454-G User manual

Henny Penny McDonald's LOV MVE 07X User manual

Henny Penny

Henny Penny McDonald's LOV MVE 07X User manual

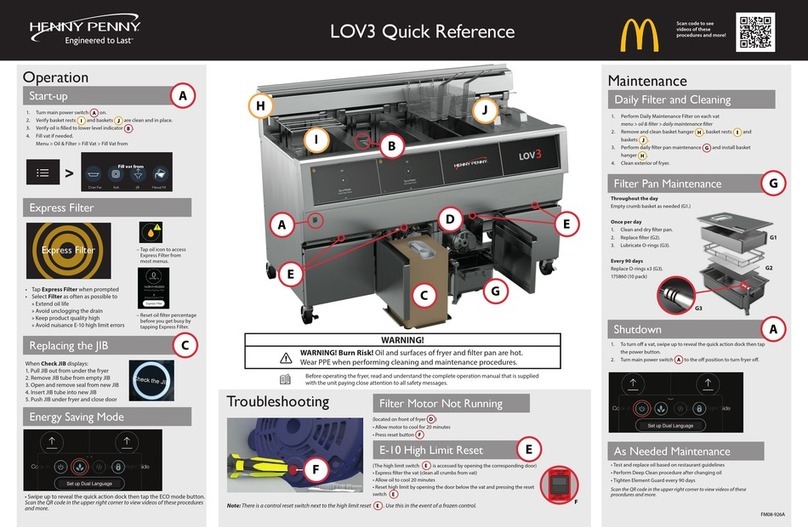
Henny Penny LOV3 User manual

Henny Penny

Henny Penny LOV3 User manual

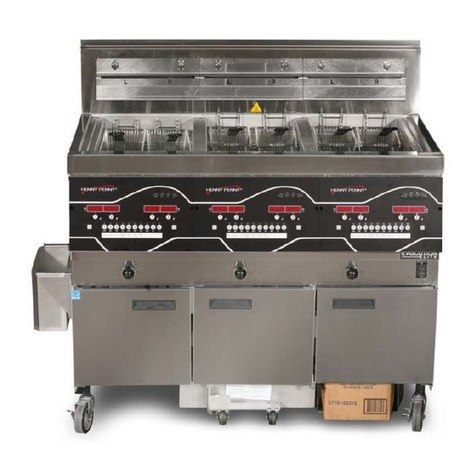
Henny Penny Evolution Elite Gas 14X User manual

Henny Penny

Henny Penny Evolution Elite Gas 14X User manual

Henny Penny 590 User manual

Henny Penny

Henny Penny 590 User manual

Henny Penny FlexFusion FPG-615 User manual

Henny Penny

Henny Penny FlexFusion FPG-615 User manual

Henny Penny Evolution Elite 14X User manual

Henny Penny

Henny Penny Evolution Elite 14X User manual

Henny Penny ODS 300 User manual

Henny Penny

Henny Penny ODS 300 User manual

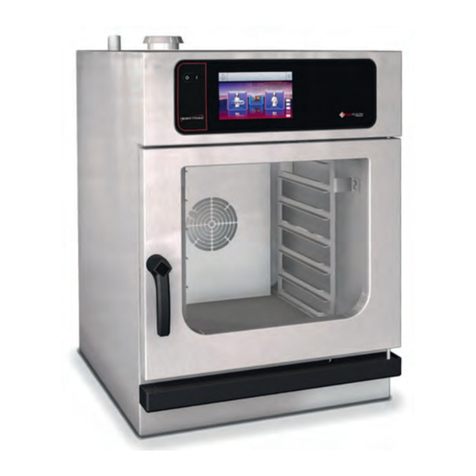
Henny Penny SmartCombi GSC62 Series Technical manual

Henny Penny

Henny Penny SmartCombi GSC62 Series Technical manual

Henny Penny FlexFusion ELECTRIC SPACESSAVER Operating instructions

Henny Penny

Henny Penny FlexFusion ELECTRIC SPACESSAVER Operating instructions

Henny Penny Evolution Elite EEE-141 User manual

Henny Penny

Henny Penny Evolution Elite EEE-141 User manual

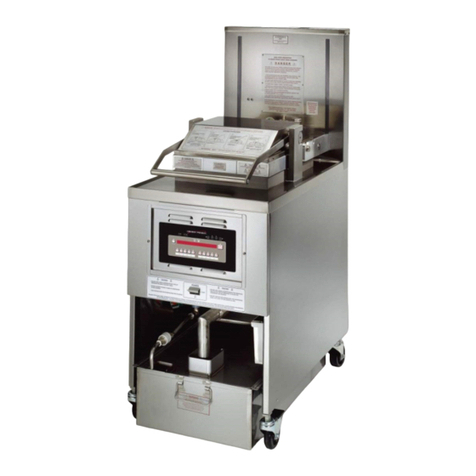
Henny Penny OFE-321 User manual

Henny Penny

Henny Penny OFE-321 User manual

Henny Penny Evolution Elite 14X User manual

Henny Penny

Henny Penny Evolution Elite 14X User manual

Henny Penny Evolution Elite EEE-141 User manual

Henny Penny

Henny Penny Evolution Elite EEE-141 User manual

Henny Penny FlexFusion ELECTRIC SPACESAVER PLUS TEAM User manual

Henny Penny

Henny Penny FlexFusion ELECTRIC SPACESAVER PLUS TEAM User manual

Henny Penny EVOLUTION ELITE EEG-142 User manual

Henny Penny

Henny Penny EVOLUTION ELITE EEG-142 User manual

Henny Penny LOV Gas 200 Series User manual

Henny Penny

Henny Penny LOV Gas 200 Series User manual

Henny Penny AHC-993 User manual

Henny Penny

Henny Penny AHC-993 User manual

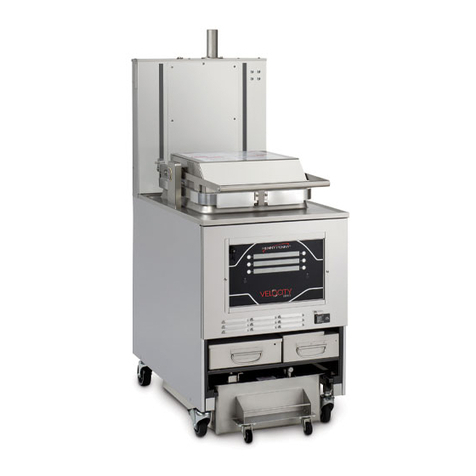
Henny Penny Velocity Series User manual

Henny Penny

Henny Penny Velocity Series User manual

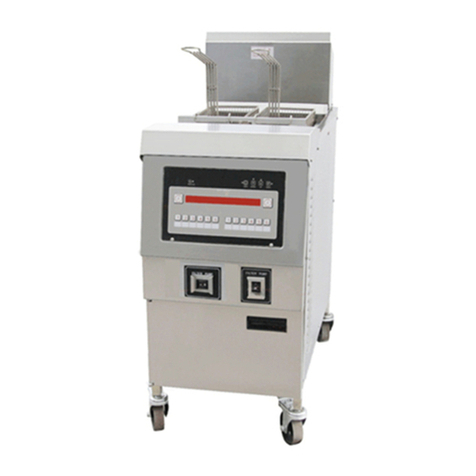
Henny Penny KFC Velocity Open Series User manual

Henny Penny

Henny Penny KFC Velocity Open Series User manual

Henny Penny FlexFusion FPG-221 Operating instructions

Henny Penny

Henny Penny FlexFusion FPG-221 Operating instructions

Henny Penny McDonald's LOV MVE 07X Electric Series User manual

Henny Penny

Henny Penny McDonald's LOV MVE 07X Electric Series User manual

Henny Penny LOV3 User manual

Henny Penny

Henny Penny LOV3 User manual

Henny Penny FlexFusion FPG-221 Operating and maintenance instructions

Henny Penny

Henny Penny FlexFusion FPG-221 Operating and maintenance instructions

Popular Commercial Food Equipment manuals by other brands

Goldmedal Astro instruction manual

Goldmedal

Goldmedal Astro instruction manual

Tasselli PANDA H205 Use and maintenance manual

Tasselli

Tasselli PANDA H205 Use and maintenance manual

LABS KVVB instruction manual

LABS

LABS KVVB instruction manual

AHT AC-XL operating instructions

AHT

AHT AC-XL operating instructions

Hogastra HWT 6 manual

Hogastra

Hogastra HWT 6 manual

Diamond DANNY PLUS Technical instructions

Diamond

Diamond DANNY PLUS Technical instructions

Town Food Service Equipment 28501 manual

Town Food Service Equipment

Town Food Service Equipment 28501 manual

ROCAM VULCANO1/1 instruction manual

ROCAM

ROCAM VULCANO1/1 instruction manual

Bourgeat SATELLITE 4G Instructions for use and maintenance

Bourgeat

Bourgeat SATELLITE 4G Instructions for use and maintenance

Equipex Sodir SEF-80 Operation manual

Equipex

Equipex Sodir SEF-80 Operation manual

Hatco FLAV-R-SAVOR FSHC-7 Series Installation and operating manual

Hatco

Hatco FLAV-R-SAVOR FSHC-7 Series Installation and operating manual

Sentinel SN-GBM-2NG/LP manual

Sentinel

Sentinel SN-GBM-2NG/LP manual

Victor BC21 Operator's & installation manual

Victor

Victor BC21 Operator's & installation manual

Xtreme Power 95401-XP Owner's manual and safety instructions

Xtreme Power

Xtreme Power 95401-XP Owner's manual and safety instructions

Proluxe Apex Pro X1 Operation manual

Proluxe

Proluxe Apex Pro X1 Operation manual

Proluxe Apex Pro X1 Operation manual

Proluxe

Proluxe Apex Pro X1 Operation manual

Redfox WE 11 Instructions for installation and use

Redfox

Redfox WE 11 Instructions for installation and use

HURAKAN HKN-RH2 manual

HURAKAN

HURAKAN HKN-RH2 manual

manuals.online logo
manuals.online logoBrands
  • About & Mission
  • Contact us
  • Privacy Policy
  • Terms and Conditions

Copyright 2025 Manuals.Online. All Rights Reserved.