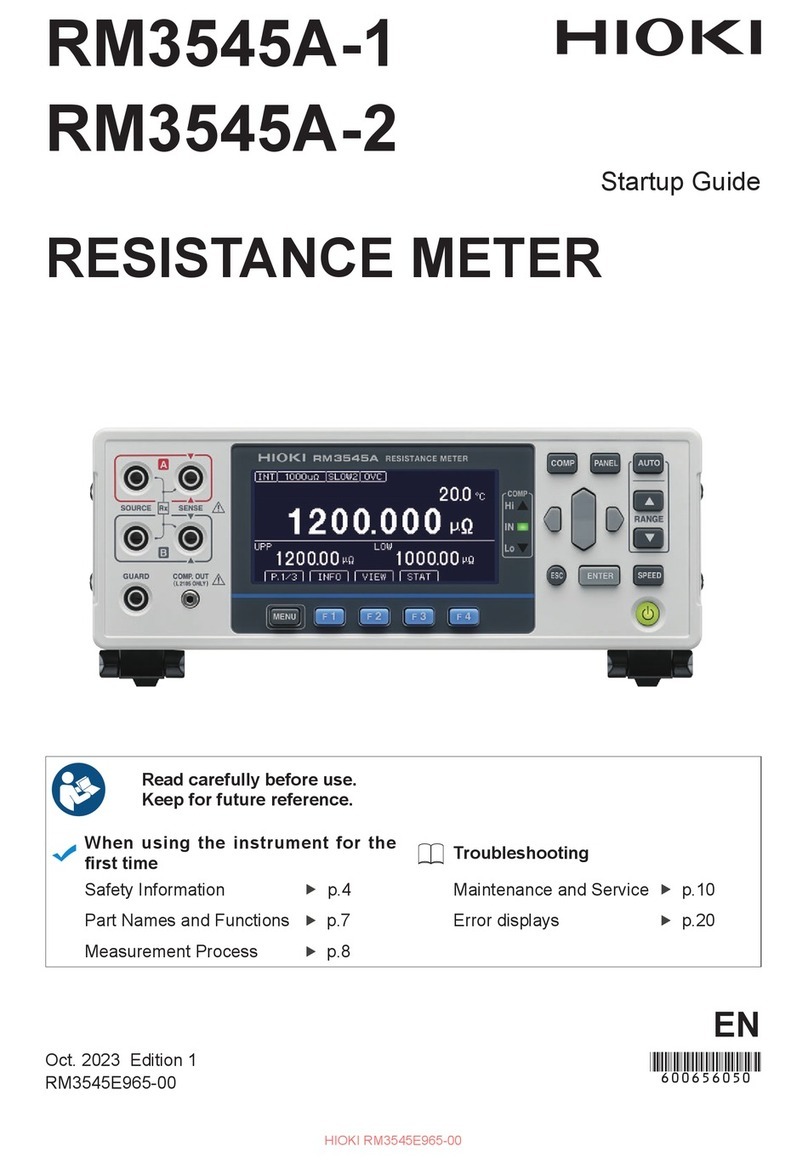
Hioki 8846 User manual

MEMORY HiCORDER
INSTRUCTION MANUAL
8846


1
2
3
4
5
6
7
8
9
10
11
12
13
14
A
Contents
Introduction i
Inspection ii
Safety Notes iii
Notes on Use v
Chapter Summary ix
Chapter 1 Product Overview 1
1.1 Major Features 1
1.2 Identification of Controls and Indicators 3
Chapter 2 Specifications 11
2.1 General Specifications 11
2.2 Trigger Unit Specifications 14
2.3 Memory Recorder Function Specifications 15
2.4 Recorder Function Specifications 16
2.5 FFT Function Specifications 17
2.6 Auxiliary Functions Specifications 18
2.7 Accessories and Options 21
2.8 System Operation 22
Chapter 3 Logic and Analog Inputs 23
3.1 Logic Inputs 23
3.1.1 Logic Probes 24
3.2 8916 ANALOG UNIT 25
3.2.1 Specifications 25
3.2.2 Safety Requirements 26
3.3 8917 DC/RMS UNIT 27
3.3.1 Specifications 27
3.3.2 Safety Requirements 28
3.4 8918 TEMPERATURE UNIT 29
3.4.1 Specifications 29
3.4.2 Safety Requirements 30
3.4.3 Notes on Installation Site 31

3.5 8919 FFT ANALOG UNIT 32
3.5.1 Specifications 32
3.5.2 Safety Requirements 33
3.6 8927 ANALOG UNIT 34
3.6.1 Specifications 34
3.6.2 Safety Requirements 35
3.7 8928 STRAIN UNIT 36
3.7.1 Specifications 36
3.7.2 Safety Requirements 37
3.7.3 Strain Unit Settings 37
3.8 Replacement Procedure 38
3.9 Input Cables 39
3.10 Measurement Errors Caused by Signal Source Internal
Resistance 40
Chapter 4 Installation and Preparation 41
4.1 Installation of the Unit 41
4.2 Power Supply and Ground Connection 44
4.3 Power On/Off 47
4.4 Probe and Thermocouple Connection 48
4.5 Connection to a Strain Gauge Adapter 51
4.6 Connecting the Voltage Transformer 52
4.7 Loading Recoding Paper 54
4.8 Storage and Handling Precautions 56
4.9 Notes on Measurement 57
Chapter 5 Basic Operation and Measurement 59
5.1 Basic Operation 59
5.1.1 Basic Display Operation 59
5.1.2 JOG/SHUTTLE Control and Select Key 60
5.1.3 Setting Items 62
5.1.4 Measurement Start and End 62
5.2 Basic Measurement and Setting Procedures 63
5.2.1 Measuring and Recording a Voltage
(Memory Recorder, Recorder) 63
5.2.2 Frequency Analysis of Measured Voltage (FFT) 74

1
2
3
4
5
6
7
8
9
10
11
12
13
14
A
Chapter 6 Memory Recorder Function 81
6.1 Outline 81
6.2 Making Settings 83
6.2.1 Setting the Function Mode 83
6.2.2 Setting the Time Axis Range 84
6.2.3 Setting the Recording Length 85
6.2.4 Setting the Format 86
6.2.5 Using the X-Y Waveform Plots 90
6.2.6 Setting the Interpolation Function 93
6.2.7 Setting the Roll Mode 94
6.2.8 Superimpose 95
6.2.9 Other Settings (STATUS Screen) 96
6.3 Settings on the Display Screen and Auto Settings 98
6.3.1 Setting Magnification/Compression Along the Time Axis 98
6.3.2 Making Channel Settings 99
6.3.3 Automatic Setting of Time Axis and Voltage Axis 100
6.4 Start and Stop Measurement Operation 102
Chapter 7 Recorder Function 105
7.1 Outline 105
7.2 Making Settings 106
7.2.1 Setting the Function Mode 106
7.2.2 Setting the Time Axis Range 107
7.2.3 Setting the Magnification Along the Time Axis 109
7.2.4 Setting the Recording Time 112
7.2.5 Setting the Format 113
7.2.6 Setting the Interpolation Function 116
7.2.7 Setting the Recording Medium 117
7.2.8 Recording a Voice Memo 118
7.2.9 Transferring Data to the Memory Recorder Function 119
7.2.10 Other Settings 121
7.3 Settings on the Display Screen and Auto Settings 123
7.3.1 Making Channel Settings 123
7.3.2 Automatic Setting of Time Axis and Voltage Axis 123
7.4 Start and Stop Measurement Operation 125

Chapter 8 FFT Function 127
8.1 Outline 127
8.2 Item Settings 128
8.2.1 Setting the FFT Function 128
8.2.2 Setting the FFT Channel Mode 129
8.2.3 Setting the Frequency Range 130
8.2.4 Setting the Window Function 132
8.2.5 Setting the Display Format 134
8.2.6 Selecting Reference Data 136
8.2.7 Setting the Peak Display 138
8.2.8 Setting the FFT Analysis Mode 140
8.2.9 Setting the Analysis Channel 141
8.2.10 Setting the X-axis and Y-axis Displays 142
8.2.11 Setting the Display Scale 144
8.2.12 Octave Filter Setting 146
8.2.13 Setting the Interpolation Function 147
8.2.14 Other Settings 148
8.3 Analysis Function 150
8.3.1 Storage Waveform [STR] 151
8.3.2 Linear Spectrum [LIN] 152
8.3.3 RMS Spectrum [RMS] 154
8.3.4 Power Spectrum [PSP] 156
8.3.5 Auto Correlation [ACR] 158
8.3.6 Histogram [HIS] 159
8.3.7 Transfer Function [TRF] 160
8.3.8 Cross Power Spectrum [CSP] 162
8.3.9 Cross Correlation [CCR] 164
8.3.10 Unit Impulse Response [IMP] 166
8.3.11 Coherence [COH] 168
8.3.12 Octave Analysis [OCT] 170

1
2
3
4
5
6
7
8
9
1
0
11
12
13
14
15
Chapter 9 Input Channel Settings 175
9.1 Overview 175
9.2 Selecting Units (SYSTEM Screen) 176
9.3 Selecting Functions 177
9.4 Selecting the Input Type 178
9.5 Making Logic Input Settings (FFT Excluded) 180
9.6 Making Analog Input Settings 181
9.6.1 Waveform Display Color (FFT Excluded) 181
9.6.2 Display Graph Type (FFT Excluded) 183
9.6.3 Setting the Voltage Axis, Temperature Axis, Strain Axis
Ranges 184
9.6.4 Setting the Input Coupling (Not Required for 8918, 8928) 187
9.6.5 Setting Voltage Axis, Temperature Axis, and Strain Axis
Magnification/ Compression 188
9.6.6 Setting the Zero Position 189
9.6.7 Setting the Low-Pass Filter 191
9.6.8 Setting the Thermocouple Type (8918 Only) 192
9.6.9 Setting the Antialiasing Filter (8919 Only) 193
9.6.10 Arbitrary Setting if Voltage Axis Magnification/
Compression and Display Range 195
9.6.11 Copying Channel Settings 197
9.6.12 Making Channel Settings on Display Screen 198
Chapter 10 Trigger Functions 199
10.1 Overview 199
10.2 Setting the Trigger Mode 200
10.3 Setting Trigger Source AND/OR Linking 201
10.4 Setting the Pretrigger (Memory recorder, FFT) 202
10.5 Using the Analog Trigger Function 204
10.5.1 Level Trigger 205
10.5.2 Window-In, Window-Out Trigger 208
10.6 Using the Logic Trigger Function 210
10.7 Using the External Trigger Function 214
10.8 Using the Timer Trigger Function 215
10.9 Trigger Output Connector 218

Chapter 11 SYSTEM Screen Settings 219
11.1 Overview 219
11.2 How to Use the SYSTEM Screen 220
11.3 Initialization [ INITIALIZE ] 221
11.3.1 Setting the Clock [ TIME SET ] 221
11.3.2 Clear Waveform Data [ DATA CLEAR ] 222
11.3.3 System Reset [ SYSTEM RESET ] 223
11.4 Special Function Settings [ SETUP ] 226
11.4.1 Channel Selection [ using unit ] 227
11.4.2 Start Key Backup [ start backup ] 228
11.4.3 Setting the Grid [ grid type ] 229
11.4.4 Channel Marker Function [ channel marker ] 231
11.4.5 Time Axis Display [ time axis ] 232
11.4.6 List and Gauge Functions [ list & gauge ] 233
11.4.7 Backlight Saver Function [ backlight saver ] 234
11.4.8 Setting Screen Colors [ LCD color type ] 235
11.4.9 Setting the Volume [ volume ] 236
11.4.10 Intermittent Printing [ intermittent print ] 237
11.4.11 Selecting the Hard Copy Destination 238
11.4.12 Setting the Display Language 239
11.5 Scaling Function [ SCALING ] 240
11.5.1 Conversion Ratio Scaling 241
11.5.2 2-Point Scaling 242
11.5.3 Scaling Setting Example 245
11.6 Adding Comments to a Graph [ COMMENT ] 247
11.6.1 Comment and File Name Entry Procedure 248
11.7 Self Check 249
11.7.1 ROM/RAM Check 250
11.7.2 LED Check 251
11.7.3 Printer Check 252
11.7.4 Key Check 253
11.7.5 Display Check 254
11.7.6 MO Check 255
11.7.7 D/A Unit Output Check 256
11.8 Interface Settings 257

1
2
3
4
5
6
7
8
9
10
1
1
1
2
1
3
14
15
Chapter 12 Printout of Waveform Data and Processing
Data 259
12.1 Overview 259
12.2 Selecting Waveform or Numeric Print 260
12.3 Using the Smooth Print Function 262
12.4 Print Settings on SYSTEM Screen 263
12.5 Printing Procedure 264
12.5.1 Normal Print (Manual) (All Functions) 264
12.5.2 Normal Print (Auto) (Memory Recorder, FFT) 266
12.5.3 Real-Time Print (Recorder Function) 267
12.5.4 Partial Print (Memory Recorder, Recorder) 269
12.5.5 Screen Hard Copy (All Functions) 271
12.5.6 A4 Print (Memory Recorder, Recorder) 272
12.5.7 List Print (All Functions) 273
12.5.8 Paper Change During Printing 274
12.6 Reading the Display and Printout 275
Chapter 13 Storing Data on DDS Tape/Reading Data
From DDS Tape 283
13.1 Overview 283
13.2 About the MO Disk 284
13.3 MO Drive Operation 285
13.4 Displaying File List and File Information 287
13.4.1 Displaying a File List 287
13.4.2 Displaying File Information 288
13.5 Storing Data on a MO Disk 289
13.5.1 Storing Memory Recorder and FFT Data 289
13.5.2 Storing Recorder Data 295
13.5.3 Automatic File Name Assignment 297
13.5.4 File Contents and Size 298
13.6 Reading Data From MO Disk 302
13.6.1 Reading Stored Data 302
13.6.2 Playback of Stored Data 304
13.7 Recording the Recorder Waveform Data Stored on MO
in Memory Recorder Function/FFT Function
(FILEtoMEM/FFTT) 309
13.8 Deleting Stored Data (directory and file deleting) 311

13.9 Renaming File (file name and directory name) 313
13.10 Operating the Disk/ Deleting the Window (HELP key) 314
13.10.1 Creating a Directory 316
13.10.2 Searching file 317
13.10.3 Sorting files 319
13.10.4 Formatting a MO Disk 320
13.10.5 Formatting a MO Disk Physically (Physical Format) 321
Chapter 14 Calculating Waveform Data 323
14.1 Overview 323
14.2 Preparing for Waveform Processing 324
14.3 Defining the Processing Equation 326
14.3.1 Entering the Equation 326
14.3.2 Deleting an Equation 329
14.3.3 Copying an Equation 330
14.4 Setting the Channel for Recording Processing Results 331
14.5 Setting the Display Scale 332
14.6 Specifying the Waveform Processing Range 333
14.7 Setting Example for Waveform Processing 334
14.8 Details on Operators 337
Chapter 15 Determining Waveform
Parameters / EvaluatingParameter Values 343
15.1 Overview 343
15.2 Making Settings for Waveform Parameter Calculation 344
15.3 Making Settings for Waveform Parameter Evaluation 348
15.4 Using the NG Output 351
15.5 Specifying a Range for Waveform Parameter Calculation 352
15.6 Printing Out Waveform Parameter Calculation Results 353
15.7 Waveform Parameter Calculation and Waveform
Parameter Evaluation Examples 354
15.8 Parameter Calculation Details 357

1
6
1
7
1
8
1
9
2
0
2
1
2
2
2
3
2
4
10
11
12
13
1
4
1
5
APP
IND
Chapter 16 Waveform GO/NG Evaluation 361
16.1 Overview 361
16.2 Waveform Evaluation Settings 362
16.3 Creating the Evaluation Area 366
16.4 Editor Command Details 368
16.5 Using the NG Output 378
16.6 Setting Example for Waveform Evaluation 379
Chapter 17 Memory Segmentation Function 383
17.1 Overview 383
17.2 Using the Sequential Save Function 384
17.3 Using the Multi-Block Function 389
Chapter 18 Waveform Averaging 393
18.1 Overview 393
18.2 Setting the Averaging Function 395
18.2.1 When Using Memory Recorder Function 395
18.2.2 When Using FFT Function 398
18.3 Averaging Equations 403
Chapter 19 Using the A/B Cursors / Waveform
Scrolling 405
19.1 Overview 405
19.2 Using the A/B Cursors 406
19.3 Scrolling the Waveform 414
Chapter 20 LEVEL MON. / CH.SET / HELP Keys 419
20.1 Overview 419
20.2 Checking the Input Level (LEVEL MON. Key) 420
20.3 Selecting the Input Channel on the Display Screen and
L.evel Monitor Screen (CH.SET Key) 422
20.4 Checking the Waveform Display Position (HELP Key) 425

Chapter 21 External Input/Output Connectors / Key Lock
Function 433
21.1 Overview 433
21.2 Using the External Start, Stop, and Print Terminals 434
21.3 Using the External Trigger Input (EXT TRIG) 436
21.4 Using the External Trigger Output (TRIG OUT) 437
21.5 Using the External Sampling Input (EXT SMPL) 438
21.6 Using the NG Evaluation Output (NG) 439
21.7 Using the Microphone Input (MIC) 441
21.8 Using the Key Lock Function 442
Chapter 22 Using the D/A Output Unit 9539 (Option) 443
22.1 Overview 443
22.2 Specifications 444
22.3 Usage Precautions 446
22.4 Replacing Units 447
22.5 Output of a Waveform Recorded With the Memory
Recorder or Recorder Function 448
Chapter 23 Maintenance 451
23.1 Cleaning of the Unit and Parts 451
23.2 Replacing the DC Power Supply Fuse 454
23.3 Removing the Battery Before Discarding the 8846 455
23.4 Troubleshooting 457
Chapter 24 Error and Warning Messages 459
24.1 Overview 459
24.2 Error Messages 460
24.3 Warning Messages 461
Appendix APPENDIX 1
Appendix 1 Glossary APPENDIX 1
Appendix 2 Reference APPENDIX 5
Appendix 2.1 Memory Recorder Function,
Recorder Function APPENDIX 5
Appendix 2.2 FFT Function APPENDIX 8
Appendix 3 Reference Table APPENDIX 18

i
────────────────────────────────────────────────────
Introduction
────────────────────────────────────────────────────
I
ntroduction
Thank you for purchasing this HIOKI "8846 MEMORY HiCORDER."
To get the maximum performance from the unit, please read this manual first,
and keep this at hand.

ii
────────────────────────────────────────────────────
Inspection
────────────────────────────────────────────────────
I
nspection
・When the unit is delivered, check and make sure that it has not been
damaged in transit. In particular, check the accessories, panel switches, and
connectors.
・If the unit is damaged, or fails to operate according to the specifications,
contact your dealer or HIOKI representative.
Accessories
□Power cord 1
□DC power cord 1
□Recording paper (roll paper) 1
□Spare fuse 1
(DC supply 10 - 30 V: class A melting fuse (NM) 12 A/250 V,
6.4 dia.×31.8 mm)
□Instruction Manual 1
□Protect cover 1
□MO disk (230MB) 1
□Recording paper attachment 2
□Eject pin 1

iii
────────────────────────────────────────────────────
Safety Notes
────────────────────────────────────────────────────
DANGE
R
During high voltage measurement, incorrect measurement procedures
could result in injury or death, as well as damage to the equipment.
Please read this manual carefully and be sure that you understand its
contents before using the equipment. The manufacturer disclaims all
responsibility for any accident or injury except that resulting due to
defect in its product.
・This symbol is affixed to locations on the equipment where the
operator should consult corresponding topics in this manual
(which are also marked with the symbol) before using relevant
functions of the equipment.
・In the manual, this mark indicates explanations which it is
particularly important that the user read before using the
equipment.
Indicates a grounding terminal.
Indicates a grounding terminal for measurement.
Indicates a fuse.
Indicates AC (Alternating Current).
Indicates DC (Direct Current).
Indicates both DC (Direct Current) and AC (Alternating Current).
PEAK Indicates a peak value.
S
afety Notes
This Instruction Manual provides information and warnings essential for
operating this equipment in a safe manner and for maintaining it in safe
operating condition. Before using this equipment, be sure to carefully read the
following safety notes.
Safety symbols

iv
────────────────────────────────────────────────────
Safety Notes
────────────────────────────────────────────────────
DANGE
R
Indicates that incorrect operation presents extreme danger of
accident resulting in death or serious injury to the user.
WARNIN
G
Indicates that incorrect operation presents significant danger of
accident resulting in death or serious injury to the user.
CAUTIO
N
Indicates that incorrect operation presents possibility of injury to the
user or damage to the equipment.
NOTE Denotes items of advice related to performance of the equipment or
to its correct operation.
Method
Operation
Step
Referenc
e
Exampl
e
Indicates a setting or operating procedure. Follow the numbered
sequence and perform the indicated steps.
Additional information about setting and operating procedures.
Indicate practical examples for setting and operating procedures.
(
Bold character)
[]
Example
Set to FFT
( Section ..)
F1
[ FFT ]
I
ndicates display items or selection item
s.
I
ndicates sections for reference.
I
ndicates operation keys.
I
ndicates function key displays.
Conventions used in this manual
The following symbols are used in this Instruction Manual to indicate the
relative importance of cautions and warnings.
Symbols used for setting and operating steps

v
────────────────────────────────────────────────────
Notes on Use
────────────────────────────────────────────────────
WARNIN
G
The unit should always be operated in a range from 5℃to 40℃and 35%
to 80% RH or less. Do not use the unit in direct sunlight, dusty
conditions, or in the presence of corrosive gases.
DANGE
R
Before connecting the unit, make sure that the power supply voltage
matches the rated power supply voltage of the 8846 ( Section 4.2,
"Power Supply and Ground Connection".
Before connecting the unit to a battery or other DC source, make sure
that the intermediate switch is set to OFF. If the switch is ON, there is a
risk of sparks.
N
otes on Use
In order to ensure safe operation and to obtain maximum performance from
the unit, observe the cautions listed below.
(1) Installation environment
(2) Power supply connections
(3) Protective grounding
・Be sure to connect the ground terminal to a good ground ( Section 4.2,
"Power Supply and Ground Connection"). If the AC outlet is grounded, using
the supplied power cord with 3-prong plug will establish the ground
connection.
・Also when powering the unit from a battery or other DC source, connect the
ground terminal to a good ground.
(4) Before powering on
・Check that the power supply is correct for the rating of the unit. Also check
that the correct fuse is fitted. ( Section 4.2, "Power Supply and Ground
Connection". (The AC fuse is integrated in the unit.)
・The power switches of this unit are separate for AC power (power switch on
8846) and DC power (intermediate switch on DC power supply cable). If DC
power is being supplied and the intermediate switch is set to ON, the 8846
will operate also if the power switch is set to OFF.

vi
────────────────────────────────────────────────────
Notes on Use
────────────────────────────────────────────────────
DANGE
R
Maximum input ratings for the analog units 8916 - 8919, 8927, and 8928
and the input terminals of the 8846 are shown below. To avoid the risk
of electric shock and damage to the unit, take care not to exceed these
ratings.
The 8918 TEMPERATURE UNIT is designed specifically for
thermocouples. Do not use it with any other components. (Circuit
protection is provided for up to 100 V DC or AC, but any voltage above
this value will destroy the unit.)
The maximum floating voltage of 8916 to 8919, 8928 (voltage between
input and 8846 frame ground, and between inputs of other analog units)
is shown below. To avoid the risk of electric shock and damage to the
unit, take care that voltage between channels and between a channel
and ground does not exceed these ratings.
The maximum floating voltage rating applies also if an input attenuator
or similar is used.
The 8927 ANALOG UNIT is not isolated from the ground of the 8846
(common ground). To avoid the risk of electric shock and damage to the
unit, make sure that the ground connection and input connections are
correctly established. ( Section 4.4)
When measuring power line voltages with the 8916, 8917, or 8919,
always connect the probe to the secondary side of the circuit breaker.
Connection to the primary side involves the risk of electric shock and
damage to the unit.
Always use the supplied input cables (units 8916, 8917, and 8919 use
the input cable 9574, and unit 8927 uses the connecting cable 9437).
Any exposed metal sections in an input cable consist a risk of electric
shock.
Input/output termina
l
Maximum input rating Maximum floating voltag
e
8916 inputs
8917 inputs
8919 inputs 500 V DC+AC peak 450 V AC/DC
8918 inputs 100 V AC/DC 250 V AC/DC
8927 inputs 50 V DC+AC peak No floating
8928 inputs 10 V DC+AC peak 40 V DC+AC peak
EXT TRIG
START
STOP
PRINT
EXT SMPL
-5 V to 10 V No floating
MIC 0 V to 5 V DC+AC peak No floating
TRIG OUT
NG -20 V to +30 V
500 mA max
200 mW max No floating
(5) Probe Connection, Measurement Voltage Input

vii
────────────────────────────────────────────────────
Notes on Use
────────────────────────────────────────────────────
WARNIN
G
The logic units all have and the 8846 have a common ground.
DANGE
R
Use a DC power supply fuse of the proper rating (12 A/250 V).
In order to avoid accidents from electric shock, before removing or
replacing an input unit or changing a fuse, check that the input cables
are disconnected, turn off the power, and remove the power cable.
Normally keep all eight input units installed permanently. If a unit is not
fitted, it must be replaced by a blanking panel. If the unit is operated
with an input unit not in place it poses a shock hazard.
CAUTIO
N
・This unit uses a thermal printer. The recording paper supplied has
characteristics finely tuned for use with the printer.
Using recording paper of a different specification may not only result in
impaired printing quality, but even prevent the printer from operating. Always
use the HIOKI specified product.
・Insert the paper with correct orientation ( Section 4.6, "Loading Recording
Paper").
CAUTIO
N
Using the printer in a high-temperature or high-humidity environment should be
avoided at all costs. This can seriously reduce the printer life.
NOTE
(6) Replacing the fuse and input units
(7) Recording paper
(8) Using a printer
(9) Storing
When the unit is not to be used for an extended period, set the head up/down
lever to the "head up" position. This will protect the printer head and prevent
deformation of the rubber roller.

viii
────────────────────────────────────────────────────
Notes on Use
────────────────────────────────────────────────────
CAUTIO
N
Remove the printer paper from the unit. If the paper is left in the unit, paper
support parts may be damaged due to vibrations.
Remove the tape from the unit.
NOTE
NOTE
(10) Shipping
If reshipping the unit, preferable use the original packing.
(11) Others
・In the event of problems with operation, first refer to Section 23.4, "Trouble
shooting".
・Carefully read and observe all precautions in this manual.
Table of contents
Other Hioki Measuring Instrument manuals
Hioki
Hioki CKT3548 User manual

Hioki
Hioki 9605 User manual

Hioki
Hioki 8730-10 User manual

Hioki
Hioki CM4001 User manual

Hioki
Hioki TM6102 Use and care manual

Hioki
Hioki 8715-01 User manual

Hioki
Hioki 3661-20 User manual

Hioki
Hioki IM3533-01 Use and care manual
Hioki
Hioki HiTESTER 3415-02 User manual

Hioki
Hioki CM4142-20 User manual
Popular Measuring Instrument manuals by other brands

Rainforest Automation
Rainforest Automation EMU-2 quick start guide

TSI Incorporated
TSI Incorporated Alnor CF920 Operation and service manual

Unipulse
Unipulse F370 Operation manual

Amprobe
Amprobe THWD-3 user manual

Castle group
Castle group dBAir operating manual

Emerson
Emerson TopWorx 4310 instruction manual