manuals.online logo
Brands
  1. Home
  2. •
  3. Brands
  4. •
  5. Hubbell
  6. •
  7. Lighting Equipment
  8. •
  9. Hubbell Dual-Lite DYNC C1D2 Series User manual

Hubbell Dual-Lite DYNC C1D2 Series User manual

Industrial LED Combination Exit/Emergency Light
DYNC C1D2 Series
IMPORTANT SAFEGUARDS
When using electrical equipment, basic safety precautions should
always be followed including the following.
READ AND FOLLOW ALL SAFETY
INSTRUCTIONS
1. Do not use outdoors (unless suitable for damp location)
2. Do not mount near gas or electric heaters
3. Equipment should be mounted in locations and at heights where it will not readily be
subject to tampering by unauthorized personnel.
4. The use of accessory equipment not authorized by the manufacturer may cause an
unsafe condition.
5. Do not use this equipment for other than its intended purpose.
6. Servicing of this equipment should be performed by qualified service personnel.
7. Test cycling: the Life Safety Code (NFPA 101) requires testing of emergency lighting
units once a month for a minimum of 30 seconds, and once a year for a minimum of
90 minutes.
INSTALLER:
•SEE UNIT LABEL FOR ADDITIONAL MODEL SPECIFICATIONS
•SAVE THESE INSTRUCTIONS FOR USE BY OWNER/OCCUPANT
RECYCLING INFORMATION
All steel, aluminum and thermoplastic parts are recyclable.
NOTICE: Emergency units contain rechargeable batteries which
must be recycled or disposed of properly.
Hubbell Lighting, Inc. Life Safety Products • www.dual-lite.com
Copyright©Hubbell Lighting, Inc., All Rights Reserved • Specifications subject to change without notice. • Printed in U.S.A.
93117090_A 10/19
Service / Maintenance
Maintenance
This emergency lighting unit should be tested and maintained in accordance with National Electrical Code and NFPA 101 Life Safety
Code requirements. It is recommended that emergency light xtures be tested for 30 seconds once a month and for 90 minutes
once a year.
Taking A Unit Out of Service
If a unit is to be deliberately taken out of service for an extended period, the battery lead connector should be disconnected from
the charger circuit board and insulated so that the battery will go into storage in a fully charged condition.
Replacing the Battery:
1. De-energize the AC power.
2. Remove the bottom electronic housing cover.
3. Disengage the battery and heater (if provided) harness from the charger PCB harness.
4. Disconnect the battery strap and remove battery pack.
5. Replace with new battery (see unit model label or battery label for correct p/n)
and repeat steps above in reverse.
Replacing LED Lamps
The LED lamps inside the exit and the lamp heads are not replaceable or eld servicable.
Troubleshooting
Emergency circuit does not work
• Batteries are shipped uncharged, please charge for 24 hours before testing.
• Make sure the switch pcb and the button/light pipe is correctly seated and aligned.
• Check wiring connections.
INSTALLATION
This Industrial Unit is designed to be mounted on a wall, ceiling or end mount. Provide standard units with a single unswitched
power supply from a 120/277VAC branch circuit used for normal lighting in the areas to be protected.
The DYNC Industrial exit combo is equipped with intelligent wiring. Connect the black wire from unit to the building hot wire
(120 or 277VAC) and the white wire to the building com wire.
Automatic Tests
The unit will automatically initiate a self-test/self-diagnostic cycle
based on the following table:
Testing Period Duration of Test
Once a month 1 minute
Once every 6 months Alternating:
30 or 60 minutes
Manual Tests
Using the unit test switch, users can initiate different duration test
cycles based on the following table:
Initiating Action Test Cycle
Press test switch once 1 minute
Press test switch twice 90 minutes
Pressing the test switch any time after a 90 minute test cycle has
begun cancels the remainder of the 90 minute test and returns
the unit to normal operation.
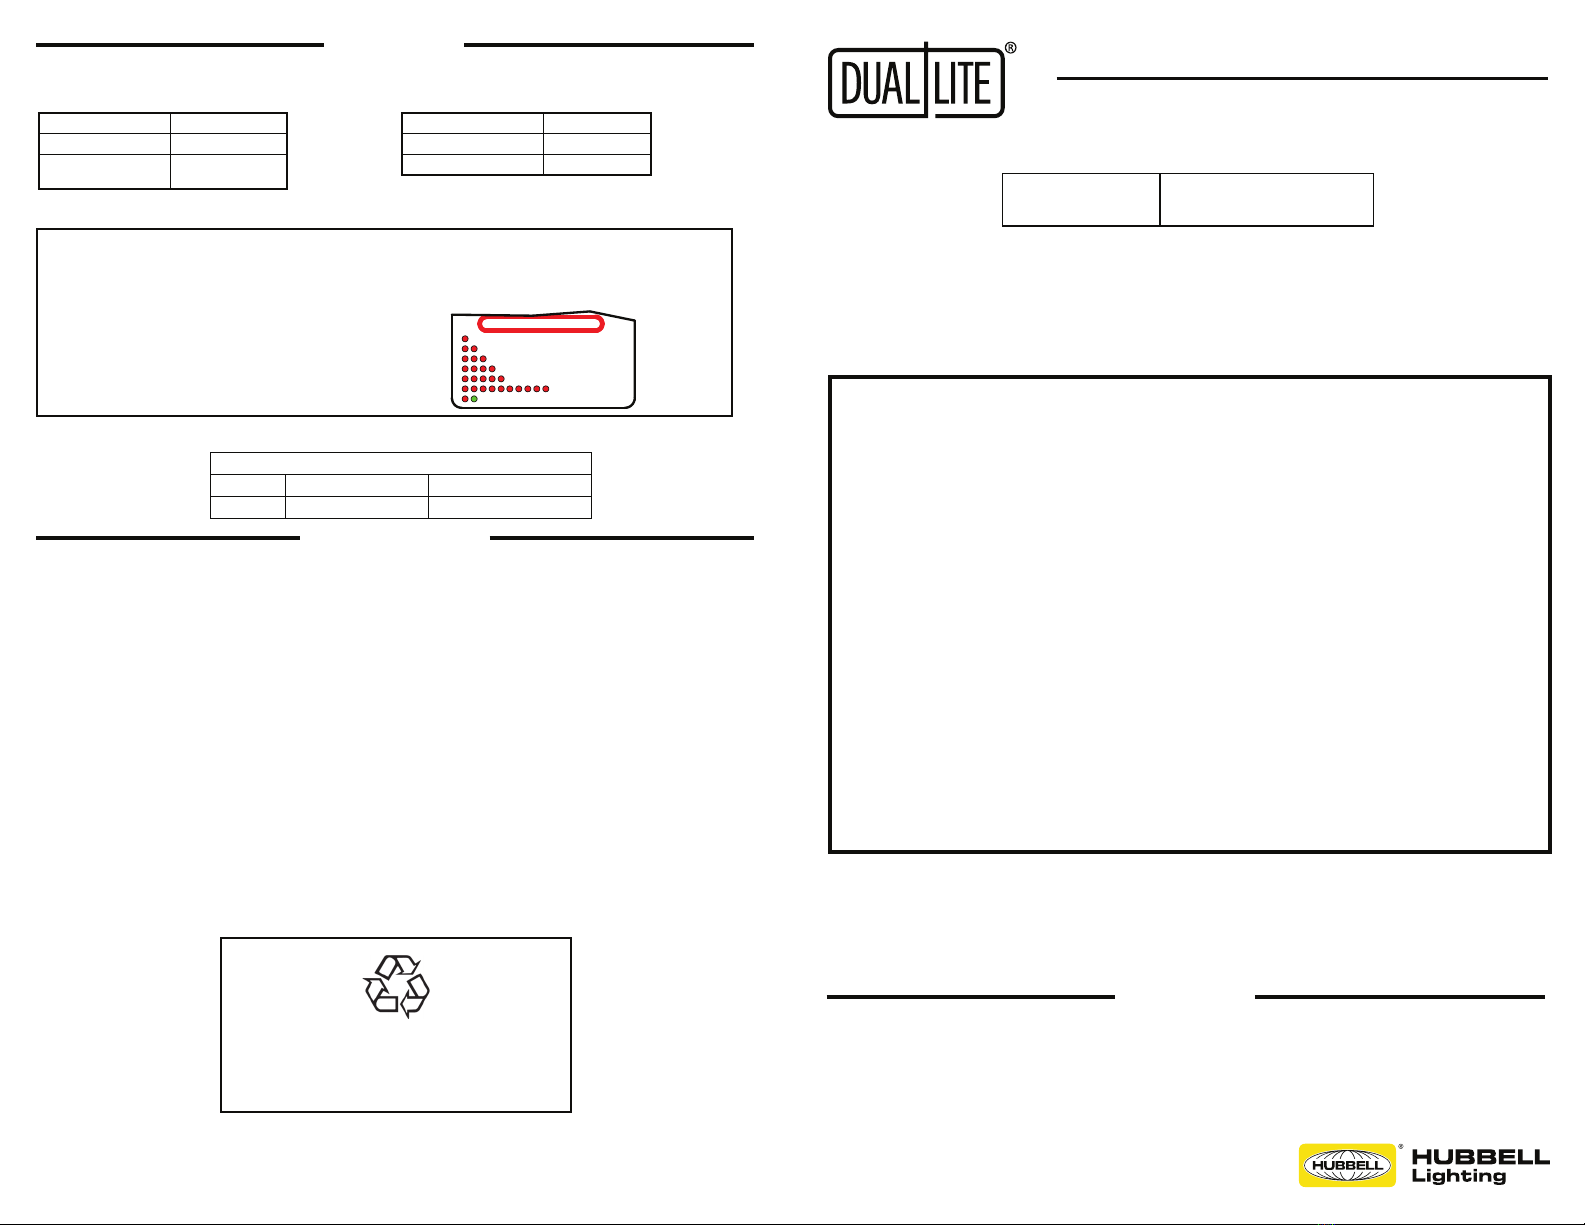
LED Status Indicator:
A green/red LED is provided on the control pane
of all models equipped with the Spectron option.
Green Operating Status LED:
The green Operating Status LED serves as both an AC pow-
er and self-test indicator. During normal operation, the green
Operating Status LED will be illuminated, indicating the
presence of AC power. During all automatic or manual self-
test cycles, the green Operating Status LED will blink “twice”
per second for the 30 / 60 / 90 minute test.
Red Service Alert LED:
Under normal operating conditions, the red Service Alert
LED indicator will remain off. If the Spectron controller
detects a malfunction, the red Service Alert LED will blink
in the pattern listed on the label around the test button.
OPERATION
= LAMP FAULT
= LED DRIVER FAULT
= CHARGER FAULT
= BATTERY FAULT
SERVICE ALERT CODES
= BATTERY DISCONNECTED
= LOAD LEARN FAILURE
ALTERNATING = LOAD LEARN IN PROGRESS
This equipment has been tested and found to comply with the limits for a Class A digital device, pursuant
to part 15 of the FCC Rules. These limits are designed to provide reasonable protection against harmful
interference when the equipment is operated in a commercial environment. This equipment generates, uses,
and can radiate radio frequency energy and, if not installed and used in accordance with the instruction
manual, may cause harmful interference to radio communications. Operation of this equipment in a
residential area is likely to cause harmful interference in which case the user will be required to correct the
interference at his own expense.
Class1, Division 2
Groups A,B,C,D
Class 1, Zone2
Groups IIA, IIB, IIB+H2, IIC
%HIRUHLQVWDOODWLRQHQVXUHWKDWXQLWVFRPSO\ZLWKKD]DUGRXVDUHDFODVVLÀFDWLRQ)DLOXUHWRGRVRPD\UHVXOWLQERGLO\
injury and/or property damage. To prevent ignition of hazardous atmospheres, area must be free of hazarous vapors
EHIRUHRSHQLQJHQFORVXUHRUVHUYLFLQJÀ[WXUHV7RUHGXFHWKHSRVVLELOLW\RIVWDWLFVSDUNLQJGRQRWDWWDFKPHWDOOLFSDUWV
to the outside of unit (i.e., metallic screws, tags decals etc.)
DO NOT ATTEMPT INSTALLATION UNTIL YOU ARE FAMILIAR WITH THEFOLLOWING PRECAUTIONS AND PROCEDURES.
CAUTION: SERVICE BY QUALIFIED PERSONNEL ONLY.
DE-ENERGIZE BEFORE OPENING.
Temperature Codes and Maximum Temperature Ratings
Operating Temperature In Cº
Ambient Cº CLASS 1 DIV. 2 A,B,C,D Supply Wire Temp. C º Min.
50 T3C; TYPE4X 75
93094720
CEILING OR END MOUNT
N4X INSTALLATION
IMPORTANT: TO WEATHERPROOF FOR OUTDOOR INSTALLATION,
BE SURE TO SEAL ALL OPENINGS-MOUNTING, CONDUIT, ETC.
FOR END MOUNTING OF SIGN USE SAME PROCEDURES AS CEILING.
BUILDING
BACK BOX
3) AFTER ROUTING WIRES
AS SHOWN ATTACH PIPE
NIPPLE WIRING TO BUILDING
AC INPUT, STUFF INTO BACK BOX.
4) AFFIX SPIDER PLT
TO BACKBOX USING
BACK BOX SCREWS
5) REMOVE ADHESIVE BACKING
FROM GASKET & APPLY TO
CANOPY
1) AFFIX PIPE NIPPLE
ASSY TO CANOPY
6) AFFIX CANOPY ASSY
ONTO SPIDER PLT
USING PROVIDED
SCREWS
7) AFFIX PROVIDED
GASKET TO
CANOPY
10) REMOVE PIPE PLUG
FOR CEILING MTG
12) USE WIRING DIAGRAM
FOR PROPER WIRING
OF SIGN AND AFFIX
WIRES INTO PUSH
CONNECTORS
10) REMOVE PIPE PLUG
FOR END MTG
11) AFFIX SIGN ASSY ONTO
PIPE NIPPLE AND SECURE
USING PROVIDED NUT
TO 40 IN-LBS
9) REMOVE STENCIL
ASSY
14) REMOVE CHEVRONS IF (REQUIRED)
BY DRIVING CHEVRONS TOWARDS
BACK OF STENCIL TAPPING
AROUND CHVRON PERIMETER
FROM FRONT OF STENCIL
13) CONNECT BATTERY
IF PROVIDED TO PCB
BATTERY HARNESS
8) USE SPANNER BIT (PROVIDED)
TO REMOVE & TIGHTEN ALL
COVER SPANNER SCREWS
TO 16 IN-LBS
THIS ILL IS TO BE USED ON IS P/N:93093016
2) AFFIX NUT TO PIPE NIPPLE ASSY
AND TIGHTEN TO 40/50 IN-LBS
93094716
6) AFFIX CANOPY ASSY ONTO
SPIDER PLT USING PROVIDED
SCREWS
5) REMOVE ADHESIVE BACKING
FROM GASKET & APPLY TO
CANOPY
1) AFFIX PIPE NIPPLE
ASSY TO CANOPY
2) AFFIX NUT TO PIPE NIPPLE ASSY
AND TIGHTEN TO 40/50 IN-LBS
7) AFFIX PROVIDED
GASKET TO
CANOPY
10) REMOVE CENTER K.O.
FOR PROPER N4X MTG.
ROUTE WIRES THRU
CENTER K.O.
12) AFFIX SIGN ASSY ONTO
PIPE NIPPLE AND SECURE
USING PROVIDED NUT
TO 40 IN-LBS
8) USE SPANNER BIT (PROVIDED)
TO REMOVE & TIGHTEN ALL
COVER SPANNER SCREWS
TO 16 IN-LBS
9) REMOVE STENCIL
ASSY
14) CONNECT BATTERY
IF REQUIRED TO PCB
13) USE WIRING DIAGRAM
FOR PROPER WIRING
OF SIGN AND AFFIX
WIRES INTO PUSH
CONNECTORS
11) ATTACH ADHESIVE
WIRING SADDLE
AND ROUTE WIRES
THRU LITE-BOX
CUTOUTS
4) AFFIX SPIDER PLT
TO BACKBOX USING
BACK BOX SCREWS
3) AFTER ROUTING WIRES
AS SHOWN ATTACH PIPE
NIPPLE WIRING TO BUILDING
AC INPUT,STUFF INTO BACK BOX.
15) REMOVE CHEVRONS IF (REQUIRED)
BY DRIVING CHEVRONS TOWARDS
BACK OF STENCIL TAPPING
AROUND CHVRON PERIMETER
FROM FRONT OF STENCIL
INSTALLATION INSTALLATION
Wall Mount NEMA 4X Installation
STANDARD EXIT
WIRING CONENCTIONS
CEILING OR END MOUNT
NEMA 4X INSTALLATION
REMOTE CAPACITY
AND -0 OPTION MODELS
Note: If using a double lamp head remote xture it should be
wired in series before connecting remote lamp head positive lead
to pos (+) exit remote lead and remote lamp head negative lead
to neg (-) exit remote lead exit orange connectors.
IMPORTANT: TO WEATHERPROOF FOR OUTDOOR
INSTALLATION, BE SURE TO SEAL ALL OPENINGS-
MOUNTING, CONDUIT, ETC.
Note: For exits wired using conduit, use 1 of 2 ttings.
For exits with -0 option use both conduit openings.
One for AC and the other for DC.
IMPORTANT: TO WEATHERPROOF FOR
OUTDOOR INSTALLATION, BE SURE TO SEAL
ALL OPENINGS - MOUNTING, CONDUIT, ETC.
FOR END MOUTING OF SIGN USE SAME
PROCEDURES AS CEILING.
93095619
"B"
"A"
ROTATE STEM CLIP ‘A’ AXIALLY TO LAMP
HEAD STEM, TO ROTATE LAMP HEAD
CLEAR LAMP HEAD COVER IS REMOVED FOR CLARITY
(YOU WILL NOT HAVE TO REMOVE UNLESS LAMP HEAD
DOSENT ADJUST USING THE INTERNAL CONTROLS).
ROTATE LEVER ‘B’ AXIALLY TO LAMP
HEAD STEM, TO ROTATE LAMP HEAD
90° TO STEM CENTER LINE
BLK (NEG -)
BLK (NEG -)
RIBBON
CABLE
SWITCH/LED PCB
CHARGER PCB
J2
J6 J5J10
J9
HEATER
HARNESS
(IF REQ)
BLK (HOT)
AC INPUT
HEATER/BATTERY
PACK
RED (POS +)
AC2 AC1
LED PCB
RED (POS +)
PCB INTER CONN
HARNESS
JUMPER used
on DYNCxxx6
MODELS
BATTERY
HARNESS
WHT (COM)
GREEN (GND)
ORG CONNECTOR
(SEE NOTE 13)
93094726
CONNECT BATTERY
TO THIS HARNESS
FOR REM CAPACITY MODELS
CHARGER PCB
J6 J10
ORG (NEG -)
REMOTE
LEAD (-)
ORG (POS +)
REMOTE
LEAD (+)
93094726
BLK (HOT)
WHT (COM)
GREEN (GND)
TO FRAME
ORG WIRE CONN.
(SEE NOTE 13)
FO
R
RE
M
OTE CAPA
CITY
M
O
DELS
(DYNCxxx12) CUT ORANGE LEAD
MIDWAY BETWEEN REM (+) AND (-)
LBL'S, STRIP .44 AND CONNECT
TO ORANGE CONNECTORS
PROVIDED.
AC INPUT
Lamp Head
Adjustment
Use tool provided in kit to
adjust lamp head control levers
INITIAL INSTALLATION REQUIREMENTS
Load Learn Process
Once the green “AC ON” LED is illuminated and AC power is present, run a load learn process on all DYNC units to include units with remotes. Run this test after
the unit has been installed and any remote connections have been made. Once completed, the load value will be retained in memory for lamp load comparison.
1. Press and hold the test button for at least 5 seconds
2. Once the test button is released, the test button LED should flash red/green until the lamp load is detected
3. Once the Load Learn test is complete, the unit LED should go to steady green. If not, repeat step 1 Note: If 10 red flash Load Learn fault is displayed load learn
process has failed. Check LED Lamp circuit wiring for proper polarity and continuity and repeat step 1.
4. Run a 1 minute test to ensure the unit is serviceable, the unit should display a blinking green LED, and go to a constant green LED after the test is complete.
Special Unit Information
This unit includes SPECTRON Self-Diagnostic/Self-Diagnostic Circuitry
This circuitry includes visual indication of the following unit faults;
-Battery Disconnected
-Battery Fault
-Charger Fault
-LED-Driver Fault
-Lamp Fault and Load Learn Failure
Additional Features
*Brownout Protection; Unit automatically transfers to emergency operation upon detection of low AC power(approx. 80% of nominal line).
*Time Delay Retransfer; upon return of normal AC power, unit will remain in emergency mode for an additional 15 minutes to allow AC power to stabilize.
*AC Lockout Circuit; prevents the emergency lights from illuminating when the battery is connected and no AC power is present.
*Low Voltage Disconnect Circuit: prevents damage to the battery from deep discharge during prolonged emergency operation.
NOTE: Batteries are often shipped in a discharged state - this is normal. The battery will require charging. Allow 24 hours of charging before testing the unit for
a long duration.

Other Hubbell Lighting Equipment manuals

Hubbell KIM LIGHTING LIGHTVAULT LTV55 User manual

Hubbell

Hubbell KIM LIGHTING LIGHTVAULT LTV55 User manual

Hubbell M-7679 R-PAC User manual

Hubbell

Hubbell M-7679 R-PAC User manual

Hubbell Dual-Lite UFO-LP1 User manual

Hubbell

Hubbell Dual-Lite UFO-LP1 User manual

Hubbell Dual Lite EV Series Manual

Hubbell

Hubbell Dual Lite EV Series Manual

Hubbell DUAL LITE PG Series User manual

Hubbell

Hubbell DUAL LITE PG Series User manual

Hubbell NXP2 Series User manual

Hubbell

Hubbell NXP2 Series User manual

Hubbell ALFW-6LU-5KBZ Series User manual

Hubbell

Hubbell ALFW-6LU-5KBZ Series User manual

Hubbell homeSELECT RMS100 User manual

Hubbell

Hubbell homeSELECT RMS100 User manual

Hubbell Laredo User manual

Hubbell

Hubbell Laredo User manual

Hubbell KIM LIGHTING VRB1 User manual

Hubbell

Hubbell KIM LIGHTING VRB1 User manual

Hubbell Dual Lite CVEC15 User manual

Hubbell

Hubbell Dual Lite CVEC15 User manual

Hubbell KILLARK VEB Series Instruction Manual

Hubbell

Hubbell KILLARK VEB Series Instruction Manual

Hubbell DUAL LITE EVE Series User manual

Hubbell

Hubbell DUAL LITE EVE Series User manual

Hubbell Kim Lighting Lightvault LTV59 User manual

Hubbell

Hubbell Kim Lighting Lightvault LTV59 User manual

Hubbell NutriLED Series User manual

Hubbell

Hubbell NutriLED Series User manual

Hubbell VAPORTITE VBGL Series User manual

Hubbell

Hubbell VAPORTITE VBGL Series User manual

Hubbell Laredo LMC User manual

Hubbell

Hubbell Laredo LMC User manual

Hubbell LITEFRAME LC4 User manual

Hubbell

Hubbell LITEFRAME LC4 User manual

Hubbell Litecontrol 22L Series User manual

Hubbell

Hubbell Litecontrol 22L Series User manual

Hubbell PRS User manual

Hubbell

Hubbell PRS User manual

Hubbell G040 Instruction Manual

Hubbell

Hubbell G040 Instruction Manual

Hubbell SAVVANO User manual

Hubbell

Hubbell SAVVANO User manual

Hubbell Dual Lite EZ-2R Series Manual

Hubbell

Hubbell Dual Lite EZ-2R Series Manual

Hubbell WPH Series User manual

Hubbell

Hubbell WPH Series User manual

Popular Lighting Equipment manuals by other brands

Conrad Electronic 57 09 98 operating instructions

Conrad Electronic

Conrad Electronic 57 09 98 operating instructions

Botex MEGASROBE 1500/DMX Operation manual

Botex

Botex MEGASROBE 1500/DMX Operation manual

Titanium TT-TRK-164D quick start guide

Titanium

Titanium TT-TRK-164D quick start guide

Beamz 150.450 user manual

Beamz

Beamz 150.450 user manual

Light Emitting Designs ILX450 Series installation guide

Light Emitting Designs

Light Emitting Designs ILX450 Series installation guide

Avlite AV-OL-LI Installation & service manual

Avlite

Avlite AV-OL-LI Installation & service manual

ML Accessories EMLSUS Installation & maintenance manual

ML Accessories

ML Accessories EMLSUS Installation & maintenance manual

Portfolio UT1007-BR4-13CF1-P manual

Portfolio

Portfolio UT1007-BR4-13CF1-P manual

Doheny's 6575 instructions

Doheny's

Doheny's 6575 instructions

lap 930PG Instruction leaflet

lap

lap 930PG Instruction leaflet

Atlantis KSIX COLORLED BXLEDTV01 user manual

Atlantis

Atlantis KSIX COLORLED BXLEDTV01 user manual

EuroLite Air Effect AC-100 user manual

EuroLite

EuroLite Air Effect AC-100 user manual

RUTEC VARDAFLEX Platin SVQ manual

RUTEC

RUTEC VARDAFLEX Platin SVQ manual

Canon INON D-180 user manual

Canon

Canon INON D-180 user manual

Larson Electronics EPL-48-2L-T12VHO instruction manual

Larson Electronics

Larson Electronics EPL-48-2L-T12VHO instruction manual

Lyt-Or ARTEMIS 3 user manual

Lyt-Or

Lyt-Or ARTEMIS 3 user manual

Safavieh Lighting TBL4424A Assembly

Safavieh Lighting

Safavieh Lighting TBL4424A Assembly

Bailey H07RN-F manual

Bailey

Bailey H07RN-F manual

manuals.online logo
manuals.online logoBrands
  • About & Mission
  • Contact us
  • Privacy Policy
  • Terms and Conditions

Copyright 2025 Manuals.Online. All Rights Reserved.