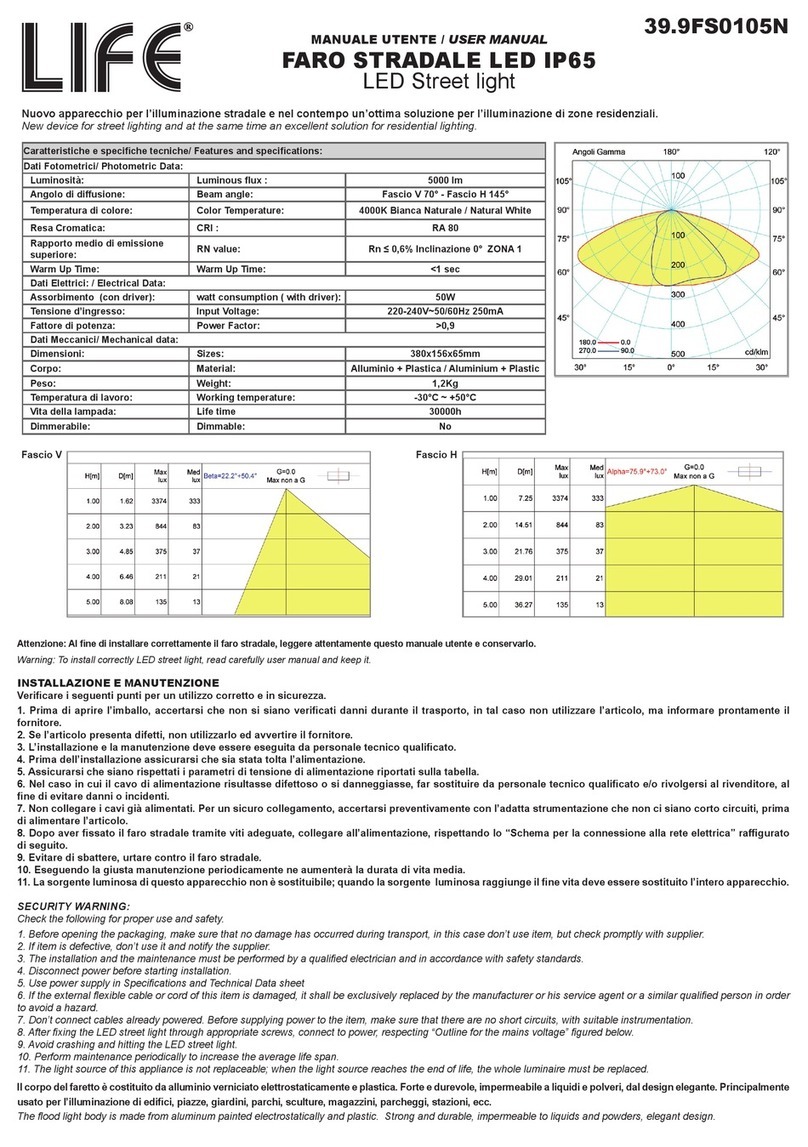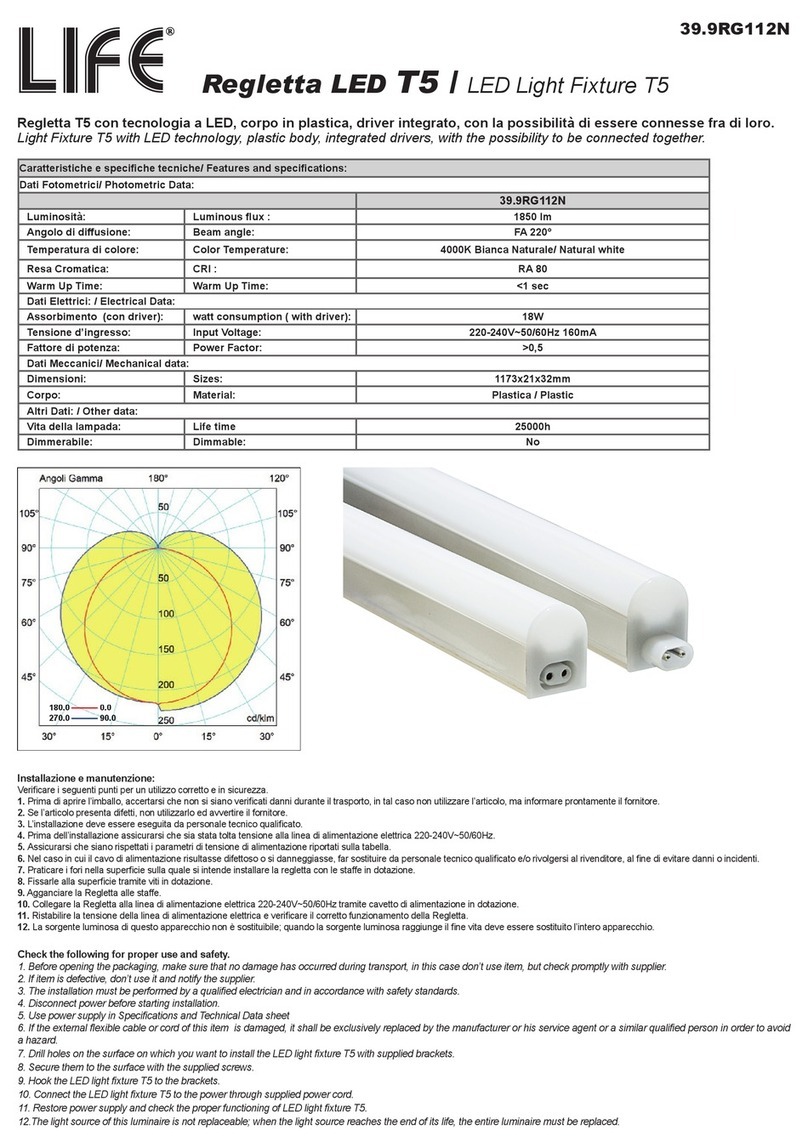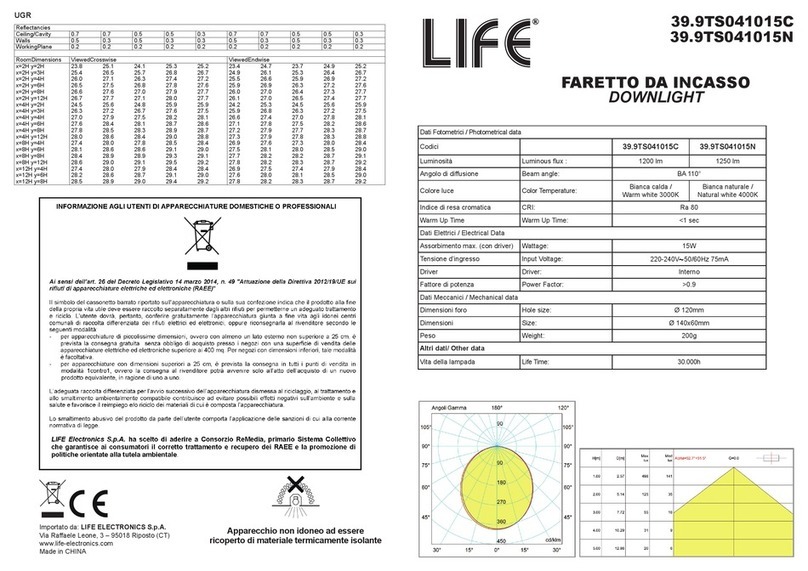
Connection
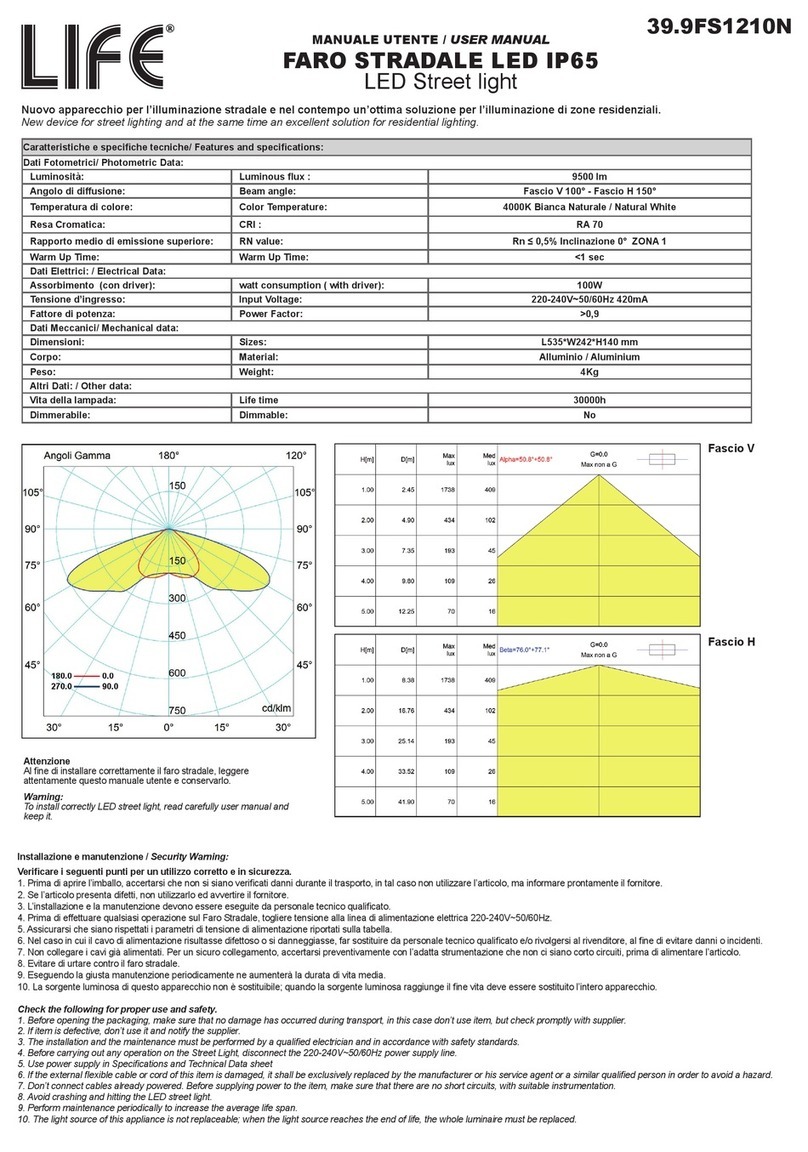
220-240V~
1
5
2 3 4
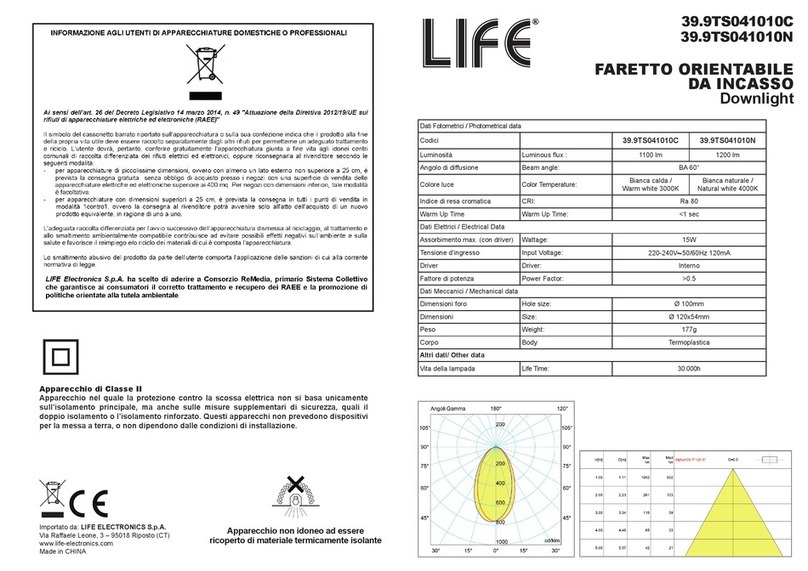
le molle di ssaggio
sseranno il faretto al supporto.
Springs clamp will be
automatically back downlight to
the support.
Driver
far passare il driver all’in-
terno del supporto.
Drill a right hole where to
need to install downlight.
piegare le molle di ssaggio
a 180° come in gura ed introdur-
le all’interno del supporto.
Pull up spring clamp 180°
before putting the downlight into
the hole.
inserire il faretto all’interno
del supporto.
Put downlight into the
hole.
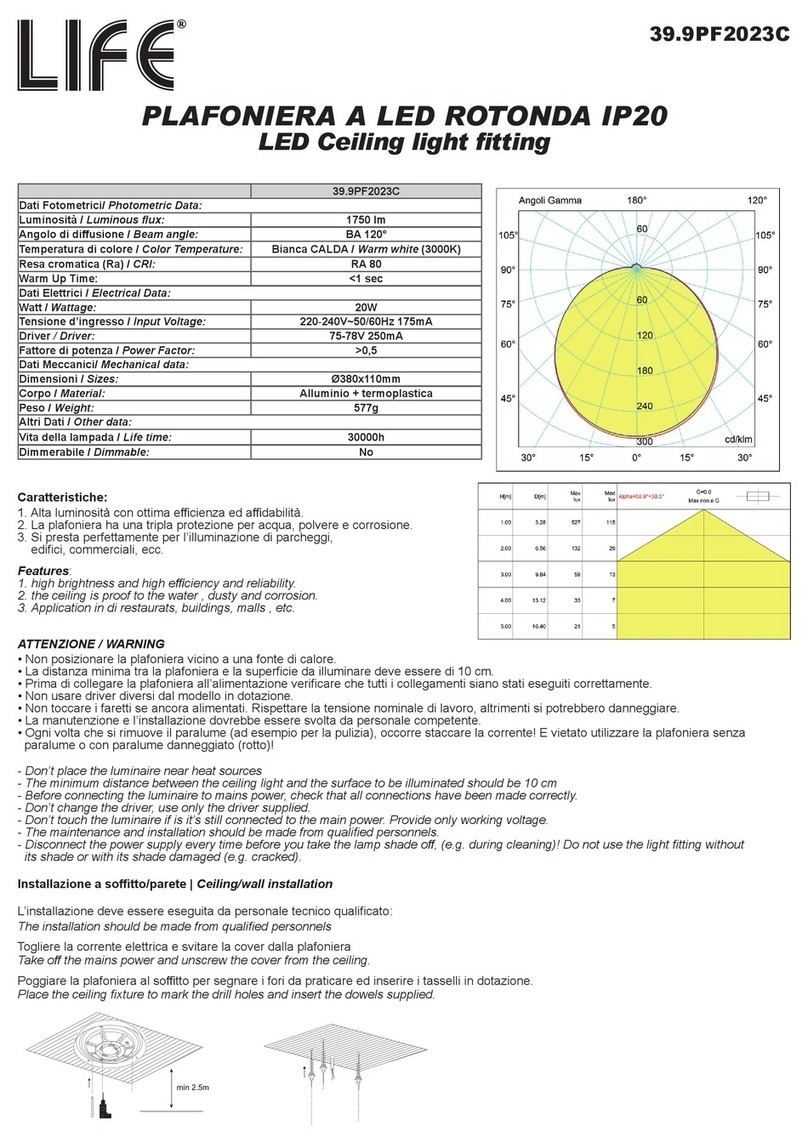
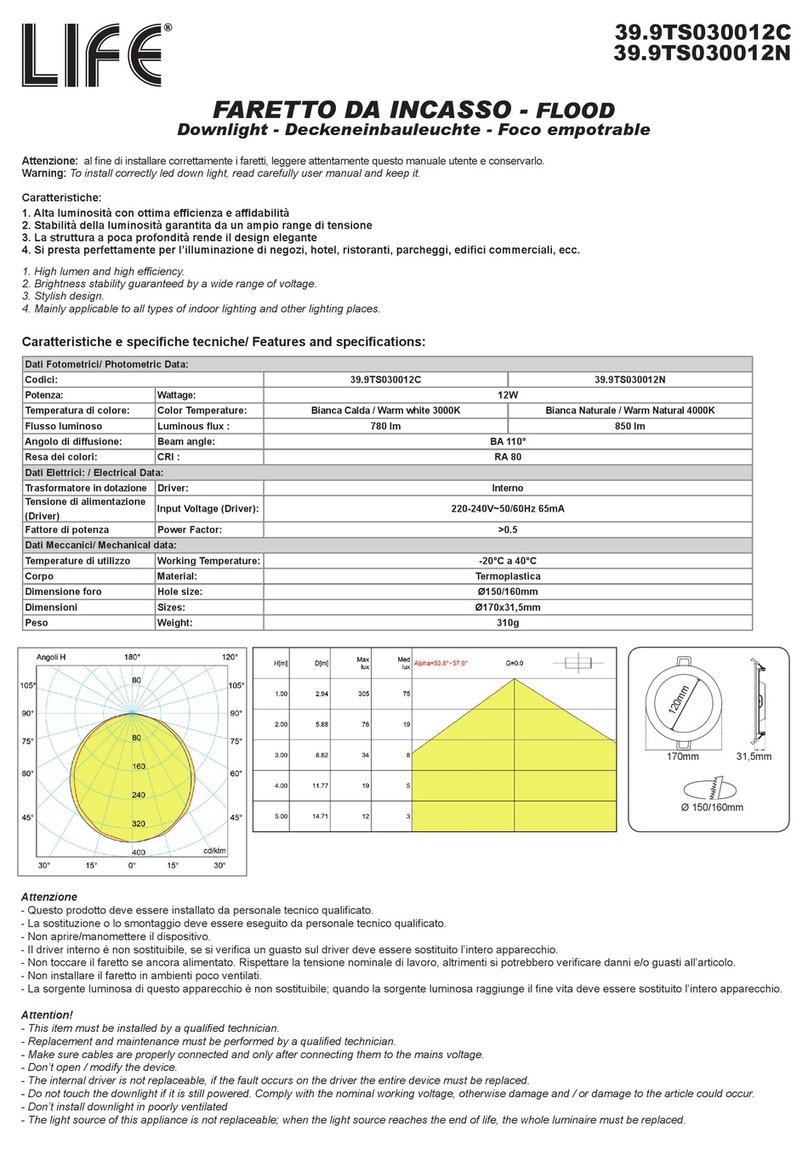
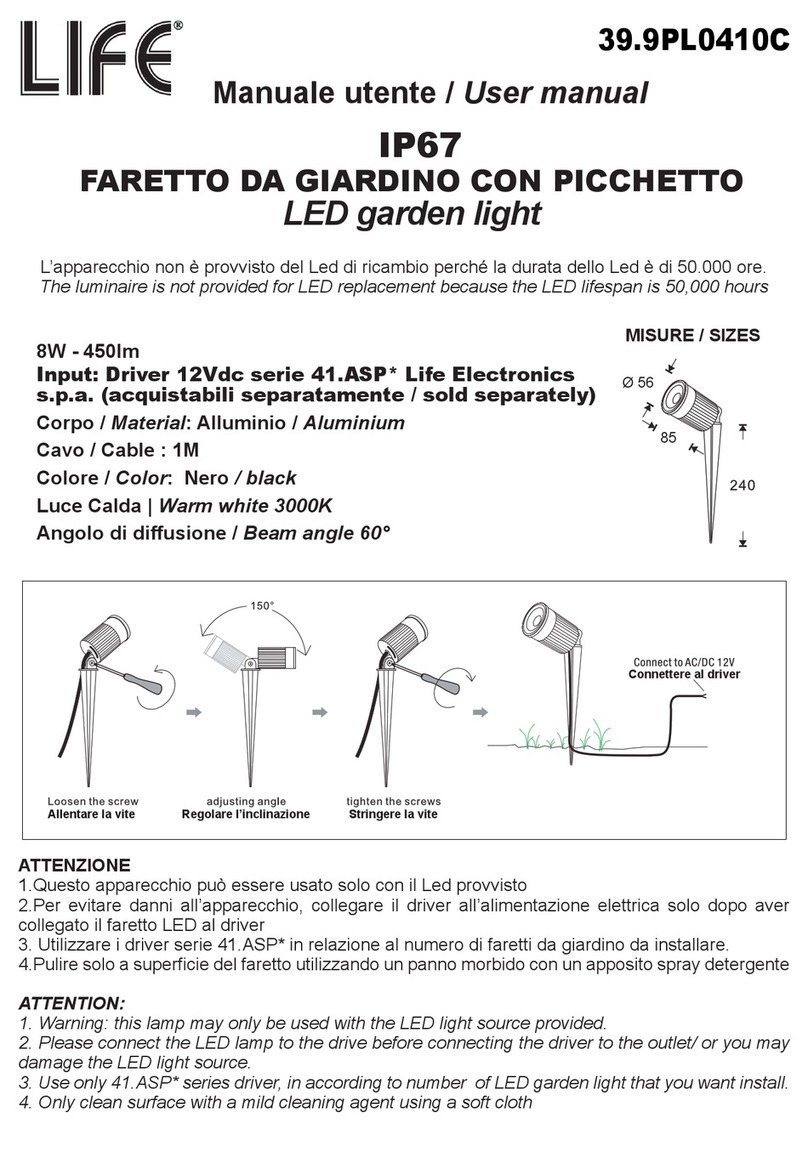
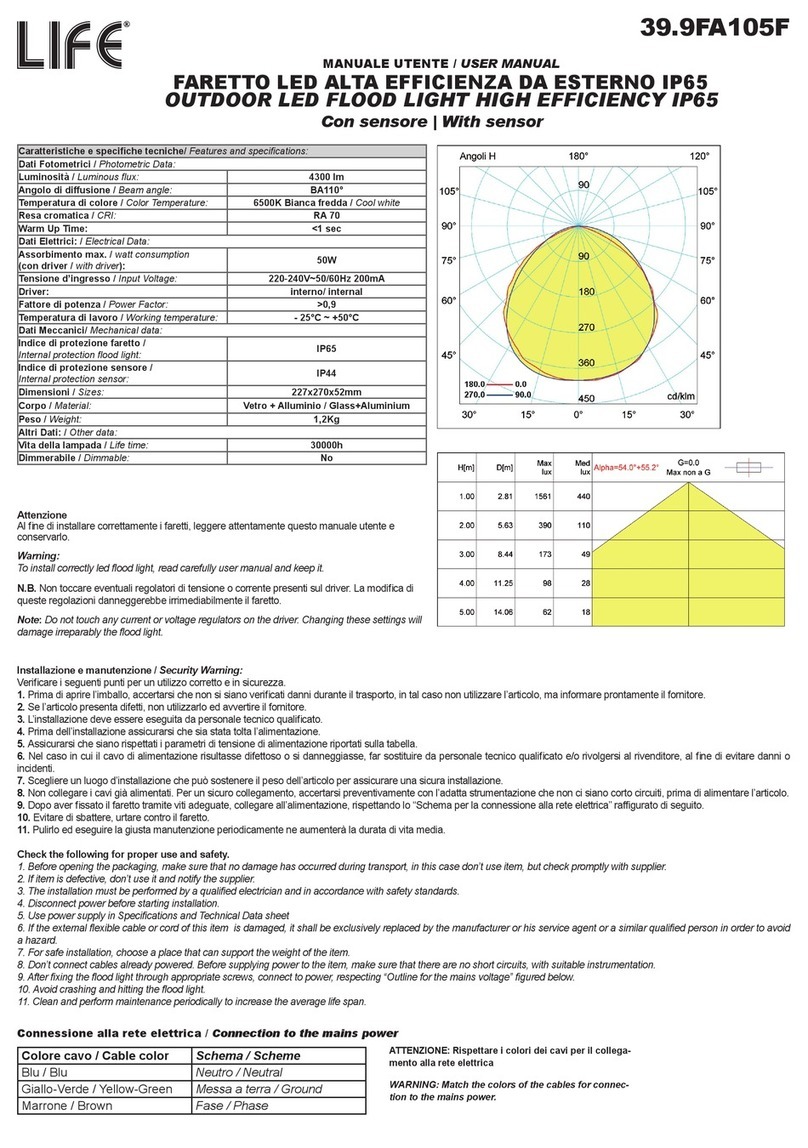
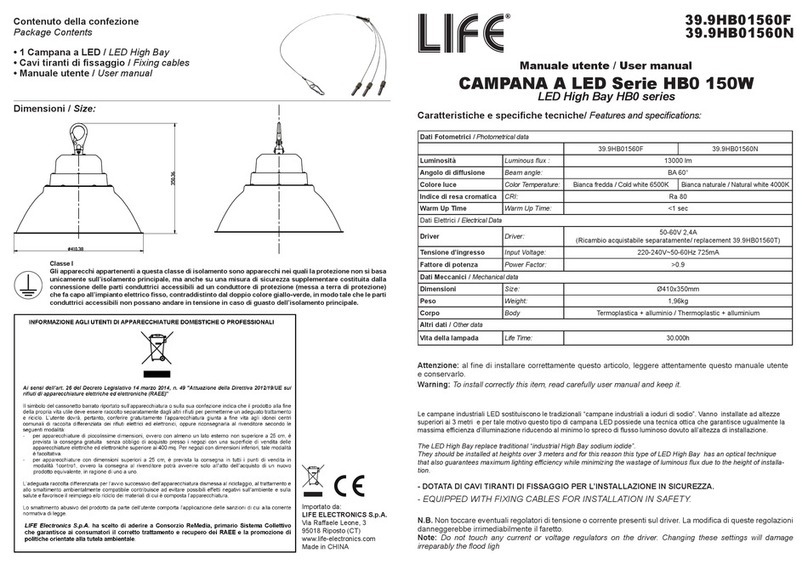
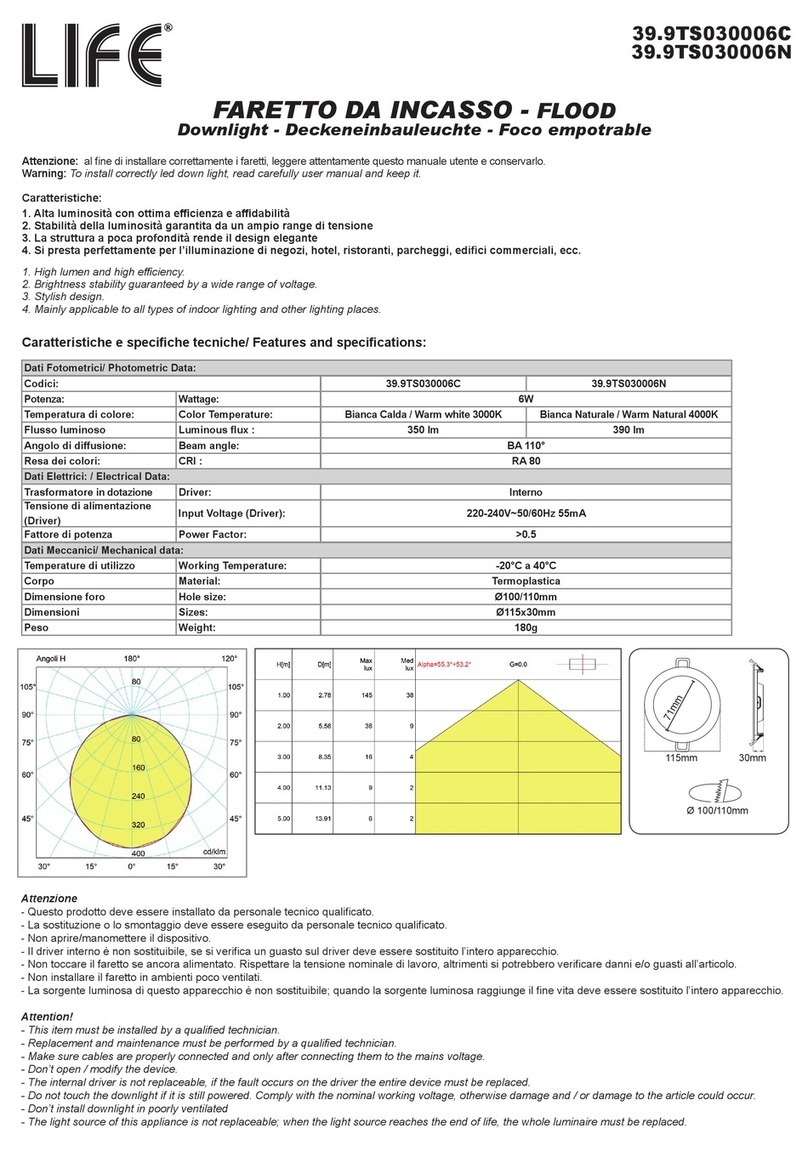
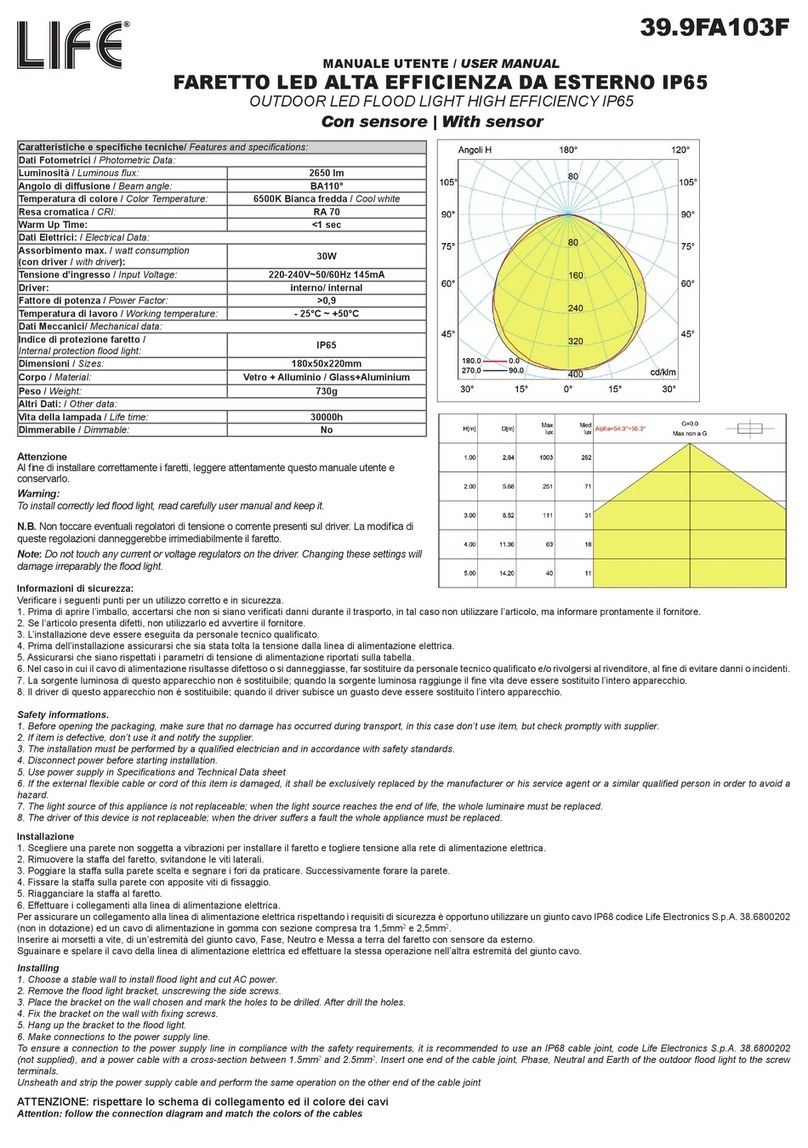
Installation must be performed by qualied technical personnel.
-
Before carrying out any operation on the LED downlight, disconnect the 220-240Vac, 50 / 60Hz power supply
line.
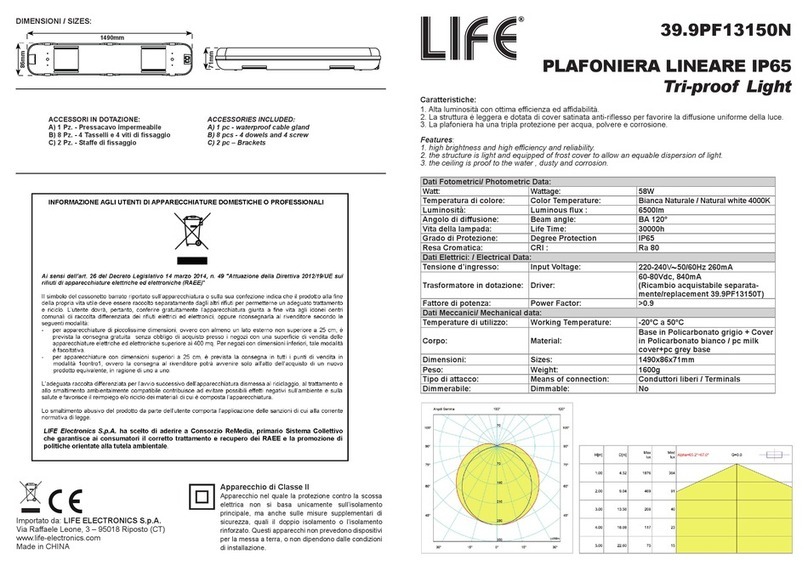
5. Connect Phase and Neutral of the driver primary to a protected terminal board (not supplied).
6. Connect Phase and Neutral of the 220-240Vac, 50 / 60Hz power supply line to the other side of the protected terminal board.
Attention: respect the diagram and
don’t invert the connections
Simbolo / Symbol Cavo / Cable
22
The device is in Class II, so it does not need to be grounded, but to ensure adequate double insulation
along the entire power line use a rubberized cable, having a section between 1.5mm2and 2, 5mm2. Strip
the conductor wires of the power supply cable only of the conductor portion that will enter the protected
terminal board, paying attention to the escape of the strands that could cause short circuits.
1
2
NF
180.0
270.0
0.0
90.0
Warning
39.9TSS1312T
• The light source of this appliance is not replaceable; when the light source reaches the end of life, the
whole appliance must be replaced.
• Do not place the LED panel near heat sources.
• Check that all connections have been made correctly respecting the nominal working voltage, otherwise
damage and / or faults could occur.
• Do not touch the LED downlight if it is still powered.
• Use the supplied driver. If the driver should be replaced, use the 39.9TSS1312T model.
• Maintenance and replacement must be performed by qualied technical personnel
Apparecchio di Classe II

