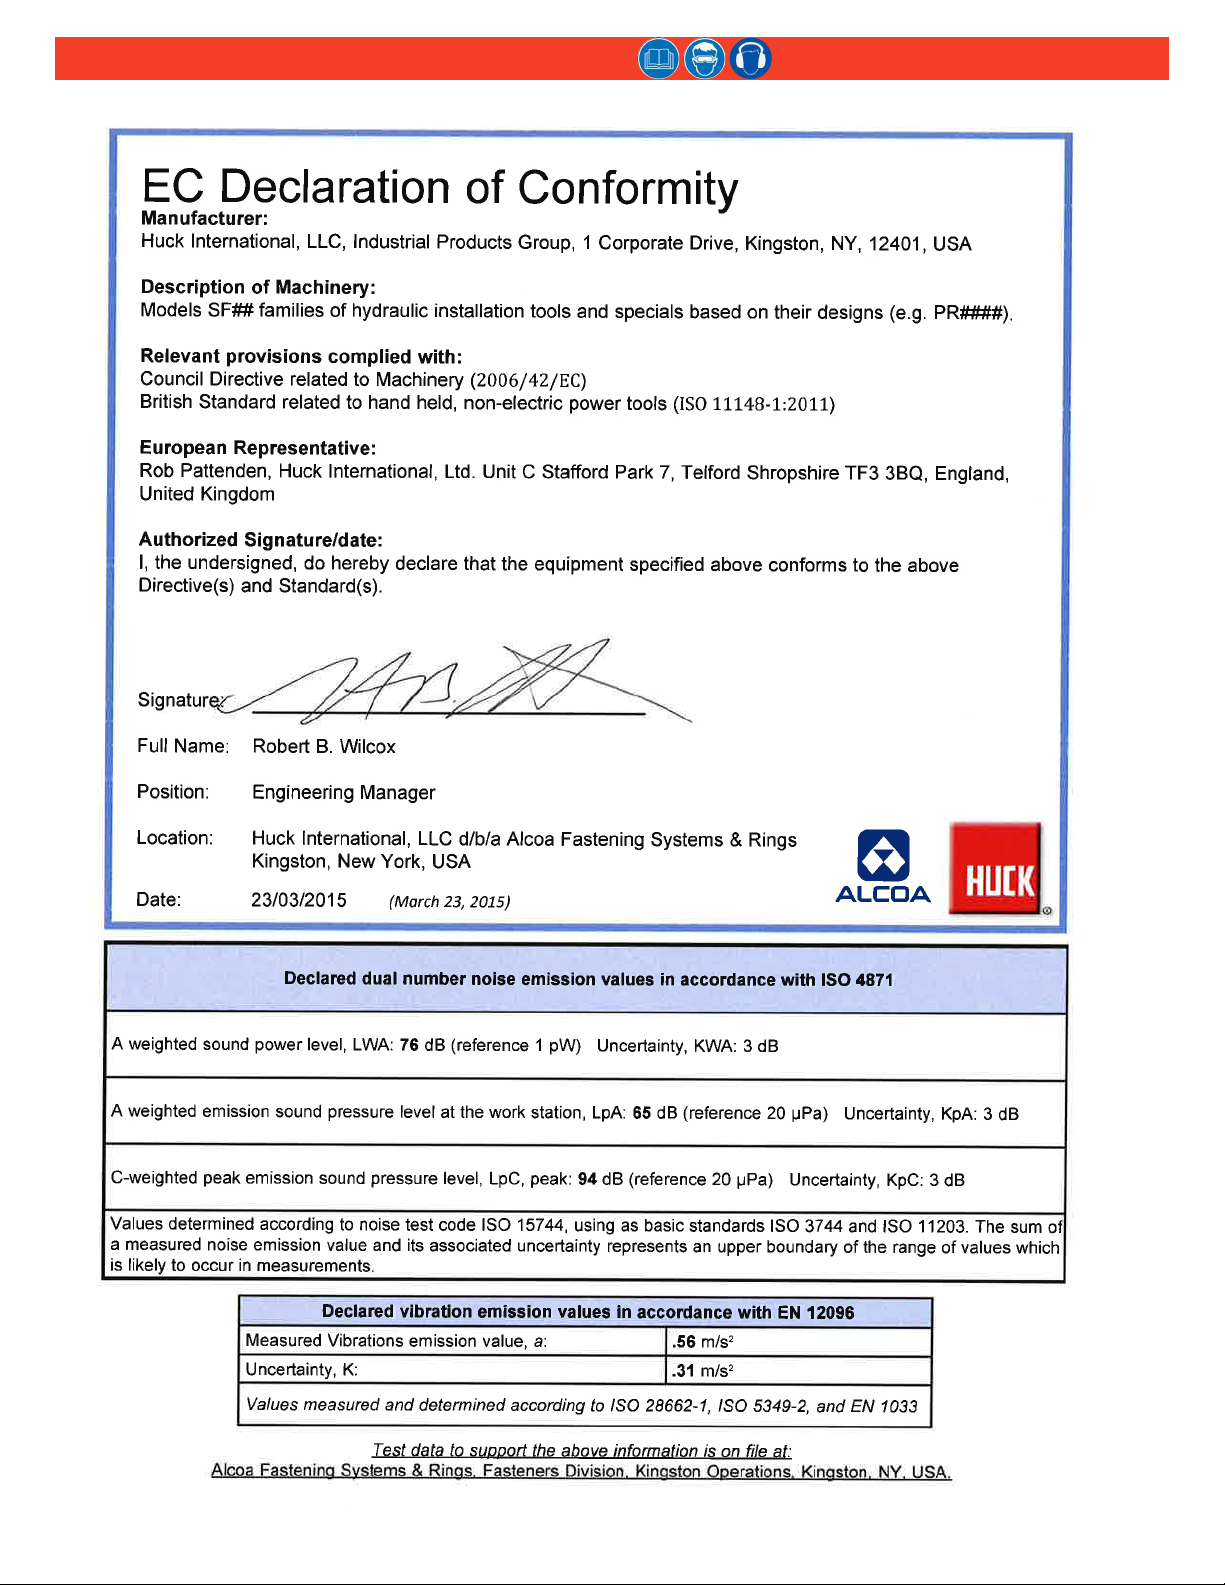
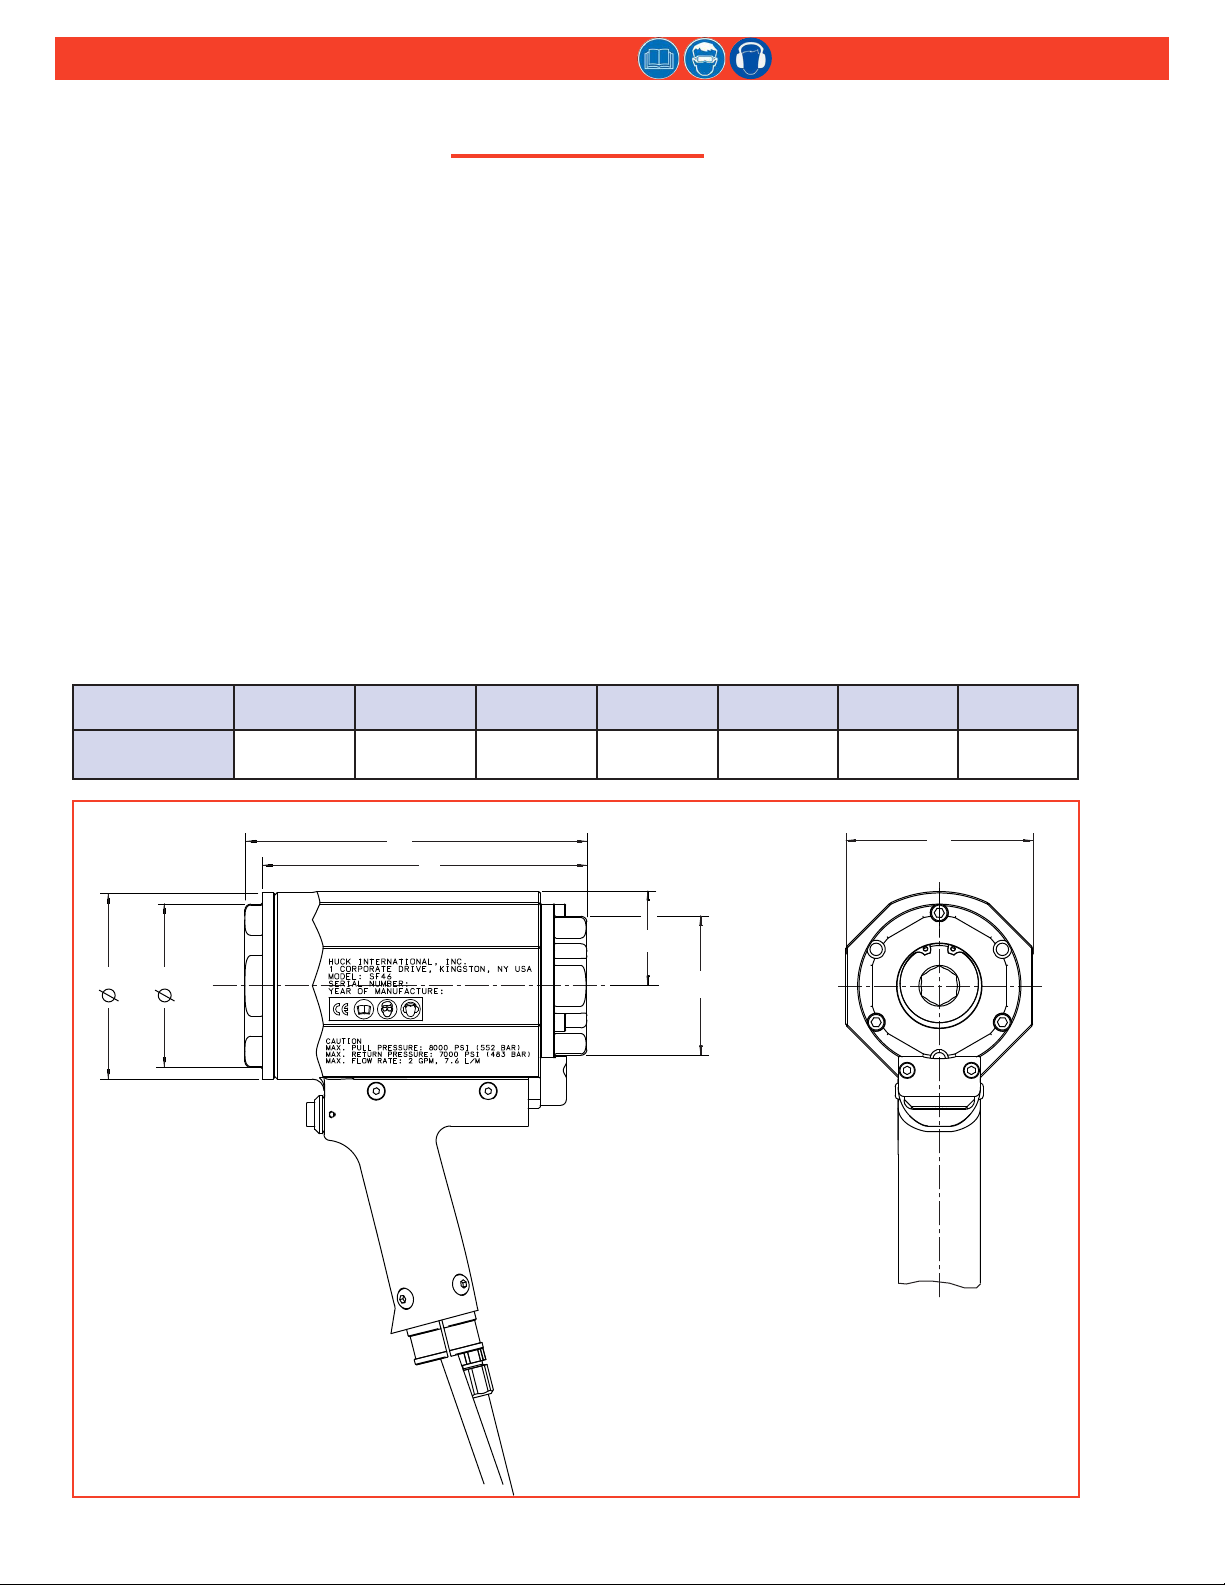
SF46 BobTail®Installation Tooling (HK1181) Alcoa Fastening Systems & Rings
10
maIntenanCe
• The eciency and life of your tool depends on proper
maintenance. Please read this secon completely
before proceeding with maintenance and repair. Use
proper hand tools in a clean and well-lighted area.
Only standard hand tools are required in most cases.
Where a special tool is required, the descripon and
part number are given.
• While clamping tool or parts in a vise, and when
parts require force, use suitable so materials to
cushion impact. For example, using a half-inch brass
dri, wood block and vise with so jaws greatly
reduces possibility of damaging tool. Remove
components in a straight line without bending,
cocking or undue force. Reassemble tool with the
same care..
Sealants, Lubricants, Service Kits
•See sPecIFIcatIons for uid type. Dispose of uid in
accordance with local environmental regulations.
Recycle steel, aluminum, and plastic parts in
accordance with local lawful and safe practices.
• Rub pipe plug threads and quick connect ttings
with PTFE thread compound.
• Smear LUBRIPLATE®13OAA*, or equivalent
lubricant, on O-Rings and mating surfaces to aid
assembly and to prevent damage to O-Rings.
(LUBRIPLATE 13O-AA is available in a tube as
Huck P/N 502723.)
•Each Service Kit contains perishable parts for your
specic tool. As foreseeable use may indicate,
keep extra kits (O-rings, Back-up Rings, other
standard items) and tool parts in stock. When stock
is depleted, you can get kit items from any regular
retailer of these items. See kit parts list for: O-ring
size (AS568- number); material; durometer.
PreventIve MaIntenance
System Inspection
Operang eciency of the tool is directly related to
the performance of the complete system, including the
tool with nose assembly, hydraulic hoses, trigger and
control cord, and POWERIG. Therefore, an eecve
prevenve maintenance program includes scheduled
inspecons of the system to detect and correct minor
troubles. At the beginning of each shi/day:
• Inspect tool and nose assembly for external damage.
• Verify that hydraulic hose ttings, couplings, and
electrical connections are secure.
• Inspect hydraulic hoses for damage and deterioration.
Do not use hoses to carry tool. Replace hoses if
damaged.
• Observe tool, hoses, and hydraulic unit during
operation to detect abnormal heating, leaks, or
vibration.
• Max hydraulic uid contamination level: NAS 1638
class 9, or ISO CODE 18/15, or SAE level 6.
Powerig Maintenance
Maintenance instructions and repair procedures are
in the appropriate POWERIG Instruction Manual.
Tool Maintenance
Whenever disassembled and also at regular intervals
(depending on severity and length of use), replace
all seals, wipers, and back-up rings in tool. Service
Kits, hoses, and extra parts should be kept in stock.
Inspect cylinder bore, pistons, and piston rods for
scored surfaces and excessive wear or damage.
Replace as necessary.
Nose Assembly Maintenance
Clean nose assembly often. Dip in mineral spirits or
similar solvent to clean puller and wash away metal
chips and debris. At regular intervals, as experience
shows, disassemble nose and use a sharp “pick” to
remove imbedded particles from grooves of puller.
*DEXRON is a registered trademark of General Motors Corp.
Quintolubric is a registered trademark of Quaker Chemical Corp.
Threadmate is a registered trademark of Parker Intangibles LLC..
TEFLON is a registered trademark of DuPont Corp.
LUBRIPLATE is a registered trademark of Fiske Brothers Rening Co.
CAUTIONS:
- Consult MSDS before servicing tool.
- Keep dirt and other material out of
hydraulic system.
- Separated parts most be kept away from
dirty work surfaces.
- Dirt/debrisinhydraulicuidcausesfailure
in Powerig® Hydraulic Unit valves.
CAUTION: Do not use TEFLON®* tape on pipe
threads. Pipe threads may cause tape to shred
resulting in tool malfunction. (Threadmate™
is available from Huck in a 4oz. tube as part
number 508517.)
CAUTION: Always replace seals,
wipers, and back-up rings when tool is
disassembled for any reason.
WARNING: Inspect tool for damage or
wear before each use. Do not operate
if damaged or worn, as severe personal
injury may occur.