manuals.online logo
Brands
  1. Home
  2. •
  3. Brands
  4. •
  5. hygena
  6. •
  7. Indoor Furnishing
  8. •
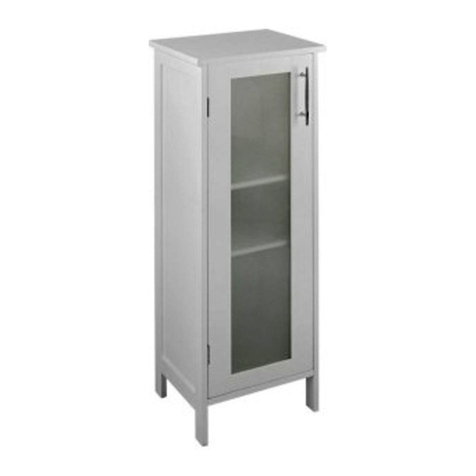
  9. hygena Underbasin 539/9974 Datasheet

hygena Underbasin 539/9974 Datasheet

Hygena - Underbasin
527/9142
Dimensions
Width - 48cm
Depth - 28cm
Height - 60cm
Issue 1 - 21/03/15
Important– Please read these instructions fully before starting assembly
Assembly lnstructions - please keep for future reference 539/9974
WARNING
In order to help prevent overturning –
To help prevent product toppling over please follow the below steps:-
Do not allow children to climb or hang on the furniture
Do not place heavy items in the top drawers
Do not place heavy items on top of the furniture, unless the furniture has been
designed for this purpose
You will need to provide wall plugs and screws applicable for your wall type
Components - Panels
Please check you have all the panels listed below
2
If you have damaged or missing components, call the
Customer Helpline:
12
46
79
3
5
8
10
If you have damaged or missing components, call the
Customer Helpline:
Components - Fittings
Please check you have all the fittings listed below
Note: The quantities below are the correct amount to complete the assembly.In some cases more fittings
may be supplied than are required.
Tools required
Phillips screwdriver
(medium & large) Drill
7mm Suitable drill bit
(for use with wall plug) Small
hammer
Ruler - Use this ruler to help correctly identify the screws
0
The screws length is measured from the head to the point (30mm screw shown).
5 10 15 20 25 30 35 40 45 50 55 60 65 70 75 80 85 90 95 100 105 110 115 120 125 130 135 140 145 150 155 160 165 170
3
ABc
Glue x 1 30mm Dowel x 12 Male comlock x 11 12mm Female comlock x 11
D
E F G H
Shelf holder x4 Hinge x 4
15mm Screw x 16 25mm Sticker x 4
I
3x12mm Screw x 14
J
Wall strap x 2
K
Wall Plug x2
L
32mm Screw & washer x 2
Assembly lnstructions
Step 1
Fitting male camlocks
1.Insert 11 x male camlocks
into Panel 2 , 3 , 5 ,
6 , and tighten using a
suitable screwdriver .
c
5
2
3
5
6
C
Assembly lnstructions
Step 2
1. Glue and insert 12 x
dowels into panel 1 ,
2 , 3 ,4 ,5 ,as
shown.
B
6
B
2
3
5
1
4
A
Assembly lnstructions
Step 3
7
1
2
A
Attaching side panel
1. Glue holes in left side
panel 1 , connect back
panel 2 to left side panel 1
as shown.
2. Insert 1 x female
camlocks to attach
left side panel 1 to front
panel 2
Use a Screwdriver to turn
the 1 x female camlock
clockwise to lock. Please
refer to the "Using
Camlocks" section at the
front of this instruction for
further assistance.
D
D
Step 4
Matt side
A
1. Glue holes in right side
panel 3 connect back
panel 1 2 and front
panel 4 to right side panel
5 .
2.Insert 6 x female
camlocks to attach
back panel 1 2 4 and
front panel 3 5 .
Use a Screwdriver to turn
the 6 x female camlock
clockwise to lock. Please
refer to the "Using
Camlocks" section at the
front of this instruction for
further assistance.
D
D
1
2
3
4
5
Step 5
Assembly lnstructions
8
1. Glue holes in right side
panel 6 connect back
panel 5 and front panel 3
to right side panel 6 .
2.Insert 4 x female
camlocks to attach
back panel 5 and front
panel 3 .
Use a Screwdriver to turn
the 4 x female camlock
clockwise to lock. Please
refer to the "Using
Camlocks" section at the
front of this instruction for
further assistance.
D
D
6
A
5
3
Step 6
1. Glue holes in right side
panel 7 X2 connect back
panel 1 3 and front
panel 5 6 to right side
panel 7 X2 .
2.Insert 14 x Screw to
attach back panel 1 2 4
and front panel 3 5 .
Use a Screwdriver to turn
the 14 x Screw
clockwise to lock. Please
refer to the "Using
Camlocks" section at the
front of this instruction for
further assistance.
I
I
3
5
1
6
7
7
Assembly lnstructions
9
Step 7
Attach hinge
1.Connect 4 x hinge to
the top panel 8 9
with 8 x screws as
show.
Use a Screwdriver to turn
the female camlock
clockwise to lock. Please
refer to the "Using
Camlocks" section at the
front of this instruction for
further assistance.
Very Important:
The friction stays
must be
attached the
correct way up.
Please pay attention to
diagram. Failure to do so
may result in damaging
the unit
G
FG
8
9
F
G
F
Assembly lnstructions
10
Step 8
Attach top panel
1. Connect top panel 8 ,
9 to the unit with 8 x screw
as shown. F
E
Hinge adjustment:
a: To move the top panel up
or down, loosen screws
shown and move top panel to
suit
b.To move the top panel in or
out, loosen screws shown
and move top panel to suit.
Retighten screws
C:To move the top panel left
or right, adjust screws
shown.
a: b: c:
8
9
F
F
Assembly lnstructions
11
Step 9
Step 10
1.Use 4 x stickers to
cover camlocks on 2x side
panel 3 and left upright 5
as shown.
5
3
H
H
10
5
3
E
1.Insert 4 x shelf holders
to 2 x side panel 3 and
left upright 5 and right .
2.Attach 4x panel 10 and
onto shelf holder as shown.
E
Assembly lnstructions
Step 11
Step 12
12
J
6
L
J
It is recommended that the
unit is fixed to a wall.
1.Move the unit into desired
position.
Warning:
The unit
is heavy.
Lift with care.
2. Mark the wall with a
suitable scribe the position
of the fixing hole.
Warning:
Before driling,check
wall for hidden pipes
and cables.
3. Drill hole and insert 2 x
wall plug .
4.Secure the other end of the 2 x
strap to the wall with 2 x
washer & screw
Note: To hide the strap behind
the unit ,drill the hole lower
than the top of unit.
J
1.Using 2 x nylon straps
to the back of left back 7 &
right back 6 .
7
7
L
If you need help or have damaged or missing parts, call the Customer Helpline: 0345 6400800
Argos LTD. 489-499 Avebury boulevard, Central Milton Keynes, MK9 2NW

This manual suits for next models

1

Other hygena Indoor Furnishing manuals
hygena Amparo 600/1443 User manual

hygena

hygena Amparo 600/1443 User manual

hygena 143/8585 User manual

hygena

hygena 143/8585 User manual

hygena 656/5831 User manual

hygena

hygena 656/5831 User manual

hygena Hamlin 145/8390 User manual

hygena

hygena Hamlin 145/8390 User manual

hygena Hamlin 152/6909 User manual

hygena

hygena Hamlin 152/6909 User manual

hygena Matrix Large Sideboard User manual
hygena

hygena Matrix Large Sideboard User manual

hygena 833/4455 User manual

hygena

hygena 833/4455 User manual

hygena Valencia 656/5824 User manual

hygena

hygena Valencia 656/5824 User manual

hygena Valencia 656/5855 User manual

hygena

hygena Valencia 656/5855 User manual

hygena Amparo 633/3252 User manual

hygena

hygena Amparo 633/3252 User manual

hygena Nitro Bar Stool User manual

hygena

hygena Nitro Bar Stool User manual

hygena Luna 448/8439 Datasheet

hygena

hygena Luna 448/8439 Datasheet

hygena Luna 461/8436 User manual

hygena

hygena Luna 461/8436 User manual

hygena Amparo 633/3290 User manual

hygena

hygena Amparo 633/3290 User manual

hygena 600/6194 User manual

hygena

hygena 600/6194 User manual

hygena 249/8940 User manual

hygena

hygena 249/8940 User manual

hygena 541/0530 User manual

hygena

hygena 541/0530 User manual

hygena 427/7396 Datasheet

hygena

hygena 427/7396 Datasheet

hygena 314/5041 User manual

hygena

hygena 314/5041 User manual

hygena 314/9195 User manual

hygena

hygena 314/9195 User manual

hygena Harcourt 412/1806 Datasheet

hygena

hygena Harcourt 412/1806 Datasheet

hygena Amparo 600/1443 User manual

hygena

hygena Amparo 600/1443 User manual

hygena Luna 459/6077 Datasheet

hygena

hygena Luna 459/6077 Datasheet

hygena Valencia 656/5776 User manual

hygena

hygena Valencia 656/5776 User manual

Popular Indoor Furnishing manuals by other brands

AshleyDirect 824 Assembly instruction sheet

AshleyDirect

AshleyDirect 824 Assembly instruction sheet

Cooper Lighting Metalux 2EP3GAX Series Specification sheet

Cooper Lighting

Cooper Lighting Metalux 2EP3GAX Series Specification sheet

Eurovema Euroflex ABC manual

Eurovema

Eurovema Euroflex ABC manual

StyleWell ET 1008 Use and care guide

StyleWell

StyleWell ET 1008 Use and care guide

Coaster FINE FURNITURE 650355 Assembly instruction

Coaster

Coaster FINE FURNITURE 650355 Assembly instruction

Safavieh Furniture Auden FOX4254 manual

Safavieh Furniture

Safavieh Furniture Auden FOX4254 manual

Argos 496/1932 Assembly instructions

Argos

Argos 496/1932 Assembly instructions

OSKA Air Overlay user guide

OSKA

OSKA Air Overlay user guide

Sauder Dakota Pass 422596 manual

Sauder

Sauder Dakota Pass 422596 manual

Lane 59909-049-1X Assembly instructions

Lane

Lane 59909-049-1X Assembly instructions

Home Decorators Collection MELPARK 30 installation manual

Home Decorators Collection

Home Decorators Collection MELPARK 30 installation manual

Ergolux SORRENTO ELSTDSKTGWA user guide

Ergolux

Ergolux SORRENTO ELSTDSKTGWA user guide

modway EEI-5877 Assembly instructions

modway

modway EEI-5877 Assembly instructions

THE BOLD LOOK OF KOHLER Vanity K-2517 Installation and care guide

THE BOLD LOOK OF KOHLER

THE BOLD LOOK OF KOHLER Vanity K-2517 Installation and care guide

nbf MORGAN Assembly instructions

nbf

nbf MORGAN Assembly instructions

J.Burrows JBMGLD15BW Assembly instructions

J.Burrows

J.Burrows JBMGLD15BW Assembly instructions

East West Furniture CAT-CAP-S Assembly instruction

East West Furniture

East West Furniture CAT-CAP-S Assembly instruction

TUHOME Furniture LYRATA BAR CABINET Assembly instructions

TUHOME Furniture

TUHOME Furniture LYRATA BAR CABINET Assembly instructions

manuals.online logo
manuals.online logoBrands
  • About & Mission
  • Contact us
  • Privacy Policy
  • Terms and Conditions

Copyright 2025 Manuals.Online. All Rights Reserved.